• Zur Hauptnavigation springen
  • Skip to main content
  • Zur Fußzeile springen

feel food club

  • Home
  • About me
  • My Recipes
  • Blog
  • Navigation Menu: Social Icons

    • Instagram

easy

Better than Store-Bought, 10 Minute Homemade Basil Pesto

Juni 1, 2021 by katharina.kuehr Kommentar verfassen

There only is one green sauce that actually everyone likes – pesto. Contrary to all other green sauces, pesto somehow manages to convince, despite its very healthy looking color. And if you buy it at the store, it’s so easy, right? It is. But let me tell you, once you have made your homemade one, you‘ll never go back to store bought. This salty goodness just won‘t compete with the one from the store. Plus, it really just takes 10 minutes to make.

What’s special about this dish? 

To be honest, this is not too fancy or has a special twist. This is one of the few classic recipes. Because really, pesto is so heavenly as is. Actually making pesto yourself already is kinda really special. 

Traditional pesto

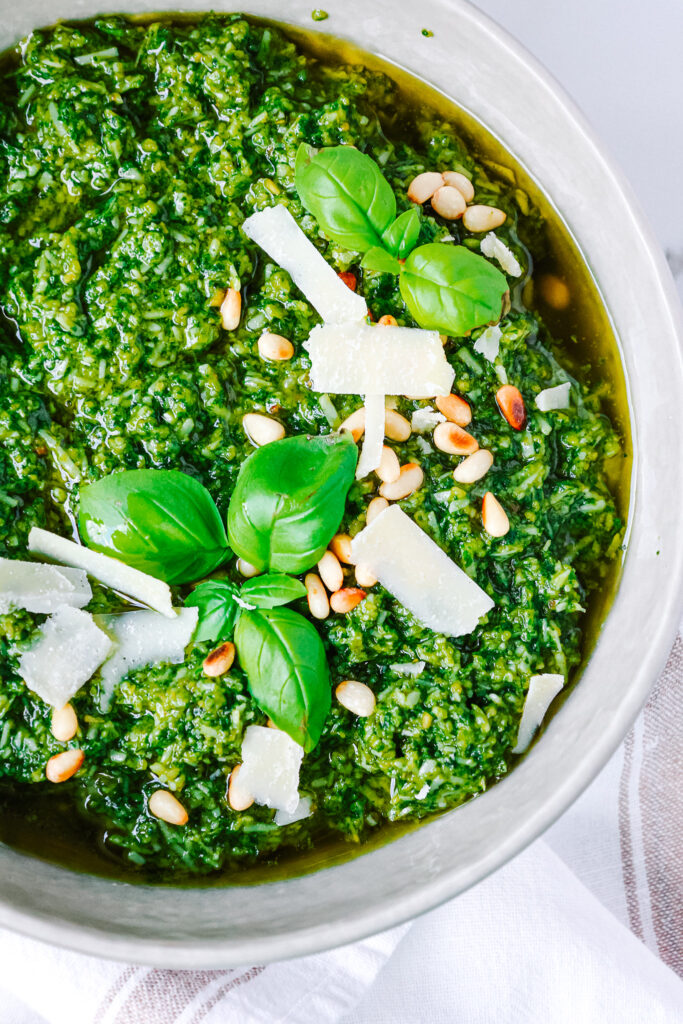
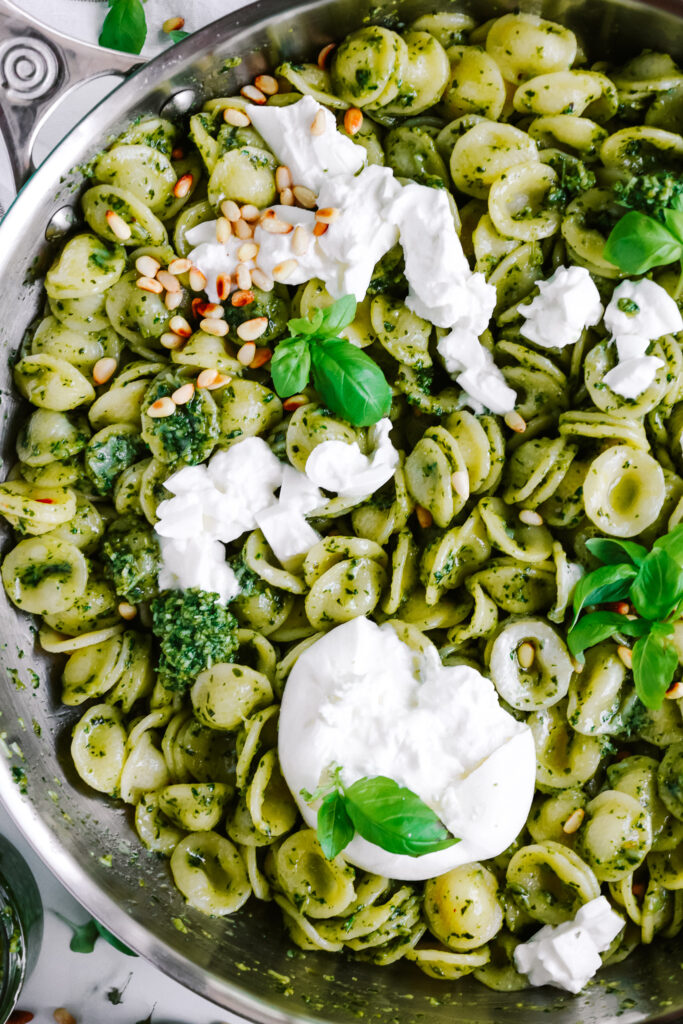
What even is pesto? What is it made of? And what differentiates traditional pesto from most store bought ones. So, pesto is a green sauce from Liguria, Italy. It is eaten with pasta, burrata, as a topping or a dip. It is made of fresh basil, grated parmesan, garlic, pine nuts, salt and olive oil. For a really good pesto, it is essential to use high quality ingredients, especially a good olive oil and some good parmesan cheese. And that already is the difference to most store bought ones. In order to make them cheaper, the quality is compromised. Often, there is water added to it or olive oil is partially substituted with some cheeper oil. This way it does not taste as intense and as good.

Also, when it comes to making pesto, it is really important which ingredients you blend, any which you stir in by hand. The basil, garlic and pine nuts need to be blended. The parmesan needs to be grated and then stirred in by hand along with the olive oil. You must not blend the parmesan and olive oil!!!!!! This needs to be stirred in by hand.

The only store bought pesto I buy is either the one from our local delicatessen store or the one from pastafani. They both have the right texture and high quality and taste like real, authentic pesto. So I can highly recommend this.

Is this dish healthy? 

Definitely healthy-ish. It is packed with lots and lots of healthy fats and vitamins. The basil accounts for a bunch of fibre and different vitamins. The nuts on the other hand are a great source of protein and also unsaturated fats. The olive oil, if high quality, also is an excellent source of omega-3 and other unsaturated fats. The parmesan cheese is packed with a bunch of protein but also saturated fat. So overall, a quite balanced meal. 

How to make this dish?

As the title says, this really takes 10 minutes only. All we need to do is blend the basil with the garlic cloves, roasted pine nuts and a pinch of salt. This should be blended really finely and make a thick paste. Then we need to grate the parmesan cheese and stir in a little parmesan cheese and a little oil a bit at a time until we get a creamy consistency. And yup, that already is it.

When and how to best have it and meal prep friendly? 

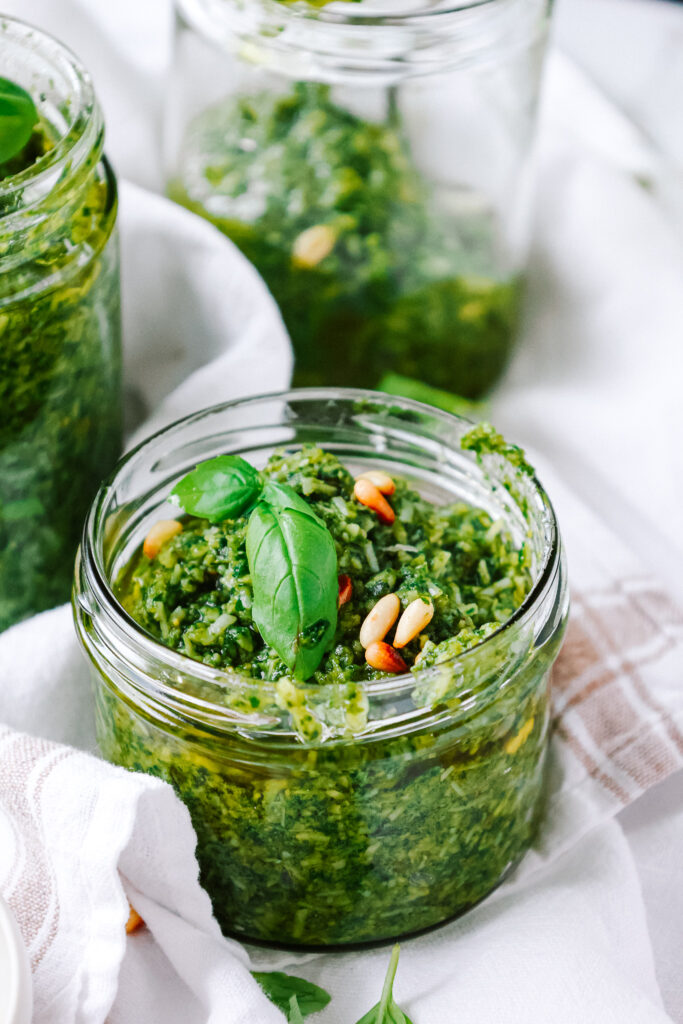
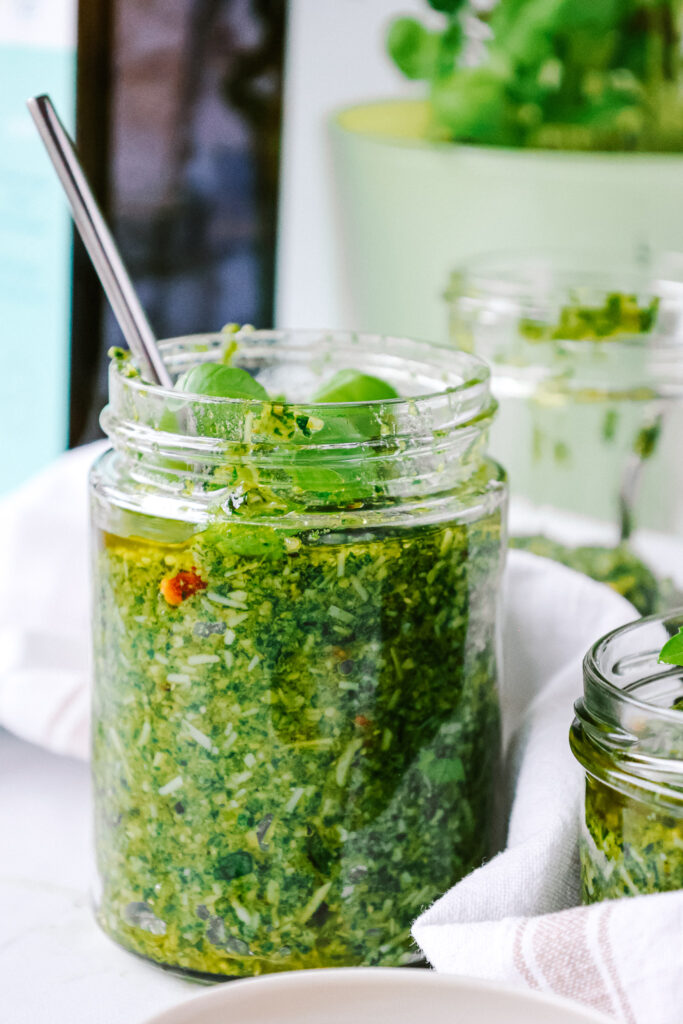
Pesto definitely is one of the most meal-prep friendly dishes. When you make it and have something left, you can just store it in a jar and cover it with oil. It‘ll last up to 2 weeks, if covered completely with oil, because then it is not in contact with fresh air. 

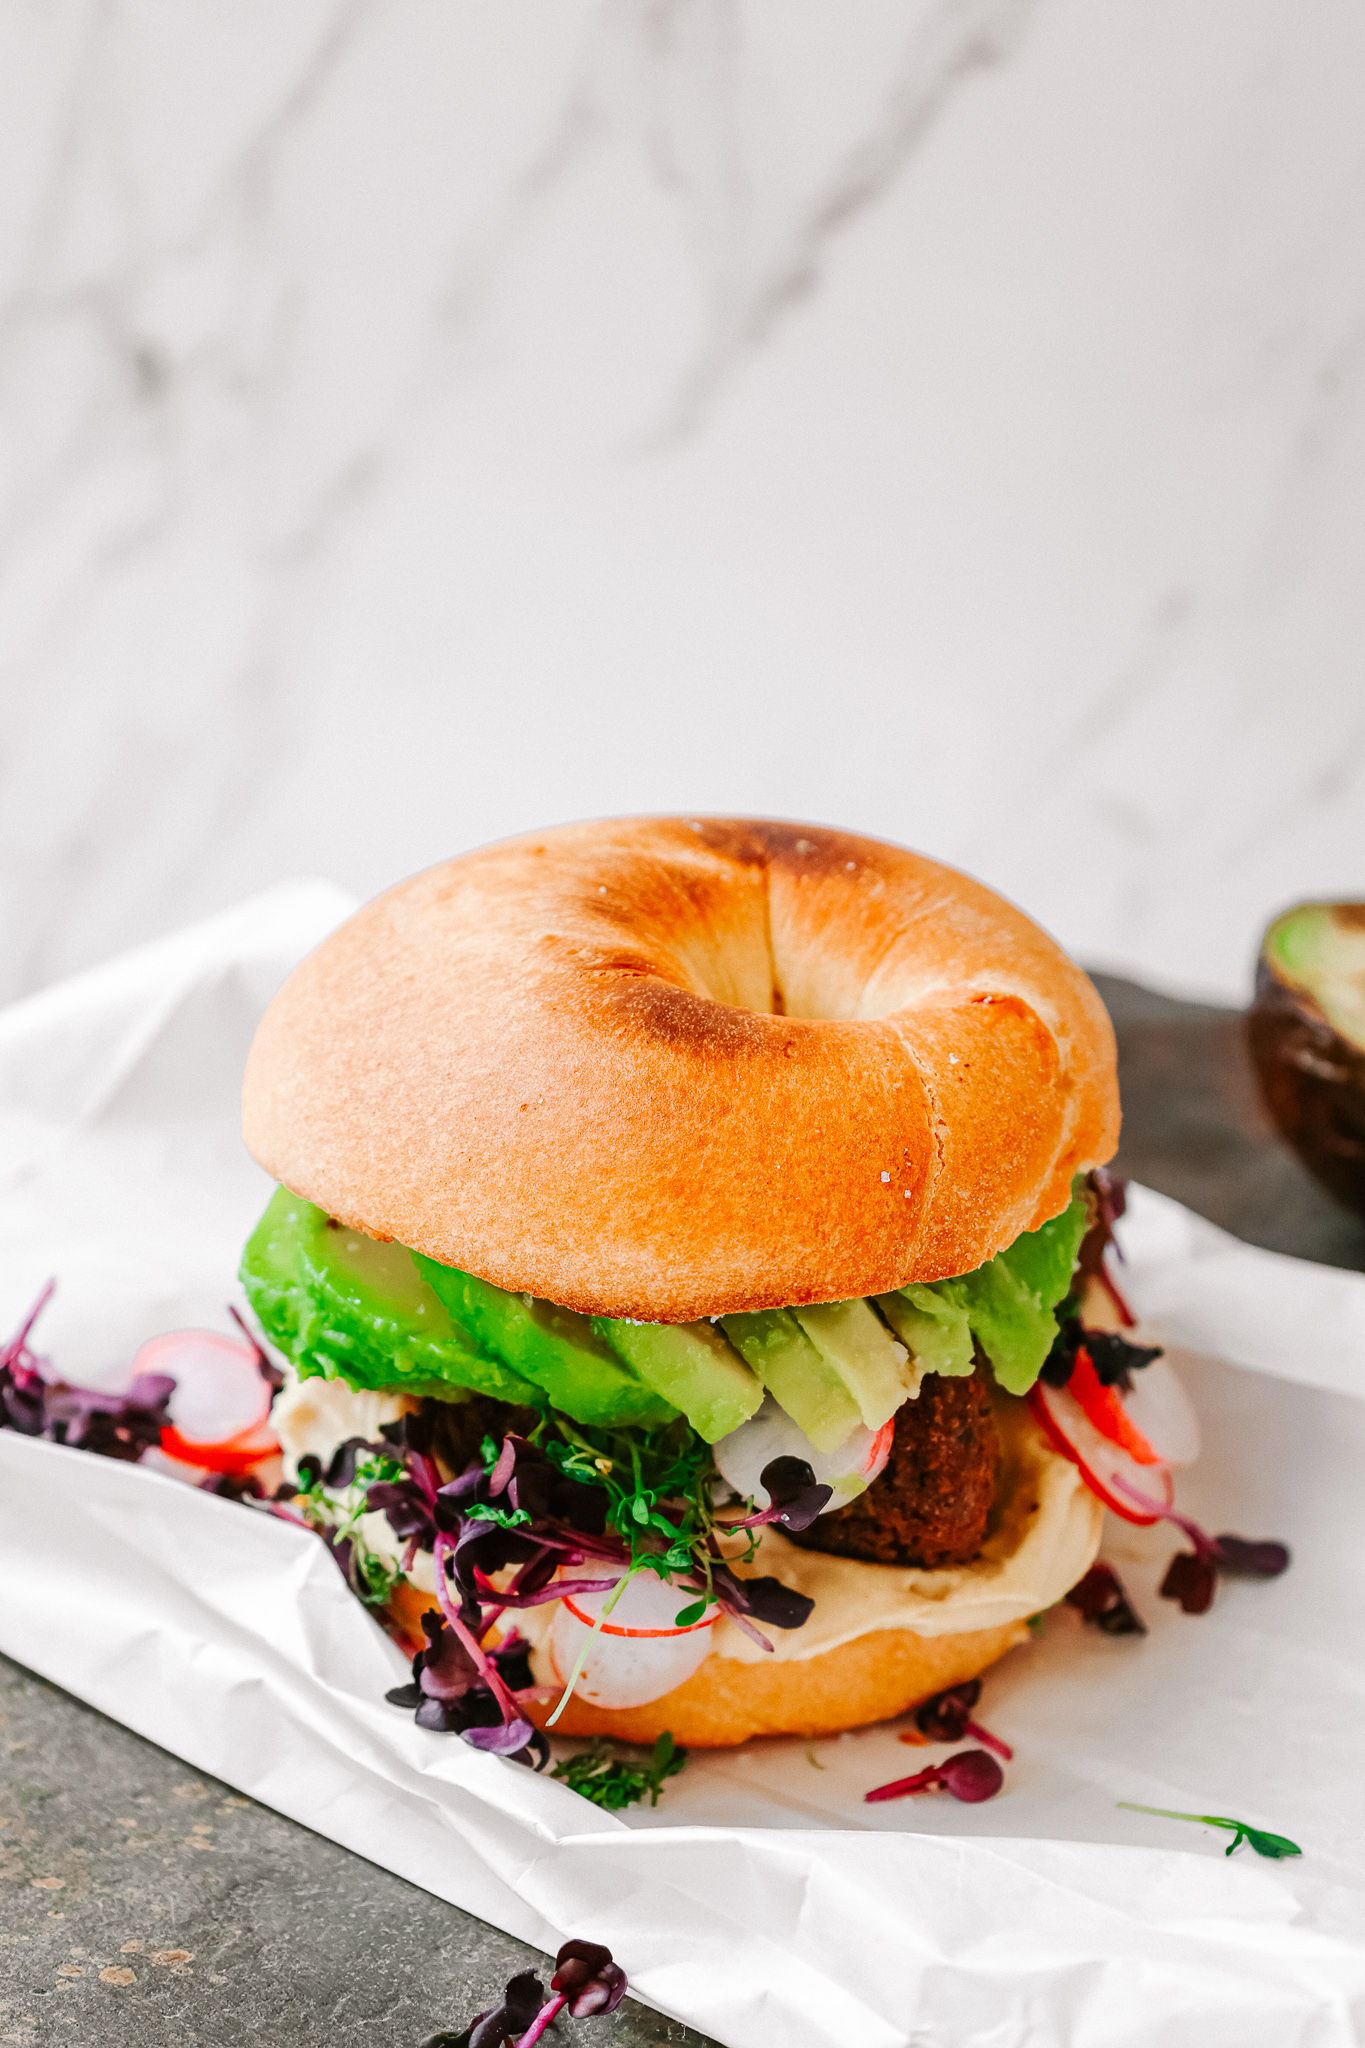
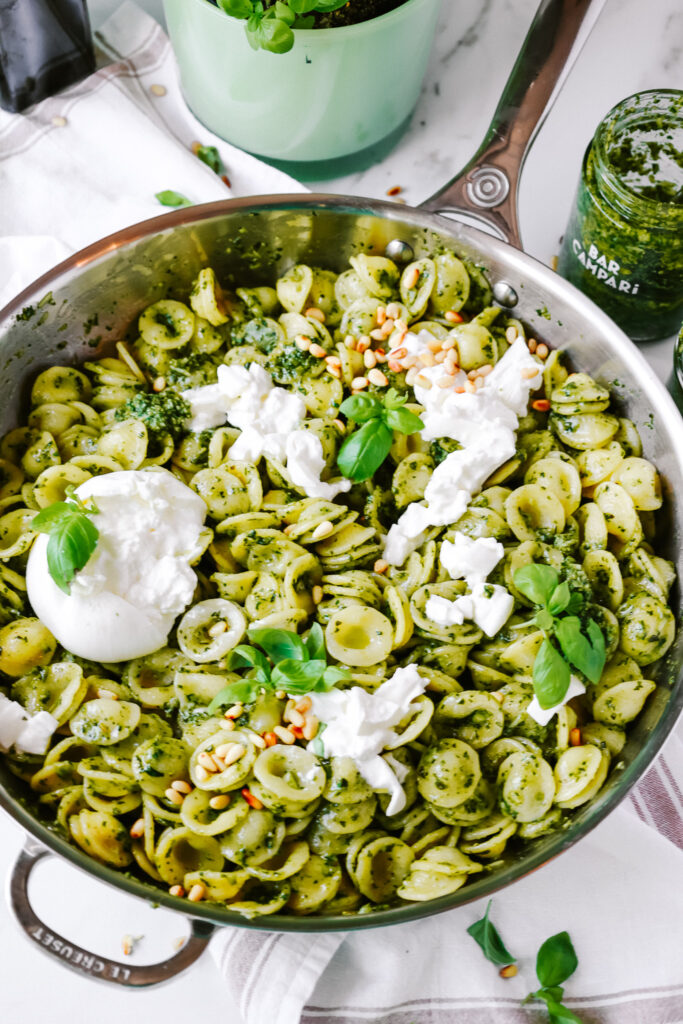
In terms of what to vest have it with, I‘d definitely say pasta!! Either Trofie (that‘s what you would typically get with pesto in Italy) or definitely on top of burrata or mozzarella, on top of salads, or, one of the best combos, which I have recently discovered is Pesto and Hummus. A MUST try! On bread, rice crackers or whatever – it is life changing.

Homemade Pesto is a must try and a real game changer. It is SO easy and honestly one of the most delicious things you could make. I know I have told you a bunch of times here, but there is no way you dl not try this! 

Print

Better than Store-Bought, 10 Minute Homemade Basil Pesto

There only is one green sauce that actually everyone likes – pesto.  It is SO easy and honestly one of the most delicious things you could make. Ready in 10 minutes (and gone in 5 probs)

Course basics, dinner, lunch
Prep Time 10 Minuten
Total Time 10 Minuten
Servings 4 servings

What you will need

  • 50 g basil
  • 30 g pine nuts
  • 2 cloves of garlic
  • 100 g parmesan cheese
  • 125 ml olive oil

How to

  1. Roast the pine nuts in a nonstick pan on high heat until golden. Add to a food processor along with the basil, the garlic and some salt. Blend until having reached a creamy paste.

  2. Finely grate the parmesan cheese.

  3. Add the basil mix to a bowl and about 2 tbsp at a time, add in the cheese and the olive oil. Then repeat until having nothing left.

  4. Serve with pasta, bread, salads, or just enjoy as is!

I am wishing you a whole bunch of fun and deliciousness when cooking! 
Enjoy,
Katie // Une Petite Cuisinière 

Kategorie: Cuisine, Diet-Specific, Italian, My favorites, Salad, Vegetarian Stichworte: 10 minute, barbecue, basil, basil pesto, Basilikum Pesto, cheese, dip, easy, gesundes Essen, homemade, italian, italy, Mediterranean, parmesan, pasta, pesto, sauce, selbstgemacht, vegetarian, veggie

Super Easy Honey – Lemon Chickpea, Avocado & Feta Wraps

Mai 27, 2021 by katharina.kuehr Kommentar verfassen

You asked for 10 minute meals, so that’s what you get. And nope, we‘re not talking boring sandwiches or bread with butter. Very little time and very much flavour. That‘s what we’re talking. And there wraps definitely fit this category! 

A soft wrap on the outside filled with all the deliciousness you could imagine. Soft, mashed avo, crunchy greens & veggies, slightly sweet and damn addicting honey chickpeas and asparagus and some tangy feta to top it all off. All of this goodness is wrapped and rolled up. And with every bite you get an explosion of flavors.

What‘s special about this dish?

It comes together super super quickly and still is packed with flavour. It‘s not like your normal wrap that doesn’t take long to make but also does not taste very exciting. This is quick and still contains so many different flavour, although there are not many ingredients needed. Plus, it is vegetarian (vegan except for the feta) and still super versatile.

Is this dish healthy? 

Yes, it definitely is. It is packed with different nutrients of all categories. The wraps deliver us some good & comforting carbs so we‘ll have energy all throughout the afternoon, and when choosing a whole grain one, we‘re also getting some extra fibre for our digestion. Speaking of fibre, there‘s a bunch more of that in the cucumber, the greens, the asparagus and the avocado. And we also get a ton of vitamins therefrom.

Not to forget about the real star of the show; the chickpeas. Chickpeas are an amazing source of plant based protein and also fibre. They also make this dish really filling, and delicious. If you are not a fan of chickpeas, you can also try this recipe with tofu or even with chicken. And lastly, the feta. Feta cheese does not have a huge nutritional value but it comes with quite some protein and a lot of deliciousness!

How to make this dish?

As previously mentioned, this is super super easy. It essentially really only comes down to chopping the veggies and preparing the chickpeas. To make the peas, we only need to add them to a pan along with some olive oil, honey, lemon juice and some chopped up asparagus. We are then turning it onto medium heat and letting the honey caramelize. Since we are adding everything at once, nothing will burn or be more cooked through at the end.

For the veggies we only need to smash an avocado, slice up some cucumber, wash the greens, slice up some spring onions and crumble the feta. Yep, that‘s already it. All that’s now left to do is wrap it up. 

Definitely meal-prep friendly!

This really is amazing for meal prep. You just wrap it up, pack it into a tupperware and then take it to work or to school or to home office. Whenever you want to eat it, you can just take it out and enjoy! It is perfectly filling and very easy to be carried with you! 

I really hope that you‘ll enjoy this dish as much as we do and that you‘ll have an amazing time cooking!!

Print

Super Easy Honey – Lemon Chickpea, Avocado & Feta Wraps

This definitely is not your average wrap, it is wayyy better and still basically takes no time to make. The combination of slightly sweet Honey Chickpeas, a soft wrap, creamy mashed avo, crunchy veggies and tangy feta is just heaven. A meal prep dream and taste heaven.

Course dinner, lunch, mealprep
Prep Time 5 Minuten
Cook Time 5 Minuten
Total Time 10 Minuten
Servings 2 servings

What you will need

  • 2 large wraps
  • 1 can chickpeas
  • 2 tbsp olive oil
  • 2 tbsp honey
  • 1/2 lemon
  • sea salt
  • 1/2 cucumber
  • 1 avocado
  • a handful greens
  • 50 g feta cheese

How to

  1. Drain and rinse the chickpeas. Add them to a pan along with the olive oil, honey, sea salt and the juice of a lemon. Turn up to medium heat and let it heat up and the honey caramelize, while stirring once in a while, then let simmer for 5 minutes.

  2. In the meantime mash the avocado and mix it with some sea salt. Finely slice the cucumber, wash the greens and crumble the feta cheese.

  3. Once the chickpeas are done, divide the avocado onto the wraps, top it with the cucumber and the greens. Then add the chickpeas and the feta and wrap it up. 

  4. Enjoy! 

Love,
Katie // Une Petite Cuisinière 

Kategorie: Diet-Specific, Lunch/ Dinner, Picnic, Vegetarian Stichworte: 10 ingredients, 10 minute, chickpeas, easy, easy meals, feta, healthy, healthy lunch, healthy wrap, Kichererbsen, meal prep, quick, quick meals, summer, vegetarian, vegetarisch, wrap

20-minute (vegan) Peanut Tofu & Greens Spring Sushirrito

Mai 12, 2021 by katharina.kuehr Kommentar verfassen

Sushiwhat? Sushi + Burrito = Sushirrito! Still no idea what this is supposed to be? Well, basically a sushi roll (like maki) just so giant that you roll it up like a burrito and can eat it holding in your hands. Pretty genius invention right? Sushi to-go basically.

Biting into this is like biting into soft (and sushi flavoured) rice, fried & salty peanut tofu, crunchy cucumber & aspragus, soft avocado and creamy sriracha sauce. An explosion of flavours in your mouth and it really is ultra delicious! Plus, it actually is not too difficult to make.

What is special about this dish?

First of all, it is vegan. Vegan sushi with tofu is not very traditional in Japan. Usually it is prepared with raw fish like salmon or tuna or with fresh veggies or fruits like avocado (yep, avocado is a fruit) and cucumber. Or sometimes tempura (vegan) vegetables or prawns. You see, nl tofu in here. Nevertheless this is not a reason for us not to add tofu into this dish.

And secondly, well a gigantic sushi wrap is not quite normal. Yeah, it kinda is like an ultra thick maki, just one you can take bites from. This shape is very untypical because you (obv) cannot eat this with chopsticks, at least it is a challenge. It is more like street-style, meal prep, on the go sushi. Still, is tastes at least as good!

Is this healthy?

Damn yep. The amazing thing about this is that you can add any veggies you like into these rolls. Whatever you think would taste good in combination with the tofu & rice. I love cucumber, asparagus, avocado and spring onions but you could also add sweet potato or carrots or whatever you love. Adding all these kinds of different veggies makes this really incredibly nutritious. And obviously, depending on which veggies you choose, you‘ll have different nutrients! 

Besides the veggies we also have the tofu. Tofu is a great source of plant based protein and fibre. Together with the peanut sauce is also serves as a source of healthy and essential, unsaturated fat. Not to forget about the rice. This itself is not too nutrient dense, yet it provides many carbohydrates to keep you energized. If you also wanted some fibre and minerals, you could swap it for brown rice instead.

How to make this dish?

If you are a professional sushi-chef, you probably have got this ready in 5 minutes. If you are not (just like most people including myself) it‘ll probably take you 20 minutes – if even. And what takes the longest is cooking the rice. Therefore that‘s also what we‘re starting with. Here we‘re using sushi rice just because it has this special sushi flavor and texture. You can either find that at the supermarket or an asian store. This we just boil with twice the amount of water and then we mix it with a mix of vinegar and maple. This combination really adds the flavor we want.

Then we also need to marinate the tofu. This essentially is done by combining a few ingredients including peanut butter, soy sauce and lime juice. The longer this can marinate, the better. While the rice is cooking, the tofu is frying in hot oil until crispy. In the meantime we can also finely chop or slice the veggies. 

Then comes the fun and challenging part; rolling (or more like folding) it up. For this we need to divide the rice into the amount of sandwiches we make. If we make two sandwiches we divide it into two. And then we need to half it again (so we have rice for the top and the bottom). We start by adding one half of it into the middle of a nori sheet and pressing this into a square or rectangle. Then we add the veggies, whichever you like, and tofu, then the sauce, more veggies and the other half of the rice. We need to make sure to keep everything in this square or rectangular form. Then we take a second nori sheet and lay it on top. Now we take a small bwol with water and dip our fingers into it to wetten the sides of the nori and then fold the sides in and roll the rest like a burrito. It is important to really keep everything very tight here so the burrito does not fall apart when eating. And that’s it!

Meal prep friendly?

Yes! Definitely! That is the great thing here – it is not only great to be eaten the next day, it also is amazing to be eaten on the go, or in the park because you do not need cutlery or chopsticks or anything. It probably lasts 2-3 days in the fridge, so you’ll have a delicious meal for several days!

Print

20-minute (vegan) Peanut Tofu & Greens Spring Sushirrito

Like Sushi, just with Tofu and rolled up like a Burrito, so you can easilyyy eat it! An explosion of flavours and not difficult to make.

Course dinner, lunch
Cuisine Japanese
Prep Time 10 Minuten
Cook Time 15 Minuten
Total Time 25 Minuten
Servings 2 servings

What you will need

For the tofu:

  • 200 g tofu
  • 2 tbsp peanut butter
  • 5 tbsp soy sauce
  • 1 lime
  • 1 tbsp maple syrup
  • 1/2 tsp garlic & ginger (dried or fresh)
  • 1 tbsp sesame oil
  • 1 tbsp oil

For the rest:

  • 120 g Sushi Rice (you can find that either at your super market or asian store – alternatively you could go for basmati rice)
  • 1/4 cucumber
  • 2 tso vinegar
  • 1 tsp maple syrup
  • 1/2 avocado
  • 100 g green asparagus

For the sriracha sauce

  • 1 tbsp sriracha
  • 2 tsp mayo
  • 2 tbsp greek yoghurt
  • 4 nori sheets

How to

  1. First mix all the ingredients for the tofu marinade. Then cut the tofu into two equally sized (about 1cm thick) blocks and let them marinate for as long as possible.

  2. Add the sushi rice, along with twice the amount of water and some salt, to a pot and bring to a boil. Reduce to a simmer and let simmer until all water is absorbed. Then turn down to very low heat and let sit until fluffy and soft.

  3. In the meantime mix all the ingredients for the sriracha sauce. Finely slice the cucumber, avocado and asparagus. Fry the asparagus in some oil for about 3-4 minutes until soft.

  4. When the sushi rice is done, combine the vinegar and maple and mix it with the rice. Then divide the rice into however many burritos you are making.

    Then add half of each portion into the middle of a nori sheet and press it into a flat and tight rectangle or square. Now layer some veggies and the tofu on top. To with the sriracha mayo and the remaining rice. Press everything together so it sticks well and does not fall apart. Top with another Nori sheet. Then fold in the edges and drizzle a bit of water on the sides, so they'll stick. Then tightly roll in the burrito and fold in the remaining edges.

  5. That's it! Serve with some soy saue and enjoy!

I really, genuinely hope that you’ll enjoy this as much as we do and that you’ll have a great time cooking this!

All the best,
Love,
Katie

Kategorie: Cuisine, Diet-Specific, Japanese, Season, spring, Vegan Stichworte: 20 minutes, asparagus, burrito, easy, easy sushi, green, healthy, lunch, meal prep, peanut, plant based, satay, spring, sushi, sushirrito, tofu, vegan, vegan sushi, wrap

Not You Average (much better) Hummus and Falafel Picnic Bagel

Mai 7, 2021 by katharina.kuehr Kommentar verfassen

The name says it all. Definitely not your average bagel. This is something so much better, I promise. Recipe 2 of the picnic series, and it only is getting better, although it is hard to top the beluga lentil salad an curry hummus stuffed pita. Yet, we managed to do so. Slightly sweet and crispy bagel with creamy hummus, fresh greens and radishes, crunchy falafel and soft and salty avocado. Oh my. If I were you, I would be running to the store right now.

Bagels are just amazing by themselves already. We really need to take a moment and thank the inventor of thebagel (who by the way was Austrian!!!) for this amazing creation. Invented by accident, probably the best accident ever, and now a staple around the world. And really, cream cheese and salmon bagels are amazing, no need to doubt that, yet there are so many other combos that just taste unreal in a bagel, which you need to try out – just like this one!

Where to get good bagels?

This is really important, because if the bagel itself does not taste amazing, the entire dish only tastes half as good. So, in Vienna there are 2 places I love to get my bagels from. The first one is Budapäst Bagels – they have been the (much deserved) restaurant of the month in march and definitely have amazing bagels. You can just grab some plain bagels there and fill them at home! The other place that never lets you down is Joseph Brot. They have several shops in Vienna, so you can just choose one that is close to you. The only disadvantage here – they are sold out so quickly always! So you got to get up early for your bagels.

What’s special about this dish?

It is a mix of the traditional bagel and a falafel pita or sandwich and an avo toast. So, really the best of everything combined! Instead of spreading a bagel with cream cheese, we are spreading it with hummus. And filling it with falafel. Yep, it gets quite thick and tastes amazing. Plus, we have some springy goodness with the fresh veggies and sprouts. This bagel combo really is (not exaggerating here) life changing.

Plus, also this recipe is part of the NENI x Une Petite Cuisinière picnic series! Which means, you can use the (super delicious) Neni am Tisch products to make this. In other words, you get some healthy deliciousness in no time.

Is this dish healthy?

We got to be honest, it probably it not the most nutrient dense dish ever. It though, also is not unhealthy. The thing is that most of the time bagels themselves are not highly nutritious. To achieve their slightly sweet flavour, there often is sugar in them and they rarely are made with whole-wheat products. They do provide you with a bunch of carbs though, yet not many complex ones and not much fibre.

Nevertheless the fillings are nutritious. We have a lot of chickpeas in here – in form of hummus and in form of falafel. Chickpeas are high in protein and fibre and therefore a great plant-based food. Plus, we have some greens & radishes, meaning more vitamins and some avocado for healthy fats and deliciousness (what even is a bagel without avocado?).

How to make this dish?

This probably is one of the easiest things you’ve ever made. All you need to do is pop the falafel into the oven (this is no must, popping them into the oven just really lets them crisp up again and makes them taste much better). In the meantime we are toasting the bagel, slicing the radishes and cutting the avo.

When falafel and bagel are done, we spread some of the (best) Hummus onto the lower half of the bagel, add the falafel, the radishes, some cress or sprouts and top it with the avo. Now we got to sprinkle it with some sea salt, close it with the top and take it onto our picnic. A perfect dish for a perfect picnic!

What about meal prep and picnic?

Obviously the bagel won’t be crispy anymore when it has been stored in the fridge or in a container to be taken onto a picnic, nevertheless, it still is as delicious! If you just leave it like that, it will be a bit of a mess to eat though. To avoid that, it is best if you cut it in half and then take some parchment paper, cut a strip off it, wrap it around the bagel-half and then fix it with a string. That way everything holds together and you can eat without everything falling apart.

If you wanted to bagel to be a bit more crispy, you could also toast it beforehand and bake the falafel, then put both into a bag (not air tight!!) and take the avocado, sprouts, radishes and hummus in a separate container and fill the bagel at your picnic spot! This makes it all a bit fresher!

Print

Not your average (much better) Hummus & Falafel Picnic Bagel

crispy bagel with creamy hummus, crispy falafel and creamy avocado. This is the bagel combo you have been misisng out on all your life, I promise. It is so good that you will want to have it every day and take it on every picnic.

Course Breakfast, brunch, lunch, picnic
Prep Time 5 Minuten
Cook Time 15 Minuten
Total Time 20 Minuten

What you will need

  • 1 bagel
  • 5 NENI am Tisch Falafel
  • 2-3 tbsp NENI am Tisch Hummus
  • 1/2 avocado
  • a few radishes
  • sprouts/ cress

How to

  1. Preheat the oven to 200°C. Place the falafel onto a baking tray and bake them for 10-15 minutes to get them crispy again.

  2. Slice the bagel in half and toast it.

  3. In the meantime slice the radishes and avocado and chop the cress.

  4. When the falafel are done, spread the bagel with the hummus, add the falafel, radishes and sprouts, and lay the sliced avocado on top. Sprinkle with some sea salt, close the bagel with the top and enjoy!

Regardless or which way you choose to take you bagel to the picnic, it’ll be delicious and I hope that you will also find it to be delicious and enjoy it!

Have a wonderful picnic,
Love,
Katie

Kategorie: Diet-Specific, Picnic, spring, Summer, Vegan Stichworte: 20 minutes, avocado, bagel, brunch, delicious, easy, einfach, falafel, gesund, healthy, hummus, hummus recipes, lunch, Neni, NENI am Tisch, picknick, picnic, plant based, quick, schnell, summer, vegan

« Vorherige Seite
Nächste Seite »

Footer

What has been happening on my Instagram

Copyright © 2024 Une Petite Cuisinière on the Foodie Pro Theme