• Zur Hauptnavigation springen
  • Skip to main content
  • Zur Fußzeile springen

feel food club

  • Home
  • About me
  • My Recipes
  • Blog
  • Navigation Menu: Social Icons

    • Instagram

healthy lunch

Super Quick, Family-Approved, Herby Prawn and Avocado Salad

Juni 21, 2021 by katharina.kuehr Kommentar verfassen

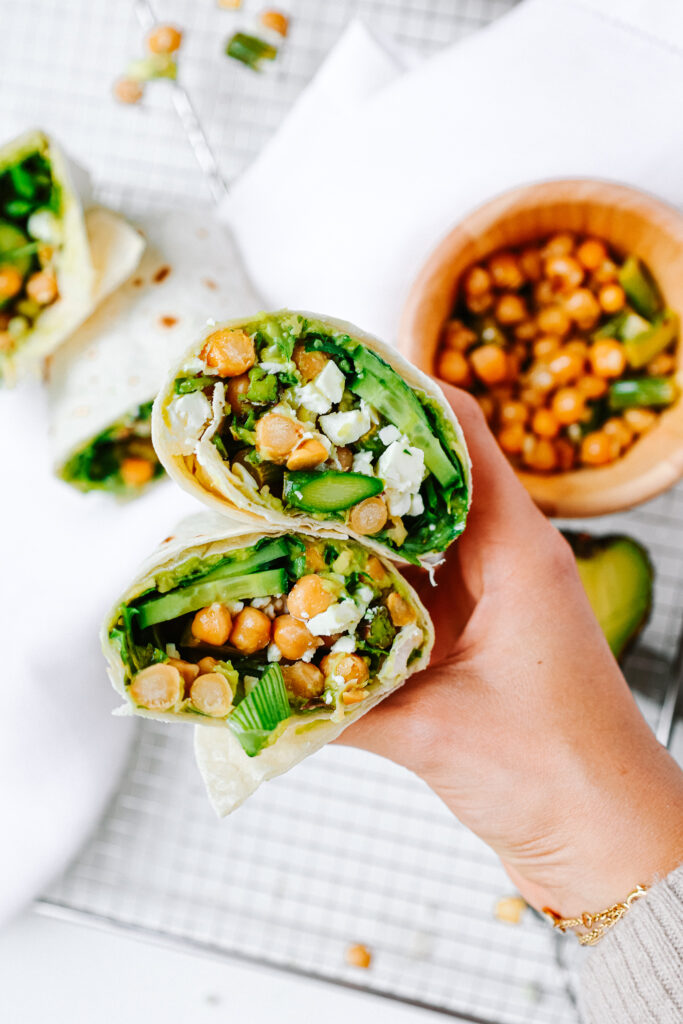
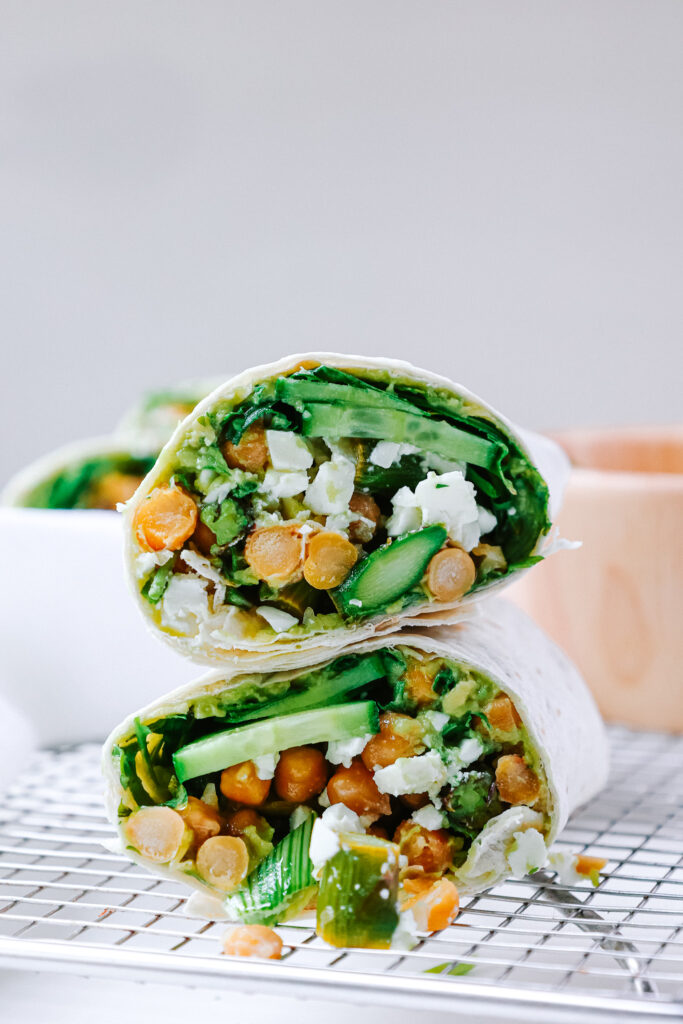
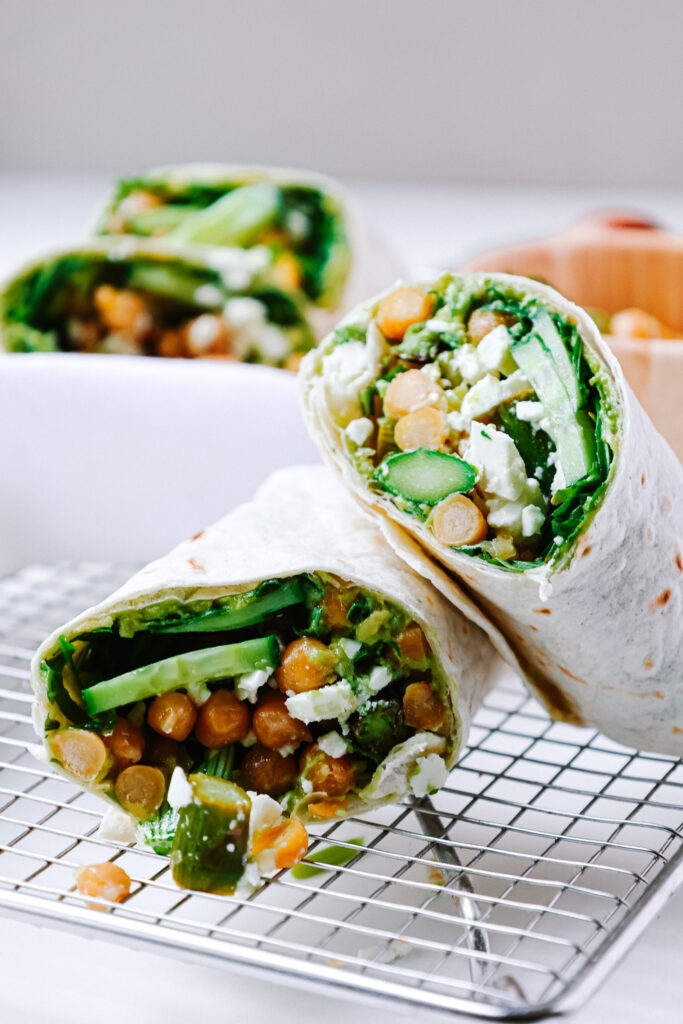
Summer season = salad season. We all know that. When it’s hot outside (which it hopefully is soon) and the sun is shining we neither want to spend hours in the kitchen, nor can anyone really eat something warm. So salads are the perfect dish to eat. They are quick to make, healthy and mostly. But they can be boring so easily.

They definitely can, but they don’t necessarily have to be. If you only make the same one over and over again, I agree, this would be boring. If you switch it up though, and add basically an entire herb garden and make the best garlic prawns ever, and still only spend 15 minutes making it, then it is a really good kind a salad. And yep, it is very delicious too (my brother ate the entire bowl so it‘s got to be delicious!)!

What is special about this dish? 

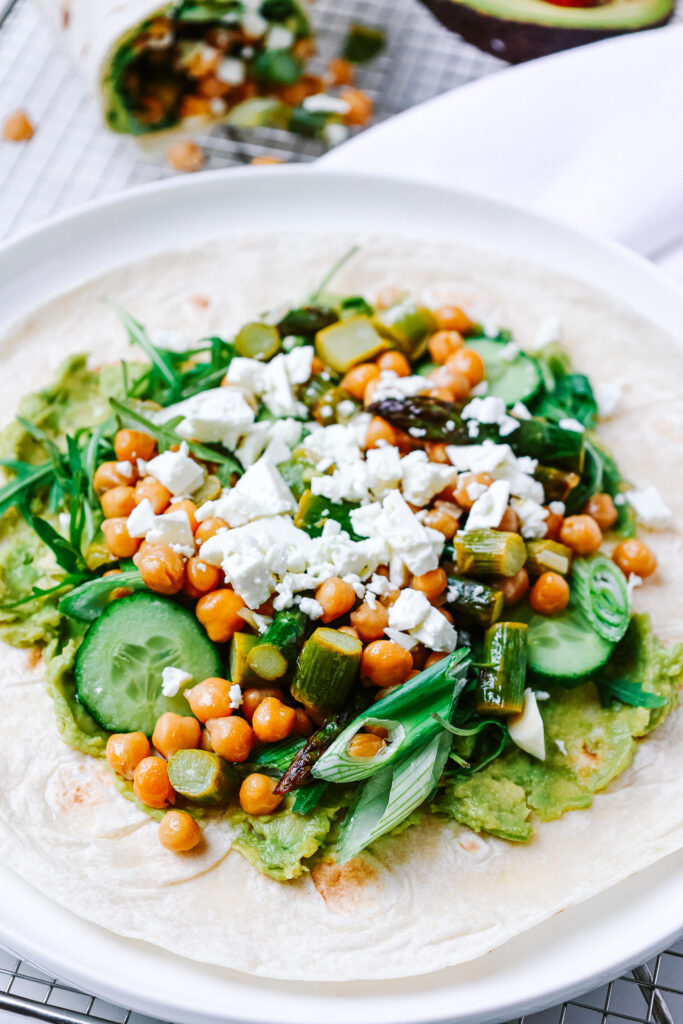
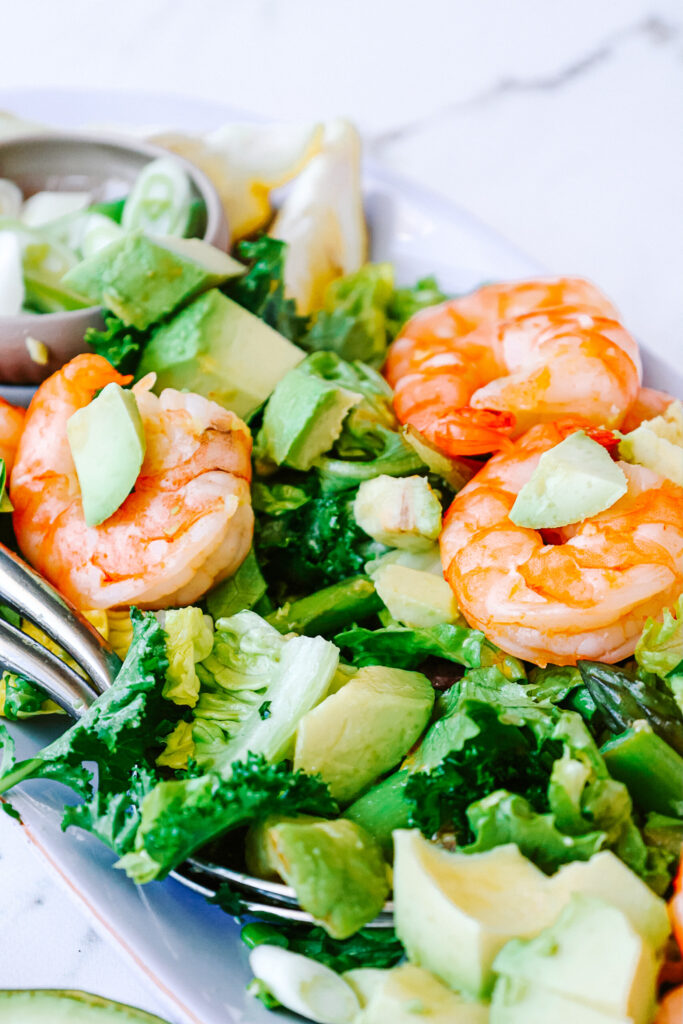
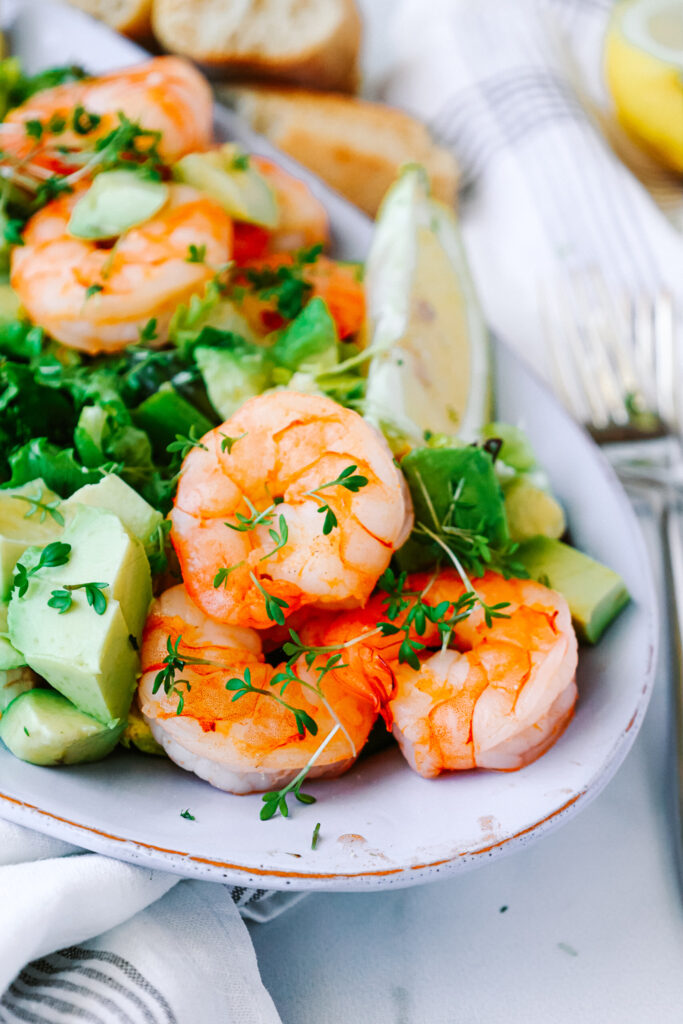
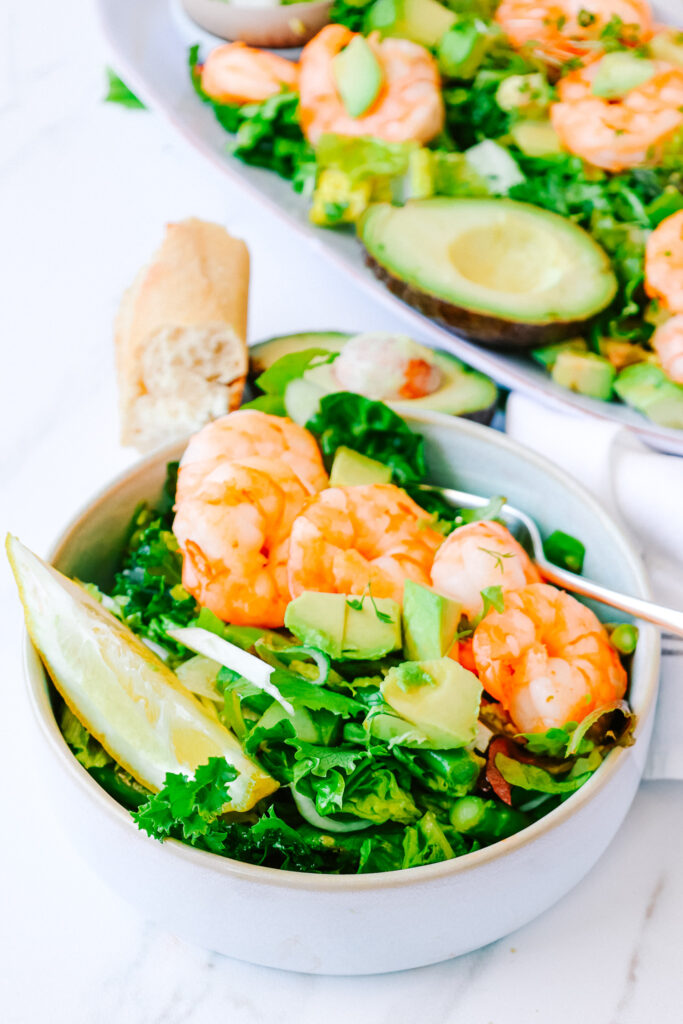
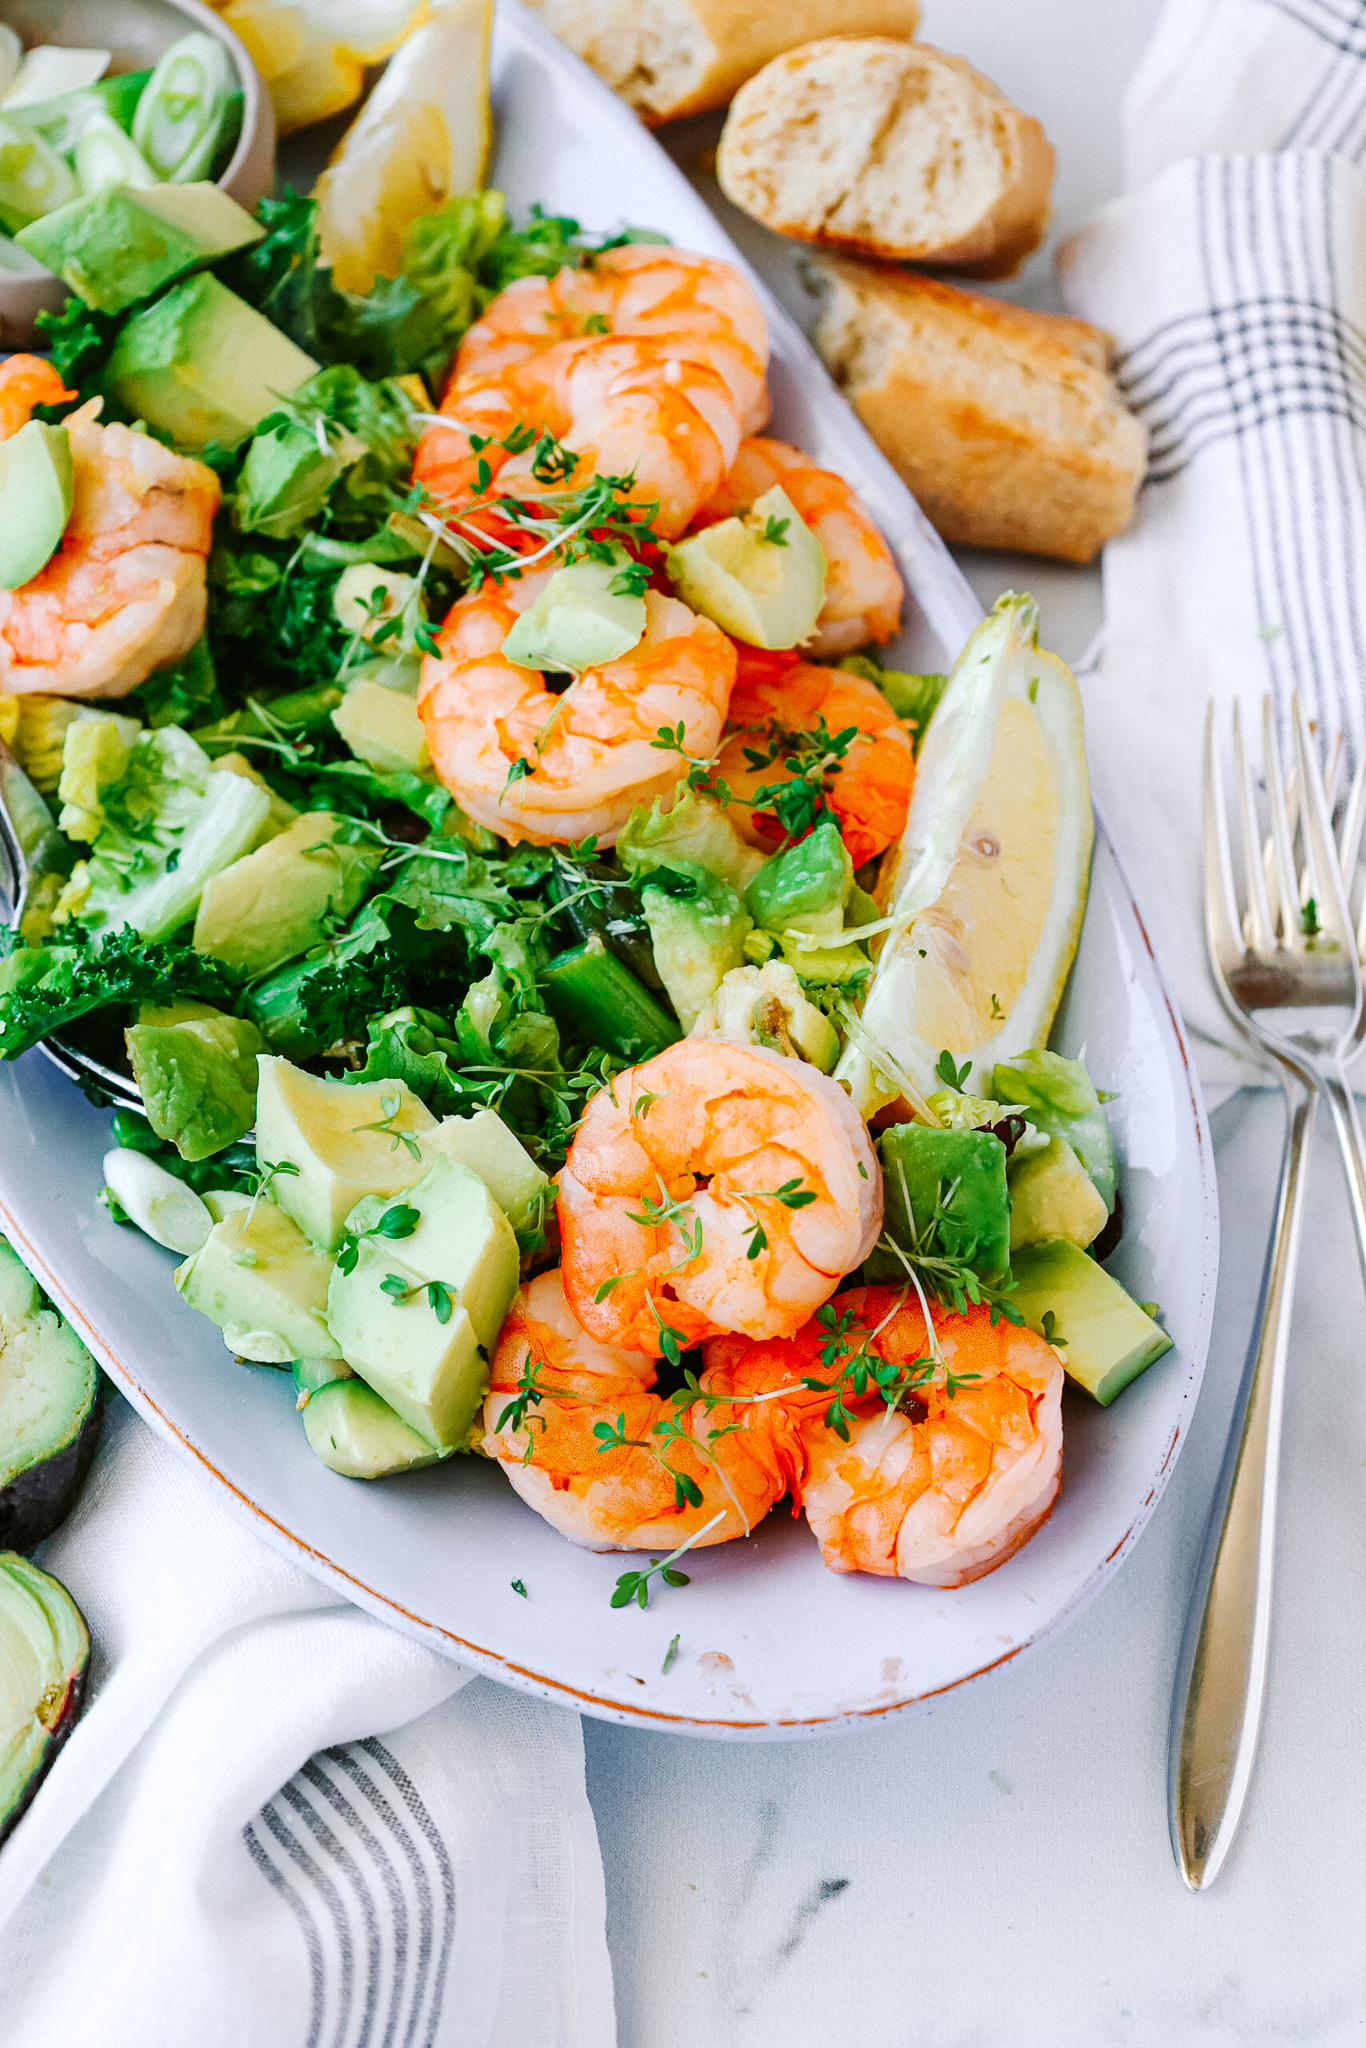
Well, it definitely is not your average salad! Its not just greens & dressing & maybe some veggies – no; it is way more delicious!! To make it taste a bit more like summer and a bit fresher, we are adding a whole brunch of herbs. Mint, basil, parsley, really, whatever you have on hand. 

And also the dressing is really really fresh, since we‘re adding some lemon and even more herbs to it, but also some honey. It‘s sweetness balanced the sourness of the lemon out perfectly. And not to forget about the prawns. They are SO. good. They are fried in olive oil with fresh garlic. While it probably is not the best recipe for a date, it definitely is the most delicious way to cook prawns!! The combo of garlic and prawns simply is unbeatable! 

Is this dish healthy? 

It definitely is! There are a whole lot of greens in here. All the herbs and also the salad are packed with different nutrient and vitamins and also a lot of fibre. Adding herbs to dishes is such an easy and flavorful way to add vitamins and fibre. We also get a decent amount of essential nutrients, and also a lot of water, from the cucumber. 

The prawns account for the right amount of protein and the olive oil makes sure we are not lacking those unsaturated fats. The lemon keeps our immune system strong with its Vitamin C. The only thing that is not directly included in the salad is a source of carbohydrates. But here you could just have some whole grain bread on the side or add some quinoa or couscous in the salad. 

How to make this dish?

There are three things that need to be done. 1. prepping the veggies; therefore we need to wash the salad, slice the cucumber and peel and chop the avocado into cubes. 2. making the dressing; here we need to mix some olive oil, lemon juice, honey and the finelly chopped herbs. And 3. we need to make the prawns; that really only comes down to finely slicing some garlic, frying it in hot oil for about 30 seconds and then adding the prawns and cooking them on each side for about 3 minutes. And voilà! 

In case the prawns are frozen

just add them to a bowl with some hot water (not boiling one, just warm one) and let them stand for about 30 minutes, changing the water every 10 minutes to let them thaw without cooking. Then just pat them dry with a kitchen towel and cook as the recipe says! 

This salad is amazing for those hot summer days or for whenever you are craving something light and healthy and fresh. It anyway is very easy to make and a must try! 

Print

Super Quick, Family-Approved, Herby Prawn and Avocado Salad

Salads in summer are simply perfect. But always having the same one over and over again also can be veryyyy boring. That’s why we need to switch things up and make this delicious goodie.

Course lunch, Salad
Prep Time 10 Minuten
Cook Time 10 Minuten
Total Time 20 Minuten
Servings 4 servings

What you will need

For the prawns:

  • 800 g prawns*
  • 1 tbsp butter
  • 1 tbsp olive oil
  • 2 cloves garlic

For the salad:

  • 1 head of salad
  • 1 avocado
  • 6 tbsp olive oil
  • 1 lemon (only the juice)
  • 1 tsp mustard
  • 2 tsp honey
  • 1/2 tbsp chopped mint
  • 1/2 tbsp chopped parsley
  • 1/2 tbsp chopped dill

How to

  1. Peel and finely dice the garlic. Heat up the olive oil and butter in a pan and sauté the garlic in the hot oil for about 30 seconds, then add in the prawns. Fry them on each side for about 3 minutes until pink and cooked through. 

  2. In the meantime finely chop the herbs and mix them with the olive oil, lemon juice, mustard and honey. 

  3. Wash and tear the salad into bite sized pieces. Half the avocado, remove the pit and scoop it out with a spoon. Then cut into about 1cm sized chunks. Also add this to the salad. 

  4. Mix with the dressing and divide onto the bowls. Top with the prawns and garnish with fresh dill. Serve and enjoy!

Notes

*if the prawns are frozen, add them to a bowl and cover them with warm water. Let stand for about 5 minutes, then drain and repeat until they have thawed. Then lay them onto a kitchen towel and tap them dry. 

I genuinely hope that you‘ll enjoy it! 
Love,
Katie // Une Petite Cuisinière 

Kategorie: Fish & Seafood, Lunch/ Dinner, Salad, Summer Stichworte: avocado, easy, easy to make, family friendly, garlic, healthy lunch, light meals, lunch, pescetarian, prawns, quick, quick meals, salad, salad season, salads, seafood, spring

Super Easy Honey – Lemon Chickpea, Avocado & Feta Wraps

Mai 27, 2021 by katharina.kuehr Kommentar verfassen

You asked for 10 minute meals, so that’s what you get. And nope, we‘re not talking boring sandwiches or bread with butter. Very little time and very much flavour. That‘s what we’re talking. And there wraps definitely fit this category! 

A soft wrap on the outside filled with all the deliciousness you could imagine. Soft, mashed avo, crunchy greens & veggies, slightly sweet and damn addicting honey chickpeas and asparagus and some tangy feta to top it all off. All of this goodness is wrapped and rolled up. And with every bite you get an explosion of flavors.

What‘s special about this dish?

It comes together super super quickly and still is packed with flavour. It‘s not like your normal wrap that doesn’t take long to make but also does not taste very exciting. This is quick and still contains so many different flavour, although there are not many ingredients needed. Plus, it is vegetarian (vegan except for the feta) and still super versatile.

Is this dish healthy? 

Yes, it definitely is. It is packed with different nutrients of all categories. The wraps deliver us some good & comforting carbs so we‘ll have energy all throughout the afternoon, and when choosing a whole grain one, we‘re also getting some extra fibre for our digestion. Speaking of fibre, there‘s a bunch more of that in the cucumber, the greens, the asparagus and the avocado. And we also get a ton of vitamins therefrom.

Not to forget about the real star of the show; the chickpeas. Chickpeas are an amazing source of plant based protein and also fibre. They also make this dish really filling, and delicious. If you are not a fan of chickpeas, you can also try this recipe with tofu or even with chicken. And lastly, the feta. Feta cheese does not have a huge nutritional value but it comes with quite some protein and a lot of deliciousness!

How to make this dish?

As previously mentioned, this is super super easy. It essentially really only comes down to chopping the veggies and preparing the chickpeas. To make the peas, we only need to add them to a pan along with some olive oil, honey, lemon juice and some chopped up asparagus. We are then turning it onto medium heat and letting the honey caramelize. Since we are adding everything at once, nothing will burn or be more cooked through at the end.

For the veggies we only need to smash an avocado, slice up some cucumber, wash the greens, slice up some spring onions and crumble the feta. Yep, that‘s already it. All that’s now left to do is wrap it up. 

Definitely meal-prep friendly!

This really is amazing for meal prep. You just wrap it up, pack it into a tupperware and then take it to work or to school or to home office. Whenever you want to eat it, you can just take it out and enjoy! It is perfectly filling and very easy to be carried with you! 

I really hope that you‘ll enjoy this dish as much as we do and that you‘ll have an amazing time cooking!!

Print

Super Easy Honey – Lemon Chickpea, Avocado & Feta Wraps

This definitely is not your average wrap, it is wayyy better and still basically takes no time to make. The combination of slightly sweet Honey Chickpeas, a soft wrap, creamy mashed avo, crunchy veggies and tangy feta is just heaven. A meal prep dream and taste heaven.

Course dinner, lunch, mealprep
Prep Time 5 Minuten
Cook Time 5 Minuten
Total Time 10 Minuten
Servings 2 servings

What you will need

  • 2 large wraps
  • 1 can chickpeas
  • 2 tbsp olive oil
  • 2 tbsp honey
  • 1/2 lemon
  • sea salt
  • 1/2 cucumber
  • 1 avocado
  • a handful greens
  • 50 g feta cheese

How to

  1. Drain and rinse the chickpeas. Add them to a pan along with the olive oil, honey, sea salt and the juice of a lemon. Turn up to medium heat and let it heat up and the honey caramelize, while stirring once in a while, then let simmer for 5 minutes.

  2. In the meantime mash the avocado and mix it with some sea salt. Finely slice the cucumber, wash the greens and crumble the feta cheese.

  3. Once the chickpeas are done, divide the avocado onto the wraps, top it with the cucumber and the greens. Then add the chickpeas and the feta and wrap it up. 

  4. Enjoy! 

Love,
Katie // Une Petite Cuisinière 

Kategorie: Diet-Specific, Lunch/ Dinner, Picnic, Vegetarian Stichworte: 10 ingredients, 10 minute, chickpeas, easy, easy meals, feta, healthy, healthy lunch, healthy wrap, Kichererbsen, meal prep, quick, quick meals, summer, vegetarian, vegetarisch, wrap

Super Easy 20-Minute Sticky Orange Tofu

März 18, 2021 by katharina.kuehr Kommentar verfassen

Put all our prejudices aside and make this recipe. If you used to think tofu is boring, you will be proven differently. We have got the sweet and slightly spicy flavours of orange and chilli combined in a sticky sauce that covers the tofu. Definitely not your average tofu.

Orange Tofu is a dish that originally is made with chicken instead of tofu and therefore also called orange chicken. Orange Chicken originated in China, where it is rarely found in traditional restaurants today. It got really popular in the US through Panda Express. There the chicken is battered, then fried and then tossed in a orange sauce, which thickens and caramelizes. 

What’s special about this dish?

It is a vegan version if the orange chicken and a mich healthier one too. It is not battered and deep fried and also not tossed in a sauce loaded with white refined sugar. It is a much healthier, easier and quicket version of the original and still tastes really intense and good! So you could say that it rather is a Chinese inspired dish and less the original one.

Is this dish healthy? 

Yep yep. What is it made of? Well our main ingredient is tofu. Tofu is really high in protein and also comes with some fiber. Then our main „ingredient“ is the orange sauce. This is mainly made from freshly squeezed orange juice, which is a vitamin C bomb. Then we have some soy sauce, vinegar, fresh ginger and garlic and some honey, plus some cornstarch in which the tofu is tossed and then fried in a little hot oil.

Contrary to regular orange chicken, we have rather little fat here because instead of deep frying it, it is simply stir fried in a pan. Also, we are using honey instead of white refined sugar. Honey still contains sugar but less per 100g in comparison to regular sugar and it actually comes with antioxidants. 

How to make this dish:

This is super simple. So, we start by pressing the tofu. To do so we just lay some kitchen paper beneath and on top of a block of tofu and them let something heavy press it down for a few minutes. This will make the liquid drain from the tofu so it gets crispier in the pan later on.

Next we just chop it up into about 1 cm sized cubes. These are then tossed in some cornstarch. The cornstarch binds the remaining liquid and kind of forms a crust when frying. After that, the tofu is fried in some hot oil from each side for about 1-2 minutes till crispy. 

In the meantime we combine the orange juice & zest, soy sauce, honey or maple, cornstarch, ginger, garlic and vinegar in a bowl and then pour it over the tofu and let it simmer on low heat for a few minutes. Because of the cornstarch the sauce will thicken and the honey makes it caramelise. That already pretty much is it, we now only have to divide it onto plates or bowls and garnish with some greens!

Meal prep friendly

You can easily make this dish in advance and reheat it. If you have a stove I would prepare everything in advance and store the tofu and sauce separately and heat it up together whenever you want to have it. If you do not have a stove when eating it, you can simply heat it up in the microwave all together. Maybe you’ll then need to add a little water.

Print

Super Easy 20-Minute Sticky Orange Tofu

Easy, delicious and healthy. A vegan and lighter version of the american-chinese classic and let me tell you, it at least is as delicious!

Course dinner, lunch, Main Course
Cuisine American, Chinese
Prep Time 10 Minuten
Cook Time 10 Minuten
Total Time 20 Minuten
Servings 2 servings

What you will need

  • 300 g tofu
  • 4 tbsp cornstarch
  • some rice or quinoa to serve with

For the sauce:

  • 1 orange zest & juice
  • 2 tbsp soy sauce
  • 1 garlic clove
  • 1 cm ginger
  • 1 tbsp cornstarch
  • 60 g honey or maple
  • 1 tbsp vinegar

How to

  1. Lay the tofu onto some kitchen paper and cover it iwth some more. Lay something heavy on top and let it press for abou 5-10 minutes, so as much liquid as possible goes out in order for the tofu to become crispy when frying. Then cut into 1 cm sized cubes and toss it in the cornstarch

  2. In the meantime grate the orange, then press it. Combine it with the remaining ingredients for the sauce.

  3. Heat up the oil in a pan and fry the tofu on each side for about 1-2 minutes until crispy and golden. Turn the heat down to medium heat and pour in the orange sauce. Give everything a good mix and let simmer for about 3-4 minutes until it has thickend a bit.

  4. Serve with some rice or quinoa and garnish with some cilantro! Serve and enjoy!

Honestly, this dish is so quick, so easy to make and so good! You’ll really, really love it and it is so so simple! I hope you’ll like it as much as we do and have a great time cooking it!

Enjoy!
Love,
Katie // Une Petite Cuisinière

Kategorie: American, Chinese, Cuisine, Diet-Specific, Lunch/ Dinner, My favorites, Vegan, Vegetarian Stichworte: 20 minutes, American, Chinese, easy tofu recipes, easy vegan, healthy lunch, healthy vegan, lunch, orange, plant based, quick, quick and easy, tofu, tofu recipes, vegan, vegan cooking, vegan lunch

Easy Oriental Baked Pumpkin with Creamy White Bean Hummus

November 13, 2020 by katharina.kuehr Kommentar verfassen

It’s finally the season of our all-beloved veggie! Soups, stews, carving, roasting. No matter when and it which way, pumpkin always is a great idea! But the good same old soup can also get a little boring after a while. So let’s bring some new spices into your kitchen and try out having pumpkin in a different way! Soft roasted pumpkin on a bed of creamy white bean hummus, topped with pine nuts and a good drizzle of olive oil. Perfect fall lunch or dinner and great for meal prep! 

What is special about this dish? 

The combination of pumpkin with oriental flavors and the slightly different variation of hummus! Hummus usually is made out of chickpeas, tahin and olive oil. In this recipe, we are using white beans, also called butter beans instead of chickpeas. They make it equally as creamy and taste very similar. The major difference is that compared to chickpeas, white beans have a milder and slightly buttery taste. This goes in great harmony with the roasted pumpkin. This is flavored with an oriental spice mix and then baked. To finish off we are topping it with roasted pine nuts. This gives the final touch and is really delicious! 

Is this dish healthy?

Yes and yes! Let’s start with the white bean hummus. Beans have a great nutritional value. They are an incredibly good source of plant based protein and fibre. Plus, the addition of the olive oil and tahin not only make it super creamy but they also add a decent amount of healthy fats.

Pumpkin, as you can read in my November Top 5 as my food of the month, is also super nutritious. Lots of vitamins such as B1, B2, B6, C and E as well as other minerals. Plus it contains a lot of fibre, which is really beneficial for your digestion. 

Also the pine nuts are really nutritious, as all nuts! Protein, unsaturated fats and minerals. Brainfood at its finest! 

How to make this dish

This actually is super simple. To start, you need to combine the spices with some olive oil and brush the pumpkin with it. Then pop it in the oven for half an hour and that’s all you got to do for the pumpkin! 

Next up, making the hummus. For this you need a food processor or at least a blender! Into this you add the white beans, olive oil, tahin, salt, paprika and garlic powder. And VERY important: you need to add a little splash of vinegar! Sounds a bit unusual at first, but believe me, it makes the difference. The slight acidity makes the hummus so super addicting, I promise, soso good! And last, but not least we also need to add some of the liquid the beans were preserved in. This helps to make it super creamy! 

When and how to best have it

If you are wondering when to best have it, I can only tell you so much: it works at any time of the day! It is a great addition to your brunch, works great as a lunch or a comforting dinner! What is great about this is, that it works amazing for meal prep too! You just need to make the hummus first. This you can store in the fridge for up to a week. The hummus need to be baked and stored separately and can be reheated when you want to eat it! 

In terms of how to best have it, I recommend serving it either with some kind of bread such as pita bread or with some cooked grain as quinoa! If you are not super hungry, it also works great with a green salad on the side!

Perfect comforting and healthy dish for fall to make use of all of the pumpkins that are in season! Easy and delicious! 

Print

Oriental Spiced Baked Pumpkin with Creamy White Bean Hummus

Creamy, tangy white bean hummus topped with super flavorful, oriental spiced pumpkin and topped with crispy nuts. Fall comfort at its finest.

Course Appetizer, dinner, lunch, Main Course
Cuisine oriental
Prep Time 10 Minuten
Servings 4 servings
Calories 391 kcal

What you will need

For the pumpkin:

  • 1 hokkaido squash
  • 1/2 tsp chili flakes
  • 1/2 tsp salt
  • 1/2 tsp oregano
  • 1/2 tsp cumin
  • 1/2 tsp thyme
  • 2 tsp sesame seeds
  • 2 tbsp olive oil

For the rest:

  • 1 can white beans
  • 1 tbsp tahin (this is a paste made out of sesame seeds. If you do not have this, simply add more olive oil)
  • 2 tbsp olive oil
  • 1 tsp vinegar
  • 1/2 tsp salt
  • 1/4 tsp paprika powder
  • 2-3 tbsp of the liquid the white beans were canned in
  • 2-3 tbsp parsley
  • 2 tbsp pine nuts
  • some PIta bread to serve

How to

  1. Preheat the oven to 200°C. Slice the pumpkin into about 1-2cm thick slices. Lay them out on a baking tray. mix the spices with the olive oil and brush the pumpkin with the mixture. Bake in the oven for 20-30 minutes until soft.

  2. In a food processor combine the drained white beans, tahin, olive oil, salt, paprika, vinegar and the preserved liquid in which the beans have been stored. Blend until creamy. If not creamy enough add more of the liquid or more olive oil.

    Add the pine nuts to a pan and heat them up. Fry them until golden brown, then immediately take them off the heat.

  3. Divide the white bean hummus onto plates. Top with the pumpkin when done. Sprinkle with the pine nuts and parsley. Enjoy!

I hope you will enjoy this recipe!
Happy cooking,
Katie // Une Petite Cuisinière 

Kategorie: Appetizers, Cuisine, Diet-Specific, Fall, Lunch/ Dinner, Oriental, Season, Vegan, Vegetarian Stichworte: easy, easy dinner, fall, fall food, fall vegan, family friendly, healthy lunch, healthy pumpkin recipes, healthy recipes, healthy vegan, hokkaido sqush, lunch, meal prep, plant based, pumpkin, pumpkin recipes, vegan, vegan pumpkin recipe

Nächste Seite »

Footer

What has been happening on my Instagram

Copyright © 2023 Une Petite Cuisinière on the Foodie Pro Theme