• Zur Hauptnavigation springen
  • Skip to main content
  • Zur Fußzeile springen

feel food club

  • Home
  • About me
  • My Recipes
  • Blog
  • Navigation Menu: Social Icons

    • Instagram

plants

Incredibly Quick & Easy Tomato Soup w/ Caramelised goats Cheese Bread

Februar 15, 2021 by katharina.kuehr Kommentar verfassen

Tomato soup in winter? Yes that’s possible – because we are using canned tomatoes! Don’t worry – it is at LEAST as delicious as the one with fresh tomatoes. Creamy, tangy and really easy. Plus, with the bread on the side you do not have your average one but a fancier (still super easy) version of it!

I, as a HUGE tomato lover (more like addict), have the hardest time in winter not eating everything with tomatoes. Tomatoes really are one of the things I miss most about summer! Anyway, we cannot have them fresh, but we can have the in their preserved way. Canned tomatoes are harvested when they are in season and then preserved in cans. Therefore you can enjoy them all year around, which is life-saving for tomato lovers like me.

What is special about this dish?

First of all it is made with canned not fresh tomatoes. Why? Tomatoes are not in season at this time of the year. You could still buy some but they are 1) not as tasty as in summer, 2) more expensive, 3) not good for the climate. Just because they are not in season right now, does not mean that we cannot enjoy some tomato soup – we just have to find other ways to make it! So we are using canned ones!

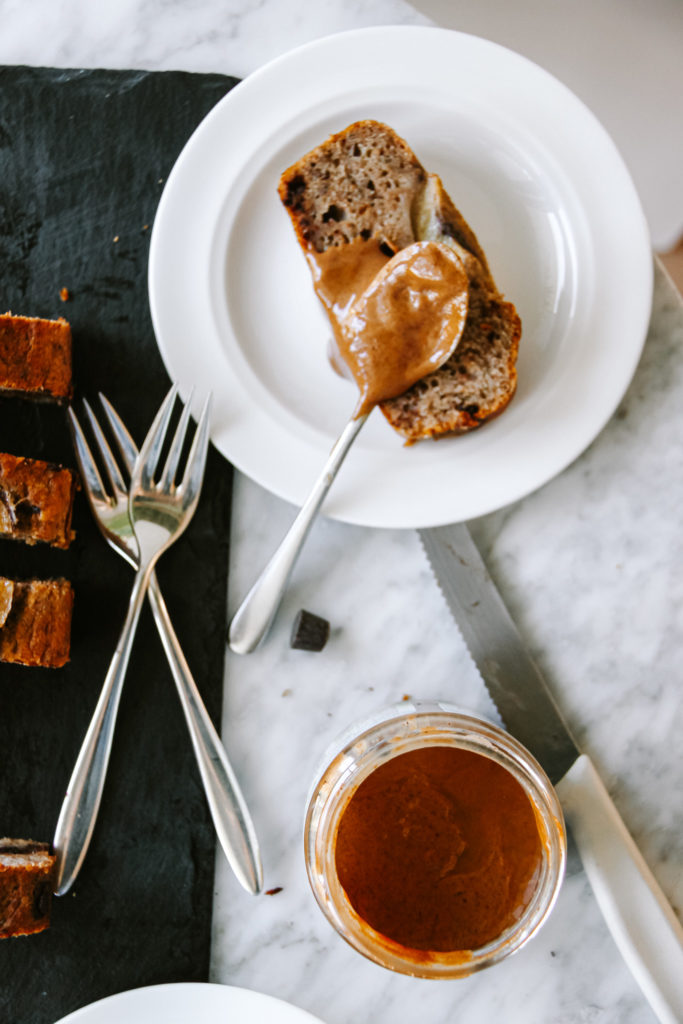
Plus we do not have some baguette to dip or some regular grilled cheese but a way fancier version of grilled cheese. Crispy wholegrain bread with goats cheese & honey straight out of the oven and still warm. This really goes perfectly with the creamy tomato sauce.

Is this dish healthy?

I would say so. We have got vitamins from the tomatoes, onions and garlic. Some carbs and fibre from the bread and some protein from the cream cheese. It definitely is no nutrient-bomb but it does provide your body with some essential nutrients! If you wanted to make it a bit more nutritious, you could serve it with a side salad!

How to make this?

Really, super easy!! It essentially comes down to frying some garlic, onion and herbs in some oil until golden. Then we only need to add some tomato paste, vegetable broth, canned tomatoes and some fresh herbs. This just simmers for about 15 minutes so it can absorb the flavours of the herbs. In the meantime we can prepare the bread.

Therefore we slice up the wholegrain bread and place it on a baking tray. To this we are adding some goats cheese. The creamier and fresher it is, the easier it is to spread on top of the bread, but here you can go for whatever you like most! Just add a drizzle of honey and bake it for about 10 minutes and that is it for the bread.

To finish off the tomato soup, we are now removing the herbs and adding it to a blender. To make it creamy and a bit tangy, we are also adding some ricotta cheese and a little touch of honey to recreate the sweetness of those beautiful summery honey tomatoes! Blend and serve!

Meal prep friendly and how to have it:

This really works great for meal prep or also for being made in a big batch. You can just make more servings, let it cool down and freeze it in Tupperware. Whenever you want to have some, just heat it up in a pot and you have got it ready in minutes.

The bread can not be meal-prepped but it really does not take very long to make 🙂 Beside the bread, I also love to serve it with some burrata cheese and balsamic vinegar!

Print

Incredibly Quick & Easy Tomato Soup w/ Caramelised goats Cheese Bread

Comforting, healthy, easy and super quick tomato sauce. Yes, you can have it in winter and it is really really good! Plus the caramelized bread with it is absolutely amaaazing!!!

Course Appetizer, dinner, Main Course
Cuisine Italian
Prep Time 15 Minuten
Cook Time 15 Minuten
Total Time 30 Minuten
Servings 2 servings

What you will need

  • 1 yellow onion
  • 2 garlic cloves
  • 1 tbsp olive oil
  • 1.5 cans tomatoes
  • 500 ml vegetable broth
  • a few branches fresh oregano & thyme
  • 3 tbsp ricotta cheese
  • 2 slices whole grain bread
  • 4 tbsp goats cheese (the younger and fresher it is, the easier it is to spread)
  • 2 tbsp honey

How to

  1. Preheat the oven to 200°C.

  2. Finely dice the onion and chop the garlic. Heat up the oil in a pot and sautée both of them in there for about 2-3 minutes until fragnant and glassy. Add the canned tomatoes, vegetable broth and fresh herbs and let simmer for about 15 minutes.

  3. In the meantime spread the bread slices with the goats cheese and drizzle about 1 tbsp of the honey onto them. Bake in the oven for 10 minutes.

  4. Remove the herbs from the tomato soup and either transfer them to a blender to blend with an immersion blender in the pot along with the ricotta.

  5. Divide onto bowls and serve with the bread! Enjoy!

I hope that you’ll enjoy this recipe and make it on repeat! It is super comforting, cozy and actually fairly easy! I would love to hear and see how you like it and am wishing you a fun time cooking!

Enjoy,
Love,
Katie

Kategorie: Appetizers, Cuisine, Diet-Specific, Italian, Lunch/ Dinner, Soups, Vegetarian, Vegetarian Stichworte: 30-minute, comforting, easy, easy soup, family friendly, healthy, plants, quick, soup recipe, soup season, suppe, tomatensuppe, tomato, tomato recipe, tomato soup, vegetarian. vegetarian dinner, vegetarisch, vegetarischkochen, winter cooking

Summer Rolls with Peanut Tofu

Juli 10, 2020 by katharina.kuehr Kommentar verfassen

Picture summer in a better way than having summer rolls in the sunshine with your loved ones on a picnic, maybe at a lake. Doesn’t this sound like a dream? To me it does. But wait, where’s the catch? Oh yes, maybe to get those summer rolls. I mean, sure you could order them at your favourite Vietnamese restaurant but why not making them yourself? It is so easy and way cheaper.

If you have been a little active in the food scene of instagram you probably have already seen those. I think summer rolls have become very popular a few years ago and have become part of the whole health food industry. Besides that they are super duper tasty. So here we are, and I have made a recipe for you to make them at home. If you are not very familiar with summer rolls here is just a brief introduction!

What are summer rolls?

Summer rolls is a dish popular in Vietnam. They are also called rice paper rolls, or fresh spring rolls. It is believed though, that they originally come from China and only became popular in Vietnam. Anyway, today you can find them in most asian restaurants, even in Japanese or Thai ones.

These cute rolls look very much like spring rolls. Same size and shape. The difference is the filling and the preparation. Spring rolls are mostly filled with pork and vegetables and then deep fried. Summer rolls on the other hand are filled with vegetables, prawn, pork or tofu and oftentimes also rice vermicelli (super thin rice noodles). Also those are not deep-fried or prepared with any oil and they are served at room temperature or cold. Both, spring and summer rolls, come with a sauce on the side.

Are summer rolls healthy?

Definitely! Since the main component are vegetables, they are super healthy. Other than vegetables you often have rice vermicelli, which also are not unhealthy. They are not high in sugar or fat but also not super nutritious. For your source of protein you can use prawns, pork or tofu. They are all great sources of protein. Prawns and they also are not high in fat at all. Pork on the other hand can be high in fat, depending on which part you use.

Summer rolls kn general are not high kn fat because, unlike spring rolls they are not deep fried, and prepared with rarely little fat. The only fat may be used when preparing the protein source or in the sauce.

The sauce is the only thing you should look out for when you have those. They often are served with a sweet chili sauce or lots of soy sauce. Sweet chili sauce mostly has a lot of sugar in it and soy sauce is high in sodium. If you only get a little on the side, that’s more than fine just be aware of that!

so what’s in these summer rolls?

This is a vegetarian (actually vegan) version. I do not use rice vermicelli because I prefer them without (plus it is less work). So, as a base we have a bunch of vegetables. We use a mix of carrots, bell pepper, cucumber, lettuce and radishes. You could also add red cabbage or anything else of your preference.

To not keep it boring we also are adding some fruit. I absolutely love mango in here but papaya also works. But mango is better tbh. And of course avocado. What would a meal be without avocado? (btw, did you know that avocado is a fruit?) And of course, our source of protein, the peanut tofu. It adds a bunch of flavour and is so tasty. But still, it is not so flavourful yet, that’s why we are adding some more peanut sauce and, if you want, also some sriracha or hot sauce.

The rice paper

Rice paper is not such an easy thing to find. You will probably not find it at your regular supermarket but you can find it in pretty much and asian store. It has the form of a circle and is almost see through but a little white-ish. I get mine from Reishunger because it is super good, easy to get and they ship it right to your door!

I think that you will love this recipe for summer and I hope that you will enjoy both, making and eating it.

Print

Summer rolls with peanut tofu

a perfectly fresh and light summer dish for those hot days!

Course Appetizer, dinner, lunch
Cuisine Chinese, Vietnamese
Prep Time 25 Minuten
Cook Time 5 Minuten
Servings 2 servings
Calories 564 kcal

What you will need

  • 10 rice papers
  • 200 g tofu
  • 2 carrots
  • 1/2 cucumber
  • 1 red bell pepper
  • 100 g radishes
  • 1/2 mango
  • 100 g lettuce
  • 1/2 avocado
  • 1 tbsp oil

For the peanut sauce:

  • 150 ml light coconut milk
  • 2 tbsp peanut butter
  • 4 tbsp soy sauce
  • 2 tsp sriracha hot sauce
  • 1/2 lime
  • 1 tbsp coconut sugar or brown sugar
  • 1-2 tbsp water

How to

  1. Combine all the ingredients for the peanut sauce. Slice the tofu into 1 cm thick and about 6-7cm long strips (or hwo ever it works best for you).

    Place them in the peanut sauce and let them marinate for about 1 h or longer if possible.

  2. Peel the carrots and either grate them or slice them into thin strips. Also slice the peper and cucumber into thin strips. Peel the mango and also cut it into bite sized pieces. Finely slice the radishes and chop up the lettuce.

  3. Heat up a pan with the oil. Take the tofu out of the sauce and fry on each side for about 2 minutes. Set it aside.

  4. To assemble prepare the rice paper according to package instructions. It most of the time works best when you take a kitchen towel and make it wet. Lay that on a flat surface. Then run the rice paper under water for about 3-4 seconds. Place them on the wet kitchen towl. Add a little bit of each filling and some of the remaining peanut sauce into the rice paper, rather on th elower end but not on the edge.

    First, fold in the rice paper from the bottom. Then fold in the sides and roll it up, so all of the fillings are in the rice paper and it is tightly closed. This takes a little practice but after a few it will work out.

  5. Pour the remaining sauce in a little conatiner and serve it with the summer rolls! Serve and enjoy!

Happy cooking,
Enjoy,
Katie // Une Petite Cuisinière

Kategorie: Appetizers, Diet-Specific, Lunch/ Dinner, Summer, Vegan, Vegetarian, Vietnamese Stichworte: good food, healthy, healthy food, healthy light dishes, healthy plants, healthy recipes, healthy summer recipes, light dishes, light food, plant based, plants, rice paper, summer food, summer rolls, vegan, vietnamese rolls

Honey Eggplant and chickpea salad with grilled halloumi

April 18, 2020 by katharina.kuehr Kommentar verfassen

Sounds like a lot and it is. So many flavors, so much goodness but still so simple and quick. Leave the boring salads behind and start making those next level ones. Salads have never tasted that good! 

Sunmer ist getting closer and closer, which means many people try to live and eat healthier. And whats the stereotype thing to do in order to eat healthiet? Salads! But contrary to commin believes, the plain ones only containing leaves and a dressing, maybe a piece of chicken, are bot the healthiest ones! 

Why are conventional salads not necessarily healthy?

Because they will fill you up for an hour maximum and wont leave you satisfied! Whats the problem with that? If you are not filled and satisfied for long, you will start to get hungry again very soon and snack or binge eat on unhealthy things as you will develop cravings for that. In order to bot develop these, it is important to have a filling, nutritious and delicious meal. And I know that this can be difficult with salads but believe me, this one is everything else than boring. 

Whats in it?

You bake the chickpeas and eggplant in the oven, with a slight olive oil and honey drizzle to get them crispy and a bit sweet. Honestly, life changing! If you habe never done chickpeas or eggplant with honey, I‘d say you should head straight to the kitchen and get started! And its so simple! You place the main components of the salad in the oven for 20 minutes and you are already half way there. 

The most extra dressing

The remaining base of the salad is some basic spinach. Bot a lot, just to add some color and vitamins! But whats a salad without a dressing? My brother would say rabbit food! And he is right. It is boring and plain. I do not get those people who skip on salad dressings because they literally are the easiest thing ever and add a ton of flavor. Honestly, don‘t skip on that. In here we have a super extra, still super simple dressing. 3 ingredients (!!) so much flavor! The ingredients are purred tomatoes (the ones from the can or box), Tahini and lemon juice. I do not know why I have never thought of making dressing with tomato sauce before but it is good. I wouldn‘t do it with a green side salad but on top of buddha bowls or italian inspired ones or ones that are pretty extra, as this one, this is so good! Highly recommended!

The star of the show

Last but definitely not least, the grilled halloumni. I have never had halloumni up till a few months ago and from then on it is a must in my diet! So addictingly good. On salads, on bowls, on pasta, on everything. It really adds this last pinch of salt to anything. Like here. It adds the extra wow, the saltiness and satisfying touch. We essentially only need to grill it for a few minutes on each side and thats it! Assemble! You can serve it with some bread, although I believe that this is not necessary because it is amazing and filling as is! 

You can meal prep it, just leave the dressing extra and keep in mind that the halloumni won’t be as melty and good but it still tastes pretty solid. My recommendation: make it fresh, it is better.

I hope that you will like this recipe and that it will change up your regular salad routine a little! 

Enjoy,

Print

Honey Eggplant and Chickpea Salad with grilled Halloumi

Next level salad. Has nothing to do with the boring image of salads you have in your head. Sweet and tangy eggplant & chickpeas, combined with salty fried halloumi and the most extra dressing. Enjoy now & Thank me later!

Course Appetizer, bowl, lunch, Salad
Prep Time 5 Minuten
Cook Time 20 Minuten
Total Time 25 Minuten
Servings 4 servings
Calories 366 kcal

What you will need

  • 2 large handful spinach
  • 160 g chickpeas from the can, rinsed, drained, and pat dry
  • 1 eggplant
  • 2 tbsp olive oil
  • 1 tbsp honey
  • some salt & pepper
  • 200 g halloumi
  • 1/2 lemon juiced

For the dressing:

  • 2 tbsp Olive Oil (just pured tomatoes from the can/ boy without anything)
  • 1 tbsp Tahini
  • 1 lemon juiced

How to

That is how it works:

  1. Slice the eggplant into about 2 cm sized cubes. Drain, rinse and pat the chickpeas dry. Place both in a bowl. In a seperate bowl combie the olive oil, lemon juice and honey. Generously salt and pepper the eggplant and chickpeas and then toss in the dressing. Bake for abou 20 minutes at 180°C.

  2. Meanwhile combine all the ingredients for the dressing.

    Heat up a grilling pan to high heat. Slice up the halloumi in about 0.5 cm thick slices. Just before the chickpeas are done baking, fry the halloumi on it for about 2-3 minutes on each side until it gets some grilling marks and melts nicely.

  3. When the tray is done baking, combine the ingredients with the spinach and the dressing. Seperate on bowls and top with the grilled halloumi!

    Serve and enjoy!

Katie // Une Petite Cuisinière

Kategorie: Diet-Specific, Lunch/ Dinner, Salad, Season, spring, Vegetarian, Vegetarian Stichworte: best salad, cheese, chickpeas, extra dressing, extra salad, filling salad, halloumi, healthy, healthy salad, honey, plants, salad, salad dressing, salad season, spring, summer, vegetarian, vegetarian salad

Chocolate Chip Banana Bread (healthy & vegan)

April 10, 2020 by katharina.kuehr Kommentar verfassen

Quarantine = Bakingtime, so here we are again with a different baking recipe. And this is one of my favourites: banana bread. If you ever have some brown bananas and are shortly before throwing them away, do not ever consider that again – just make (healthy & vegan) banana bread!

I think the first time I had that was in the US and it was heavenly (but not healthy at all hahaha) and then again in Lisbon. Since then I am obsessed with it. It just is so incredibly good and moist and sweet, plus it is so easy to make it healthy.

Brown Bananas?

The great thing about banana bread is that it is a use-up dessert and treat. Whenever we have overripe bananas I ether freeze them for smoothie bowls, or I make banana bread out of them. That way you save food that would otherwise go to waste.

Why Vegan?

Because why not? It is not always easy to bake something vegan but in this case it is. You do not need any butter, because the banana is taking the place the butter would usually do, and instead of eggs we are using a mix of vinegar and baking powder as well as chia eggs. Of course, you can substitute them out for eggs if you prefer that or if you do not have these things on hand.

Is it difficult?

It is everything else than difficult. You can actually throw everything into a food processor and mix and bake. If you do not have or want to use one, mash the bananas by hand and mix the other ingredients in by hand. Without a mixer or blender. Transform to a baking dish and voilà – you have it.

Is it versatile?

It is! If you are vegan make it vegan. If you want some chocolate – add some chocolate chips to it. If you feel like something fresh, add blueberries. Want a crunch? Add in some nuts. Want to make it healthier? Use wholegrain flour? Not a fan of wholegrain? – no problem just use plain. If you cannot do baking without butter, use it instead of the coconut oil! So really in the end it is up to you how you make it. Depending on what you like you can add a personal twist to it.

Breakfast, Snack, Dessert – when and how?

This can honestly be enjoyed as any of those three meal. It can be a healthy breakfast (because of the protein, fibre and carbohydrate content), a delish and filling snack or a satisfying dessert.

Maybe you ask yourself how to eat it! I can tell you: the best way is to spread some almond butter on top, some freshly sliced banana and a drizzle of maple syrup or brown sugar. That is the best. But you can also crumble it into a yoghurt (heavenly) or on top of ice cream.

A winner for families!

Want to know why? I can tell you! Because 1) it is so easy to make, so literally everyone in the family can help. 2) it is sweet so it will taste good but it is not an unhealthy dessert because the sugar content is not as high and it is high in fiber. 3) everyone can enjoy it the way the want to. No matter if it is with whipped cream, almond butter, vanilla ice cream or in their breakfast bowl. It is good.

I hope that you will like this recipe and it will become a staple in your house just as much as it is in ours!

Have fun baking,
Enjoy,
Katie // Une Petite Cuisinière

Print

(Healthy & vegan) Banana Bread

A healthy version of the all time favorite – banana bread. Moist, sweet, just good. Super easy and perfect for families.

Course Breakfast, brunch, Dessert, Snack
Cuisine American
Prep Time 10 Minuten
Cook Time 50 Minuten
Total Time 1 Stunde
Servings 1 loaf (12 slices)
Calories 187 kcal

What you will need

  • 4 bananas the browner, the better (the sweeter)
  • 75 g coconut oil
  • 30 g Honey (use about 75g if your bananas are only a little bit brown)
  • 1 tbsp vinegar white wine or apple cider vinegar
  • 1 tsp natron (baking soda)
  • 1 tbsp chia seeds (can be substituted for 1 egg)
  • 4-5 tbsp water
  • 250 g (whole)wheat flour
  • 1 tsp baking powder
  • 1 tsp cinnamon
  • chocolate chips, berries, nuts or other optional add-ins
  • 1 banana for garnish

How to

  1. Preheat the oven to 180°C.

    In a small bowl combine the chia seeds with the water and let sit for about 5 minute to make the "chia egg". In another bowl combine the vinegar with natron.

    Take a bowl or a food processor and mash or blend the bananas until very mushy. Add in the molten coconut oil, the chia egg, honey or agave, and apple cider vinegar mix. Blend/ mix again until all combined.

    Mix the flour with the cinnamon and baking powder. Fold it under the banana mash mixture. If you have any add-ins (e.g. chocolate chips, nuts, berries) fold them in now.

    Transfer the mixture to a loafpan lined with parchment paper. Cut the extra banana in half, lengthwise and add it on top. Sprinkle with some cinnamon and/ or brown sugar and bake in the oven for 45-50 minutes. After the baking time piek through with a toothpick. If nother sticks to it, the bread is done. If there still is some dough sticking to it, it needs more time in the oven.

    Take it out, let it cool down and cut into 12 slices. Serve each slices with some almond butter, fresh banana, and a drizzle of maple syrup or a sprinkle of brown sugar

Kategorie: American, Breakfast, Cuisine, Desserts, Diet-Specific, Snack, Sugar Free, Vegan, Vegetarian Stichworte: banana, banana bread, brown bananas, chocolate chip banana bread, healthy, healthy baking, healthy banana bread, Healthy Dessert, plant based, plants, sugar free, vegan, vegan baking, vegan banana bread, vegan dessert, vegan treat

Nächste Seite »

Footer

What has been happening on my Instagram

Copyright © 2023 Une Petite Cuisinière on the Foodie Pro Theme