• Zur Hauptnavigation springen
  • Skip to main content
  • Zur Fußzeile springen

feel food club

  • Home
  • About me
  • My Recipes
  • Blog
  • Navigation Menu: Social Icons

    • Instagram

plant based

Super Easy 20-Minute Sticky Orange Tofu

März 18, 2021 by katharina.kuehr Kommentar verfassen

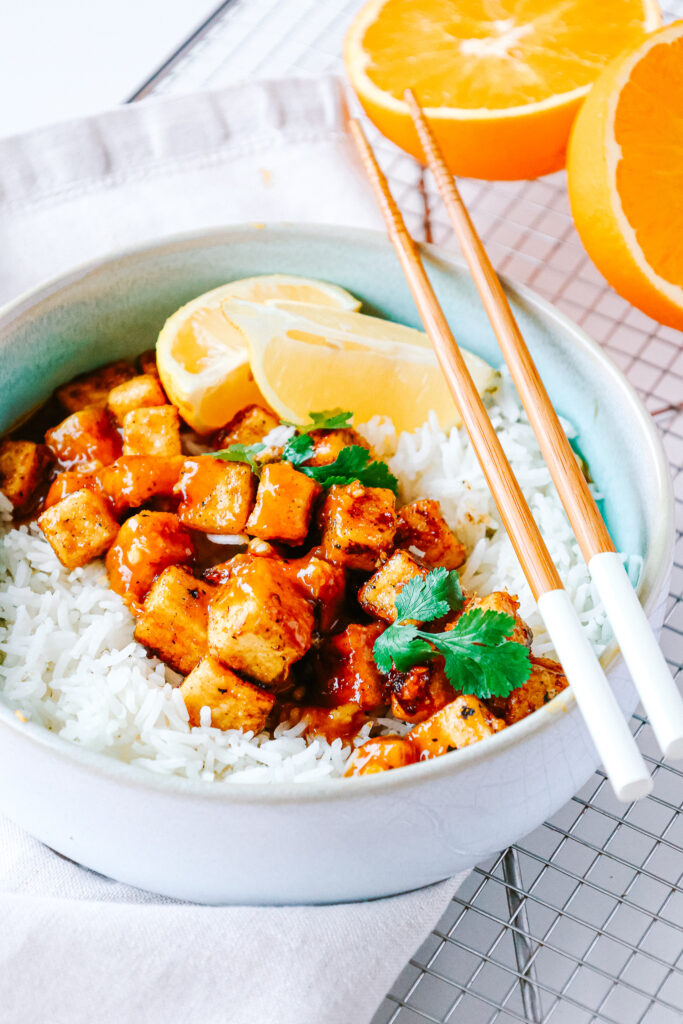
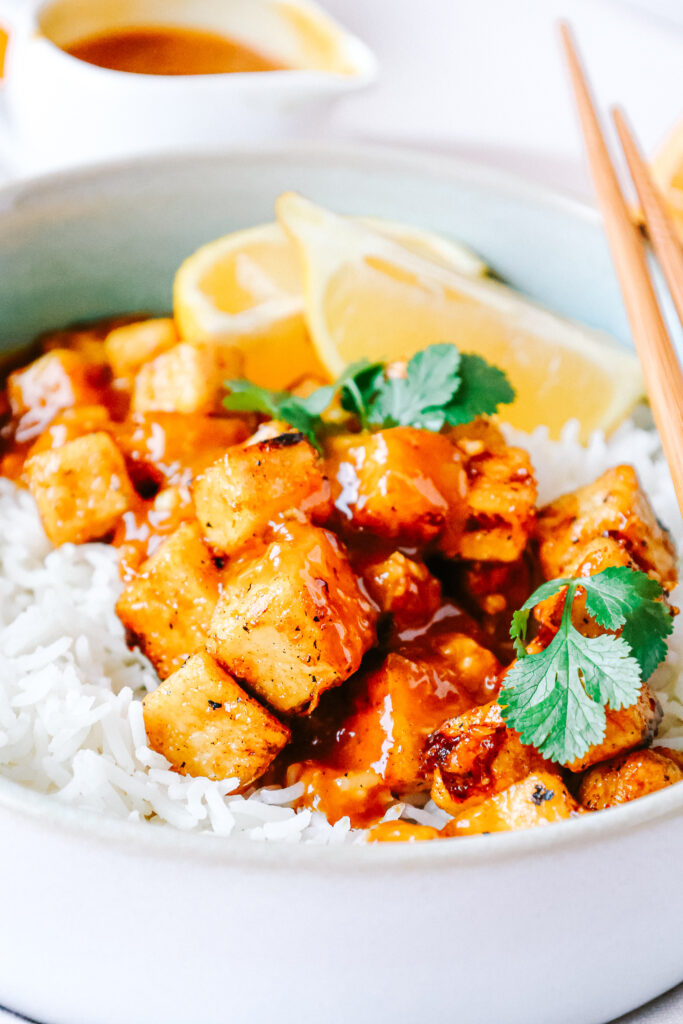
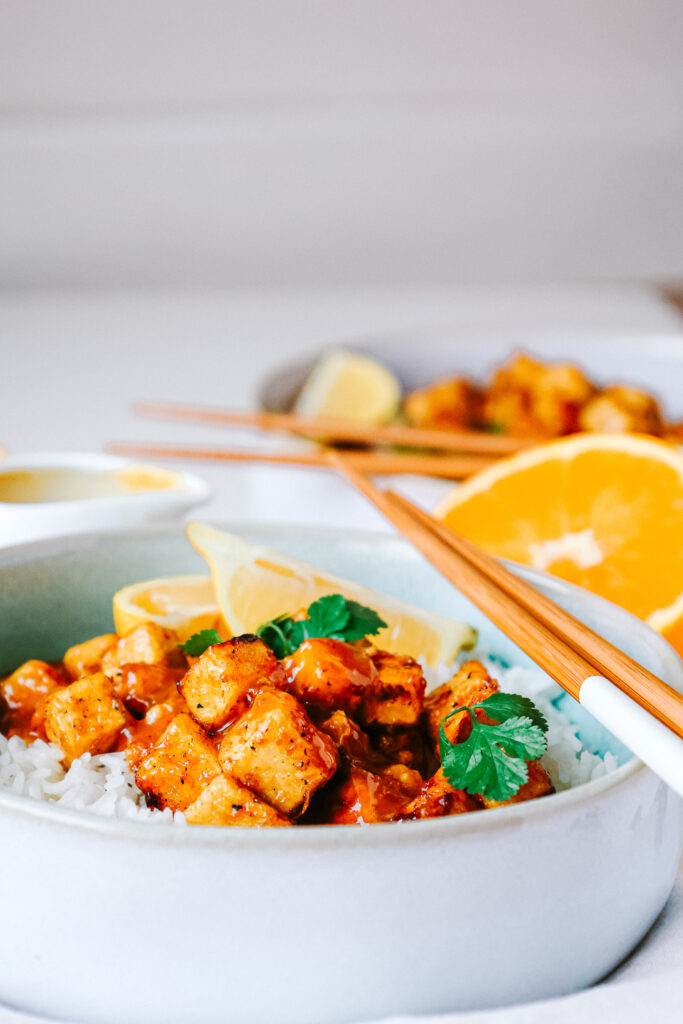
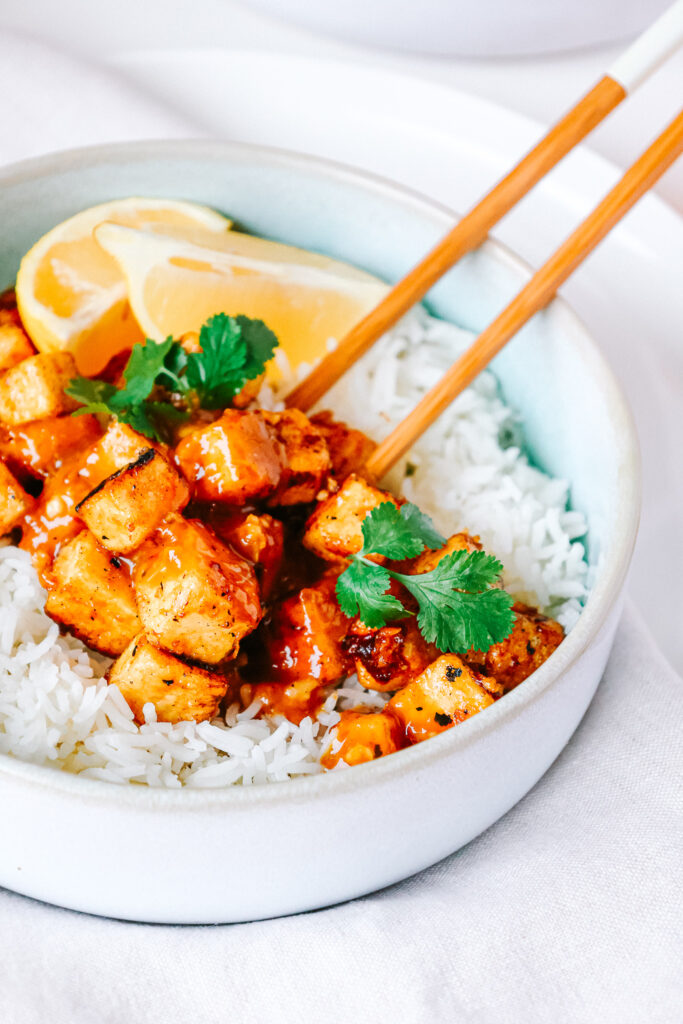
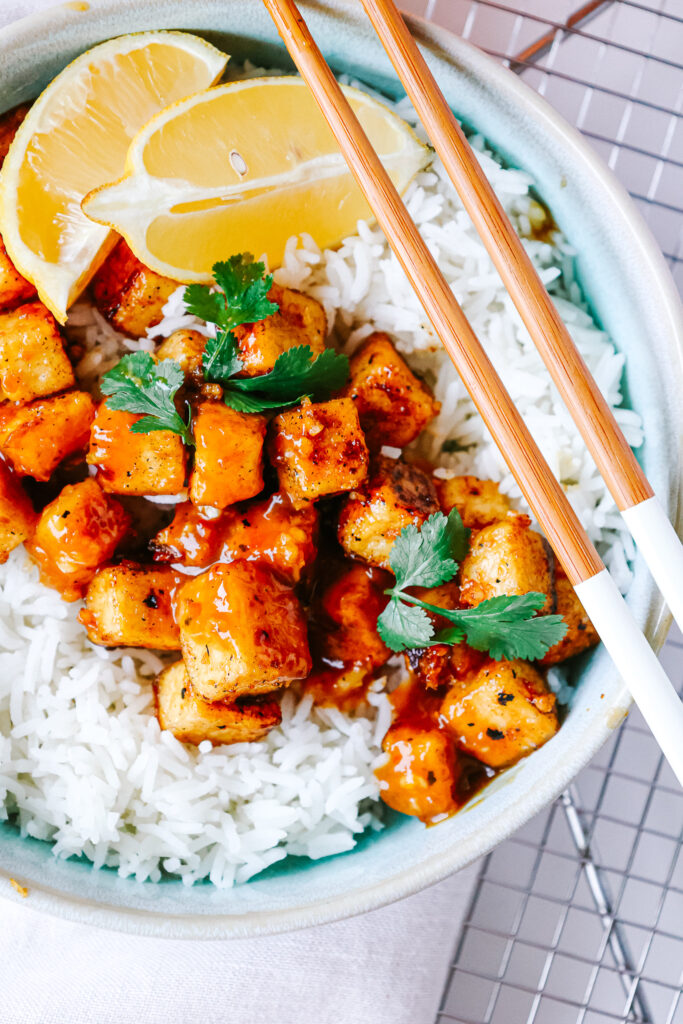
Put all our prejudices aside and make this recipe. If you used to think tofu is boring, you will be proven differently. We have got the sweet and slightly spicy flavours of orange and chilli combined in a sticky sauce that covers the tofu. Definitely not your average tofu.

Orange Tofu is a dish that originally is made with chicken instead of tofu and therefore also called orange chicken. Orange Chicken originated in China, where it is rarely found in traditional restaurants today. It got really popular in the US through Panda Express. There the chicken is battered, then fried and then tossed in a orange sauce, which thickens and caramelizes. 

What’s special about this dish?

It is a vegan version if the orange chicken and a mich healthier one too. It is not battered and deep fried and also not tossed in a sauce loaded with white refined sugar. It is a much healthier, easier and quicket version of the original and still tastes really intense and good! So you could say that it rather is a Chinese inspired dish and less the original one.

Is this dish healthy? 

Yep yep. What is it made of? Well our main ingredient is tofu. Tofu is really high in protein and also comes with some fiber. Then our main „ingredient“ is the orange sauce. This is mainly made from freshly squeezed orange juice, which is a vitamin C bomb. Then we have some soy sauce, vinegar, fresh ginger and garlic and some honey, plus some cornstarch in which the tofu is tossed and then fried in a little hot oil.

Contrary to regular orange chicken, we have rather little fat here because instead of deep frying it, it is simply stir fried in a pan. Also, we are using honey instead of white refined sugar. Honey still contains sugar but less per 100g in comparison to regular sugar and it actually comes with antioxidants. 

How to make this dish:

This is super simple. So, we start by pressing the tofu. To do so we just lay some kitchen paper beneath and on top of a block of tofu and them let something heavy press it down for a few minutes. This will make the liquid drain from the tofu so it gets crispier in the pan later on.

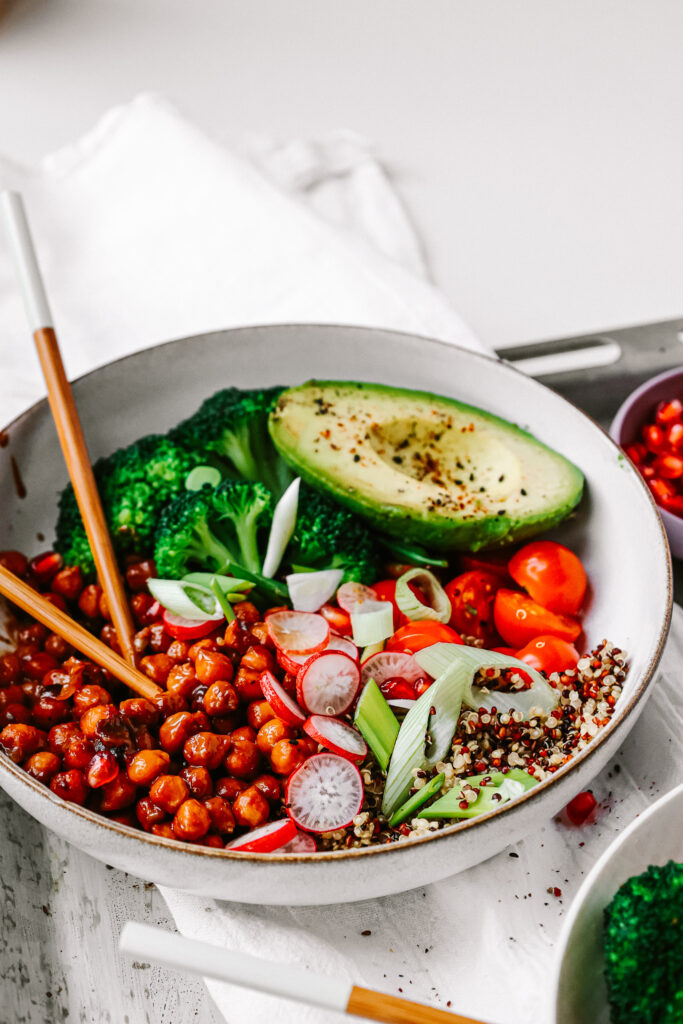
Next we just chop it up into about 1 cm sized cubes. These are then tossed in some cornstarch. The cornstarch binds the remaining liquid and kind of forms a crust when frying. After that, the tofu is fried in some hot oil from each side for about 1-2 minutes till crispy. 

In the meantime we combine the orange juice & zest, soy sauce, honey or maple, cornstarch, ginger, garlic and vinegar in a bowl and then pour it over the tofu and let it simmer on low heat for a few minutes. Because of the cornstarch the sauce will thicken and the honey makes it caramelise. That already pretty much is it, we now only have to divide it onto plates or bowls and garnish with some greens!

Meal prep friendly

You can easily make this dish in advance and reheat it. If you have a stove I would prepare everything in advance and store the tofu and sauce separately and heat it up together whenever you want to have it. If you do not have a stove when eating it, you can simply heat it up in the microwave all together. Maybe you’ll then need to add a little water.

Print

Super Easy 20-Minute Sticky Orange Tofu

Easy, delicious and healthy. A vegan and lighter version of the american-chinese classic and let me tell you, it at least is as delicious!

Course dinner, lunch, Main Course
Cuisine American, Chinese
Prep Time 10 Minuten
Cook Time 10 Minuten
Total Time 20 Minuten
Servings 2 servings

What you will need

  • 300 g tofu
  • 4 tbsp cornstarch
  • some rice or quinoa to serve with

For the sauce:

  • 1 orange zest & juice
  • 2 tbsp soy sauce
  • 1 garlic clove
  • 1 cm ginger
  • 1 tbsp cornstarch
  • 60 g honey or maple
  • 1 tbsp vinegar

How to

  1. Lay the tofu onto some kitchen paper and cover it iwth some more. Lay something heavy on top and let it press for abou 5-10 minutes, so as much liquid as possible goes out in order for the tofu to become crispy when frying. Then cut into 1 cm sized cubes and toss it in the cornstarch

  2. In the meantime grate the orange, then press it. Combine it with the remaining ingredients for the sauce.

  3. Heat up the oil in a pan and fry the tofu on each side for about 1-2 minutes until crispy and golden. Turn the heat down to medium heat and pour in the orange sauce. Give everything a good mix and let simmer for about 3-4 minutes until it has thickend a bit.

  4. Serve with some rice or quinoa and garnish with some cilantro! Serve and enjoy!

Honestly, this dish is so quick, so easy to make and so good! You’ll really, really love it and it is so so simple! I hope you’ll like it as much as we do and have a great time cooking it!

Enjoy!
Love,
Katie // Une Petite Cuisinière

Kategorie: American, Chinese, Cuisine, Diet-Specific, Lunch/ Dinner, My favorites, Vegan, Vegetarian Stichworte: 20 minutes, American, Chinese, easy tofu recipes, easy vegan, healthy lunch, healthy vegan, lunch, orange, plant based, quick, quick and easy, tofu, tofu recipes, vegan, vegan cooking, vegan lunch

Lazy Overnight Vanilla Quinoa with Stewed Berries (vegan)

Januar 22, 2021 by katharina.kuehr Kommentar verfassen

Kind of like overnight oats, just better and a bit different. Creamy, sweet and fresh and so incredibly easy to make. One of those breakfasts that don’t even take 5 minutes in the morning, yet are super nutritious and super flavourful!

I actually ate this 4 (!!) years ago when I was in Mauritius. They served it one day at the breakfast buffet and I absolutely loved it. Unfortunately I never had it again and never found it anywhere anymore. So, I always wanted to recreate it. Took me a while to actually do so and the result is pretty amazing. A pity that I have missed out on this for such a long time!

What is special about this dish?

Overnight quinoa not really is a thing. Overnight oats is really popular (& delish!) but overnight quinoa, to be honest, is at least as good! So having quinoa for breakfast is kind of special and then having sweet quinoa is also not so normal. Although I do not understand why because it actually is soso good!

The combination of vanilla, yoghurt & Quinoa is really so great and all of these components work together in such great harmony. And the best thing is, in the morning you just take it out off the fridge and enjoy it. Really, the best.

Is this dish healthy?

Yes, it is! Quinoa is such a nutrient-dense food, which actually is great to be having in the morning. It is packed with carbs, fibre, protein and nutrients and will keep you full for a while. If you want to read more about Quinoa, you can check out my January Top 5!

Besides our main ingredient we also have Vanilla Bean, which also is great in here because it naturally has a slightly sweet flavour so we do not need to add any additional sweeteners. Then there also is (plant-based) yoghurt and milk, which contain several vitamins (depending on which one you choose) and probiotics.

How to make this:

Really, really easy. Either you start with pre-cooked quinoa, which you either meal prepped before or bought ready to eat, or you are making it freshly. Both work equally fine. When you are making it fresh, you have the advantage of cooking it until it is really soft, which will make it taste better.

When you have the quinoa ready, we just combine it with some (plant-based) yoghurt & milk and a little sweetener of choice, I prefer honey. Then we need a fresh vanilla bean. Yes, it is possible to use vanilla paste, powder or syrup but fresh one has the most intense flavour. We’re also mixing that in. Then it goes into the fridge overnight.

The next morning we take it out, and heat up the frozen berries either in a pot on the stove or in the microwave. You can add some lemon zest and/ or juice or just leave them natural. Now it just needs to be served. I love it best with some roasted almond butter and fresh berries but this is up to you!

Meal prep friendly?

Totally! Since we anyway need to store it in the fridge you can also leave it there for more days. The texture or flavour won’t really change and you have a breakfast ready for several days!

I do not know why it took me 4 years to recreate this but I finally did and it was worth it! I hope that you’ll enjoy this at least as much as I do and that you’ll have a fun time cooking!

Print

Lazy Overnight Vanilla Quinoa with Stewed Berries (vegan)

Like overnight oats – just better. Creamy, sweet vanilla quinoa with warm stewed berries on top. Ready to eat in 5 minutes!

Course Breakfast, brunch
Prep Time 15 Minuten
Servings 2 servings
Calories 325 kcal

What you will need

  • 100 g Quinoa
  • 300 g yoghurt (plant based)
  • 100 ml milk (plant based)
  • 2 tbsp honey or maple syrup
  • 1 vanilla bean
  • 300 g frozen Berries
  • nuts or nut butterr

How to

  1. The night before, add the quinoa to a pot along with 200ml water and a pinch of salt. Bring to a boil, reduce to a simmer and let simmer until all water is absorbed. Turn the heat to minimum and let it sit unil fluffy and everything is soaked up.

  2. Add the cooked quinoa to a bowl along with the yoghutt, milk and honey or maple. Slice the vanilla bean in half lengthwise and scrape out the inner part. Also add it to the bowl and let it sit in the fridge overnight.

  3. The next morning heat up the frozen berries in the microwave or on the stove and top the quinoa with them. Add some nuts and/or nut butter and enjoy!

Enjoy,
Love,
Katie

Kategorie: Breakfast, Diet-Specific, Vegan, Vegetarian Stichworte: berries, breakfast, brunch, easy, easy breakfast, healthy vegan, overnight, plant based, quinoa, simple, simple breakfast, vanilla, vegan, vegan brunch, veganuary

Super Easy Saucy Hoisin Chickpea and Quinoa Bowl

Januar 14, 2021 by katharina.kuehr Kommentar verfassen

Bowls really have been the greatest invention ever. You can just take one, take your favorite ingredients, throw it all in, mix it and enjoy it. This is pure genius. Endless options and possibilities. And that can also be challenging, because how do you make a good bowl? This bowl definitely is a good one! Tangy and slightly sweet hoisin chickpeas with fluffy quinoa, crunchy veggies and soft avocado. = heaven.

How to make a good bowl?

A bowl always comes together out of several different ingredient groups. We have grains, greens, protein, veggies, fruits (optional), sauce and a topping. When we add something out of every group, we have got a perfectly balanced, healthy and delicious bowl

What’s special about this dish?

It is a bowl like no other – that is what is so great about bowls – everyone is so different. This is kind of an asian inspired bowl with flavours from China because of the hoisin. And since it is veganuary (and a lot of people are doing veganuary) we are making a vegan bowl – and no it is not boring! It is super flavourful, easy to make and packed with nutrients!

Is this dish healthy?

Definitely! You have got a very well balanced dish! As a base we have a mix of quinoa, which is packed with fibre, carbohydrates and protein, and greens, which are loaded with vitamins & nutrients. Then we have the star of the show: the chickpeas. Chickpeas are not only delicious, but also high in fibre and protein and a great source of plant based protein.

The sauce, in which the chickpeas are in, is made out of soy sauce, honey or maple, ginger and garlic and peanut butter, which provides some more protein and healthy fats. And then we also have the fresh veggies, which are very important for us with their nutrients and of course, some avocado (a bowl without avocado just wouldn’t be a bowl). Extra healthy fats and nutrients. As a topping we have spring onions and radishes, which add some more crunch and nutrients.

How to make this dish?

Really really simple. We start by preparing the quinoa (which by the way is the food of the month and you can read more about it here). Then we make the sauce for the chickpeas by blending peanut butter, soy sauce, ginger, lime juice, miso paste, honey and cornstarch

Now we are going to cook the chickpeas and the veggies. The veggies in boiling, salted water and the chickpeas with the sauce in a pan. The sauce will thicken and the chickpeas will absorb the flavour.

To assemble we now just add everything to a bowl, along with the avocado and tomatoes and top it with radishes and spring onions. That already is it!

Meal prep friendly?

Yes it definitely is, I have already had it reheated and it was at least as delicious! Just do not reheat the spring onions, tomatoes, radishes and avocado since they are meant to be eaten raw. And maybe you’ll need to add a splash of water to the chickpeas to thin out the sauce a bit!

I hope you’ll enjoy this bowl at least as much as I do, that you’ll have a fun time cooking and a healthy January!

Print

Super Easy Saucy Hoisin Chickpea and Quinoa Bowl

A delicious, easy & healthy (vegan) bowl recipe that is packed with a tangy, slightly sweet sauce, many fresh and crunchy veggies and fluffy, soft quinoa!

Course bowl, Main Course
Cuisine asian
Prep Time 5 Minuten
Cook Time 10 Minuten
Total Time 15 Minuten
Servings 2 servings
Calories 577 kcal

What you will need

For the chickpeas:

  • 1 can chickpeas
  • 1 tbsp peanut butter
  • 4 tbsp soy sauce
  • 1/2 lime
  • 1 tbsp honey or maple syrup
  • 2 garlic cloves
  • 1 thumb sized piece of ginger
  • 1 tsp cornstarch
  • 1/2 tsp chili paste (optional)

For the rest:

  • 120 g quinoa
  • 1 small head broccoli
  • 100 g edamame beans
  • 1 handful cherry tomatoes
  • 2 stalks spring onions
  • 100 g radishes
  • 1 avocado

How to

  1. To a pot add the quinoa, with a pinch of salt, and twice the amount of water. Bring to a boil and reduce to a simmer. Let simmer on medium-low heat until all water in absorbed. Then turn down to low heat and let the quinoa fluff.

  2. In the meantime peel the ginger and garlic, juice the lime and blend them along with all the otehr ingredients for the chickpeas, except the chickpeas themselves. If you do not have a blender, finely grate the garlic and ginger and just stir to combine the other ingredients for the sauce. Add it to a pot along with the drained and washed chickpeas and bring to a boil. Then reduce to a simmer and let it thicken a bit, about 5-8 minutes.

  3. In the meantime bring another pot of water to a boil and cook the broccoli and edmame in it for about 4 minutes, then drain.

  4. Half the cherry tomatoes, finely slice up the spring onions and half and depit the avocado.

  5. Once everything is ready, add it to a bowl and enjoy!

Love,
Katie // Une Petite Cuisinière

Kategorie: Asian, Cuisine, Diet-Specific, Lunch/ Dinner, My favorites, Vegan Stichworte: bowl food, chickpeas, Chinese, Chinese vegan, easy, easy lunch, health dish, healthy food, healthy vegan, meal prep, plant based, plant power, quick, quick lunch, quinoa, soul food, vegan, vegan bowl

Not your average, super quick beetroot and couscous Kisir

Januar 7, 2021 by katharina.kuehr Kommentar verfassen

Fluffy (not dry) couscous in a packed-with-flavor beetroot sauce, all tossed together with crunchy and fresh veggies and topped off with tangy, crumble feta cheese. Every bite is an explosion of flavours in your mouth, and every bite is pure enjoyment!

What is Kisir?

Kisir usually is a Turkish dish made from roasted red bell peppers and bulgur. The peppers are blended into a sauce and the bulgur is cooked with vegetable broth. The both then are tossed with different, chopped up vegetables and a marinade from lemon juice, pomegranate juice and olive oil.

What is special about this dish?

I am not even sure if I can call this Kisir because the only aspects we are keeping from Kisir is the sauce out of a roasted vegetable, that a grain is cooked in vegetable broth and that it both is mixed with chopped up vegetables.

Instead of bell peppers we are using beetroots. They are in season now, they are super nutritious, they are a flavour-bomb and they add a pretty colour :). Instead of bulgur we go for couscous because it is quicker and easier to make. And instead of only adding cucumber and tomatoes, we are upgrading our couscous and making it more international with spring onions, edamame beans and feta.

So, you can see it is pretty far from Kisir and at the same time really similar. And it needs to be said, it is at least as delicious, I promise!

Is this dish healthy?

Oh, yes! It is not only packed with flavour but also with many many nutrients. The star of the show, beetroot, is an extremely healthy, immune system boosting vegetable, with many many healthy benefits, If you are interested in it, you can check out my September Top 5 and learn more about it!

Besides the star, we also have many other small stars. Edamame, for example is not only super delicious, but also packed with protein and nutrients. Cucumber, vitamin loaded. Bell Pepper, fibre star. spring onions and the herbs also add another nutrient kick! So, there are many ingredients that will make you feel amazing!

And then we also have the couscous, which is a great source of carbohydrates, and when bought wholegrain also a great source of protein. The olive oil, which we are adding, also adds some healthy fats and the lemon some vitamin C!

How to make this dish?

Easiest thing ever. Because no-one wants to spend an hour cooking lunch when their tummy already is groaning. It essentially comes down to preparing the couscous, blending the beets with vegetable broth and oil, chopping the veggies and mixing everything! Yes, it is as easy as it sounds!

When and how to best have it?

It is great for a quick lunch, a leftover side for dinner but also as a delicious meal prep idea. You can store it very well in the fridge (the flavours will only get more intense) and have it the next day!

I love to serve it with some feta or goats cream cheese and some fresh herbs. If you are more on the meat side you could add some grilled chicken or if you are plant based, go ahead and add some chickpeas or vegan feta!

I hope you’ll enjoy this as much as we do and that it will be a healthy staple in you winter cuisine! Have a fun and delicious time cooking and enjoy!

Print

Not your average, super quick beetroot and couscous Kisir

a flavor packed, creamy (not dry) couscous in a beetroot sauce, tossed with fresh, crunchy veggies and topped with tangy feta. All ready in 15 minuntes!

Course Appetizer, dinner, Main Course, Salad, Side Dish
Cuisine turquish (inspired)
Prep Time 15 Minuten
Total Time 15 Minuten
Servings 4 servings
Calories 473 kcal

What you will need

  • 300 g couscous
  • 600 ml vegetable broth
  • 2 rather small beets
  • 1/2 cucumber
  • 100 g edamame beens (cooked)
  • 2 spring onions
  • 1 bell pepper
  • 150 g feta
  • 1 tbsp parsley
  • 1 tbsp mint
  • 2 tsp honey
  • 1 tbsp olive oil
  • 1/2 lemon

How to

  1. Bring the vegetable broth to a boil. Take off the heat and add about 3 tbsp of it to a blender with the beets. Pour in the couscous to the rest and let it soak up the liquid and fluff.

  2. Chop up the cucumber and bell peppers into small (about 1cm sized) pieces. Finely slice the spring onions and chopp the herbs. Add them all to a large bowl. In a seperate bowl combine the olive oil, honey and lemon juice.

  3. When the couscous is done, add it to the bowl with the veggies, the beetroot sauce and olive oil mixture. Mix it through until the sauce has covered everything.

  4. Divide onto plates and crumble the feta on top. Serve with some fresh herbs and enjoy!

Love,
Katie // Une Petite Cuisinière

Kategorie: Appetizers, Diet-Specific, Lunch/ Dinner, Salad, Side, Vegan, Vegetarian, Vegetarian Stichworte: beet, beetroot, couscous, easy lunch, feta, healthy side, healthy vegan, kisser, light lunch, main dish, plant based, quick, salad, side dish, side salad, tabouleh, vegan, veganuary, vegetarian

« Vorherige Seite
Nächste Seite »

Footer

What has been happening on my Instagram

Copyright © 2024 Une Petite Cuisinière on the Foodie Pro Theme