• Zur Hauptnavigation springen
  • Skip to main content
  • Zur Fußzeile springen

feel food club

  • Home
  • About me
  • My Recipes
  • Blog
  • Navigation Menu: Social Icons

    • Instagram

comfort food

Black Quinoa Teriyaki Burger (vegan)

Juni 5, 2020 by katharina.kuehr Kommentar verfassen

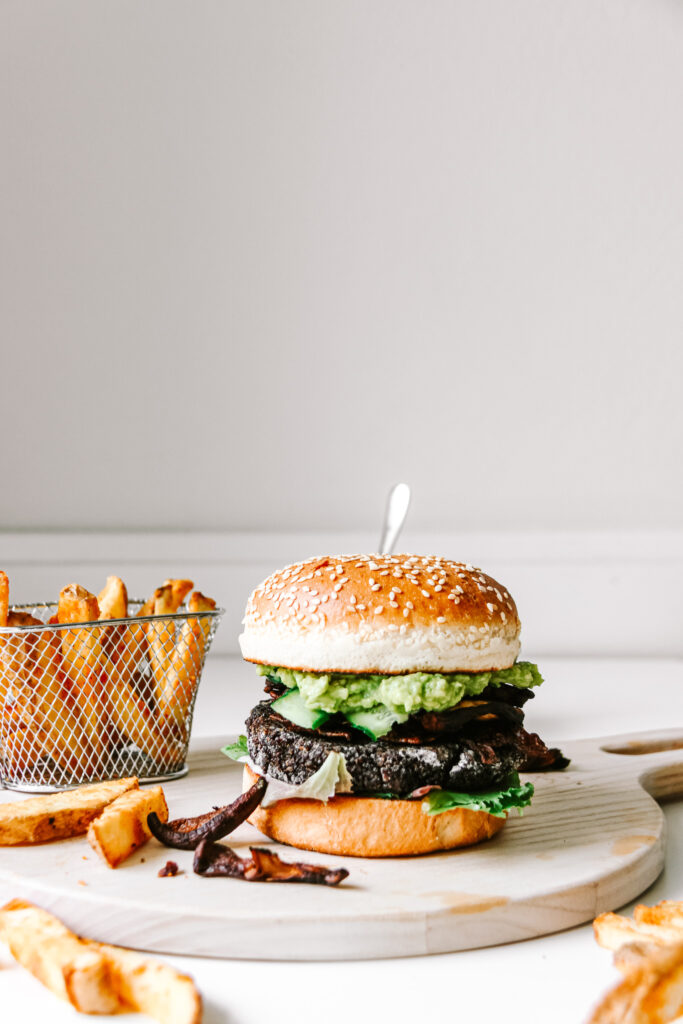
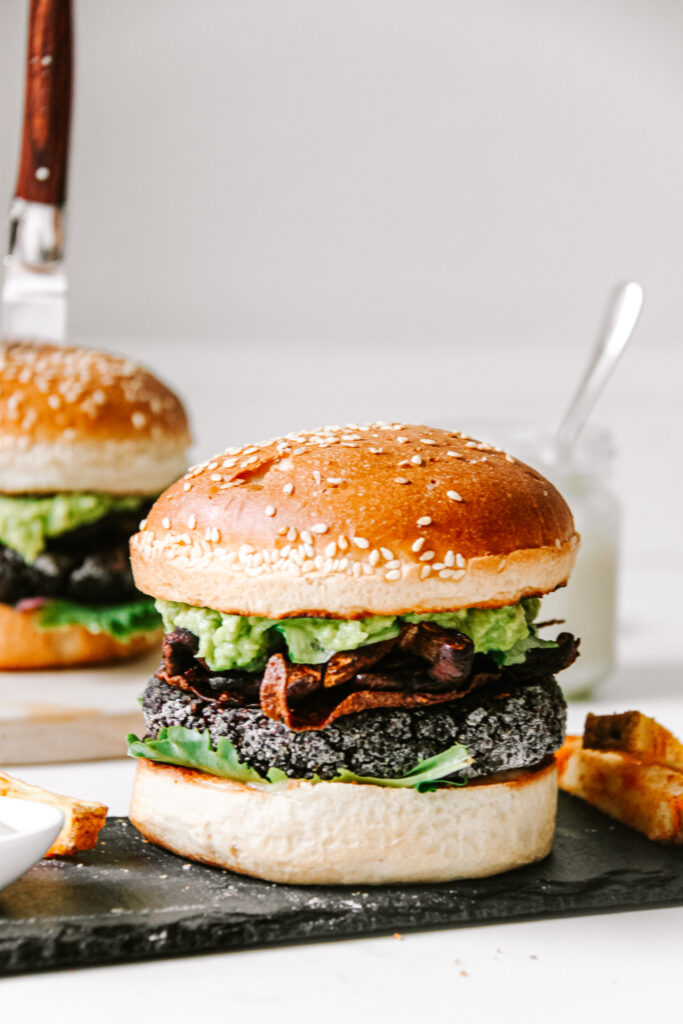
Burgers; the ultimate comfort and fat food. The embodiment of unhealthy. But can you make it healthy? I can tell you, yes you can! This is a healthy, plant based and incredibly delicious version of the most popular fast food. A healthy black quinoa teriyaki burger.

Why aren’t burgers healthy?

First things first. We always hear burgers aren’t healthy. But what exactly is it that is not healthy? A lot of people think it is the bun. Because bread has the reputation to be unhealthy. But I need to disappoint you if you were believing that because this is not true. Bread is a good source of carbohydrates and vitamins. Also it has some protein and little fat and sugar (although store bought burger buns may have a lot of sugar, so keep an eye out for that). Sure, if you choose a wholewheat burger bun it would be healthier. But this is not what I am referring to. The unhealthy parts of most burgers are the meat, cheese, bacon and sometimes even sauces.

The meat oftentimes is not healthy because usually fatty meat is used. This adds more flavour but also more calories and more fat. Bacon goes along the same way. Bacon mainly is made of fat and sodium. Which both is not healthy for us. And of course the cheese. Sure, cheese does have protein but again, the fat is the less healthy macronutrient here. Do not get me wrong, fat is not necessarily bad for our bodies and we do need it to live but the amount which is in one burger is not really healthy anymore.

The when I said that sauces aren’t always healthy, this may have surprised you. Why , you think? In most burgers you can find mayonnaise. High quality mayonnaise is made out of oil and egg yolk. This is not unhealthy when consumed in right amounts. It is high in calories but those calories have a nutritional value. But most store bough mayonnaises have hundreds of other ingredients in them. Most of which you cannot pronounce. This is not very good for our bodies. To summarise: high quality mayonnaise can be healthy when consumed in right amounts, highly processed ones are not good for us.
But mayonnaise isn’t the only sauce. In many other sauces there is a lot of butter or sugar added to get more flavour. Butter and sugar both, I think most people are aware of that, are not great sources of nutrients. While oftentimes we assume that the sauces do not make much of a difference, they actually do. 2-3 tablespoons of high calorie sauces can quickly add up to 200-300 kcal. So be aware the next time you choose it.

About balance

But please, after reading about the nutritional information about burgers, do not say that you will not have them again. Having a good and super tasty burger once in a while is more than alright. Not stressing out about it too much also is important for a healthy relationship with food. Just be aware that this is not the ideal meal to nourish your body and it should be consumed in moderation if you want to eat a healthy diet.

How to make it healthy

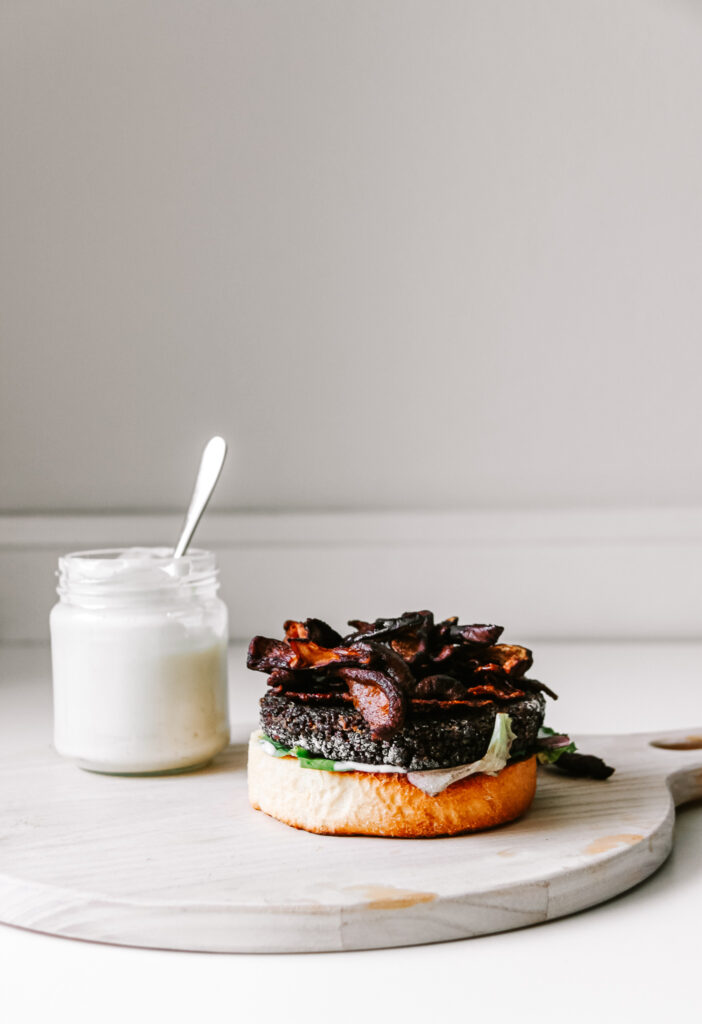
I think we now have talked enough about why it is not healthy. So let’s focus on making it healthy. This comes down to super easy swaps. For example instead of taking a beef patty you can substitute it for a plant based one. Here we are making one out of black quinoa from Reishunger (you can get it here). But you can also long for one made out of beans of ground turkey for example. Instead of bacon we are using mushrooms. May sound a little boring at first, but once you’ll try it out, you’ll be convinced. Instead of store bought low quality mayonnaise, you can use a homemade one. Or you can use ketchup without added sugar. If that’s too boring for you, I am sure you are going to find sauces at the supermarket that do not have a lot of added sugar. Last but not least, we probably need something else. Avocado. Don’t be fooled thinking that this is just another ago trend because it isn’t. Avocado in your burger is life changing.

How to build the perfect burger:

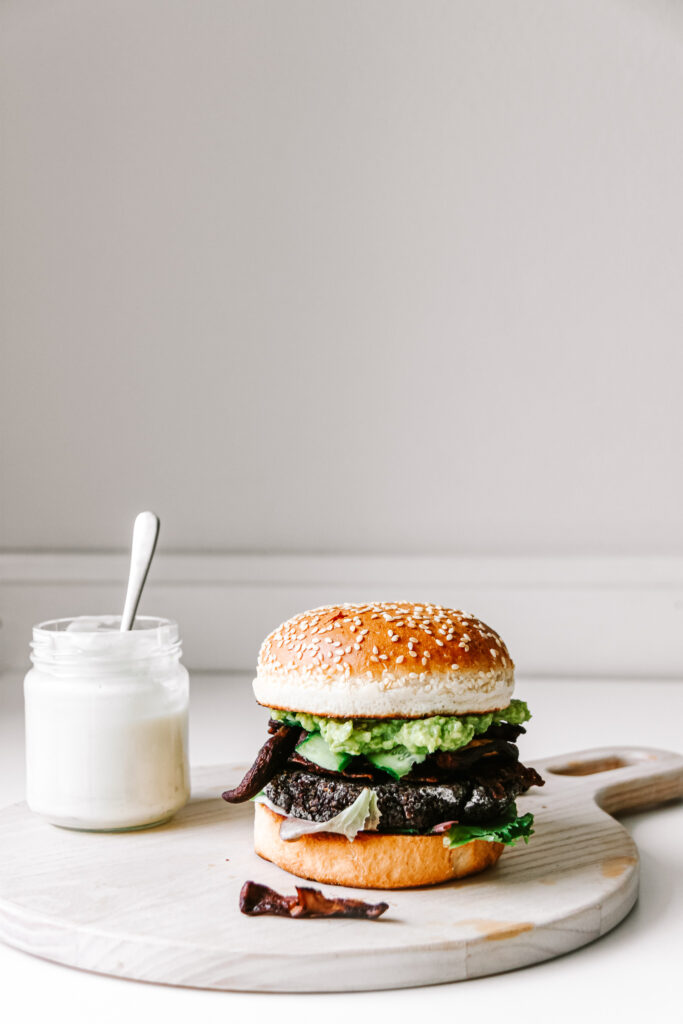
This is a very important part. This can change your burger 180°. No but honestly you can ruin so much when you build it the wrong way.

  1. toast your bun. This crispness it up and adds a lot of flavour. No matter whether you are doing this in a toaster of a pan, this step is essential.
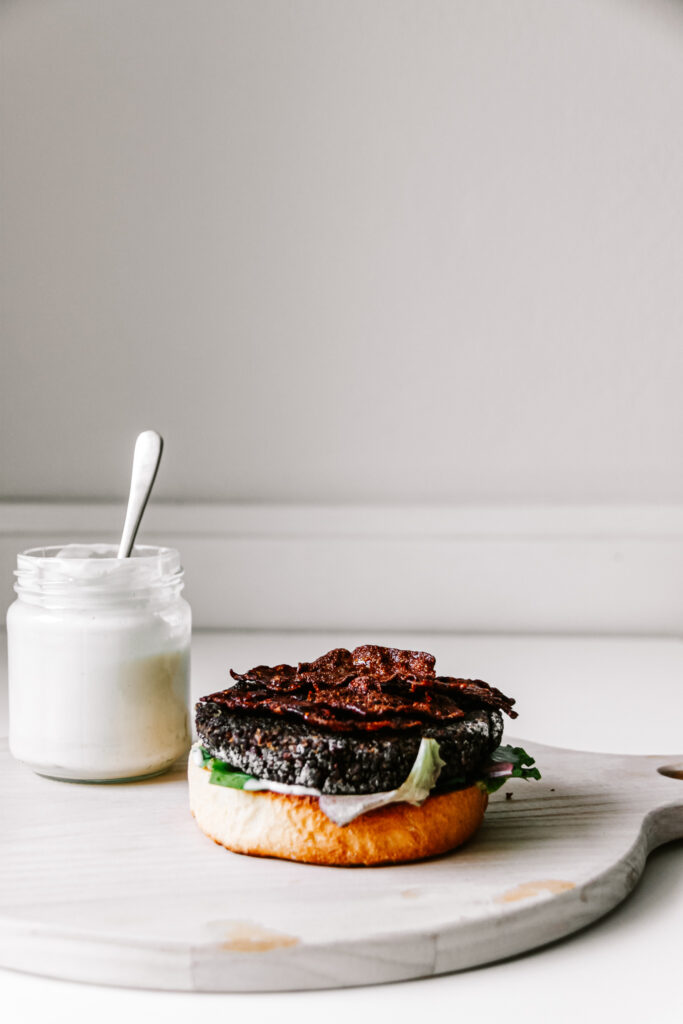
  2. Sauce. Right on top of the bun that is the first layer, we are adding a sauce. Ketchup, homemade mayonnaise, barbecue sauce. Whatever.
  3. Greens. They won’t change much of the taste but much of the vitamins you get in. Also it is important to add a layer of greens before adding something else because when you add the patty or something else like tomatoes or cucumber right onto the bun it will get soggy.
  4. The patty. Pretty self-explanatory.
  5. Bacon/Mushrooms/other add ins. they have a good flat surface to lay on.
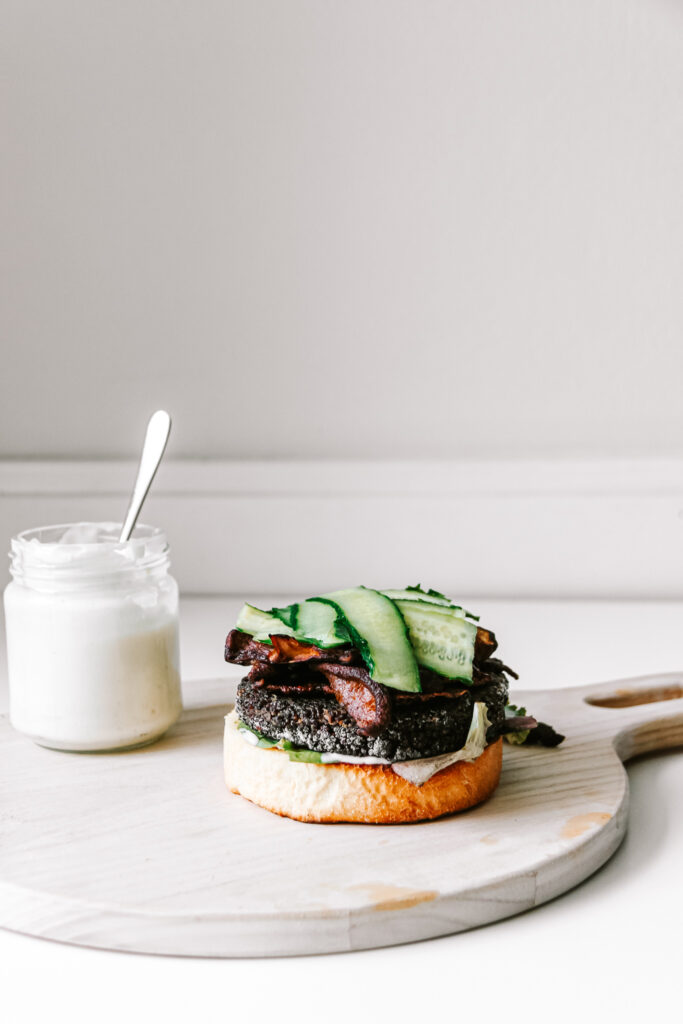
  6. Soggy veggies. Now you can add tomatoes, cucumber, or anything else containing a lot of water. It s not next to a bun so it won’t turn anything soggy.
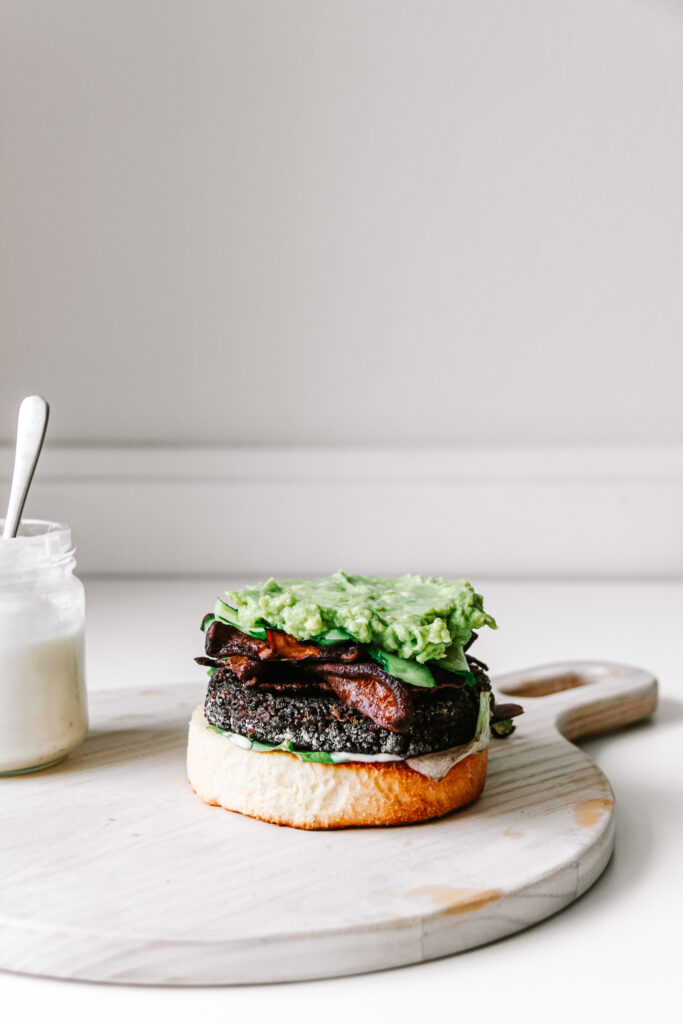
  7. Avocado/ sauces. To finish it up, a nice layer of sauce or smashed avocado to add extra flavour and consistency.
  8. the top bun. Again, I would recommend to toast it.

The Quinoa Patty

Making a burger out of quinoa may sound a little weird but it is so good and so easy. The black quinoa adds an extra bit of flavour and depth to it. You can find black quinoa at Reishunger.com . It is important to completely cook the quinoa through until it has absorbed all of the liquid. This way it will give a perfectly mushy consistency when blending. What also is important is the seasoning. Since it does not have as a strong flavour itself as meat does, we need to season it well. Here we are doing it with a super simple teriyaki sauce.

Meal prep and serving:

You can batch make the quinoa patties and freeze them before cooking. Whenever you wanna have one, let them thaw a little bit and fry them up in a pan.
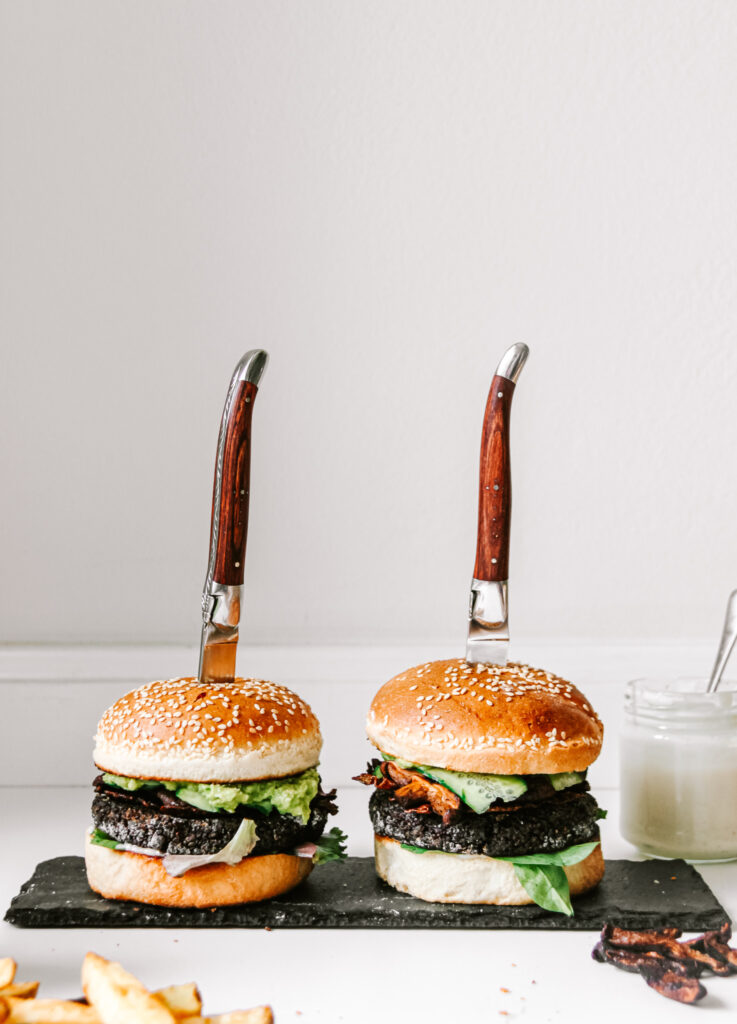
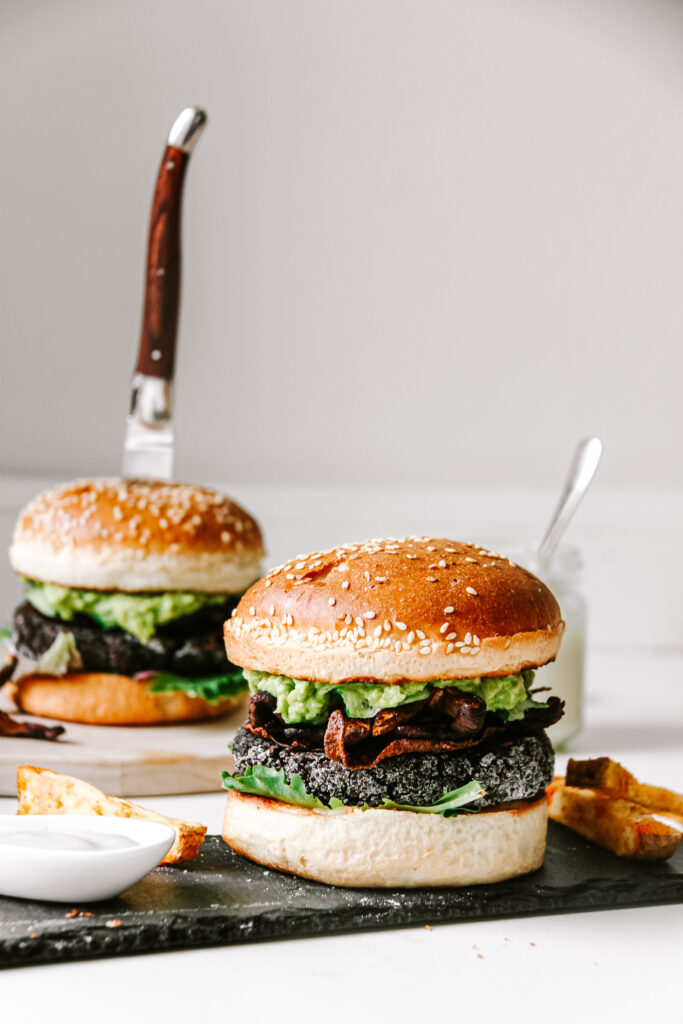
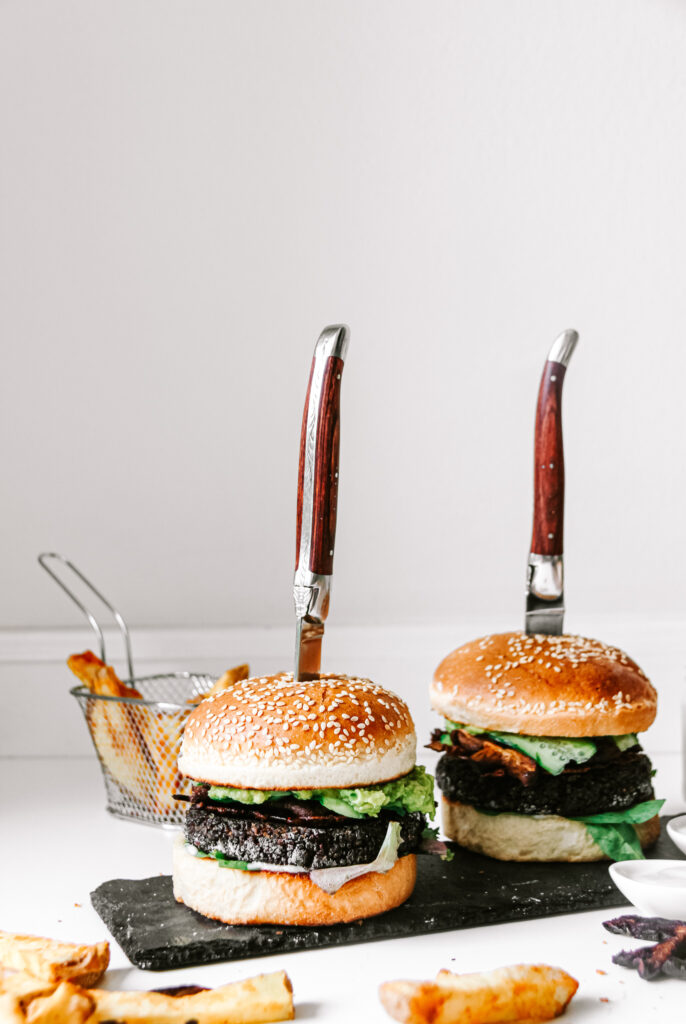
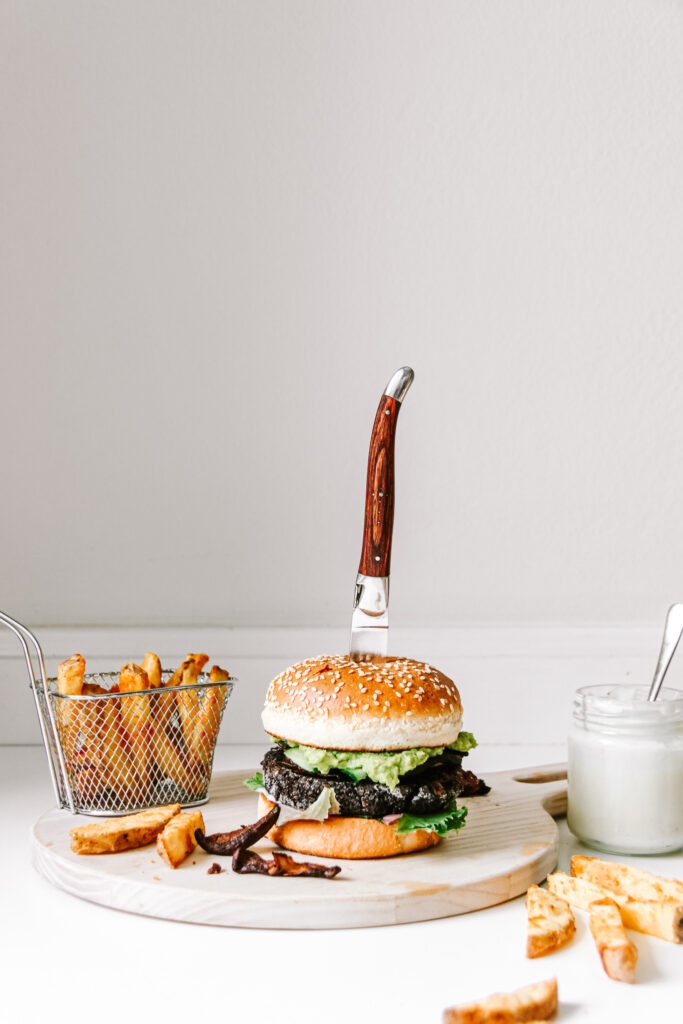
The burgers are best served with some homemade fries or sweet potato fries or just a simple little salad.

I hope that you enjoy this recipe as much as I do and have fun cooking it!

Print

Black Quinoa Teriyaki Burgers

Healthy Plant Based Burgers. A ton of flavor. A ton of goodness. Pretty easy, pretty good.

Course dinner, lunch, Main Course
Prep Time 10 Minuten
Cook Time 25 Minuten
Total Time 35 Minuten
Servings 2 burgers
Calories 695 kcal

What you will need

  • 100 g quinoa
  • 5 tbsp soy sauce
  • 1.5 tbsp cornstarch
  • 1 tsp sriracha or hot sauce
  • 1 tbsp maple syrup
  • 2 tbsp oil
  • 200 g mushrooms
  • 1/2-1 Avocado
  • 2 burger buns
  • a handful greens

For the vegan mayonaise (makes about 8 servings)

  • 125 ml soy milk can use any plant based milk alternative
  • 1 tbsp vinegar
  • 200 ml oil
  • 1 tsp mustard
  • 1 tsp salt

How to

  1. Add the quinoa to a pot along with 200 ml of water. Bring to a boil and then reduce to a simmer. Let simmer for about 10-15 minutes until all water is absorbed completely.

  2. In the meantime make the vegan mayo. Add the milk alternative, oil, salt and vinegar into a tall container. Take an immersion/ hand blender and place it on the very bottom. Turn the speed onto low and pull it up in one go until you have reached the surface of the liquids. Keep blending until it begins to emulsify and becomes creamy. Add the mustard and continue to blend for about 1 minute until it if smooth and creamy. Place in the fridge.

  3. Slice the mushrooms into about 0,5 cm thick slices.

  4. In a small bowl combine the soy sauce, maple syrup, hot sauce and conrnstarch. Make sure there are no big lumps of cornstarch in the mixture.

  5. When the quinoa is done transfer it to a food processor. But make sure it has really absorbed all liquids, otherwise the burger patty will fall apart. Add about 2/3 of the teriyaki mixture to it and blend well. It should all stick together and form a big ball.

    Slightly flour your hands so they are dry. Divide the quinoa mixture into 2 and form them into patties. Do this by first rolling a ball in your hand and laying it on a flat surface. Then press it down with the palm of hand to make a flat surface.

  6. Heat up half of the oil in a pan. Sautée the mushrooms in there for about 3 minutes. reduce the heat and add the remaining teriyaki sauce.

  7. Mash the avocado. Half the burger buns and toats the bottom half.

  8. Heat up the remaining oil in another pan. Once hot add the quinoa patties and fry on each side for about 3-4 minutes.

  9. Once the bottom bun is toasted add a generous spread of mayonaise. Top it with some salad. Add the black quinoa patty on top. Then theh mushrooms and some sliced cucumber if using. Lastly, add the mashed avocado and the top half of the burger bun. Serve and enjoy!

Happy cooking,
Enjoy,
Katie // Une Petite Cuisinière

Kategorie: American, Cuisine, Diet-Specific, Lunch/ Dinner, spring, Vegan, Vegetarian, Vegetarian Stichworte: barbecue, barbecue season, burger, comfort food, healthy, healthy burgers, healthy comfort food, healthy fast food, lunch, plant based, plant based burgers, quinoa burger, quinoa recipes, reishunger, teriyaki burger, vegan, vegan burger recipe, vegan burgers

Shrimp, Carrot & Aubergine Mushroom Dumplings

März 27, 2020 by katharina.kuehr Kommentar verfassen

Dumplings are one of my absolutely favourite things to have. I always order them when going out to Chinese or Japanese restaurant but I have never dared to make them at home because I thought it was super complicated to make them. Wrong! They are not complicated at all, just require a little work, which is a lot of fun when doing it with someone else.

I do not know if anyone else loves the mix of textures and flavours or a decently spiced filling and a soft and doughy outer shell as much as I do. The combination always gets me and I believe that it is the perfect comforting and still healthy food. The great thing is that you can switch up the fillings and get so creative. There is nothing you cannot put into those cute, little dumplings.

Since everyone has different taste buds, I created 2 versions for this first dumpling blog post. A vegetarian (vegan actually) and one with seafood. They both are incredibly delicious. For the vegetarian I combined some super finely chopped eggplant and some super finally chopped mushrooms. The chopping really takes time but making it that small just changes the taste so much because it almost feels like ground meat, texture wise, and you have both veggies in one bite. This mixture is sautéed just for a minute or so and then tossed with a teriyaki sauce. The sauce really adds a lot of flavour and makes it so addictingly good.

The shrimp dumpling is even easier. I use frozen shrimps simply because they are easiest to get and to store. Before preparing them, they need to be defrosted, which you can either do by taking them out of the freezer a few hours before cooking or if you forgot to do that, you can place them in a bowl with warm water and let them defrost that way. The shrimps are also finely chopped. The other 2 ingredients are carrots, which are peeled and also chopped up really finely and wild garlic. I love to use wild garlic at this time of the year but if you do not have that on hand you can use normal garlic cloves instead. This mixture does not have to be pre cooked, because the shrimps I use are already cooked before frozen. If yours are not you can quickly pan fry them or you just cook them when steaming.

As for the outside dough, in this recipe we are using wonton wrappers. You can get those frozen at any asian market and sometimes even in supermarkets or speciality stores. Those are the same ones you would use for spring rolls. So you can deep fry, pan fry or steam them. Same with those dumplings. I am 100% down for steaming, simply because I believe they taste best and the flavours come out most, but you can also crisp them up in a pan. I would not recommend deep-frying them tough.

Here I decided to close them differently and bring them into diverse shapes but if this is too much work for you, leaving it with one is absolutely fine. The filling and shaping does take some time, because each wrapper is a bite, so it takes a while until you have gotten them all read but it is so worth it.

You can serve them as an appetiser when friends are over, or also if not, or just prepare more and make an asian spread for lunch or dinner (maybe with the satay skewers, which are coming up on the blog next week?). This recipe is totally family approved, not only everyone likes eating them, but the making them together part is. a lot of fun too!

When you serve them, then do so with some soy, teriyaki, chilli or peanut sauce to dip in!

I hope that you will love this recipe as much as I do!

Have fun cooking,

Katie // Une Petite Cuisinière

Print

Shrimp and Carrot Dumplings

Light, easy and super tasty. Crunchy carrot, soft prawns and fresh wild garlic, the result, an absoltue amazing dish!

Course Appetizer, dinner, lunch, Side Dish
Cuisine asian, Chinese
Prep Time 27 Minuten
Cook Time 8 Minuten
Total Time 35 Minuten
Servings 15 dumplings
Calories 48 kcal

What you will need

That is what you need:

  • 15 wonton wrappers
  • 3 carrots
  • 300 g prawns frozen and thawed
  • 1 handful wild garlic
  • 1 tbsp soy sauce
  • some sesame seeds

How to

This is how it works:

  1. Peel the carrot. Slice and cube it into mini chunks, about 2 mm large. The smaller you get them, the better they are. Or, grate them with a grater.

  2. Defrost the prawns and chop them very small too. Take the wild garlic, wash it and also cut this one into small sizes.

  3. Place all of those ingredients in a bowl and mix them together with the soy sauce.

  4. Take one wrapper at a time and place a teaspoon of the filling into the middle. Brush the edges of the wraper with some water and fold two diagonal edges together. Close the dumpling up by pressing the open sides to each other so they close.

  5. If you want to, you can make a small pattern by taking one end of the triangle and folding it towards the other side. The part of the wrapper where the dough has been folded over, now folds over in the same direction. Continue doing this until you have reached the other side of the wrapper.

  6. Repeat that with the remaining wrappers until the filling is used up.

    Bring some water to a boil in a pot. Take a steamer, a bamboo steamer preferably, and place the dumplings in it on top of some parchment paper to prevent them from sticking.

    Steam them for about 5-8 minutes until the dough is soft. Serve them with some sauces like soy sauce, chili sauce or peanut sauce, a sprinkle of sesame seeds and some fresh cilantro.

    Enjoy!

Print

Aubergine and Mushroom Dumplings

A vegan version of the best asian comfort food. Soft and tangy aubergine mushroom mix tossed in soft wrappers. INcredibly good.

Course Appetizer, dinner, lunch, Side Dish
Prep Time 27 Minuten
Cook Time 8 Minuten
Total Time 35 Minuten
Servings 15 wrappers
Calories 39 kcal

What you will need

That is what you need:

  • 15 wonton wrappers
  • 1/2 eggplant
  • 1 tbsp oil
  • 200 g mushrooms you can use champignons or oyster mushrooms
  • 2 tbsp teriyaki sauce can be substituted for 1 tbsp soy sauce and 1 tbsp honey
  • sesame seeds
  • fresh cilantro
  • 1 garlic clove
  • 3 cm ginger

How to

That is how it works:

  1. Finely chop the ginger, garlic, mushrooms and eggplant into about 2mm sized cubes. The smaller the better.

    In a pan heat up the oil. Sautée the veggies for about 2 minutes. Take them off the heat and stir in the teriyaki sauce.

    Take one wrapper at a time and place one teaspoon of the mixture in the middle. Brush all edges with some water. Take the four edges and pull them up to the center and press them together. Take the remaing open sides and also press those together so the dumpling is fully closed.

  2. Repeat that with the remaining wrappers until the filling is used up. 

    Bring some water to a boil in a pot. Take a steamer, a bamboo steamer preferably, and place the dumplings in it on top of some parchment paper to prevent them from sticking.

    Steam them for about 5-8 minutes until the dough is soft. Serve them with some sauces like soy sauce, chili sauce or peanut sauce, a sprinkle of sesame seeds and some fresh cilantro. 

    Enjoy!

Kategorie: Appetizers, Asian, Cuisine, Diet-Specific, Fish & Seafood, Japanese, Lunch/ Dinner, Poultry & Meat, Side, Vegan, Vegetarian, Vegetarian Stichworte: appetiser, asian, asian appetiser, asian food, Carrot, comfort food, dumplings, eggplant, family food, family friendly, family meal, healthy, healthy dumplings, healthy lunch, light lunch, prawns, teriyaki

Coconut Curry Lentils

Dezember 23, 2019 by katharina.kuehr Kommentar verfassen

This is one of my favorite ways to enjoy lentils. In a good and creamy coconut milk, spices, along with some rice, vegetables or bread! A definitely must try! 

When it is rainy outside and you just want some heat and comfort, this is great! It is for days when you don’t want a soup but don’t want meat, just something easy and good. Something as a quick weeknight dinner, that makes you feel awesome, boosts your mood and tastes bomb! The curry lentils are great for this occasion, because ether are super nutritious and packed with flavor and spices. 

A little bit about lentils…

When I made this the first time, I fell in love with it and it made me cook more often with lentils. Lentils are a real amazing food. They are Part of the legume family, along with beans and chickpeas. Lentils, that you can purchase at the supermarkets in Austria are often grown in Austria which makes them a regional product, which is better for the environment since it doesn’t need that much transportation. Moreover, lentils are packed with protein and nutrients! They contain 25g protein per 100g, which is real amazing, that is the same amount as chicken breast contains! They are really easy to cook, basically the same way you cook rice. If you are too lazy too cook them or need them to be done even quicker, you can find some canned ones at the supermarkets too! 

And the other ingredients

The onion and the spices in the beginning, just give the entire dish this kick of flavor. The onion adds the sweetness while the spices heat it up and give the oriental touch. I use dry spices and not curry paste because I believe that it works better with the lentils. To be honest, I have never tried it with curry paste before but if you do want to give it a try I would opt for a red one probably. 

The coconut milk creams up the entire dish and adds richness. I would go for normal canned options and not low fat ones because the flavor is different and it makes it all a little more hearty. Plus it takes it to the next (curry) level. I believe that a real good curry (at least Thai ones) need some coconut milk. The recipe I make is a mix of Thai and Indian, because Indians don’t use coconut milk but the dry spices, and Thai ones use coconut milk and curry paste. So it is a crossover! 

Perfect dish

No matter whether you make this dish for meal prep (because wir works great for that) or prepare it as a vegan Christmas dish or serve it at new year (because it is said that lentils bring money), it is a super delish meal to make. Perfect for friends or family that are vegan, and for those who are not. I hope that you will enjoy it and have a really nice Christmas! 

Enjoy,

Katie

Print

Coconut Curry Lentils

Comforting, warm, delicious, nutritious. The perfect winter dish, for christmas or new year, for vegan friends, or just to treat yourself! One of the best ways to cook lentils!

Course bowl, dinner, lunch, Main Course
Prep Time 3 Minuten
Cook Time 17 Minuten
Total Time 20 Minuten
Servings 2 servings
Calories 438 kcal

What you will need

  • 1 tbsp Olive Oil
  • 1 white onion
  • 1 tsp turmeric powder
  • 1 tsp paprika powder
  • 1 tsp cinnamon
  • 1 tsp curry powder
  • 120 g red lentils
  • 300 ml vegetable broth
  • 150 ml coconut milk
  • 2 tsp tomato paste
  • 2 tsp harissa paste
  • 1 tsp peanut butter
  • some spinach or kale to stir in optional
  • some cilantro and peanuts to garnish

How to

Thats how it works:

  1. Finely dice up the onion. In a pot heat up the olive oil and add the onion in. Sauté it for a few minutes until it is all glassy. Then add in the spices and let them in cooperate well for about one minute. Next, pour the lentils into the pot and sauté them for a few seconds before you add the vegetable broth. 

  2. Once it boils, reduce it to a medium-low heat and let them simmer for 15 minutes. They should almost be done by now. Add in the tomato and harissa paste, the peanut butter and the coconut milk. Stir everything in until well combined and creamy. I wished, and on hand, stir in some extra spinach or kale.

  3. Place in bowls and garnish with some peanuts, some coriander and a little extra coconut milk. Serve over rice, vegetables or with bread and enjoy!

Kategorie: Cuisine, Diet-Specific, Indian, Lunch/ Dinner, Thai, Vegan, Vegetarian, Vegetarian Stichworte: 20minute, coconut, coconut milk, comfort food, comforting, cozy, curry, dinner, family dinner, healthy, lentil, lentil curry, lentils, meal prep, quick, red lentils, spice, vegan, vegan Christmas, vegan dinner, weeknight dinner

Healthy Apple Crumble Cake

November 3, 2019 by katharina.kuehr Kommentar verfassen

During this time of the year I eat at least 1-2 apples a day. In every different way. Whole, in Apple sauces, in oatmeal, on toast, with almond butter, or even in cake. I love apples, they come in so many different shapes, colors and flavors and they just taste amazing! Also, they are packed with nutrients. The saying an Apple a day keeps the doctor away doesn’t exist for no reason! 

Honestly apples are one of my favorite fruits. They make the perfect snack because you can just throw them into a bag and eat them on the go whenever hungry. Fall is one of the best seasons because it’s Apple time, which means eating tons and tons of local apples! 🙂 When I came up with this recipe we had a lot of apples at home (A LOT!) and we were going on holidays the week after so we had to use them all up! Since I did not want to cook them all into my delicious Apple sauce (the recipe is coming soon), I decided I need to make something else. 

It did not take me long to decide to bake a cake, because cake always works! This cake is just so delicious and packs a bunch of fall ingredients into it. Cinnamon, apples, nuts, oats, all the good things. It is super easy to make, just takes 30 minutes and packed with so much flavor. Actually, when I made this, my cousin was here and he instantly ate 3 pieces because he liked it so much! 

The cake consists of three layers. The first one is a cake batter. It is fluffy, made with whole grains and full of fiber. It is made out of eggs, a little bit of margarine, oats, whole grain flour, and wheat bran. If you do not have wheat bran on hand, just use more flour, but if you do them use it because this contains so much fiber and nutrients! 

The second and middle layer is only made out of 4 ingredients. Apples, coconut oil,  cinnamon, and sea salt. The apples are fried in coconut oil and softened in the pan before baking because otherwise they would not be soft by the time you take the cake out of the oven. The cinnamon totally gives it fall and cozy vibe while the sea salt helps to bring out the flavor and the coconut oil with softening.

The crumble is not made like traditional crumble but much healthier. It gets its texture from Walnuts and Pecan nuts, oats, chia seeds for fibre, cinnamon, because there can never be enough cinnamon, coconut oil, for some healthy fats and to help it all stick together, and last but not least, some honey, for sweetness and it also helps the sticking. When this is baked it is very similar to Granola but even better and it works great on cake. It may sound a little silly but it is amazing!!

To make it you first have to bake the first layer by itself for 4 minutes, because if you would add the apples right away they would sink down and be at the very bottom of the cake, which doesn’t make great layers. After 4 minutes you spread the apples on the pre baked cake and top it with the crumble. To finish it off drizzle some extra honey on top to make it caramelise and then it is baked again.

This is so incredibly delicious when enjoyed warm with a melting scoop of vanilla ice cream but it also tastes amazing when cold. It even makes a great breakfast because it is loaded with carbs, proteins and healthy fats which makes a perfectly balanced meal or snack. I hope you really like this recipe and it gives you some fall inspiration!

Happy cooking!

Print

Healthy Apple Crumble Cake

A delcious way to use the seasonal juicy and sweet apples and make a cake out of them. Super healthy and a great fall dessert.

Course Breakfast, Dessert, Snack
Cuisine American
Prep Time 15 Minuten
Bake Time 15 Minuten
Total Time 30 Minuten
Servings 12 slices
Calories 159 kcal

What you will need

For the first layer:

  • 100 g stevia
  • 50 g brown sugar
  • 1 tsp vegan butter
  • 100 g oat flour oats processed in a food processor until very fine, like flour
  • 20 g flour can use wholegrain
  • 30 g wheat bran
  • 1 tsp baking powder

For the Apple layer:

  • 2 red apples
  • 1 tbsp coconut oil
  • 1 tsp cinnamon
  • 1/2 tsp sea salt

For the Crumble:

  • 30 g Pecan Nuts
  • 30 g Walnuts
  • 50 g Oats
  • 1 tbsp Chia Seeds
  • 1 tbsp Coconut Oil
  • 1 tbsp honey to drizzle

How to

That is how it works:

  1. Preheat the oven to 180C.

    Add the eggs, the magarine, and the sugars into a mixing bowl. Mix on high speed for about 10 minutes until fluffy.

  2. Meanwhile in a bowl combine the flour, oat flour, wheat bran, and baking powder. Set it aside.

  3. Cut up the apples into 1cm sizes cubes. In a pan melt 1 tbsp of coconut oil. Add the apples, the cinnamon and the sea salt into it and let the apples soften at medium heat.

  4. Carefully fold the flour mixture under the eggs and pour into a baking form. Bake for 4 minutes.

  5. In the meantime, roughly chop up the nuts, and combine them with the remaining crumble ingredients in a bowl.

  6. Now the cake batter should be pre baked. Take it out of the oven and add the apples on top followed by the crumble. Drizzle with some more honey and bake for another 10-12 minutes until the cake batter it baked through. You can test this by sticking a tooth pick into the batter and if it comes out without any dough sticking to it, it is done.

  7. Cut it into 12 pieces and serve warm with some vanilla ice cream or cold as a snack! Enjoy!

Kategorie: American, Breakfast, Desserts, Fall, Season, Sugar Free, Vegetarian Stichworte: Apple, applecake, Applepie, comfort food, comfortfood, crumble, fall, falldessert, foodfallfood, healthy, healthydessert, healthyfall, lowsugar

« Vorherige Seite

Footer

What has been happening on my Instagram

Copyright © 2024 Une Petite Cuisinière on the Foodie Pro Theme