• Zur Hauptnavigation springen
  • Skip to main content
  • Zur Fußzeile springen

feel food club

  • Home
  • About me
  • My Recipes
  • Blog
  • Navigation Menu: Social Icons

    • Instagram

20 minutes

20-minute (vegan) Peanut Tofu & Greens Spring Sushirrito

Mai 12, 2021 by katharina.kuehr Kommentar verfassen

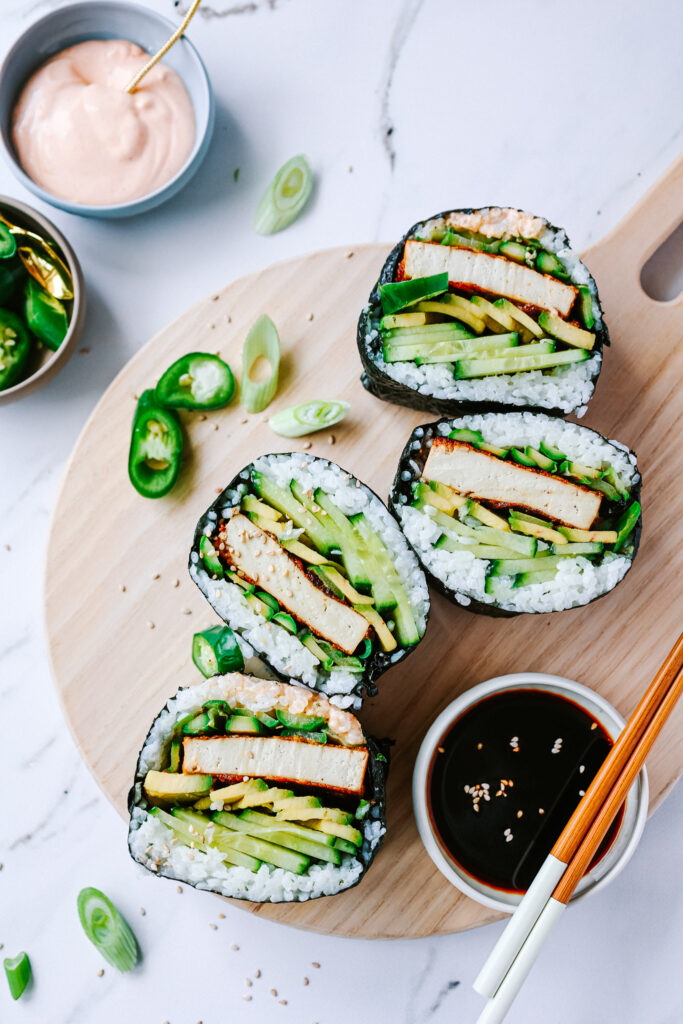
Sushiwhat? Sushi + Burrito = Sushirrito! Still no idea what this is supposed to be? Well, basically a sushi roll (like maki) just so giant that you roll it up like a burrito and can eat it holding in your hands. Pretty genius invention right? Sushi to-go basically.

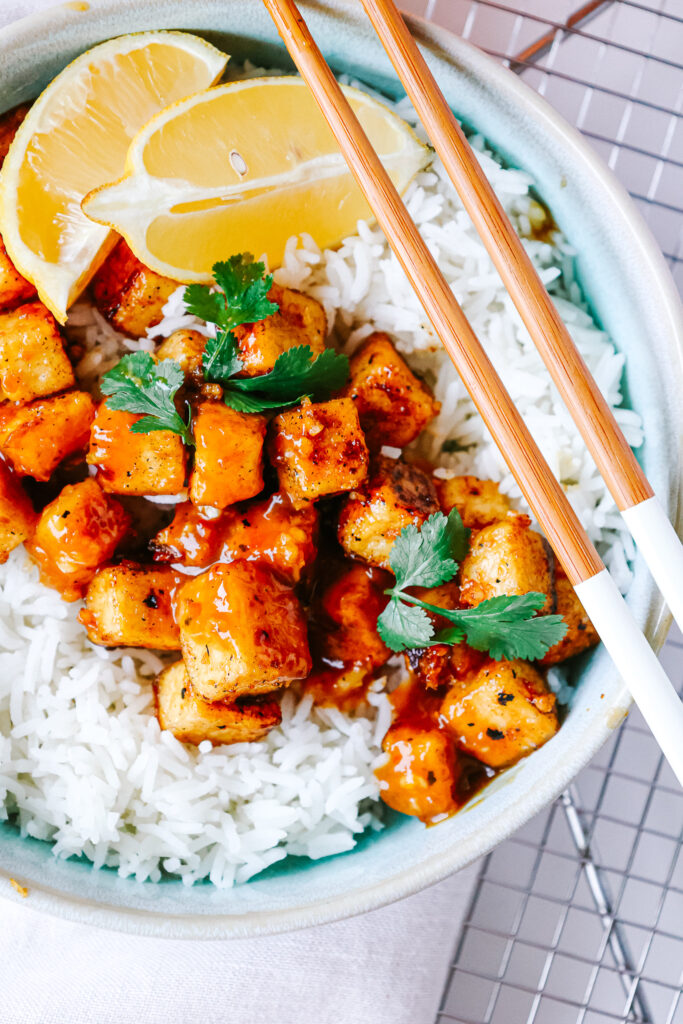
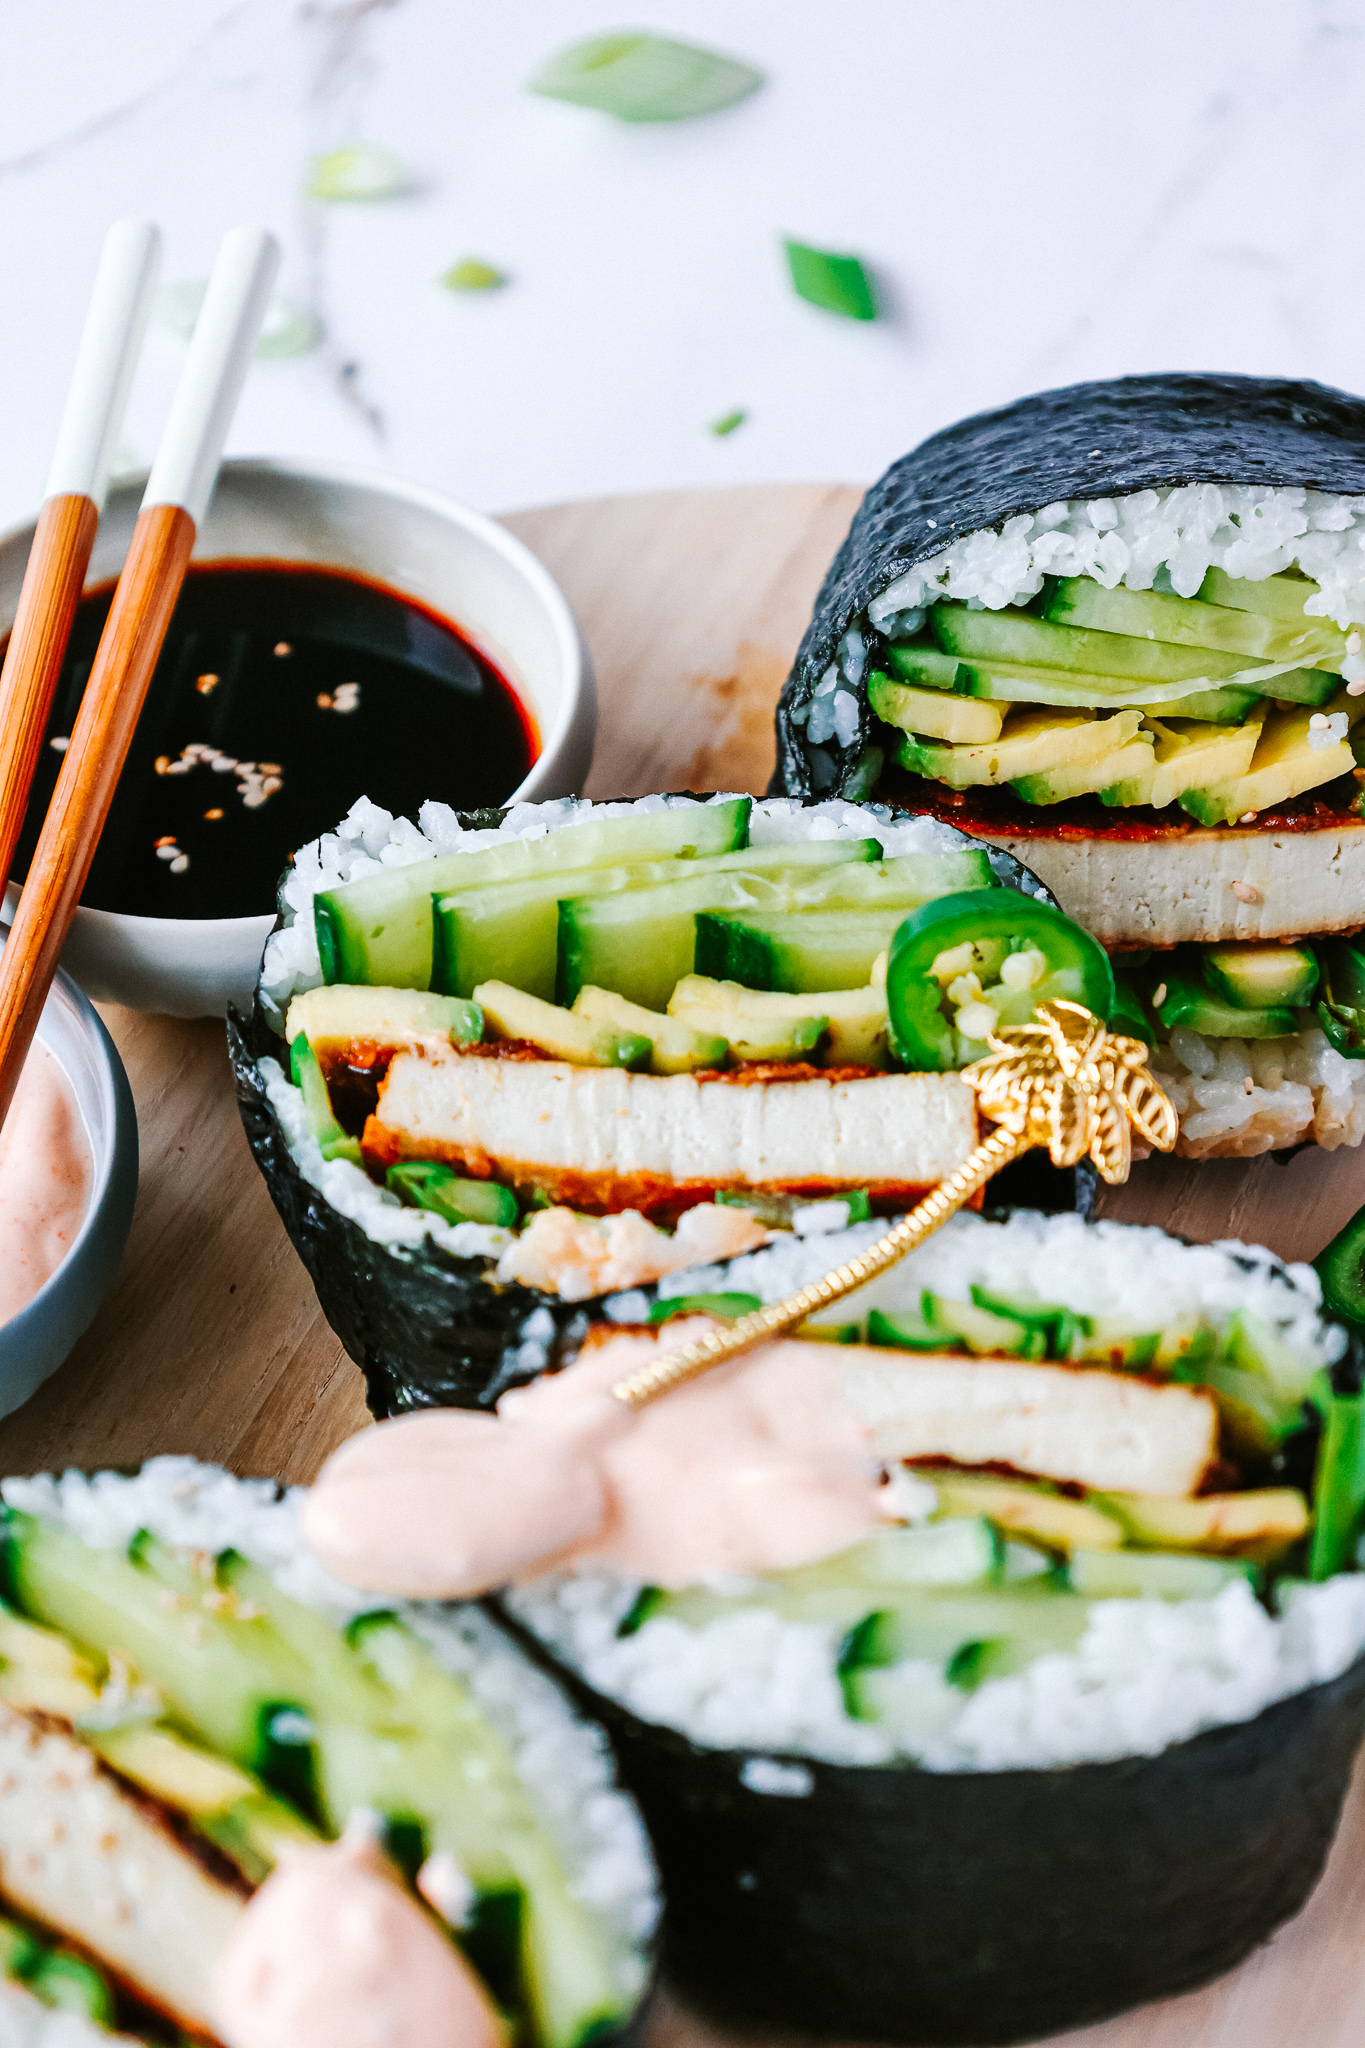
Biting into this is like biting into soft (and sushi flavoured) rice, fried & salty peanut tofu, crunchy cucumber & aspragus, soft avocado and creamy sriracha sauce. An explosion of flavours in your mouth and it really is ultra delicious! Plus, it actually is not too difficult to make.

What is special about this dish?

First of all, it is vegan. Vegan sushi with tofu is not very traditional in Japan. Usually it is prepared with raw fish like salmon or tuna or with fresh veggies or fruits like avocado (yep, avocado is a fruit) and cucumber. Or sometimes tempura (vegan) vegetables or prawns. You see, nl tofu in here. Nevertheless this is not a reason for us not to add tofu into this dish.

And secondly, well a gigantic sushi wrap is not quite normal. Yeah, it kinda is like an ultra thick maki, just one you can take bites from. This shape is very untypical because you (obv) cannot eat this with chopsticks, at least it is a challenge. It is more like street-style, meal prep, on the go sushi. Still, is tastes at least as good!

Is this healthy?

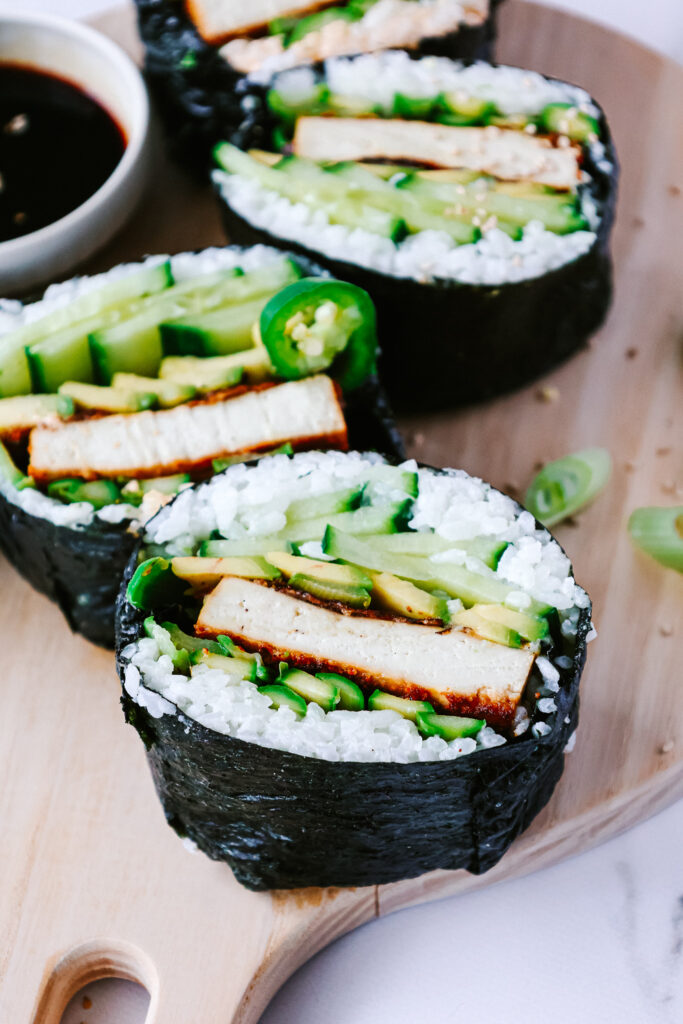
Damn yep. The amazing thing about this is that you can add any veggies you like into these rolls. Whatever you think would taste good in combination with the tofu & rice. I love cucumber, asparagus, avocado and spring onions but you could also add sweet potato or carrots or whatever you love. Adding all these kinds of different veggies makes this really incredibly nutritious. And obviously, depending on which veggies you choose, you‘ll have different nutrients! 

Besides the veggies we also have the tofu. Tofu is a great source of plant based protein and fibre. Together with the peanut sauce is also serves as a source of healthy and essential, unsaturated fat. Not to forget about the rice. This itself is not too nutrient dense, yet it provides many carbohydrates to keep you energized. If you also wanted some fibre and minerals, you could swap it for brown rice instead.

How to make this dish?

If you are a professional sushi-chef, you probably have got this ready in 5 minutes. If you are not (just like most people including myself) it‘ll probably take you 20 minutes – if even. And what takes the longest is cooking the rice. Therefore that‘s also what we‘re starting with. Here we‘re using sushi rice just because it has this special sushi flavor and texture. You can either find that at the supermarket or an asian store. This we just boil with twice the amount of water and then we mix it with a mix of vinegar and maple. This combination really adds the flavor we want.

Then we also need to marinate the tofu. This essentially is done by combining a few ingredients including peanut butter, soy sauce and lime juice. The longer this can marinate, the better. While the rice is cooking, the tofu is frying in hot oil until crispy. In the meantime we can also finely chop or slice the veggies. 

Then comes the fun and challenging part; rolling (or more like folding) it up. For this we need to divide the rice into the amount of sandwiches we make. If we make two sandwiches we divide it into two. And then we need to half it again (so we have rice for the top and the bottom). We start by adding one half of it into the middle of a nori sheet and pressing this into a square or rectangle. Then we add the veggies, whichever you like, and tofu, then the sauce, more veggies and the other half of the rice. We need to make sure to keep everything in this square or rectangular form. Then we take a second nori sheet and lay it on top. Now we take a small bwol with water and dip our fingers into it to wetten the sides of the nori and then fold the sides in and roll the rest like a burrito. It is important to really keep everything very tight here so the burrito does not fall apart when eating. And that’s it!

Meal prep friendly?

Yes! Definitely! That is the great thing here – it is not only great to be eaten the next day, it also is amazing to be eaten on the go, or in the park because you do not need cutlery or chopsticks or anything. It probably lasts 2-3 days in the fridge, so you’ll have a delicious meal for several days!

Print

20-minute (vegan) Peanut Tofu & Greens Spring Sushirrito

Like Sushi, just with Tofu and rolled up like a Burrito, so you can easilyyy eat it! An explosion of flavours and not difficult to make.

Course dinner, lunch
Cuisine Japanese
Prep Time 10 Minuten
Cook Time 15 Minuten
Total Time 25 Minuten
Servings 2 servings

What you will need

For the tofu:

  • 200 g tofu
  • 2 tbsp peanut butter
  • 5 tbsp soy sauce
  • 1 lime
  • 1 tbsp maple syrup
  • 1/2 tsp garlic & ginger (dried or fresh)
  • 1 tbsp sesame oil
  • 1 tbsp oil

For the rest:

  • 120 g Sushi Rice (you can find that either at your super market or asian store – alternatively you could go for basmati rice)
  • 1/4 cucumber
  • 2 tso vinegar
  • 1 tsp maple syrup
  • 1/2 avocado
  • 100 g green asparagus

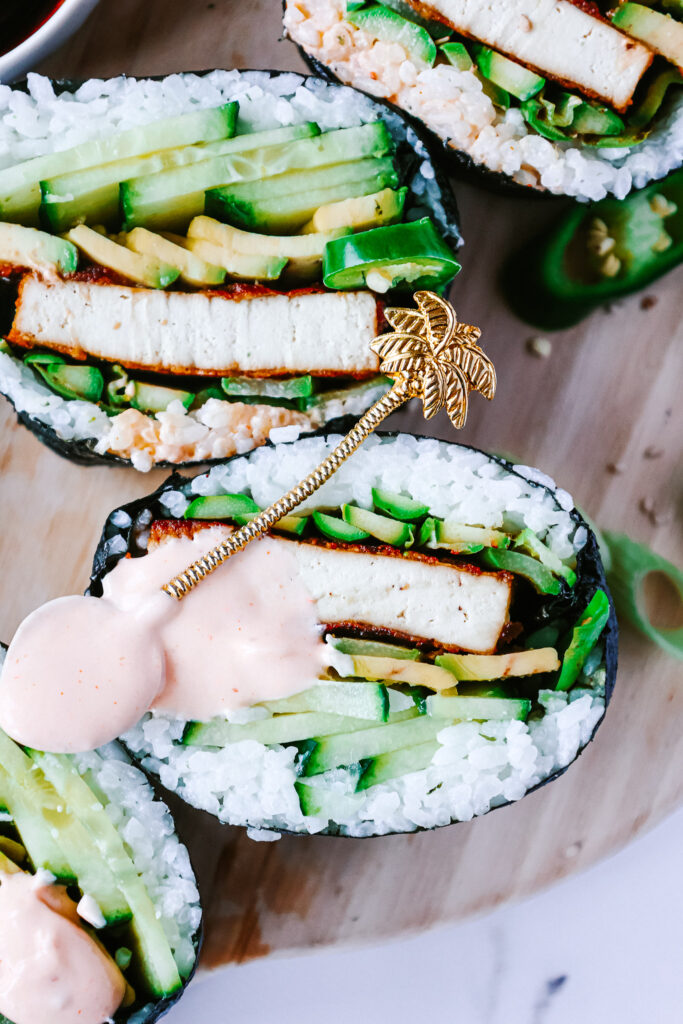
For the sriracha sauce

  • 1 tbsp sriracha
  • 2 tsp mayo
  • 2 tbsp greek yoghurt
  • 4 nori sheets

How to

  1. First mix all the ingredients for the tofu marinade. Then cut the tofu into two equally sized (about 1cm thick) blocks and let them marinate for as long as possible.

  2. Add the sushi rice, along with twice the amount of water and some salt, to a pot and bring to a boil. Reduce to a simmer and let simmer until all water is absorbed. Then turn down to very low heat and let sit until fluffy and soft.

  3. In the meantime mix all the ingredients for the sriracha sauce. Finely slice the cucumber, avocado and asparagus. Fry the asparagus in some oil for about 3-4 minutes until soft.

  4. When the sushi rice is done, combine the vinegar and maple and mix it with the rice. Then divide the rice into however many burritos you are making.

    Then add half of each portion into the middle of a nori sheet and press it into a flat and tight rectangle or square. Now layer some veggies and the tofu on top. To with the sriracha mayo and the remaining rice. Press everything together so it sticks well and does not fall apart. Top with another Nori sheet. Then fold in the edges and drizzle a bit of water on the sides, so they'll stick. Then tightly roll in the burrito and fold in the remaining edges.

  5. That's it! Serve with some soy saue and enjoy!

I really, genuinely hope that you’ll enjoy this as much as we do and that you’ll have a great time cooking this!

All the best,
Love,
Katie

Kategorie: Cuisine, Diet-Specific, Japanese, Season, spring, Vegan Stichworte: 20 minutes, asparagus, burrito, easy, easy sushi, green, healthy, lunch, meal prep, peanut, plant based, satay, spring, sushi, sushirrito, tofu, vegan, vegan sushi, wrap

Not You Average (much better) Hummus and Falafel Picnic Bagel

Mai 7, 2021 by katharina.kuehr Kommentar verfassen

The name says it all. Definitely not your average bagel. This is something so much better, I promise. Recipe 2 of the picnic series, and it only is getting better, although it is hard to top the beluga lentil salad an curry hummus stuffed pita. Yet, we managed to do so. Slightly sweet and crispy bagel with creamy hummus, fresh greens and radishes, crunchy falafel and soft and salty avocado. Oh my. If I were you, I would be running to the store right now.

Bagels are just amazing by themselves already. We really need to take a moment and thank the inventor of thebagel (who by the way was Austrian!!!) for this amazing creation. Invented by accident, probably the best accident ever, and now a staple around the world. And really, cream cheese and salmon bagels are amazing, no need to doubt that, yet there are so many other combos that just taste unreal in a bagel, which you need to try out – just like this one!

Where to get good bagels?

This is really important, because if the bagel itself does not taste amazing, the entire dish only tastes half as good. So, in Vienna there are 2 places I love to get my bagels from. The first one is Budapäst Bagels – they have been the (much deserved) restaurant of the month in march and definitely have amazing bagels. You can just grab some plain bagels there and fill them at home! The other place that never lets you down is Joseph Brot. They have several shops in Vienna, so you can just choose one that is close to you. The only disadvantage here – they are sold out so quickly always! So you got to get up early for your bagels.

What’s special about this dish?

It is a mix of the traditional bagel and a falafel pita or sandwich and an avo toast. So, really the best of everything combined! Instead of spreading a bagel with cream cheese, we are spreading it with hummus. And filling it with falafel. Yep, it gets quite thick and tastes amazing. Plus, we have some springy goodness with the fresh veggies and sprouts. This bagel combo really is (not exaggerating here) life changing.

Plus, also this recipe is part of the NENI x Une Petite Cuisinière picnic series! Which means, you can use the (super delicious) Neni am Tisch products to make this. In other words, you get some healthy deliciousness in no time.

Is this dish healthy?

We got to be honest, it probably it not the most nutrient dense dish ever. It though, also is not unhealthy. The thing is that most of the time bagels themselves are not highly nutritious. To achieve their slightly sweet flavour, there often is sugar in them and they rarely are made with whole-wheat products. They do provide you with a bunch of carbs though, yet not many complex ones and not much fibre.

Nevertheless the fillings are nutritious. We have a lot of chickpeas in here – in form of hummus and in form of falafel. Chickpeas are high in protein and fibre and therefore a great plant-based food. Plus, we have some greens & radishes, meaning more vitamins and some avocado for healthy fats and deliciousness (what even is a bagel without avocado?).

How to make this dish?

This probably is one of the easiest things you’ve ever made. All you need to do is pop the falafel into the oven (this is no must, popping them into the oven just really lets them crisp up again and makes them taste much better). In the meantime we are toasting the bagel, slicing the radishes and cutting the avo.

When falafel and bagel are done, we spread some of the (best) Hummus onto the lower half of the bagel, add the falafel, the radishes, some cress or sprouts and top it with the avo. Now we got to sprinkle it with some sea salt, close it with the top and take it onto our picnic. A perfect dish for a perfect picnic!

What about meal prep and picnic?

Obviously the bagel won’t be crispy anymore when it has been stored in the fridge or in a container to be taken onto a picnic, nevertheless, it still is as delicious! If you just leave it like that, it will be a bit of a mess to eat though. To avoid that, it is best if you cut it in half and then take some parchment paper, cut a strip off it, wrap it around the bagel-half and then fix it with a string. That way everything holds together and you can eat without everything falling apart.

If you wanted to bagel to be a bit more crispy, you could also toast it beforehand and bake the falafel, then put both into a bag (not air tight!!) and take the avocado, sprouts, radishes and hummus in a separate container and fill the bagel at your picnic spot! This makes it all a bit fresher!

Print

Not your average (much better) Hummus & Falafel Picnic Bagel

crispy bagel with creamy hummus, crispy falafel and creamy avocado. This is the bagel combo you have been misisng out on all your life, I promise. It is so good that you will want to have it every day and take it on every picnic.

Course Breakfast, brunch, lunch, picnic
Prep Time 5 Minuten
Cook Time 15 Minuten
Total Time 20 Minuten

What you will need

  • 1 bagel
  • 5 NENI am Tisch Falafel
  • 2-3 tbsp NENI am Tisch Hummus
  • 1/2 avocado
  • a few radishes
  • sprouts/ cress

How to

  1. Preheat the oven to 200°C. Place the falafel onto a baking tray and bake them for 10-15 minutes to get them crispy again.

  2. Slice the bagel in half and toast it.

  3. In the meantime slice the radishes and avocado and chop the cress.

  4. When the falafel are done, spread the bagel with the hummus, add the falafel, radishes and sprouts, and lay the sliced avocado on top. Sprinkle with some sea salt, close the bagel with the top and enjoy!

Regardless or which way you choose to take you bagel to the picnic, it’ll be delicious and I hope that you will also find it to be delicious and enjoy it!

Have a wonderful picnic,
Love,
Katie

Kategorie: Diet-Specific, Picnic, spring, Summer, Vegan Stichworte: 20 minutes, avocado, bagel, brunch, delicious, easy, einfach, falafel, gesund, healthy, hummus, hummus recipes, lunch, Neni, NENI am Tisch, picknick, picnic, plant based, quick, schnell, summer, vegan

The Easiest 20 Minute Garlic Curry Eggplant

März 24, 2021 by katharina.kuehr Kommentar verfassen

20 minutes in combination with curry and soft eggplant? Who can say no to that? Seriously, standing in the kitchen for hours when we are hungry and don’t have much time is just not great fun. So we often grab something quick and often not the healthiest options. But this does not have to be the case! It is sooo easy to make something healthy and delicious is like only twenty minutes! And really, these 20 minutes of cooking probably are the most meditative break during your busy day.

What’s special about this dish?

it is not quite a regular curry – but it also is not a stir fry. It is something inbetween. Actually I have been inspired by Baba Ganush when I came up with this dish (which is a middle eastern eggplant dip) and wanted to make a curry version of it that is not quite as creamy. And that kind of is what it turned out to be – a mix of Baba Ganush, Curry and Stir Fry. Anyway, no matter how you label it, it is super addicting.

Contrary to regular curry, it does not contain many different veggies and it not as saucy. The only veggies in it are the eggplant and the edamame. Why? Because we’re keeping it simple. This way the flavors also come through more intense and you can really focus on the eggplant and edamame. The eggplant is basically the base and adds some softness and the edamame gives a nice & fresh contrast.

Is this dish healthy?

OH YES! The main star of the show is eggplant! Besides being super tasty, eggplant also is super healthy! Eggplants are loaded with vitamins, minerals and fibre. Plus they come with a bunch of antioxidants and they are incredibly easy to cook! You could roast them like in the Sesame Roasted Miso Eggplant Recipe or you could add it to an italian tomato stew or throw it into a salad! Options are endless!

Then we also have edamame. Edamame actually is one of my favourite foods ever! The actually are a bean, and therefore extremely high in fibre and protein!! Plus, obv. a bunch of minerals! That all comes with a side of rice, which provides us the carbs to stay happy and healthy and full of energy throughout the entire day!

How to make this dish?

That now really is easy as pie!! It really only comes down to chopping garlic and eggplant and frying them in oil untl soft. Here we need to salt the eggplant, because the salt helps to get the water out of the eggplant, which makes it cook quicker. All that’s left to do now, is to add the edamame and the curry paste that has been mixed with the coconut milk and let it simmer. To garnish we only chop up some spring onions and cilantro and there you go! Easy as pie!

Meal prep friendly?

Yepyepyep! Curry actually is one of the foods that is the meal prep friendliest. It actually enhances in flavour when you let it stand overnight. You can just store it separately from the rice and either heat it up in a pot with a splash of water or in the microwave. This really makes it even more suitable as a quick lunch, because then it really only takes about 5 minutes!

Honestly, this has become one of my new favourites and it is soso good! Easy, quick, super tasty, and healthy! I do not know what you are waiting for any more and why you are not already in the kitchen cooking! Have fun cooking!

Print

The easiest 20 minute garlic curry eggplant

Ready in basically no time and yet so full of flavor and deliciousness. Th perfect dish for quick lunches or easy dinners. Soft and garlicy eggplant tossed in a spicy red curry sauce on a bed of fluffy rice. All you really need!

Course dinner, lunch, Main Course
Prep Time 5 Minuten
Cook Time 15 Minuten
Total Time 20 Minuten
Servings 2 servings

What you will need

  • 1 eggplant
  • 4 tbsp curry paste
  • 100 ml coconut milk
  • 1 tbsp oil
  • 2 garlic cloves
  • 1 tbsp soy sauce
  • spring onions & cilantro for garnish
  • 150 g rice

How to

  1. To a pot add the rice along with twice the amount of water and a generous pinch of salt. Bring to a boil, then reduce to a simmer. Once all water is absorbed turn down to very low heat and let the rice stand to fluff.

  2. In the meantime finely chop the garlic clove and roughly cut the eggplant into about 2-3cm sized chunks. In a pan heat up the oil, then fry the garlic in it for about 1-2 minutes until fragrant before adding the soy sauce. Then add the eggplant and fry on medium high for about 5-8 minutes.

  3. In the meantime combine the curry paste and coconut milk in a bowl and slice the spring onions.

  4. Then add the coconut-curry mix to the eggplant and stir it in. Turn down to medium heat and let cook for about 8 minutes, until the eggplant is nice and soft.

  5. By now the rice should be done too. Divide it onto the plates and top with the eggplant. Sprinkle some sesame seeds and spring onions and serve with a little cilantro!

    Enjoy!

Enjoy,
love,
Katie

Kategorie: Uncategorized Stichworte: 20 minutes, aubergine, easy, easy lunch, easy meal, eggplant recipes, einfach, family meals, gesund, healthy, healthy vegan, lunch, plant based, quick, quick meals, schnell, schnelles Essen, schnelles Mittagessen, vegan, vegetarian, vegetarisch, weeknight dinners

Super Easy 20-Minute Sticky Orange Tofu

März 18, 2021 by katharina.kuehr Kommentar verfassen

Put all our prejudices aside and make this recipe. If you used to think tofu is boring, you will be proven differently. We have got the sweet and slightly spicy flavours of orange and chilli combined in a sticky sauce that covers the tofu. Definitely not your average tofu.

Orange Tofu is a dish that originally is made with chicken instead of tofu and therefore also called orange chicken. Orange Chicken originated in China, where it is rarely found in traditional restaurants today. It got really popular in the US through Panda Express. There the chicken is battered, then fried and then tossed in a orange sauce, which thickens and caramelizes. 

What’s special about this dish?

It is a vegan version if the orange chicken and a mich healthier one too. It is not battered and deep fried and also not tossed in a sauce loaded with white refined sugar. It is a much healthier, easier and quicket version of the original and still tastes really intense and good! So you could say that it rather is a Chinese inspired dish and less the original one.

Is this dish healthy? 

Yep yep. What is it made of? Well our main ingredient is tofu. Tofu is really high in protein and also comes with some fiber. Then our main „ingredient“ is the orange sauce. This is mainly made from freshly squeezed orange juice, which is a vitamin C bomb. Then we have some soy sauce, vinegar, fresh ginger and garlic and some honey, plus some cornstarch in which the tofu is tossed and then fried in a little hot oil.

Contrary to regular orange chicken, we have rather little fat here because instead of deep frying it, it is simply stir fried in a pan. Also, we are using honey instead of white refined sugar. Honey still contains sugar but less per 100g in comparison to regular sugar and it actually comes with antioxidants. 

How to make this dish:

This is super simple. So, we start by pressing the tofu. To do so we just lay some kitchen paper beneath and on top of a block of tofu and them let something heavy press it down for a few minutes. This will make the liquid drain from the tofu so it gets crispier in the pan later on.

Next we just chop it up into about 1 cm sized cubes. These are then tossed in some cornstarch. The cornstarch binds the remaining liquid and kind of forms a crust when frying. After that, the tofu is fried in some hot oil from each side for about 1-2 minutes till crispy. 

In the meantime we combine the orange juice & zest, soy sauce, honey or maple, cornstarch, ginger, garlic and vinegar in a bowl and then pour it over the tofu and let it simmer on low heat for a few minutes. Because of the cornstarch the sauce will thicken and the honey makes it caramelise. That already pretty much is it, we now only have to divide it onto plates or bowls and garnish with some greens!

Meal prep friendly

You can easily make this dish in advance and reheat it. If you have a stove I would prepare everything in advance and store the tofu and sauce separately and heat it up together whenever you want to have it. If you do not have a stove when eating it, you can simply heat it up in the microwave all together. Maybe you’ll then need to add a little water.

Print

Super Easy 20-Minute Sticky Orange Tofu

Easy, delicious and healthy. A vegan and lighter version of the american-chinese classic and let me tell you, it at least is as delicious!

Course dinner, lunch, Main Course
Cuisine American, Chinese
Prep Time 10 Minuten
Cook Time 10 Minuten
Total Time 20 Minuten
Servings 2 servings

What you will need

  • 300 g tofu
  • 4 tbsp cornstarch
  • some rice or quinoa to serve with

For the sauce:

  • 1 orange zest & juice
  • 2 tbsp soy sauce
  • 1 garlic clove
  • 1 cm ginger
  • 1 tbsp cornstarch
  • 60 g honey or maple
  • 1 tbsp vinegar

How to

  1. Lay the tofu onto some kitchen paper and cover it iwth some more. Lay something heavy on top and let it press for abou 5-10 minutes, so as much liquid as possible goes out in order for the tofu to become crispy when frying. Then cut into 1 cm sized cubes and toss it in the cornstarch

  2. In the meantime grate the orange, then press it. Combine it with the remaining ingredients for the sauce.

  3. Heat up the oil in a pan and fry the tofu on each side for about 1-2 minutes until crispy and golden. Turn the heat down to medium heat and pour in the orange sauce. Give everything a good mix and let simmer for about 3-4 minutes until it has thickend a bit.

  4. Serve with some rice or quinoa and garnish with some cilantro! Serve and enjoy!

Honestly, this dish is so quick, so easy to make and so good! You’ll really, really love it and it is so so simple! I hope you’ll like it as much as we do and have a great time cooking it!

Enjoy!
Love,
Katie // Une Petite Cuisinière

Kategorie: American, Chinese, Cuisine, Diet-Specific, Lunch/ Dinner, My favorites, Vegan, Vegetarian Stichworte: 20 minutes, American, Chinese, easy tofu recipes, easy vegan, healthy lunch, healthy vegan, lunch, orange, plant based, quick, quick and easy, tofu, tofu recipes, vegan, vegan cooking, vegan lunch

Nächste Seite »

Footer

What has been happening on my Instagram

Copyright © 2024 Une Petite Cuisinière on the Foodie Pro Theme