• Zur Hauptnavigation springen
  • Skip to main content
  • Zur Fußzeile springen

feel food club

  • Home
  • About me
  • My Recipes
  • Blog
  • Navigation Menu: Social Icons

    • Instagram

Snack

Healthy Rhubarb Crumble Cake

Mai 29, 2020 by katharina.kuehr Kommentar verfassen

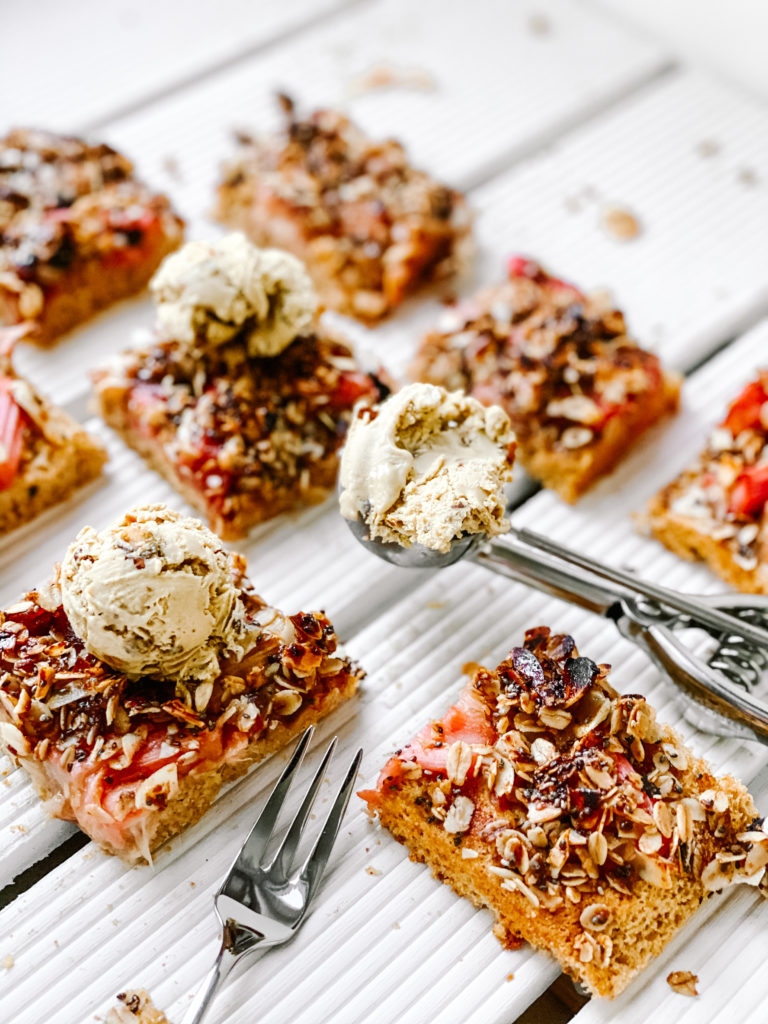
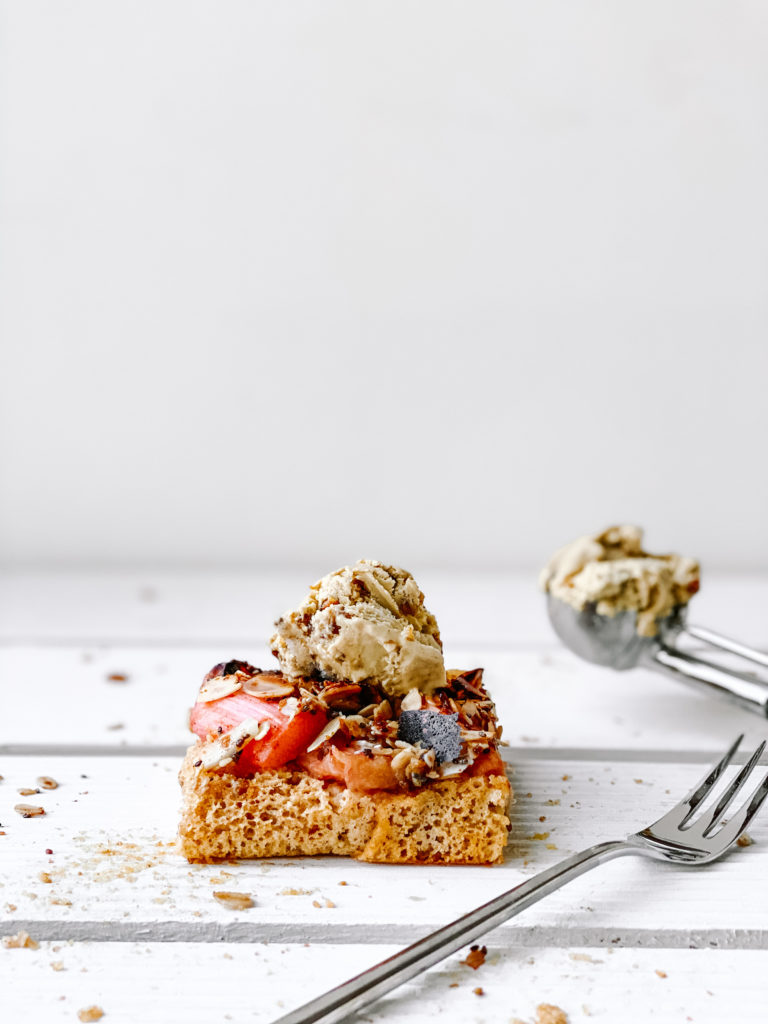
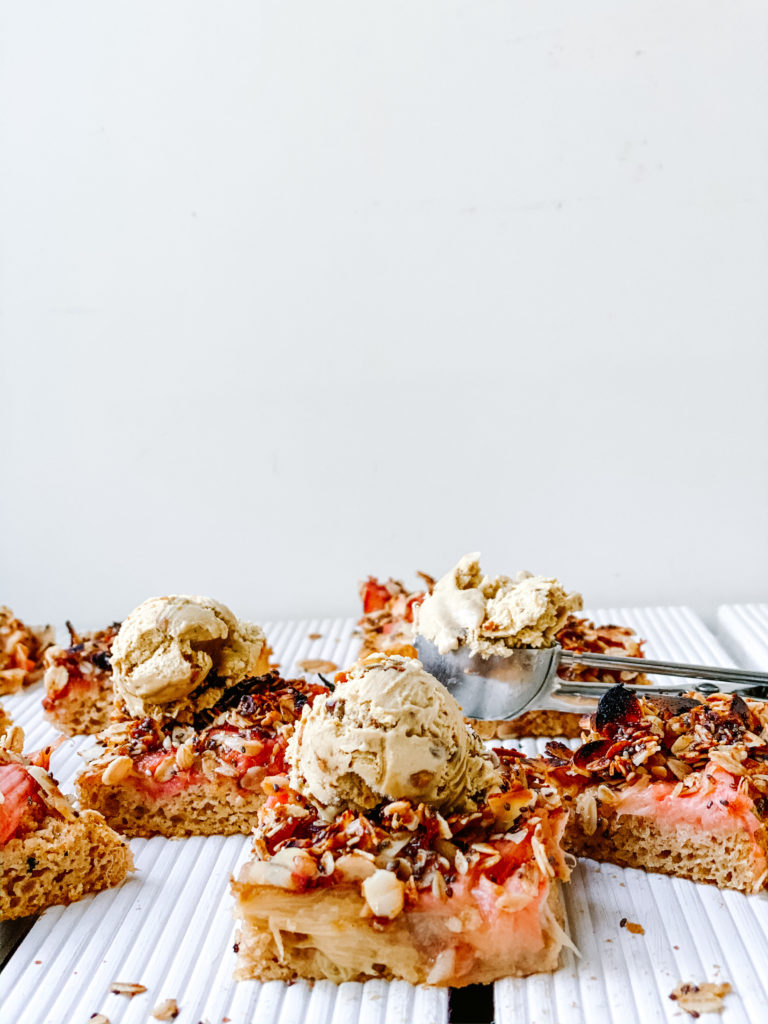
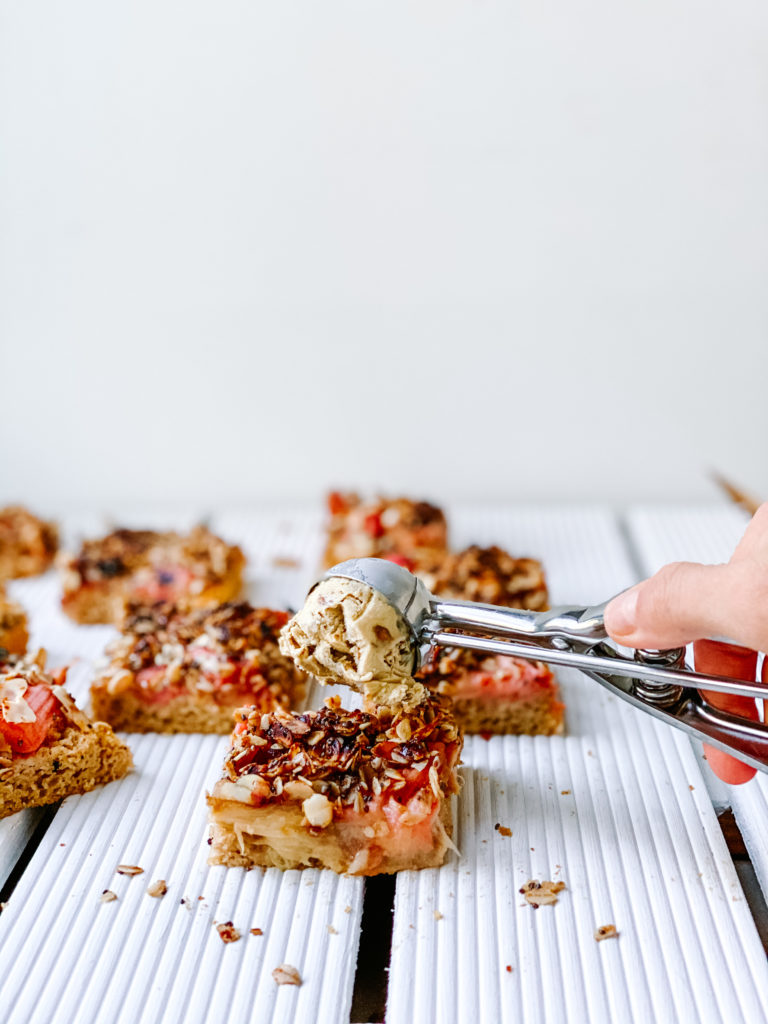
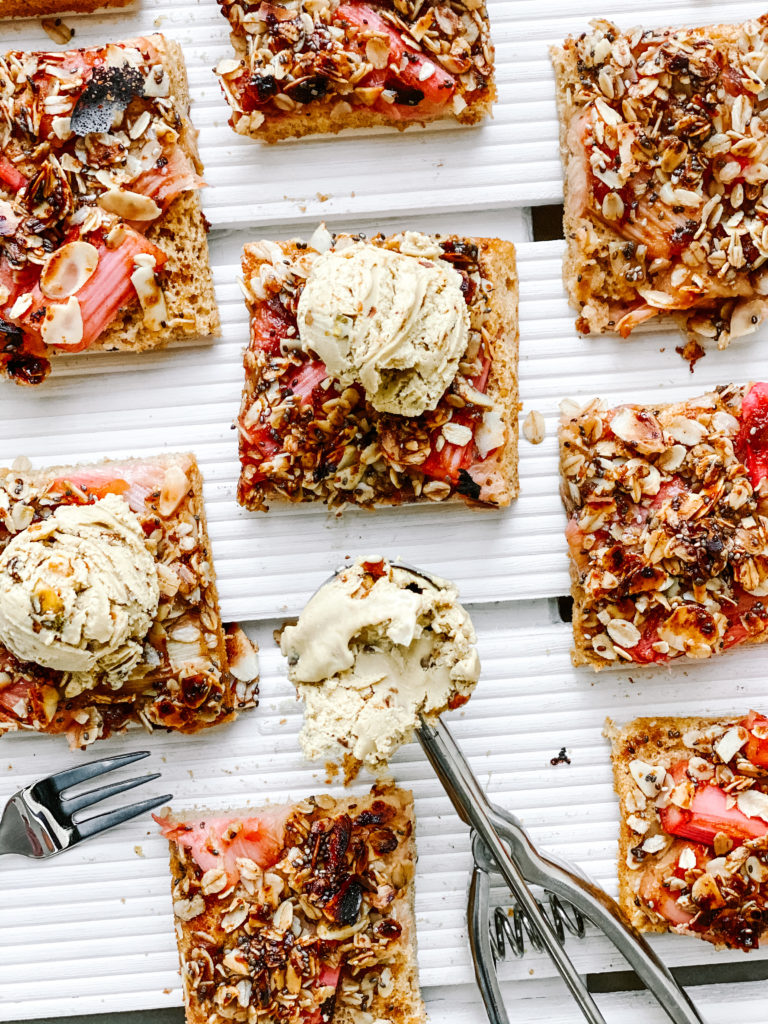
A nice, fluffy and juice layer of cake underneath a fresh and sweet layer of rhubarb topped with a healthy and crispy almond oat crumble. Is there anything else you want? Maybe having this healthy rhubarb crumble cake with a nice cup of coffee? you better don’t say no!

Why crumble cake?

Crumble cakes are one of my favourites. I love the different tastes and textures in each layer and the combination of them melting together in my mouth. Also, I think they are very fun to make and they always have something fresh in them with the fruits. I already have one crumble cake on my blog, an apple crumble cake, and it is so good! In this recipe I just added a spring twist on it instead of a fall one! Imagine this cake as a mix between my healthy apple crumble cake and my rhubarb compote!

I had my first crumble cake about 2 years ago. It actually also was a rhubarb one, and it was amazing! I can remember it very well because it was at a small café in Dublin where they had soo many different cakes! I shared one piece with my friends and let me tell you, it was amazing! So when I saw all the fresh rhubarb at the farmers market the other day, I decided to try to recreate it, but make it healthier. And let me tell you, I did not expect it to turn out THAT GOOD. I thought it would be fine but when I tried the first slice, I just wanted to eat the whole tray before photographing it. It is insane!! And really, it does not taste healthy or boring at all.

The layers:

The first layer is kind of a biscuit layer but a little healthier. It essentially comes down to only 5 ingredients! Who thought that you could make a cake with 4 ingredients only? Eggs, maple syrup, apple sauce (Apfelmuß in German, because so many asked me what this was), wholegrain flour, baking powder. That is it. The egg whites are separated from the yolks and whipped up until super fluffy and stiff. This makes the cake really airy. The applesauce makes it really juicy and the maple syrup makes it sweet. Both are combined with the egg yolk. Afterwards, the flour and baking powder as well as the egg whites are folded in. This need to be pre-baked a little.

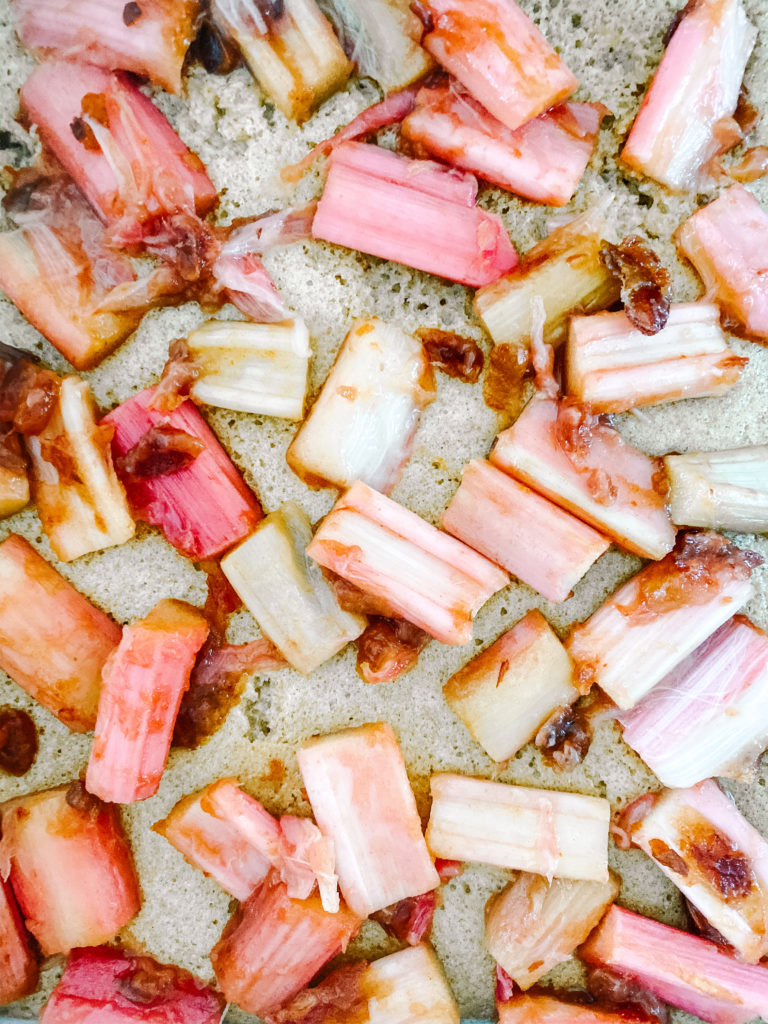
The second, and middle layer is a fruit layer. This is even easier than the first one. You do not even need to peel the rhubarb (if you buy organic one preferably), just cut it into smaller pieces. Add it to a pot with some lemon juice and a date to sweeten it up (could use sugar or honey as well) and a splash of water. The heating up helps it to get a little softer and absorb the flavour of the lemon and date. Then this is added on top of the biscuit layer.

The last but definitely not least layer is the crumble. Contrary to conventional crumbles it is not based of sugar, butter and flour. NO. The base are oats and almonds. I like to use sliced ones but you could also just chop the up a little. Together with some chia seeds (optional) and coconut sugar (again, another sweetener works fine too, just a liquid one will not have the same crunch effect, so I would recommend substituting it out for white or brown sugar), and a little coconut oil it creates a sticky consistency. This on top of the fruit just tastes bomb. It is kind of like granola just on top of a cake. So good.

When to enjoy best?

So honestly, you are going to want to eat this at every time of the day. And basically you could. It would even work as a nice breakfast. It has about than 2.6g fibre, 3.3g of protein, and 14.2g of carbohydrates per slice. So having two slices for breakfast with some yoghurt on top wouldn’t be unhealthy. But this also makes a great snack or dessert. Even when having guests over this will be amazing! Or take it to a picnic?

Substitutions

If you do not like rhubarb at all, but still want a crumble cake, you can also substitute them out for berries, such as strawberries. It really is versatile but I believe that the little sour taste of the rhubarb just goes really well with the sweetness of the cake. Instead of whole grain flour, you could use plain one, and instead of the maple syrup you can totally go for honey, agave of coconut sugar. If you do not have almonds on hand, you can use any other nuts as well!

I hope that you like this recipe and it gives you some inspiration for cooking healthy! Enjoy!

Happy cooking,
Katie // Une Petite Cuisiniere

Print

Healthy Rhubarb Crumble Cake

The best cake you´ll ever have! Fluffly and juice biscuit, topped with fresh and tangy rhubarb and a healthy and crispy crumble! SO good.

Course brunch, Dessert, Snack
Cuisine austrian
Prep Time 20 Minuten
Cook Time 15 Minuten
Total Time 35 Minuten
Servings 12 slices
Calories 113 kcal

What you will need

For the first layer:

  • 2 eggs
  • 100 g unsweetend apple sauce (Apfelmuß in Deutsch)
  • 60 g Maple syrup agave, honey or sugar work too!
  • 125 g wholegrain flour normal flour is fine as well
  • 1 tsp baking powder

For the second layer:

  • 250 g Rhubarb
  • 1/2 lemon, juiced
  • 1 large date (or 2 small ones, about 30g)
  • a splash of water

For the thrid layer:

  • 50 g oats
  • 25 g sliced almonds or any nuts
  • 1 tbsp chia seeds (optional)
  • 1 tbsp coconut sugar (or any other sweetener of choice)
  • 1 tsp vanilla extract
  • 1 tbsp coconut oil

How to

  1. Preheat the oven to 180°C.

    For the first layer seperate the egg yolks from the whites. Whip the whites until fluffy and stiff. In the meantime combine the yolks with the apple sauce and maple syrup. Combine flour and baking powder.

    Once the egg whites are stiff gently fold them under the yolk mixture, along with the flour, one at a time. When combined pour it onto a baking tray lined with parchment paper. Bake for 8 minutes.

  2. In the meantime cut the ends of the rhubarb and wash it gently. Cut it into about 3cm (1 inch) sized pieces. Take the pit out of the date and chop it finely. Add both to a pot along with the lemon juice and a splash of water (about 2 tbsp). Bring it to a boil and simmer until the first layer is done baking.

  3. While the rhubarb is simmering, combine the oats, nuts and seeds in a bowl. Melt the coconut oil and combine with the sugar and vanilla. Pour it over the mixture and combine everything well. It should all stick together a bit.

  4. When the frist layer is done baking take it out of the oven. Add the rhubarb evenly on top and sprinkle with the crumble. Bake for another 7-10 minutes.

  5. Take out of the oven and let cool. Serve with some ice cream, whipped cream or a dollop of yoghurt and enjoy!

Kategorie: Austrian, Cuisine, Desserts, Season, Snack, spring, Sugar Free, Summer Stichworte: cake, healthy, healthy baking, healthy cake, Healthy Dessert, healthy treat, lemon, no refined sugar, refined sugar free, rhubarb, rhubarb cake, rhubarb crumble cake, rhubarb crumble cake recipes, rhubarb recipes, spring, spring baking, spring dessert, sugar free, treat

Oven baked Sweet Potato Fries

Mai 7, 2020 by katharina.kuehr Kommentar verfassen

Crispy on the outside, soft on the inside. With a little hint of roasted garlic and paprika. Sprinkled with a little sea salt. That’s what I call the perfect side. No matter with what, a burger, a salad or just by itself. It is so good. And so simple. You will never want to go back to making sweet potatoes differently.

More Sweet Potato inspiration…

I absolutely love sweet potatoes. In any form. Baked as a whole and stuffed, mashed, boiled, fried, baked in little chunks or whatever. They are just so tasty! I already have a few recipes on my blog with it like the Miso sweet potato with coconut rice or the Thai sweet potato cauliflower soup or the fall tabouleh stuffed sweet potatoes (which honestly are so good) and one of my favourites, the harvest buddha bowl with apple chicken! But all of those were a while ago so I knew it was time to make something new.

Are sweet potatoes healthy?

Sweet Potatoes, as the name says, are potatoes, and taste very similar to regular ones, just a little sweeter. Because of that they are also sometimes used in desserts or sweet dishes. But they are just as common in savoury ones. They are extremely high in Fibre, Vitamin A, Vitamin C and Protein. Plus, they are very high in antioxidants, meaning they support your gut healthy. All in all, super healthy.

How do you make them?

It‘s really simple! Cut into thin strips. They should be rather small and thin because this way they’ll get crispier in the oven. If you have the time for that I would recommend soaking the strips in water because that helps to remove some of the starch to make it crispier (this wasn’t my idea, i learned it at pickuplimes blog). And of course, you need to pat them dry afterwards, very dry, because obviously, water will make them soggy. Next step, which I do recommend, is tossing them in a little cornstarch. I also love making this with my tofu (like in my vegan glas boodle salad recipe) because it really binds the water in the food. 

Spice it up!!

Next up: spices! This is really important because the key to good food are good spices! The spices used really depend on what you serve the potatoes with. For example, if we serve it with a burger, I would recommend using paprika and garlic. If it is a side to some grilled halloumi, some herbs like rosemary and oregano work really well. If you are making wedges and want to make them a bit extra (in winter this is so good!), you can add some cinnamon. This surprisingly works really well!

Tossing them in spices is really essential. They add so much flavour. So last on the list is some oil. I would recommend using olive oil or another one that is neutral in taste. The oil adds more flavour and helps crisping them up. The potatoes are now baked on very high heat in the oven, for really not long. After taking them out, you can sprinkle some sea salt and serve them with a delicious sauce.

Why not frying them?

The reason we are making them in the oven is fairly simple. Because it is way healthier. While they do get a little crispier when deep fried, they also soak up way more oil. This means way more fat and calories. Of course, once in a while it is super good, but when making it more often, baking them in the oven is just way healthier.

I hope that you will love this recipe as much as I do and your family or friends do so too. In our house, they are always gone, and not a single fry is a leftover! Enjoy!

Happy Cooking,
Katie // Une Petite Cuisinière

Print

Sweet Potato Fries from the Oven

Crispy on the outside, soft on the inside and perfectly spiced! The ideal side for anything!

Course lunch, Side Dish
Prep Time 10 Minuten
Cook Time 20 Minuten
Total Time 30 Minuten
Servings 4 sides
Calories 230 kcal

What you will need

  • 600-800 g Sweet Potatoes 2 smaller ones or 1 big one
  • 3 tbsp corn starch
  • 2 tbsp olive oil
  • 6 garlic cloves
  • 3 tsp paprika
  • 2 tsp garlic powder
  • some sea salt

How to

  1. Preheat the oven to 220°C.

    Wash the sweet potatoes. Cut them into about 1cm thick strips, about 8cm in length. Place them in a large bowl and cover with water. Let sit for at least 5-10 minutes. This helps to remove the starch.

    Drain them and place on a kitchen towel or kitchen paper and tap them dry. They need to be really dry.

    Place them in a clean bowl and toss with the cornstarch and spices.

    Spread them onto two baking trays and make sure they have enough space. They should not touch each other. Drizzle the olive oil and add the garlic cloves (they do not need to be peeled). Sprinkle some salt on top.

    Bake for 10 minutes, then flip them. Bake for another 5-8 minutes. Take out and serve. Enjoy!

    P.s.: If you want, you can squish out the garlic from the peel and mix with some mayonaise to get a garlic dip!

Kategorie: Diet-Specific, Lunch/ Dinner, Side, Snack, Vegan, Vegetarian, Vegetarian Stichworte: carbohydrates, carbs side, fries, garlic, garlic fries, healthy, healthy fries, healthy side, oven baked, potato, side dish, Snack, spicy, Sweet potato, sweet potato fries, sweet potatoes

Vegan Coconut Mango Panna Cotta

April 29, 2020 by katharina.kuehr Kommentar verfassen

Take a creamy panna cotta but image it being healthy and with a twist of coconut and mango. And there you go! This incredibly flavourful dessert is what you should make next! The layers are just THE BEST!

Why is Panna Cotta not healthy?

Panna Cotta is, besides Tiramisu, my favourite dessert. I love the creaminess, the consistency and the taste. It just is so good. But, unfortunately, it is not very healthy. IT contains a lot of cream and sugar which really make it a treat but it is not very good for you.

What is this „Panna Cotta“ like?

But as I still want to get that amazing creamy consistency and that sweet taste, I decided to make one that is healthy and a little different. It still has a rich and creamy consistency but also a nice gel-ly like layer of mango, which is so refreshing and sweet.

How to make it healthier:

To make it healthier we need to substitute a few ingredients. Instead of heavy cream we use coconut milk or coconut yoghurt. To cut out the processed sugars, we do not use white one but we use maple syrup or honey. I would not recommend using fresh dates because that would ruin the nice whitish colour. Contrary to maple white sugar, maple syrup and honey also do have some other vitamins and fibre which makes them easier to digest and they are absorbed slower into your blood.

How can you make it vegan?

Since we are wanting to make it vegan, we are of course not using gelantine. If you are not that strict on using vegan products you can also use it. But in this recipe we are going to use agar agar, also known as plant based gelatine. This helps to bind everything together and achieve the pan cotta consistency. We will use this both, for the coconut and the mango layer.

The mango layer:

The mango layer also is super simple. We blend, either fresh or frozen and thawed mango up so it gets saucy. If you like to have a few chunks left, you can blend it a little less. Depending on how sweet your mango is, and how sweet you want it to be, you can add a little sweetener here too.

How to serve them?

I like to poor them in really small jars or bowls so you can have one (or probably more) as a small snack or a dessert. I love how cute they look when serving them and they also have a nice serving size. If you do not have such on hand, you can just pour it into a large dish and scoop a bit out whenever you want to enjoy it.

Final important words:

As already mentioned, it works great as a snack or dessert! Half an hour before serving it, take it out of the fridge. This is an important step. If you serve it cold, it has way less flavour, which would be sad because it tastes really amazing when served at room temperature! The fresh flavours make it a really nice thing to have during hot days in spring and summer!

I hope that you like this recipe and it gives you some inspiration to cook healthy!

Happy cooking,
Enjoy,
Katie // Une Petite Cuisinière

Print

Vegan Mango Coconut Panna Cotta

A healthy and vegan version of the italian classic! WIth an exotic twist, it is just an amazing snack or dessert!

Course Dessert, Snack
Cuisine Italian
Prep Time 10 Minuten
Cooling time 1 Stunde
Total Time 1 Stunde 10 Minuten
Servings 6 servings
Calories 164 kcal

What you will need

  • 450 g coconut yogurt alternatively: Coconut milk
  • 4 g Agar Agar or 2 pieces of gelatine
  • 50 g maple syrup
  • 450 g mango (can be frozen and thawed)
  • 50 ml water
  • some shredded coconut

How to

  1. In a small pan add the agar agar and the water and heat it up.

    Meanwhile pure the mango so it has a sauce consistency.

    Bring the agar agar mixture to a boil. Once boiling, reduce to a simmer and cook for 1 minute, stirring continuesly. Take off the heat and divide it into 2 bowls. In one bowl mix in about 1/3 of the coconut yoghurt or milk and stir through until well combined. Then add the agar agar coconut mixture to the remaining coconut yoghurt/ milk and combine.

    Repeat his process with the mango.

    Into small jars or a large dish add the coconut layer first and make it even. Then add the mango layer on top and put it into the refridgerator for at least an hour.

    Half an hour before serving, take it out and sprinkle with some shredded coconut.

    Serve (at room temperature) and enjoy!

Kategorie: Desserts, Diet-Specific, Snack, Sugar Free, Vegan

Chocolate Chip Banana Bread (healthy & vegan)

April 10, 2020 by katharina.kuehr Kommentar verfassen

Quarantine = Bakingtime, so here we are again with a different baking recipe. And this is one of my favourites: banana bread. If you ever have some brown bananas and are shortly before throwing them away, do not ever consider that again – just make (healthy & vegan) banana bread!

I think the first time I had that was in the US and it was heavenly (but not healthy at all hahaha) and then again in Lisbon. Since then I am obsessed with it. It just is so incredibly good and moist and sweet, plus it is so easy to make it healthy.

Brown Bananas?

The great thing about banana bread is that it is a use-up dessert and treat. Whenever we have overripe bananas I ether freeze them for smoothie bowls, or I make banana bread out of them. That way you save food that would otherwise go to waste.

Why Vegan?

Because why not? It is not always easy to bake something vegan but in this case it is. You do not need any butter, because the banana is taking the place the butter would usually do, and instead of eggs we are using a mix of vinegar and baking powder as well as chia eggs. Of course, you can substitute them out for eggs if you prefer that or if you do not have these things on hand.

Is it difficult?

It is everything else than difficult. You can actually throw everything into a food processor and mix and bake. If you do not have or want to use one, mash the bananas by hand and mix the other ingredients in by hand. Without a mixer or blender. Transform to a baking dish and voilà – you have it.

Is it versatile?

It is! If you are vegan make it vegan. If you want some chocolate – add some chocolate chips to it. If you feel like something fresh, add blueberries. Want a crunch? Add in some nuts. Want to make it healthier? Use wholegrain flour? Not a fan of wholegrain? – no problem just use plain. If you cannot do baking without butter, use it instead of the coconut oil! So really in the end it is up to you how you make it. Depending on what you like you can add a personal twist to it.

Breakfast, Snack, Dessert – when and how?

This can honestly be enjoyed as any of those three meal. It can be a healthy breakfast (because of the protein, fibre and carbohydrate content), a delish and filling snack or a satisfying dessert.

Maybe you ask yourself how to eat it! I can tell you: the best way is to spread some almond butter on top, some freshly sliced banana and a drizzle of maple syrup or brown sugar. That is the best. But you can also crumble it into a yoghurt (heavenly) or on top of ice cream.

A winner for families!

Want to know why? I can tell you! Because 1) it is so easy to make, so literally everyone in the family can help. 2) it is sweet so it will taste good but it is not an unhealthy dessert because the sugar content is not as high and it is high in fiber. 3) everyone can enjoy it the way the want to. No matter if it is with whipped cream, almond butter, vanilla ice cream or in their breakfast bowl. It is good.

I hope that you will like this recipe and it will become a staple in your house just as much as it is in ours!

Have fun baking,
Enjoy,
Katie // Une Petite Cuisinière

Print

(Healthy & vegan) Banana Bread

A healthy version of the all time favorite – banana bread. Moist, sweet, just good. Super easy and perfect for families.

Course Breakfast, brunch, Dessert, Snack
Cuisine American
Prep Time 10 Minuten
Cook Time 50 Minuten
Total Time 1 Stunde
Servings 1 loaf (12 slices)
Calories 187 kcal

What you will need

  • 4 bananas the browner, the better (the sweeter)
  • 75 g coconut oil
  • 30 g Honey (use about 75g if your bananas are only a little bit brown)
  • 1 tbsp vinegar white wine or apple cider vinegar
  • 1 tsp natron (baking soda)
  • 1 tbsp chia seeds (can be substituted for 1 egg)
  • 4-5 tbsp water
  • 250 g (whole)wheat flour
  • 1 tsp baking powder
  • 1 tsp cinnamon
  • chocolate chips, berries, nuts or other optional add-ins
  • 1 banana for garnish

How to

  1. Preheat the oven to 180°C.

    In a small bowl combine the chia seeds with the water and let sit for about 5 minute to make the "chia egg". In another bowl combine the vinegar with natron.

    Take a bowl or a food processor and mash or blend the bananas until very mushy. Add in the molten coconut oil, the chia egg, honey or agave, and apple cider vinegar mix. Blend/ mix again until all combined.

    Mix the flour with the cinnamon and baking powder. Fold it under the banana mash mixture. If you have any add-ins (e.g. chocolate chips, nuts, berries) fold them in now.

    Transfer the mixture to a loafpan lined with parchment paper. Cut the extra banana in half, lengthwise and add it on top. Sprinkle with some cinnamon and/ or brown sugar and bake in the oven for 45-50 minutes. After the baking time piek through with a toothpick. If nother sticks to it, the bread is done. If there still is some dough sticking to it, it needs more time in the oven.

    Take it out, let it cool down and cut into 12 slices. Serve each slices with some almond butter, fresh banana, and a drizzle of maple syrup or a sprinkle of brown sugar

Kategorie: American, Breakfast, Cuisine, Desserts, Diet-Specific, Snack, Sugar Free, Vegan, Vegetarian Stichworte: banana, banana bread, brown bananas, chocolate chip banana bread, healthy, healthy baking, healthy banana bread, Healthy Dessert, plant based, plants, sugar free, vegan, vegan baking, vegan banana bread, vegan dessert, vegan treat

« Vorherige Seite
Nächste Seite »

Footer

What has been happening on my Instagram

Copyright © 2024 Une Petite Cuisinière on the Foodie Pro Theme