• Zur Hauptnavigation springen
  • Skip to main content
  • Zur Fußzeile springen

feel food club

  • Home
  • About me
  • My Recipes
  • Blog
  • Navigation Menu: Social Icons

    • Instagram

Desserts

Açai Bowl

September 11, 2019 by katharina.kuehr 1 Kommentar

A friend of mine is from brazil. And she always tells me about all the delicious acai bowls she eats when she is there. Every. Single. Time. We. Meet. This makes me so jealous! I absolutely love Açai Bowls but it is so hard to get one (and if you get one, to get a good one) in Vienna. Now I know one place that makes really delicious ones and that is Superfooddeli! But unfortunately this one place that actually has them is 1 hour away from my home with public transport 🙁 !

Since I am a really huge fan of these bowls and do not want to spend 2 hours reaching that place and coming back I decided to make my own one. I bought Açai Packets from that store and made it at home. Absolutely delicious! And so easy. I really haven´t expected it to be that easy! The clue to making a good Açai Bowl is having a good blender. If your blender is not very strong, it is going to be hard for it to blend everything up smoothly and there will remain chunks in the smoothie.

I love having such a bowl for breakfast or brunch or even as a light lunch! It is prepared so quickly and really delicious. If you are off heading somewhere you can just pour it into a Tupperware and take it on the go! I love this dish!

Isn´t it a ton of Sugar?

Although I love making smoothie bowls, an issue I have with those kind of meals is that I am usually eating tons of sugar. Bananas, berries, mangoes, acai, … whatever. They are really delicious and full of vitamins but sadly also full of sugar. If you blend all of them up, I believe that you eat more fruit pureed than you would normally eat as a whole. To still get a delicious, creamy, and sweat bowl but not consuming to much sugar I decided to add some veggies to my meals. And believe me, this was the best decision!

I could not taste the vegetables at all, I couldn´t have told that they were in there. My 2 tips to adding vegetables to your smoothies are:

1st: freeze them before adding. You not only get a creamier and thicker consistency but you will also taste them less. I do not know why, but it absolutely is worth it.

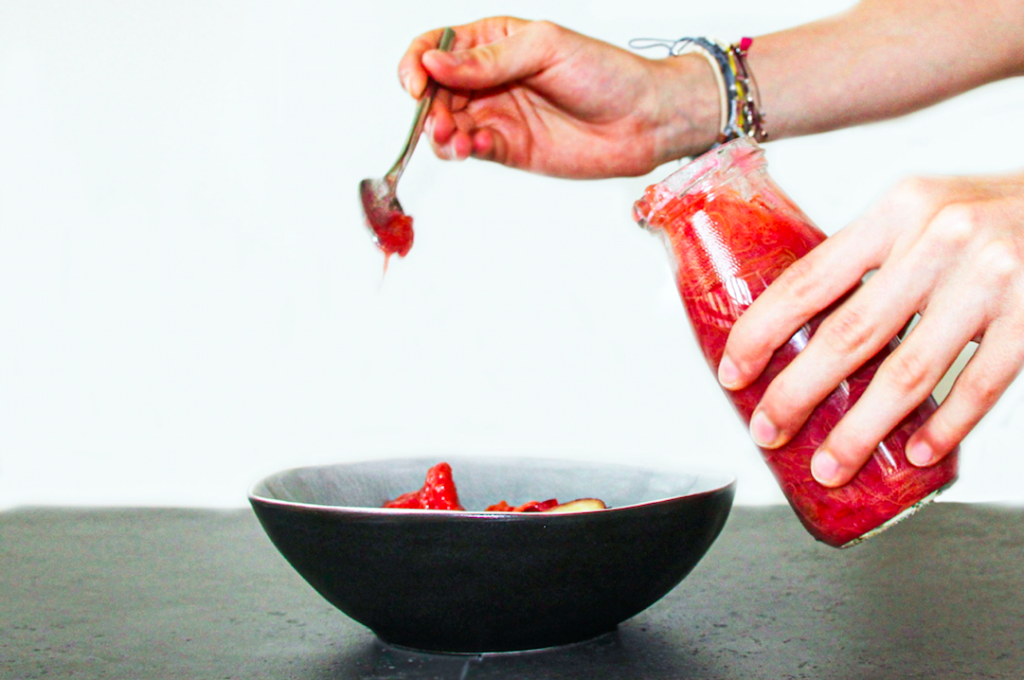
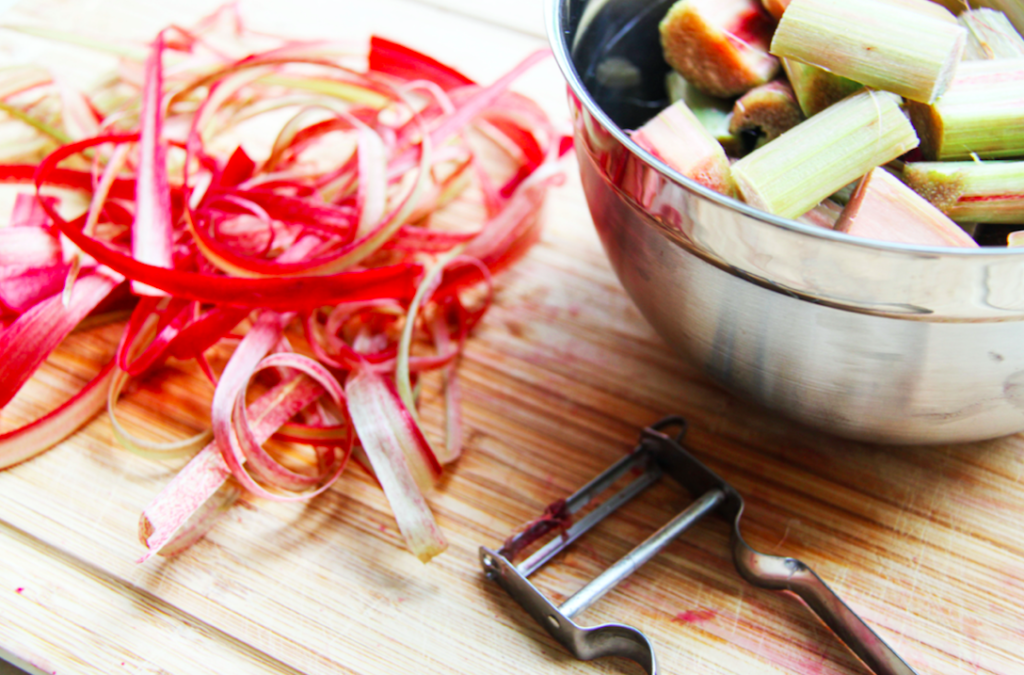
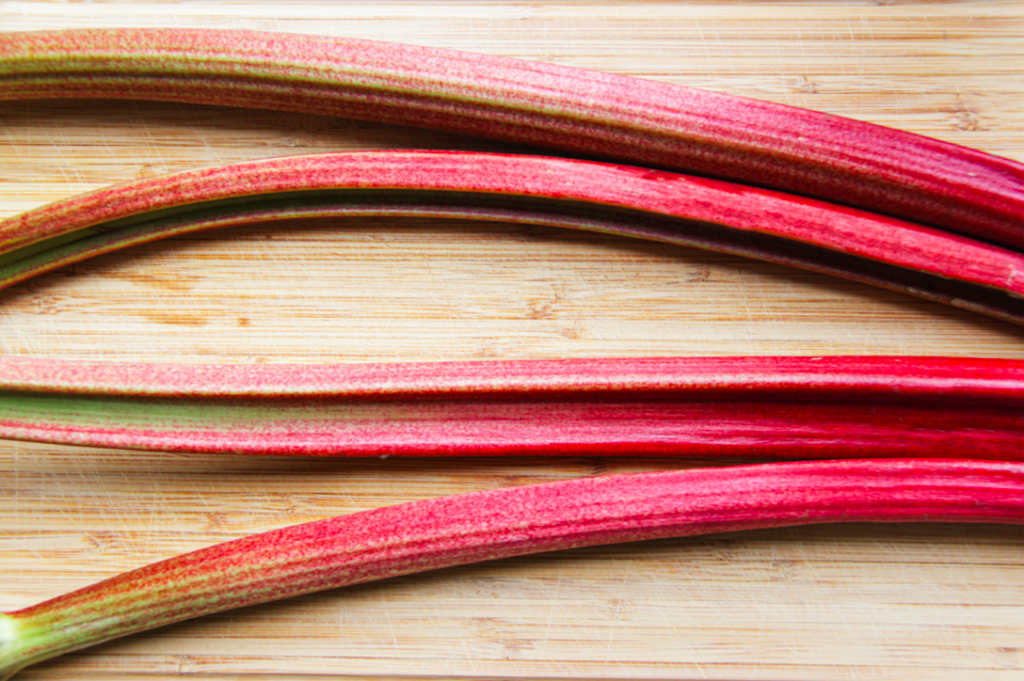
2nd: use vegetables that do not have an intense color. In this case, it doesn´t matter too much since the smoothie bowl is pretty dark anyways but when making a bright smoothie bowls, e.g. a mango one and you add a dark vegetable like spinach, the whole meal will get a darker color and will look less appealing. If you want to make a green smoothie though, this is something different, the go ahead and add all the spinach and kale. For my Açai Bowl I used celery and zucchini, which I have peeled before a froze it.           

What about toppings?

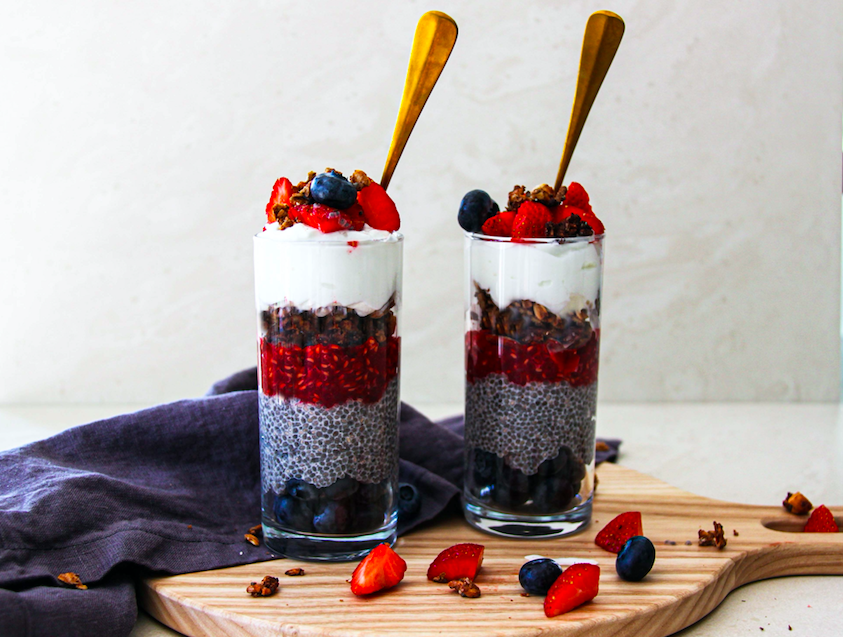
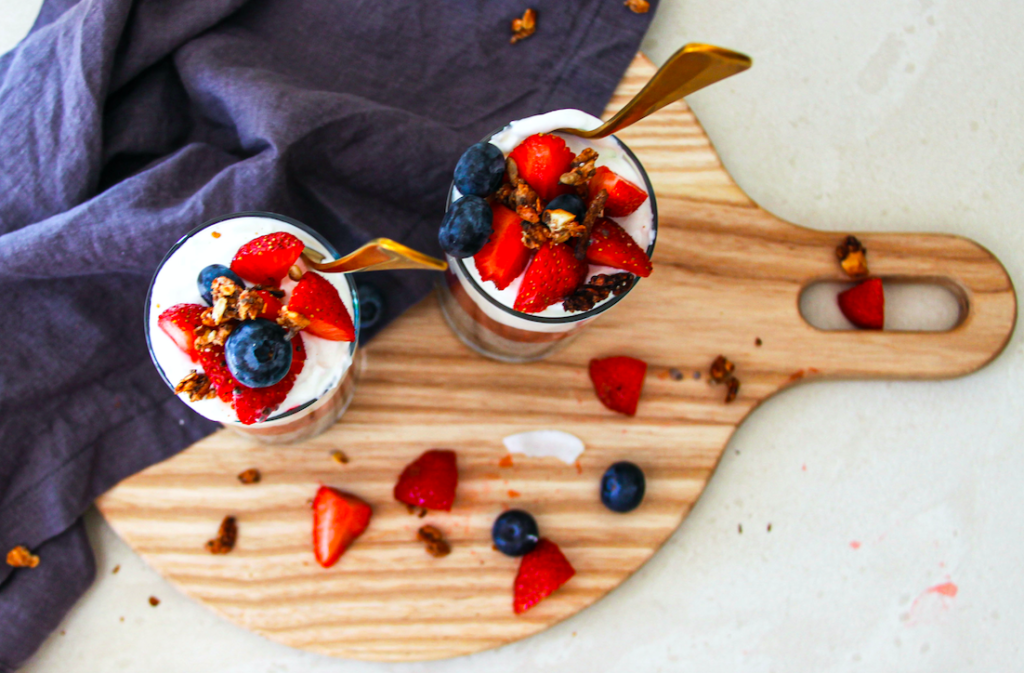
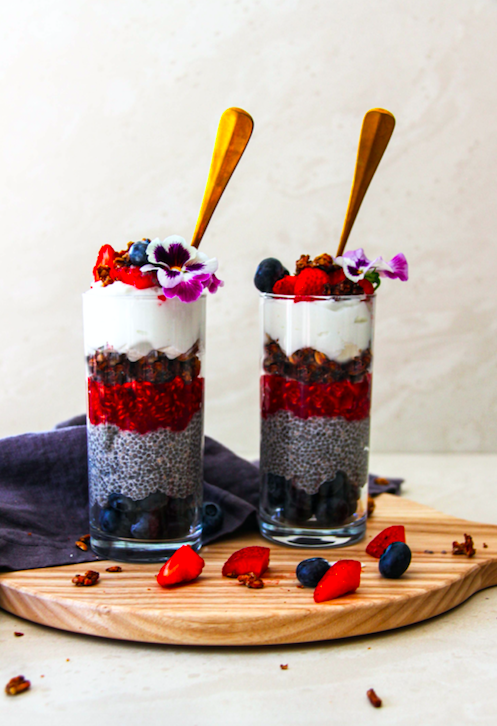
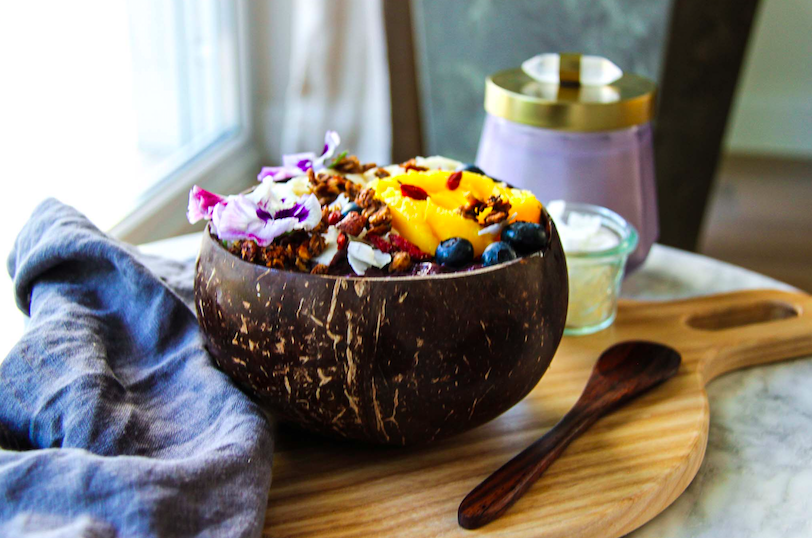
When it comes to the toppings you are absolutely free and can decide according to your desires! If you prefer fresh fruit, whatever fruit you like, something crunchy, something frozen, something creamy, the possibilities are endless! For me, I believe that toppings are the best part of any smoothie bowl!

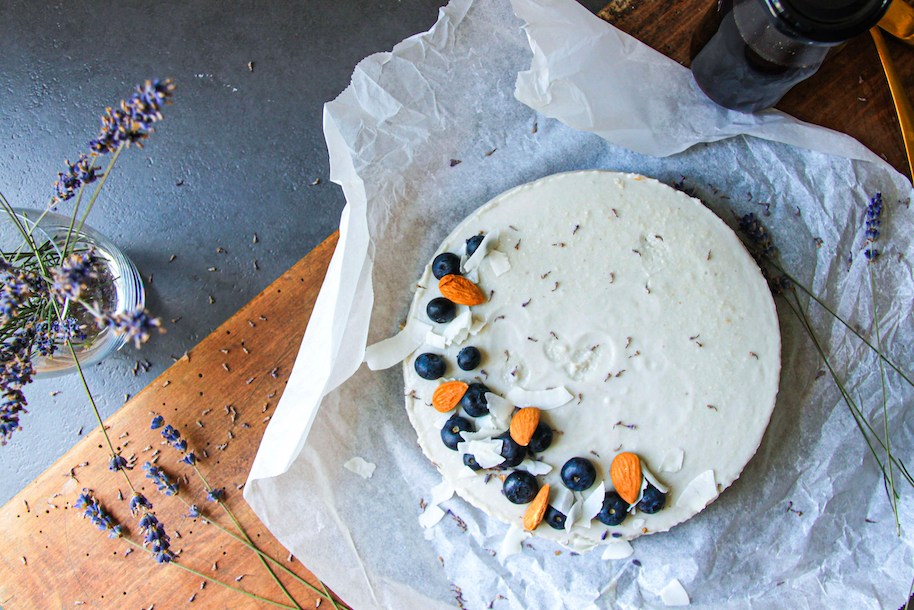
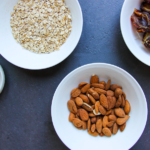
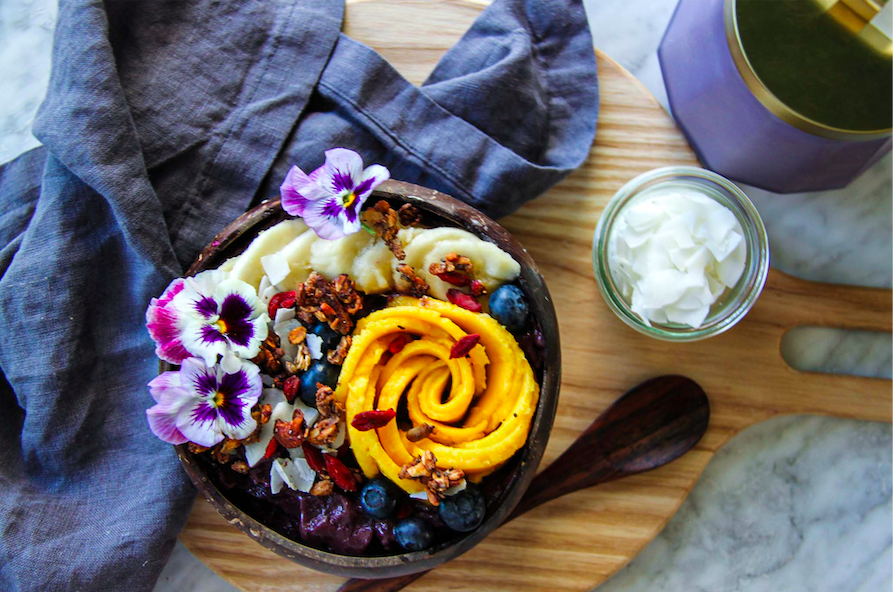
As delicious as they are, you can easily go overboard. When adding tons of nut butters, chocolate chunks and sugar loaded granola you can easily turn a light and healthy meal into something rather heavy and dense. For my topping I like to use some more fresh fruit, like mango and berries, some homemade healthy granola, coconut chips, goji berries, hemp seeds, a spoonful of nut butter (I absolutely love almond butter with this!), some cut up banana and some edible flowers.

5 von 1 Bewertung
Print

Açai Bowl

A low sugar twist on our all time favorite smoothie bowl

Course Breakfast
Cuisine brazilian
Prep Time 12 Minuten
Servings 1
Calories 465 kcal

What you will need

For the smoothie

  • 100g g frozen Acai
  • 1/2 Banana frozen
  • 2 stalks Celery frozen
  • 1/2 Zucchini frozen
  • 100 g Blueberries frozen
  • 100 ml Almond milk more/ less depending on how thick you want it

For the toppings

  • 1/2 Mango
  • Blueberries
  • 2 tbsp Granola
  • 1/3 Banana
  • 1/2 tbsp Goji Berries
  • 1 tbsp coconut flakes
  • 1 tsp almond butter or any other nut butter

How to

Thats how it works:

  1. The night before making the bowl peel the zucchini and cut it up along with the celery and banana. Freeze an Açai package and the berries.

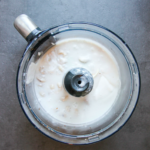
  2. Add all the ingredients for the bowl to the blender and blend it up. Start with a little nut milk and work your way up adding a little a time, depending on how thick you want your bowl to be.

  3. While you are blending the smoothie, take the mango and cut down the half. Peel it and place it with the flat side down on a cutting board. Finely slice it into really thin strips. The thinner the easier to make the rose. Once you have cut it, carefully slide them slightly apart, so it is a long strip. Take an end of the long strip and start rolling it so it will turn in itself so it turns into a rose. Cut up the banana into slices.

  4. When the smoothie is blended well, pour it into a bowl. Top it with the mango rose, the banana, the granola, the berries, the goji berries, the coconut, almond butter, and edible flowers. 

  5. Serve and enjoy!

Kategorie: Breakfast, Desserts, Snack, Sugar Free, Vegan, Vegetarian Stichworte: acai, açaibowl, banana, bowl, lowsugsr, mango, smoothie bowl, summer

No-bake Vegan Cashew Lavender Cake

September 8, 2019 by katharina.kuehr Kommentar verfassen

When it comes to making vegan desserts, I am usually not the first person to be asked. Don´t get me wrong, I do like desserts, although they cannot be too sweet, and I do like vegan food but I just have so little experience with making vegan desserts. I am all into that richness and creaminess of dairy products as cream, mascarpone and cream cheese. Especially in summer, when I do not want to turn the oven on but still have a slice of cake. 

This cake has definitely changed my mind though. I do not need the rich milk products (which are not necessarily healthy) in order to make a no-bake cake. A plant based version definitely is an alternative. It still contains a richness and a lot of flavor but is healthier and vegan! I do not want to call it a vegan cheesecake as others might do, because I do not believe that it tastes like cheese and in my opinion a CHEESE cake can´t be vegan. 

I made this recipe using a sugar free syrup and only sweetened it up with a little maple syrup because I wanted to make it a healthier and refined-sugar free version but also not have it too sweet. The coconut milk and the cashews already give it some sweetness so I did not believe that it is necessary to add a lot more. If you are a sweet person, you can add as much syrup as you desire!

For the crust I decided to use few ingredients and make it simple. It uses dates, for binding and natural sweetness, almonds, for texture and healthy fats, oats for carbohydrates, protein, fiber, and lots of vitamins, a pinch of salt to bring out the flavor, and lastly some coconut oil to bind it all together. I think that this tastes like rawnola, basically like a muesli and I loooove it. If you want to you can absolutely make the recipe for the crust and eat it with some milk or yoghurt or even form it into energy balls to eat them as a snack. 

The cream layer is made with full fat coconut milk, to keep that richness but still lighten it up a little )if that makes sense), cashews, that give the cake a sweet hint, add texture and creaminess and loads of healthy fats and proteins, some coconut yoghurt for more creamy deliciousness (I think b now you can tell that this is going to be a creamy cake!), some agave to sweeten, sugar free lavender syrup to add some flavor and agar to bind it all. If you cannot find a sugar free lavender syrup or a lavender syrup at all, this recipe works very well with any other syrup as well. 

If you are allergic, or do not like almonds you can substitute them with any nuts of your desire, which is the same for the dates. They can be replaced with any dried fruit you like, as apricots or figs or else something. If you want to get a little fancier with the crust and add some seeds such as chia, hemp, or sunflower, feel free to do that but I decided to keep it simple and use few ingredients. 

I like the cake most when it is enjoyed cold, straight out of the fridge. When it is frozen it loses some of the flavor so I would not recommend doing that. This cake works perfect if you have a group of friends over and some are vegan as this is a delicious desset for anyone vegan or non-vegan. It is pretty healthy as it contains lots of healthy fats, protein, carbs, and vitamins so it is a balanced and delicious snack. 

Print

Vegan Cashew Lavender Cake

A really delicious vegan dessert

Course Dessert
Prep Time 30 Minuten
Soaking & Cooling time 10 Stunden
Servings 12 slices
Calories 221 kcal

What you will need

For the crust:

  • 130 g Dates about 5
  • 50 g Oats
  • 80 g Almonds
  • 1 tsp Coconut Oil

For the cream layer

  • 115 g cashews
  • 1 can full fat coconut milk
  • 150 g coconut yogurt
  • 20 g agar-agar
  • 60 ml sugar free lavender syrup can substitute for any other fruit syrup
  • 1 tbsp maple syrup

How to

  1. Put the cashews in a bowl and let them soak for at least 6 hours or overnight.

  2. Blend the dates in a food processor until it forms a paste. Add the oats, almonds, coconut oil and a pinch of salt and blend again until it becomes firm texture. Line out an 18cm springform pan with parchment paper. Add the crust into the pan and press it to the ground and all the edges. Place it in the fidge.

  3. Drain the cashews and place them in a food processor. Add the coconut yoghurt, the maple syrup, and the lavender syrup and blend until smooth.

  4. Place the coconut milk in a sauce pan along with the agrtine. Bring it so a boil and let cook for 2 minutes. Add one tablespoon of the cashew cream into the coconut milk mixture and mix well. Pour it back into the rest of the cashew cream and mix it well (by hand!). It works best with a spatula. If you prefer it sweeter, add a little more lavender or maple syrup here.

  5. Take the springform pan with the crust out of the fridge and pour the cashew cream on top. Place in the fridge for at least 5 hours to overnight to let the agartine get firm.

  6. When ready take it out of the fridge and garnish with almonds, blueberries and some fresh lavender.

    Serve and enjoy!

Kategorie: Desserts, Vegan Stichworte: cake, cashew, dessert, lavender, vegan, vegan cheesecake

Triple Berry Breakfast Jars

Juli 14, 2019 by katharina.kuehr Kommentar verfassen

Summer in a jar

I loooooove breakfast. For me breakfast is my favourite meal of the entire day. If it was for me, I´d eat breakfast food all day long. Chia puddings, oatmeals, pancakes, eggs, avocado toasts, .. I mean – what do you need more?

breakfast the first thing in the morning we give our body after a long rest, it is something we re-fuel our energy cells, and the way we start the day. With breakfast we set the attitude for the rest of our day. If we start our day with a healthy and balanced meal, we tend to be healthier throughout the day and make smarter decisions.

Skipping breakfast is not an option for me as I then get hungry an hour after I got up latest, and I get super tired. I just need something in the morning to give me energy and fill me up. I used to eat something in the morning, like a simple bread with butter and jam, which was good in that moment and gave me energy. After an hour though, I tended to get tired and hungry again, as such a breakfast was really high in sugar and very low in fibres.

These Triple Berry Chia Pudding Breakfast Jars (what a long name!) are the complete opposite. Chia seeds are a real superfood and packed with tons of vitamins, as well as fiber, actually more than most fruits and vegetables. It has 10 grams of fiber per 25 grams serving! The little seeds also contain a good amount of protein and healthy omega 3 fats (more than salmon), which makes us feel full for longer. The small seeds may lower your risk in heart diseases, and lower your blood pressure, as well as they are going to boost your digestion due to the fiber.

Not only the chia seeds provide great nutritional value but also the fresh fruits, which contain a ton of vitamins, antioxidants, and fiber. They are consumed raw in this recipe, which keeps all of their vitamins. The greek yoghurt is also a great source of protein and healthy fats, and the sugar-free granola add some carbs and crunch without any added sugar.

What I really like about this breakfast is that it is super simple and easy to prepare. The chia pudding has to be prepared the night before, and in the morning it is all just thrown together into a jar or bowl and ready in 5 minutes. Just add the fresh fruits, yoghurt, and granola and assemble.

This also is a great recipe for meal prep. If it is packed into mason jars or a bento box it is easily potable and can be prepared the night before or a few days before. I would not prepare it more than 2 days ahead as the berries will get mushy and will rotten faster. Also the granola should be kept separately as it won’t be crispy if added to the yoghurt and pudding ahead of time.

All in all, this is such a nutrient – dense breakfast, which will keep you full for several hours and satisfy your tummy for a great start into your day.

Print

Tripple Berry Breakfast Jars

A delicious and nutrient-dense breakfast for a great start into your day! Gluten- and refined sugar free, seasonal, and as a vegan option available.

Course Breakfast
Prep Time 10 Minuten
Resting time 4 Stunden 10 Minuten
Total Time 4 Stunden 20 Minuten
Servings 2 people
Calories 246 kcal

What you will need

Chia Pudding

  • 50 grams chia seeds (1/4 cup)
  • 250 ml almond milk (1 cup)

For the jars

  • 100 grams yogurt can substitute for plant based yogurt for a vegan option
  • 1 handful blueberries can be frozen
  • 1 handful raspberries can be frozen
  • 2 tbsp granola sugar-free preferably
  • 4 strawberries
  • edible flowers for decoration (optional)

How to

For the Chia Pudding:

  1. Combine the chia seeds and the almond milk in a rather flat container. Stir to combine and place in the fridge. Take out after 10 minutes. You will see that it has thickened slightly. Stir through again to make sure that the chia seeds wont stay at the bottom. Then return to the fridge and keep in there for at least 4 hours but best overnight to let it thicken.

For the Jars:

  1. The next morning take the chia pudding out of the fridge. Place he blueberries at the bottom of the jars. Top them with a layer of the chia pudding. In a small bowl mash the rasberries with a fork and add them on top of the pudding. Sprinkle one tablespoon of ganola into each jar, and pour the yogurt on top of it. Cut the strawberries into small pieces and place them at the top, along with some blueberries and edible flowers.

    Enjoy!

Kategorie: Breakfast, Desserts, Sugar Free, Vegetarian Stichworte: berry, blueberry, breakfast, chia, healthy, jar, rasberry, stra, yoghurt

Rhubarb Compote (V,GF,S)

Juli 14, 2019 by katharina.kuehr Kommentar verfassen

Rhubarb season is almost over and this is a perfect recipe to round up and finish the season. Such a simple and quick recipe because, let’s be honest, with this nice weather who likes to spend their entire day cooking. It is finished in 30 minutes, and only 4 ingredients but still super flavourful.

What I love about this compote is that it is so versatile. It is sweet but still contains the slight sourness of the rhubarb. This makes it such a great addition to ever dish. You can use it in addition to your breakfast with yoghurt and chia pudding, or with a scoop of vanilla ice cream as a quick dessert. But if you wanna go a bit more creative, go ahead and add it to a grilled chicken or halloumi and use it as a chutney.

I am actually pretty new to cooking with rhubarb, and this is the first recipe I created myself with it. I think it is a bit tricky to come up with recipes. I actually just wanted to make a rhubarb side dish, where you can still eat all the chunks but then I forgot I on the stove and it turned thicker and got creamier. It turned into this delicious compote.

I really love the flavour of this vegetable (yes, it is a vegetable) because it is slightly sour but it can be enjoyed so well as a sweet dish too. It contains a lot of vitamin C and vitamin K as well as fiber. It also is a great source of antioxidants. If you want to make this a healthy compote, without sugar, you can substitute the sugar for stevia or erythrit.

You do NOT HAVE to peel the rhubarb but I prefer to do it. As I did not grow the rhubarb myself, I do not know which dirt got onto the skin, which is probably not all going to be removed by washing. That is why I decided to peel it but it is not necessary. It can actually be consumed raw but if done so, it has a pretty sour flavour, that´s why it is hardly found raw and often used in desserts with sugar.

For this recipe, I recommend using stalks that are very red-pinkish and not green, as it gives the compote a prettier colour. The more intense the colour of your rhubarb is, the nicer will the colour of your finished product be. If the stalks are more green than red, then it will turn into a light pink colour. Also if you prefer the compote sweeter or less sweet, you can simply adapt the amount of sugar you add into it.

Print

Rhubarb Compote

This compote is the perfect add-on for yoghurt, ice cream, chia pudding or anything rather sweet you can think off … even cake! perfect vegan and seasonal summer dish.

Course Dessert
Prep Time 10 Minuten
Cook Time 15 Minuten
Total Time 25 Minuten
Servings 12 tbsp
Calories 24 kcal

What you will need

Makes 2 jars å 250ml

  • 4 stalks rhubarb
  • 60 g sugar
  • 0.5 lemon juice
  • splash water

How to

  1. Peel the rhubarb stalks, so that the outest layer is off. Then cut them into 3cm (1 inch) cubes. Place them into a pan along with the suagr, the juice of half a lemon, and a splash of water to help it cook.

    Bring it to a boil, then lower the heat. let it simmer for about 10 more mintues, until some rhubarb chunks have broken down, and some are still in shape but soft. You should be able to stab through with a fork easily. The compote should have reached a creamy consistency. Pour it into 2 jars who have been washed out with boiling water peviously. Let cool completetly at room temperature and then store in the fridge. It will last in the fridge for at least 4 weeks.

    Serve it over yoghurt for breakfast or with ice cream as a dessert option.

 If you have any questions don’t hesitate to ask me! And if you recreate the recipe be sure to tag me on instagram with @happyfoodkitchen! I hope you enjoy it.
Xx Katie

Kategorie: Breakfast, Desserts, Snack, Sugar Free, Vegetarian Stichworte: compote, rhubarb, seasonal, sugarfree, topping

« Vorherige Seite
Nächste Seite »

Footer

What has been happening on my Instagram

Copyright © 2024 Une Petite Cuisinière on the Foodie Pro Theme