• Zur Hauptnavigation springen
  • Skip to main content
  • Zur Fußzeile springen

feel food club

  • Home
  • About me
  • My Recipes
  • Blog
  • Navigation Menu: Social Icons

    • Instagram

Cuisine

Super quick Peanut Soba Noodle Stir-fry with best sticky tofu

September 29, 2020 by katharina.kuehr Kommentar verfassen

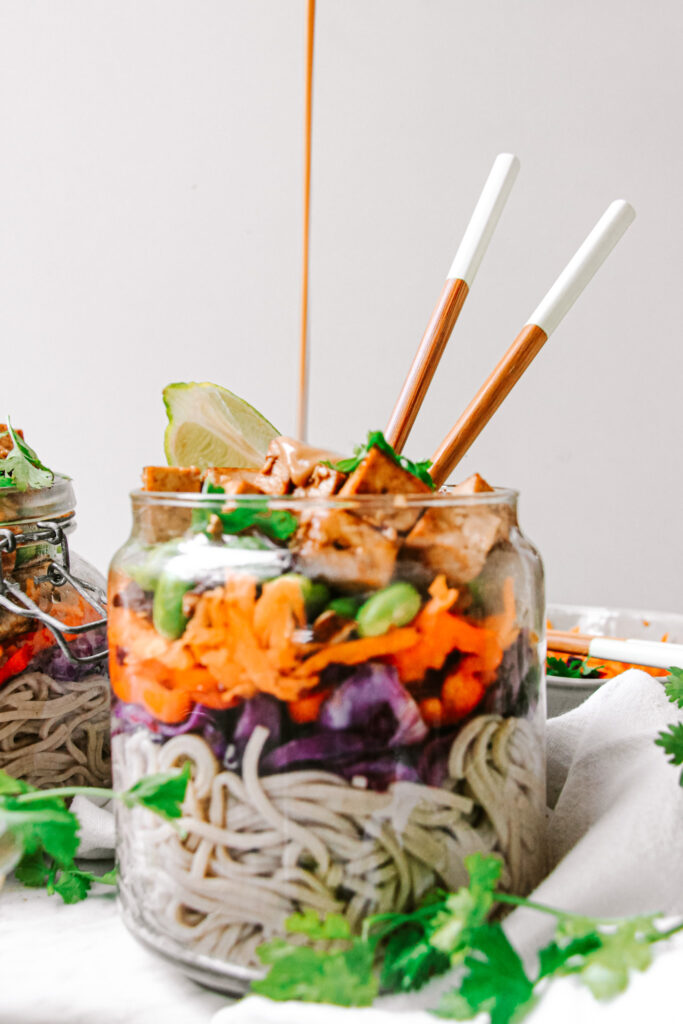
Soft noodles tossed in a (super delicious) creamy peanut sauce together with some crispy veggies and topped with a slightly sweet sticky maple soy tofu. And all of that’s vegan. I can truly see no reason you would not love this. It’s quick, it’s healthy, it’s versatile and it’s incredibly tasty.

What is special about this dish?

It is not your regular asian inspired stir-fry dish, neither is it your regular satay Salad. It is a great combination of the two of them. Also, we are using soba-noodles, not regular egg or stir-fry noodles. Plus, it has some delicious sticky maple-soy tofu that is the perfect addition. And, it is ready in pretty much no time.

What are soba noodles?

Soba noodles are noodles that originated in Japan but now are eaten all over the world. They are made from buckwheat flour, and most of the time it is in a wholewheat form. That makes them taste a little bit different from regular noodles, meaning they have a slight nutty flavour. The also take very little time to cook and are great in stir fry´s or soups. I already have a few other soba noodle recipes on my blog like my curry soup with lemongrass meatballs.

Is this recipe healthy?

Yes, it definitely is. Why? The soba noodles add a bunch of carbohydrates and fibre (since they are wholegrain) to the dish. The tofu gives a nice and delicious kick of protein and the peanut butter (please use a natural one, and not one with thousands of add-ins) has all the healthy fats you need. Not to forget about all of the veggies you add into the dish, that provide a whole bunch of fibre and vitamins! So yes, definitely healthy!

Easy to make, family friendly and meal prep friendly

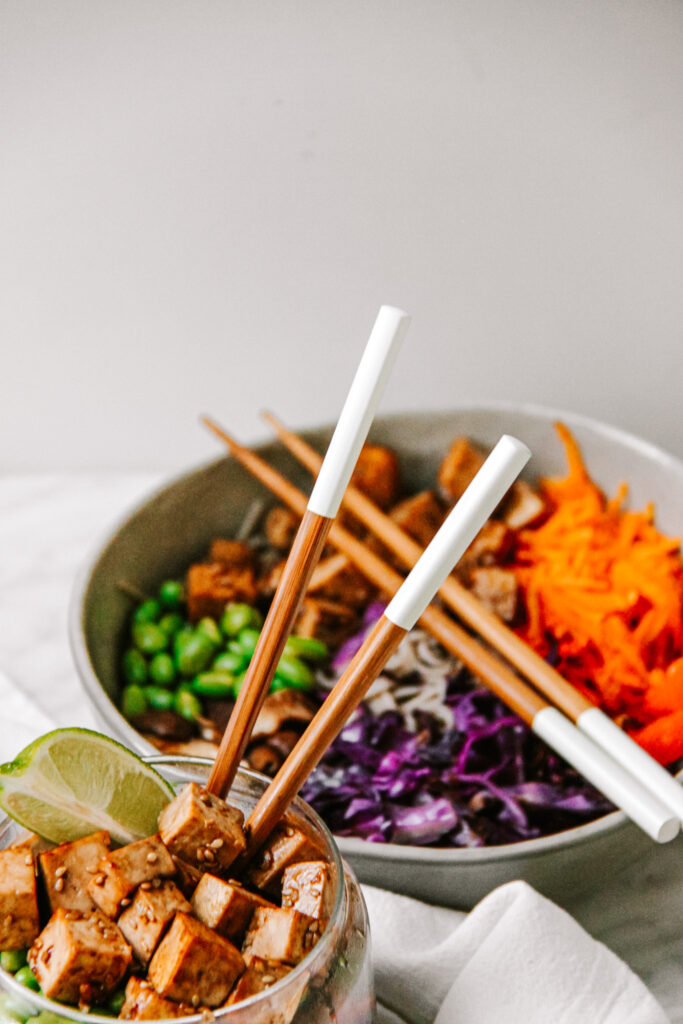
This dish truly ticks all of the boxes you need. It is ready in 20 minutes, which makes it a great quick lunch or an easy dinner. Also, it is very versatile and family friendly, since you can substitute ingredients in and out, depending on your preference. Instead of tofu you could go for chicken or prawns or if you do not like a specific veggies leave it out or use something else. Also if you do not have a certain vegetable at home, leave it out and it will still be delicious! I also really like to take this with me and enjoy in my lunch break as it is really easy to heat up and it will still be delicious!

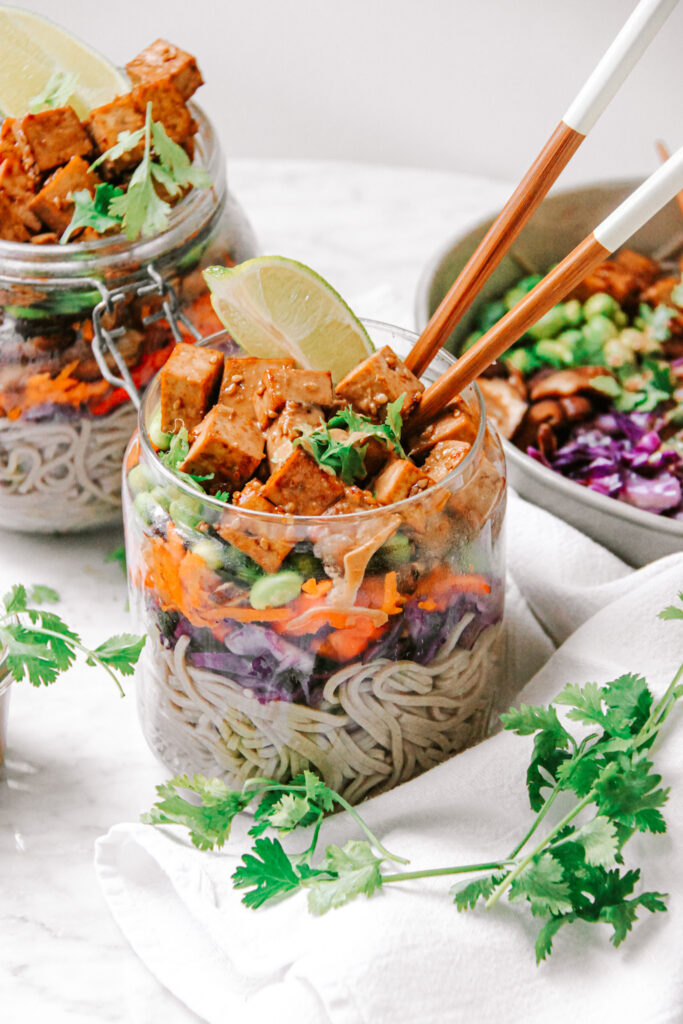
This truly is one of my favourite things to have, warm or cold. I absolutely love how quick it comes together and how incredibly good it still tastes! Unreal. A favourite!

Print

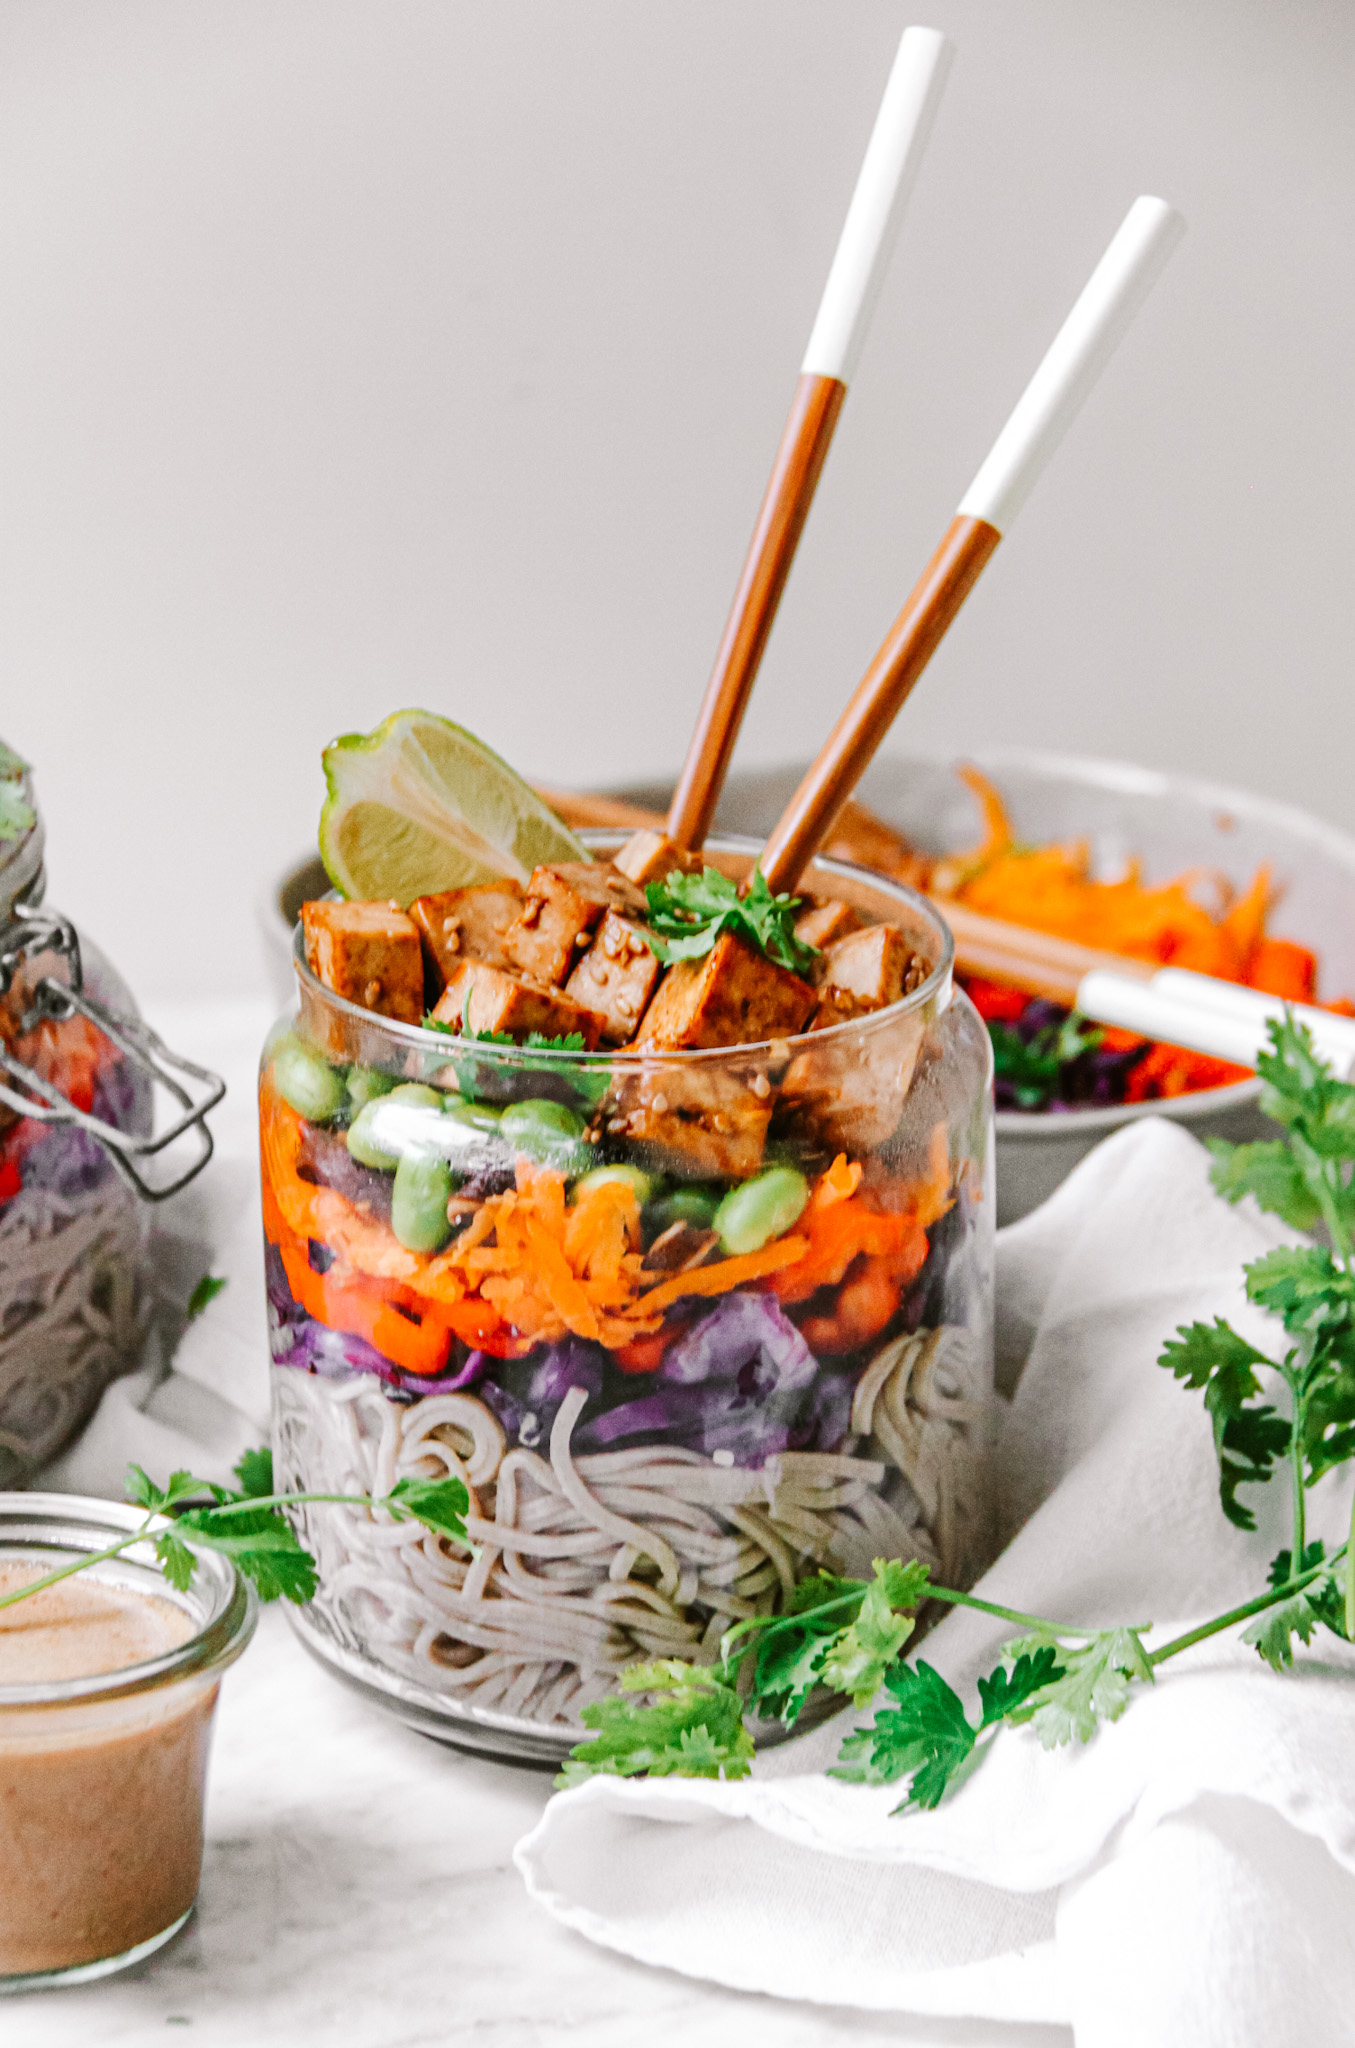
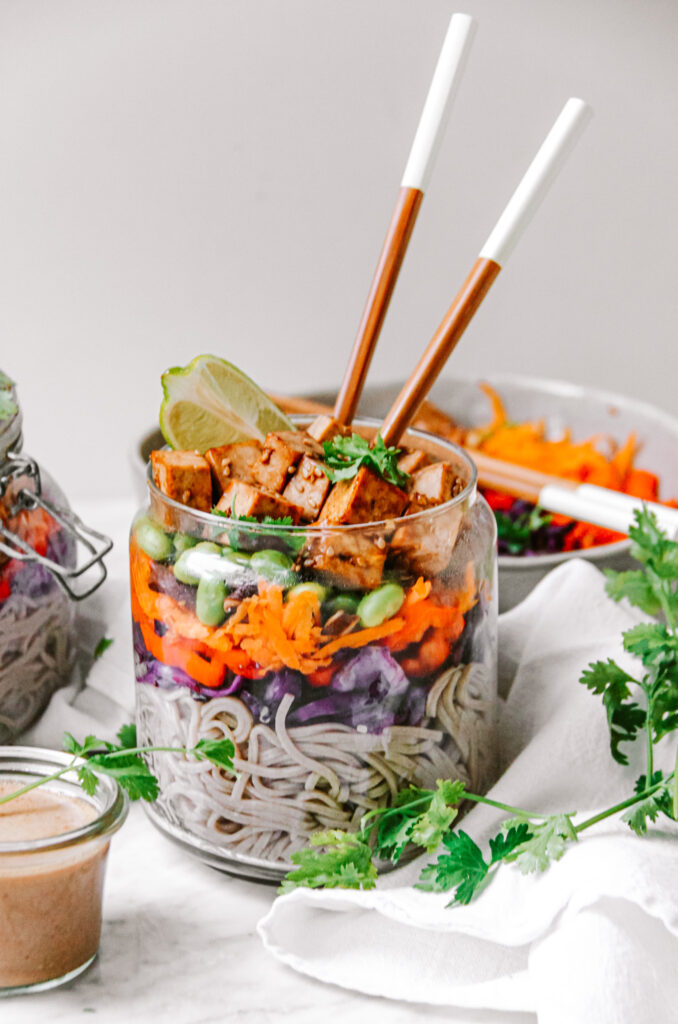
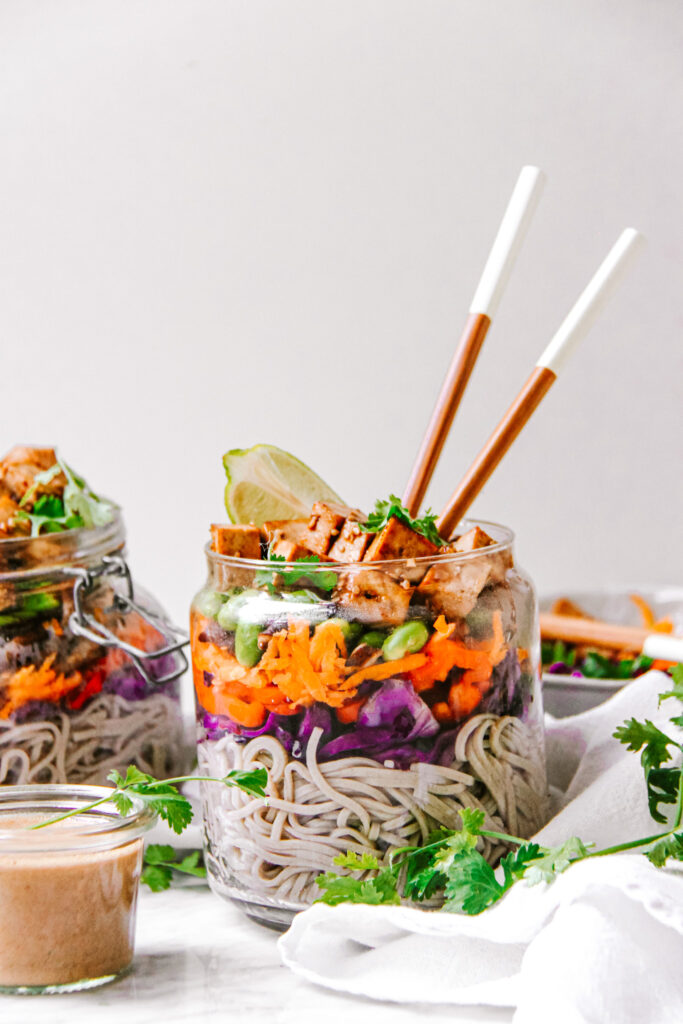
Quick Peanut Soba Noodle Stir Fry with sticky Tofu

An easy, delicious and nutritious meal. Crispy veggies with delicious noodles, all tossed up in a creamy peanut sauce and topped with some tofu.

Course dinner, lunch, Main Course
Cuisine asian
Prep Time 10 Minuten
Cook Time 10 Minuten
Total Time 20 Minuten
Servings 4 servings
Calories 599 kcal

What you will need

  • 320 g soba noodles
  • 200 g oyster mushrooms *
  • 1 red bell pepper *
  • 1/4 head red cabbage
  • 2 large carrots
  • 100 g edamame beans
  • 2 tbsp oil

For the peanut sauce:

  • 2 tbsp peanut butter
  • 1 garlic clove
  • 2 cm ginger
  • juice of 1 lime
  • 1.5 tbsp coconut sugar
  • 4 tbsp soy sauce
  • 1/2 tsp rice wine vinegar

For the tofu:

  • 400 g firm tofu
  • 4 tbsp soy sauce
  • 2 tbsp maple syrup
  • 1 tsp cornstarch

How to

  1. Bring a pot of water to a boil. Add the soba noodles and cook according to package instructions (about 5 minutes). When done cooking, preserve 2 tablespoons of the water they were cooking in and drain them and rinse under cold water to stop them from continuing to cook.

  2. Peel the carrot and grate it roughly. Slice the bell pepper, mushrooms and the cabbage into bite sized pieces/ slices. In a pan heat up 1 tbsp of the oil and fry the veggies on high heat for about 3 minutes, then turn down to medium.

  3. In the meanwhile cut the tofu into 1cm sized chunks. Mix the soy sauce, maple syrup and cornstarch until no chunks left. Heat up the remaining oil in another pan and fry the tofu on each side for about 1-2 minutes until crisp. Turn the heat down and add the soy sauce mixture. Stir to make sure the tofu is all covered with the sauce.

  4. In a blender blend together all of the ingredients for the peanut sauce and add the 2 tbsp of preserved water. Add it to the veggies along with the cooked noodles and mix till well combined. Divide onto plates and top with the tofu! Enjoy!

Kategorie: Asian, Cuisine, Diet-Specific, Lunch/ Dinner, Vegan, Vegetarian

Better than Store-bought 15-minute beetroot hummus

September 7, 2020 by katharina.kuehr Kommentar verfassen

Hummus. We all know it – we all love it! That creamy, tangy goodness that we spread onto bread, enjoy in pita, top every bowl with and dip our veggies in to make them more delicious! A staple in most households – and still, most people buy it at the store while it is SO easy to make!

What is hummus?

Hummus is a dip or a spread that originated and nowadays is found in Middle Eastern cuisine. It has a very smooth consistency and is made out out chickpeas, tahini (which is a sesame paste), olive oil, garlic, and spices. It typically is enjoyed with some fresh Pita bread. Hummus is very popular among the vegan nutrition because it works great as a spread on bread or as a dairy free dip and is pretty healthy!

What is special about this dish?

Regular hummus, as I said is made out of chickpeas as its main ingredient. But this one is a little bit different and perfect for fall! Besides Chickpeas, the star of the show is beetroot. Beetroot is a quite popular ingredient to be added to hummus because its slightly sweet flavour just works in perfect harmony with the creaminess and tanginess of the hummus. So instead of plain hummus, we are switching things up a little bit and making a delicious beetroot hummus!

How do you make hummus?

The entire process is pretty simple, and will take you a maximum of 10 minutes. To make it, you definitely need canned chickpeas. It is possible to use dried ones, but you will have to cook those for 1,5-2 hours before being able to make the hummus, which is pretty time consuming! So I prefer to go for canned ones. You add those to a blender or a food processor (either works) along with a few other ingredients and blend it until it’s creamy. It really is this simple and does not ask for any other cooking!

The secrets to making a really good hummus

There are a few things you can look out for when making hummus to take it next level. First, use canned chickpeas or ones that are boiled really softly. Second, use a good Tahini. This is a sesame paste you can find at most supermarkets and has a runny consistency but I would recommend buying it at an asian store. The Tahini there is just more liquid and will make the hummus creamier! If you cannot make it to an asian store, I recommend at least checking the ingredients list. A good Tahini has Sesame seeds as its only ingredient.

My third tip is to preserve some aquafaba (this is the liquid the chickpeas come in when canned). Adding this will keep the hummus really creamy. My fourth, and last tip is to use a splash of vinegar. As weird as it may sound, it really makes a difference! It adds this tanginess that makes a hummus really good. Sometimes lemons are used, but I would really recommend doing some vinegar!

Is beetroot hummus healthy?

It definitely is! Chickpeas are very healthy since they are high in protein and high in fibre. The Tahini and Olive oil add some healthy unsaturated fats, which makes a great nutritional value for a dip! The beetroot adds some natural sweetness and vitamins! Another reason why it is loved by the food industry is because it is healthy!

How to best have it

Really with anything, you would have regular hummus with. On top of some toasted bread with some avocado, or to dip some veggies in. Also works great on top of (buddha) bowls, in pita bread or on top of a rice cracker. You can even just thin it out with water and lemon juice to make a salad dressing! So the options are endless… and all delicious!

I hope that you will love this recipe and I am sure you’ll be making this on repeat in your kitchen! A great & healthy fall food!

I hope that you will love this recipe and I am sure you’ll be making this on repeat in your kitchen! A great & healthy fall food!

Print

Better than Store-bought 15-minute beetroot hummus

The best creamy & delicious beetroot hummus ever. Better than any premade takeout version!

Course Appetizer, Side Dish, Snack
Cuisine arabian, middle eastern
Prep Time 10 Minuten
Total Time 10 Minuten
Servings 5 servings
Calories 144 kcal

What you will need

  • 1 can chickpeas
  • 2 small beetroots (precooked)
  • 1 tbsp Tahini
  • 2 tbsp Olive Oil
  • 2 tsp vinegar (white wine vinegar works best)
  • 3-4 tbsp aquafaba (the liquid canned chickpeas come in)
  • 1/2 tsp garlic powder
  • 1/2 tsp salt
  • 1/2 tsp paprika powder

How to

  1. Drain the chickpeas but preserve the liquid they were in. Add them to a blender along with all the other ingredients and 3-4 tbsp of that preserved liquid. Blend until smooth! If it is too firm, add more olive oil or aquafaba. But be aware that beetroot hummus will not be as creamy as normal hummus because of the beets in it! Enjoy!

Happy cooking,
Enjoy,
Katie // Une Petite Cuisinière

Kategorie: Appetizers, Asian, Cuisine, Diet-Specific, My favorites, Vegan Stichworte: beetroot, beetroot hummus, beetroot recipes, easy snack, healthy dips, homemade hummus, hummus, hummus recipe, vegan, vegan dips, vegan eats, vegan recipes

The only healthy Plum Compote Recipe you’ll ever need

September 4, 2020 by katharina.kuehr Kommentar verfassen

Plum compote = Zwetschkenröster

Plum Compote – an austrian staple

If you are not from Austria and have never heard of plum compote or Zwetschkenröster I can understand that you may be confused about this. Zwetschkenröster is a compote made out of plums, which mostly is eaten with Curd Cheese Dumplings (Topfenknödel) or Kaiserschmarren. It is sweet and still have fruit chunks in it so it is not the same as jam.

Traditional plum compote & how it is made

There is more than just the country it comes from, that connects me to plum compote. I have always had a passion for cooking from an early age on, and apparently a very big one for plum compote. A few years ago my parents showed me pictures of me, when I was a little kid, 2 years old or so, sitting on the counter in the kitchen and making curd cheese dumplings and plum roaster with my uncle. So yes, this is a very traditional recipe.

In Austria you can find it in pretty much any house hold, which makes sense when you realise how easy it is to make. And how delicious it is to enjoy. Making this actually is pretty simple. It really just is cooking plums with sugar, lemon juice, spices and some cornstarch until the skin separates slightly from the fruit. Then you let it cool down and fill it into jars. That is it.

What it special about this dish?

The only really special thing here is that it is healthy. Regular plum compote comes with loaded sugar, which obviously is not healthy so we are making a healthier version of it. Besides this, not too much is fancy here because we want to keep it quite traditional.

How to make it healthy

The main ingredient, the plums, stays the same of course. But instead of regular, white, refined sugar, we are using a mixture between coconut sugar and dates. Both of these have a great sweetness but are packed with less actual sugar and come with fibre, which makes the sugar be digested better.

How to best have it:

As I already mentioned, you can have this really well with desserts such as Kaiserschmarren (which is like a destroyed dutch baby) or with dumplings. I also love to have it on top of yoghurt with some granola or with some ice cream. I am sure this would also work really well on top of a creamy porridge. It is a great addition to pretty much anything sweet!

I hope that you will enjoy this recipe and that you will also have memories that are as great as mine!

Print

Healthy Plum Compote

A healthy version of the austrian classic. Perfectly sweet and juicy plums cookeed into a long lasting and super delicious compote!

Course Breakfast, Dessert
Cuisine austrian
Prep Time 10 Minuten
Cook Time 1 Stunde 15 Minuten
Total Time 1 Stunde 25 Minuten
Servings 2 jars à 3 servings
Calories 133 kcal

What you will need

  • 1 kg plums
  • 50 g dates
  • 50 g coconut sugar
  • 1/2 tsp cinnamon
  • a sprinkle of sea salt
  • 1/2 lemon
  • 2 tsp cornstarch
  • 50 ml water

How to

  1. Cut all of the plums in half and remove the pit. Slice the dates very finely or cut them into amll pieces. Add them to a pot along with the coconut sugar, water, lemon juice, salt, and cinnamon. Bring to a boil, then reduce the heat and let it simmer for about an hour at medium heat.

  2. After an hour you will see that the skins of the plums started to seperate from the fruit and are rolling in a littlw bit. Now combine the cornstarch with 1 tablespoon of water in a seperate bowl and whisk until smooth. Pour it in and stir through the compote very well so everything is combined.

  3. Take off the heat and let cool. Then fill into jars and stor ein the fridge! Enjoy!

Happy cooking,
Enjoy,
Katie // Une Petite Cuisinière

Kategorie: Austrian, Breakfast, Cuisine, Desserts, Diet-Specific, Sugar Free, Vegan, Vegetarian Stichworte: Austrian food, compote, gesund, healthy, healthy compote, healthy compotes, healthy desserts, healthy plum recipes, jam, plum, plum compote, sugar free, vegan, Zwetschke, zwetschkenröster

The Best Healthy Falafel-style Pita with Dreamy Pink Goddess Sauce

August 31, 2020 by katharina.kuehr 1 Kommentar

That bite into a warm and soft pita filled with a giant dollop of hummus, that coleslaw, the crispy deep fried falafel and that yummy yoghurt-mayonnaise sauce on top. Sounds heavenly doesn’t it? As good as it sounds, it is really everything else than healthy. But we do not want to miss out on that deliciousness. So why not making it healthy?

What is special about this dish?

A lot to be fair. We have falafel, that are not deep fried, as traditional falafel would be but pan fried. Then we have a pink tahini and greek yoghurt sauce (which I have never seen at any of those falafel stands before) instead of the mayonnaise yoghurt dressing and we have a homemade tzatziki and self-made hummus for that extra flavour .

First, what is falafel and where does it come from?

Falafel is a ball made out of chickpeas or cassava beens combined with different spices and herbs before it is deep fried. Usually it is served in a pita bread or to go with hummus or other mezze appetisers. It is believed to have originated in Egypt and can be found in the Middle Eastern cuisine today.

Why are falafel not very healthy?

While many people would believe that falafel are healthy because they are made out of chickpeas and are vegan, that is not quite the case. That is true, that the base of the falafel is healthy, so the „dough“ is healthy. But what is not nutritious about them then? The fact that they are deep fried. All of the oil adds a lot of fat and calories. It is more than fine to have fried food once in a while but it is not something that is healthy, one needs to be aware of that.

Authentic falafel are made with raw chickpeas that have been soaked. This way they are soft enough to blend but not too soft so you do not have a mushy consistency. But since we do not all have the time to soak falafel (especially when we want a quick meal), in here we use flour for the right consistency and canned falafel. This way they will not be white as crispy, but they are way quicker and still delicious!

How to make this dish healthy

Instead of deep frying the falafel, we prepare them in a pan with just a little oil. Yes, you can also bake them in the oven but to be honest, I never find that those get really crispy when being prepared in the oven. When making them in the pan, we still get that crisp (not the exact same of course, but a really good one) while keeping things healthy.

Also, to replace the mayo dressing that often comes on top we make a beetroot-greek yoghurt – tahini dressing. While homemade mayonnaise, in moderation is not unhealthy, store bought ones often have a lot of additives and preservatives in them and making your own one is a little tricky. The sauce we are making is high in protein, from the greek yoghurt, tastes delicious with the beets (and also has a nice colour), and has a good amount of healthy (or unsaturated fats) from the Tahin.

To make this entire dish even healthier you can substitute the normal pita with whole grain pita. This just is pretty difficult to find, which is the reason I stick with normal pita.

How do you make healthy falafel

This is super easy, to be honest. You need to drain canned chickpeas and add them to a food processor along with a bunch of parsley, onion, garlic, spices, and (wholewheat) flour. Then you just pulse everything together until you have reached a sticky, doughy consistency. (if you do not have a food processor or blender you can also add everything to a bowl, very finely chopped and mix it with a fork or your hands). Then you form little balls with your hand, one at a time and roll them in breadcrumbs.
In a hot pan with oil, you add the falafel and let them fry until crisp for about 3 minutes on each side. That is it!

Meal prep friendly?

I would say so. Pack everything separately and mix together before eating. The falafel will not be quite as crisp anymore but they’ll be just fine when you heat them up in the oven.

I hope that you will enjoy this recipe and please your family and friends with it!

5 von 1 Bewertung
Print

The best falafel-style pita with dreamy pink goddess sauce

A healthy version of the dreamy Middle Eastern classic. A little crispy on the outside, super soft soft on the inside falafel with a creamy delicious Tahini-Beetroot Sauce, Tzatziki and Hummus. Not difficult, but really healthy.

Course Appetizer, dinner, lunch, Main Course
Cuisine middle eastern
Prep Time 25 Minuten
Cook Time 10 Minuten
Total Time 35 Minuten
Servings 4 servings
Calories 397 kcal

What you will need

For the falafel:

  • 1 can chickpeas
  • 2-3 tbsp flour (whole grain is prefered)
  • 1/2 red onion
  • 1 bunch parsley
  • 3 cloves garlic
  • 1 tsp salt
  • 1/2 tsp cayenne pepper
  • 1/2 tsp cracked black pepper
  • 1/2 tsp cumin
  • breadcrumbs
  • 2 tbsp olive oil

For the beet sauce

  • 1 small beetroot (precooked)
  • 100 g greek yoghurt
  • 1 tbsp Tahin
  • 1/2 lemon juiced
  • 1 clove garlic
  • 2 tsp honey

For the rest:

  • 1 cucumber
  • 200 g greek yoghurt
  • 1 clove garlic
  • 2 pita breads
  • some hummus
  • fresh radishes & tomatoes
  • 2 handful salad

How to

  1. For the falafel combine all the ingredients, except the breadcrumbs, flour and olive oil in a food processor and pulse until combined (do not blend until smooth!!!). Then add the flour a tablespoon at a time and pulse it in (not blending fully, again!) until the dough is not sticky anymore. Chill in the frisge for half an hour.

  2. In the meanwhile peel the cucumber. Then cut into very thin slices (preferably with a mandoline). Add it into a bowl and salt generously. Let sit for 20 minutes.

  3. In the meantime slice up the raidshes and tomatoes and wash the salad.

  4. For the beetroot sauce add all of the ingredients to a food processor and blend until smooth. If the sauce is too thick add some water or olive oil!

  5. After chilling take about 1 tablespoon at a time of the falafel dough and roll out in your hands into a small ball. Toss in the breadcrumbs until they cover the ball fully. Repeat with the rest of the dough. Heat up the oil in a pan and add the falafel. Let fry on this side for about 2-3 minutes on medium high heat before tossing. Do not toss around in the pan immediately since the dough still is a little bit soft. After those 2-3 minutes, start tossing them around in a pan softly and fry for another 5-6 minutes until they are golden brown on each side and crispy.

  6. Prepare the Tzatziki. Take a clean kitchen towl and place the salted and sliced cucumber in it. Squeeze out all of the remaining water of the cucumber and put it back into the bowl. Press the garlic and add it along with the greek yoghurt. Combine everything well and season with more salt if desired.

  7. To serve fill the pita with hummus, the veggies and the tzatziki. Add the falafel on top and drizzle with the sauce. Serve and enjoy !

Happy cooking,
Enjoy,
Katie // Une Petite Cusinière

Kategorie: Appetizers, Cuisine, Diet-Specific, Lunch/ Dinner, Middle Eastern, Oriental, Vegetarian, Vegetarian Stichworte: beetroot, beetroot sauce, best falafel, chickpea, chickpea recipes, crispy falafel, cucumber, falafel, falafel pita sandwich, family friendly, healthy, healthy chickpea recipes, healthy falafel, healthy family friendly, healthy pita, pita, pita sandwich, tahini, tahini sauce, tzatziki, vegan meals, vegetarian, vegetarian dinner

« Vorherige Seite
Nächste Seite »

Footer

What has been happening on my Instagram

Copyright © 2024 Une Petite Cuisinière on the Foodie Pro Theme