• Zur Hauptnavigation springen
  • Skip to main content
  • Zur Fußzeile springen

feel food club

  • Home
  • About me
  • My Recipes
  • Blog
  • Navigation Menu: Social Icons

    • Instagram

Appetizers

Asparagus and Strawberry Salad

Mai 22, 2020 by katharina.kuehr Kommentar verfassen

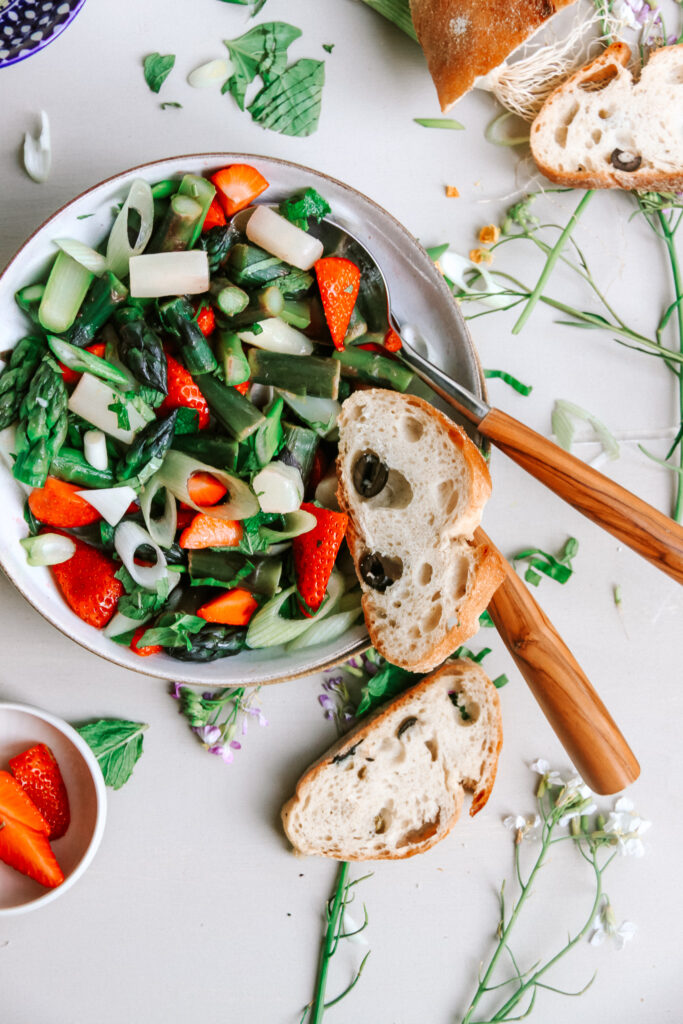
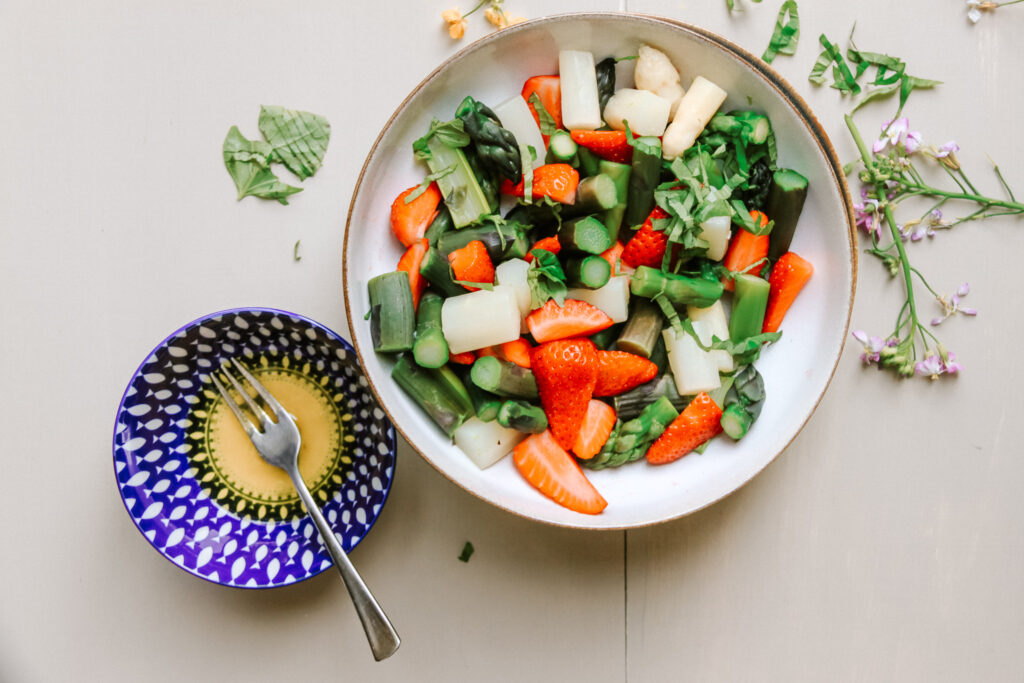
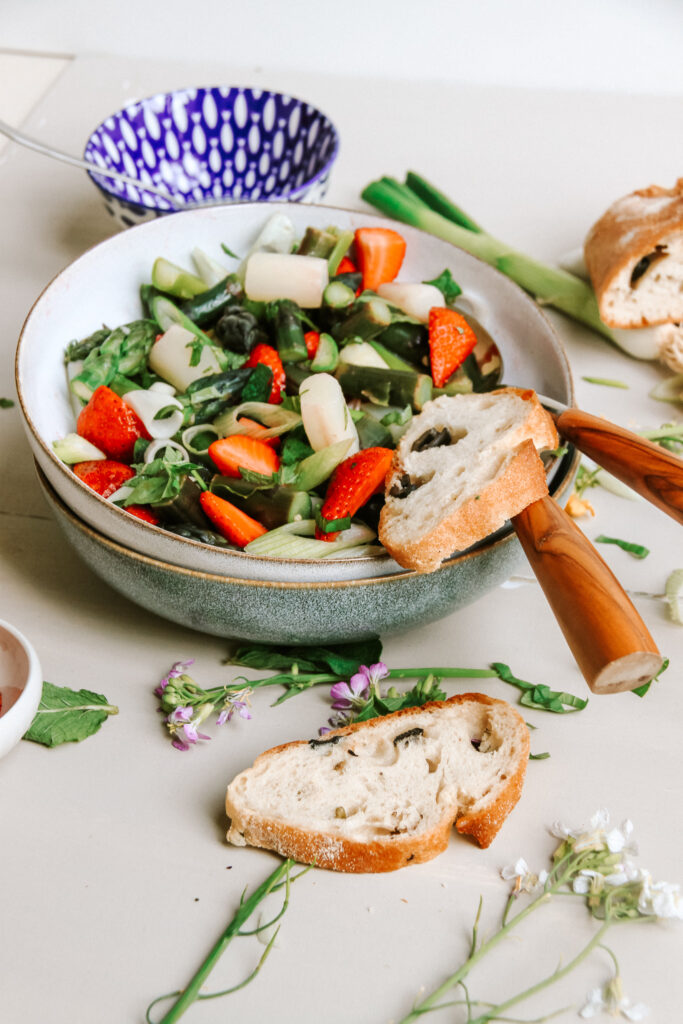
This salad is like spring in a bowl. So mush freshness, fruitiness but also savoury goodness. Super easy to make, full of vitamins, perfect side dish or light main course. Absolutely in love!

Spring honestly is my favourite season. Everything is starting to bloom and coming back to life. Flowers are so colourful and the markets are full of fresh fruits and vegetables. Including two of my favourites: Asparagus and strawberries.

How we typically eat Asparagus

Asparagus is something very typical in Austria. We usually have it with Risotto, as a side or very very typical with potatoes, ham and molten butter or sauce hollandaise. But while this is good once in a while I feel like it is really heavy and not healthy in the long term. This salad, on the other hand is something very light and refreshing.

Which Asparagus works best?

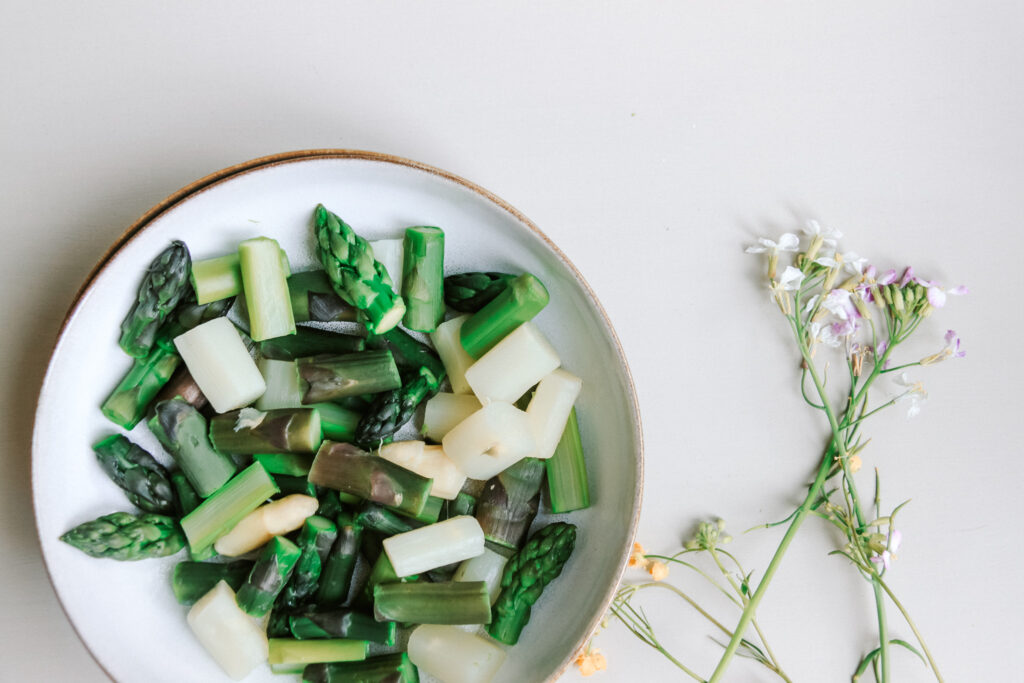
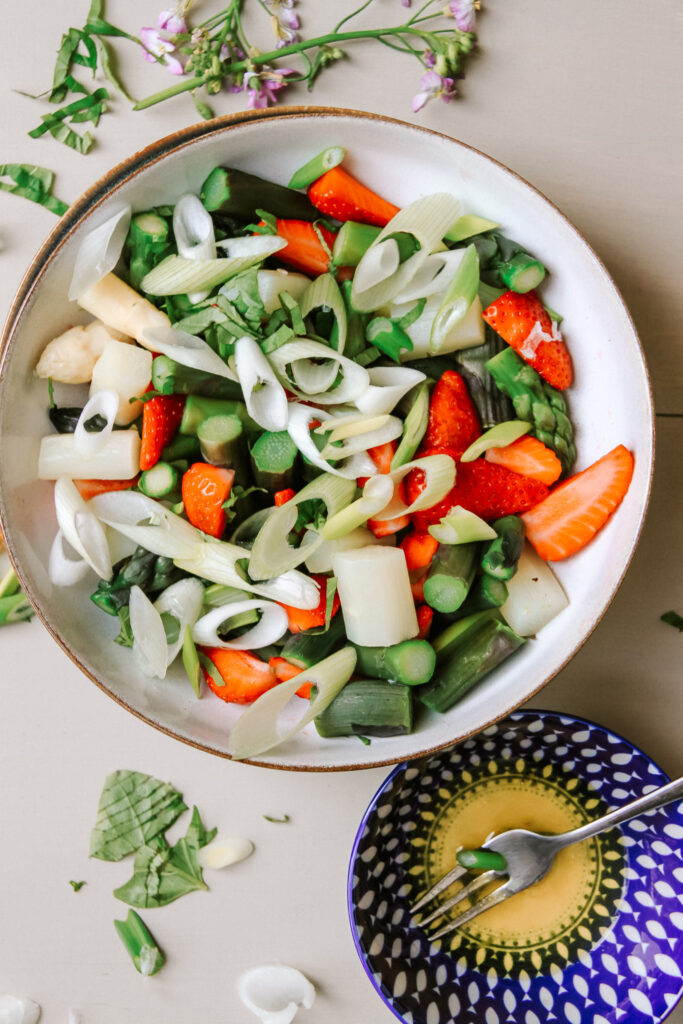
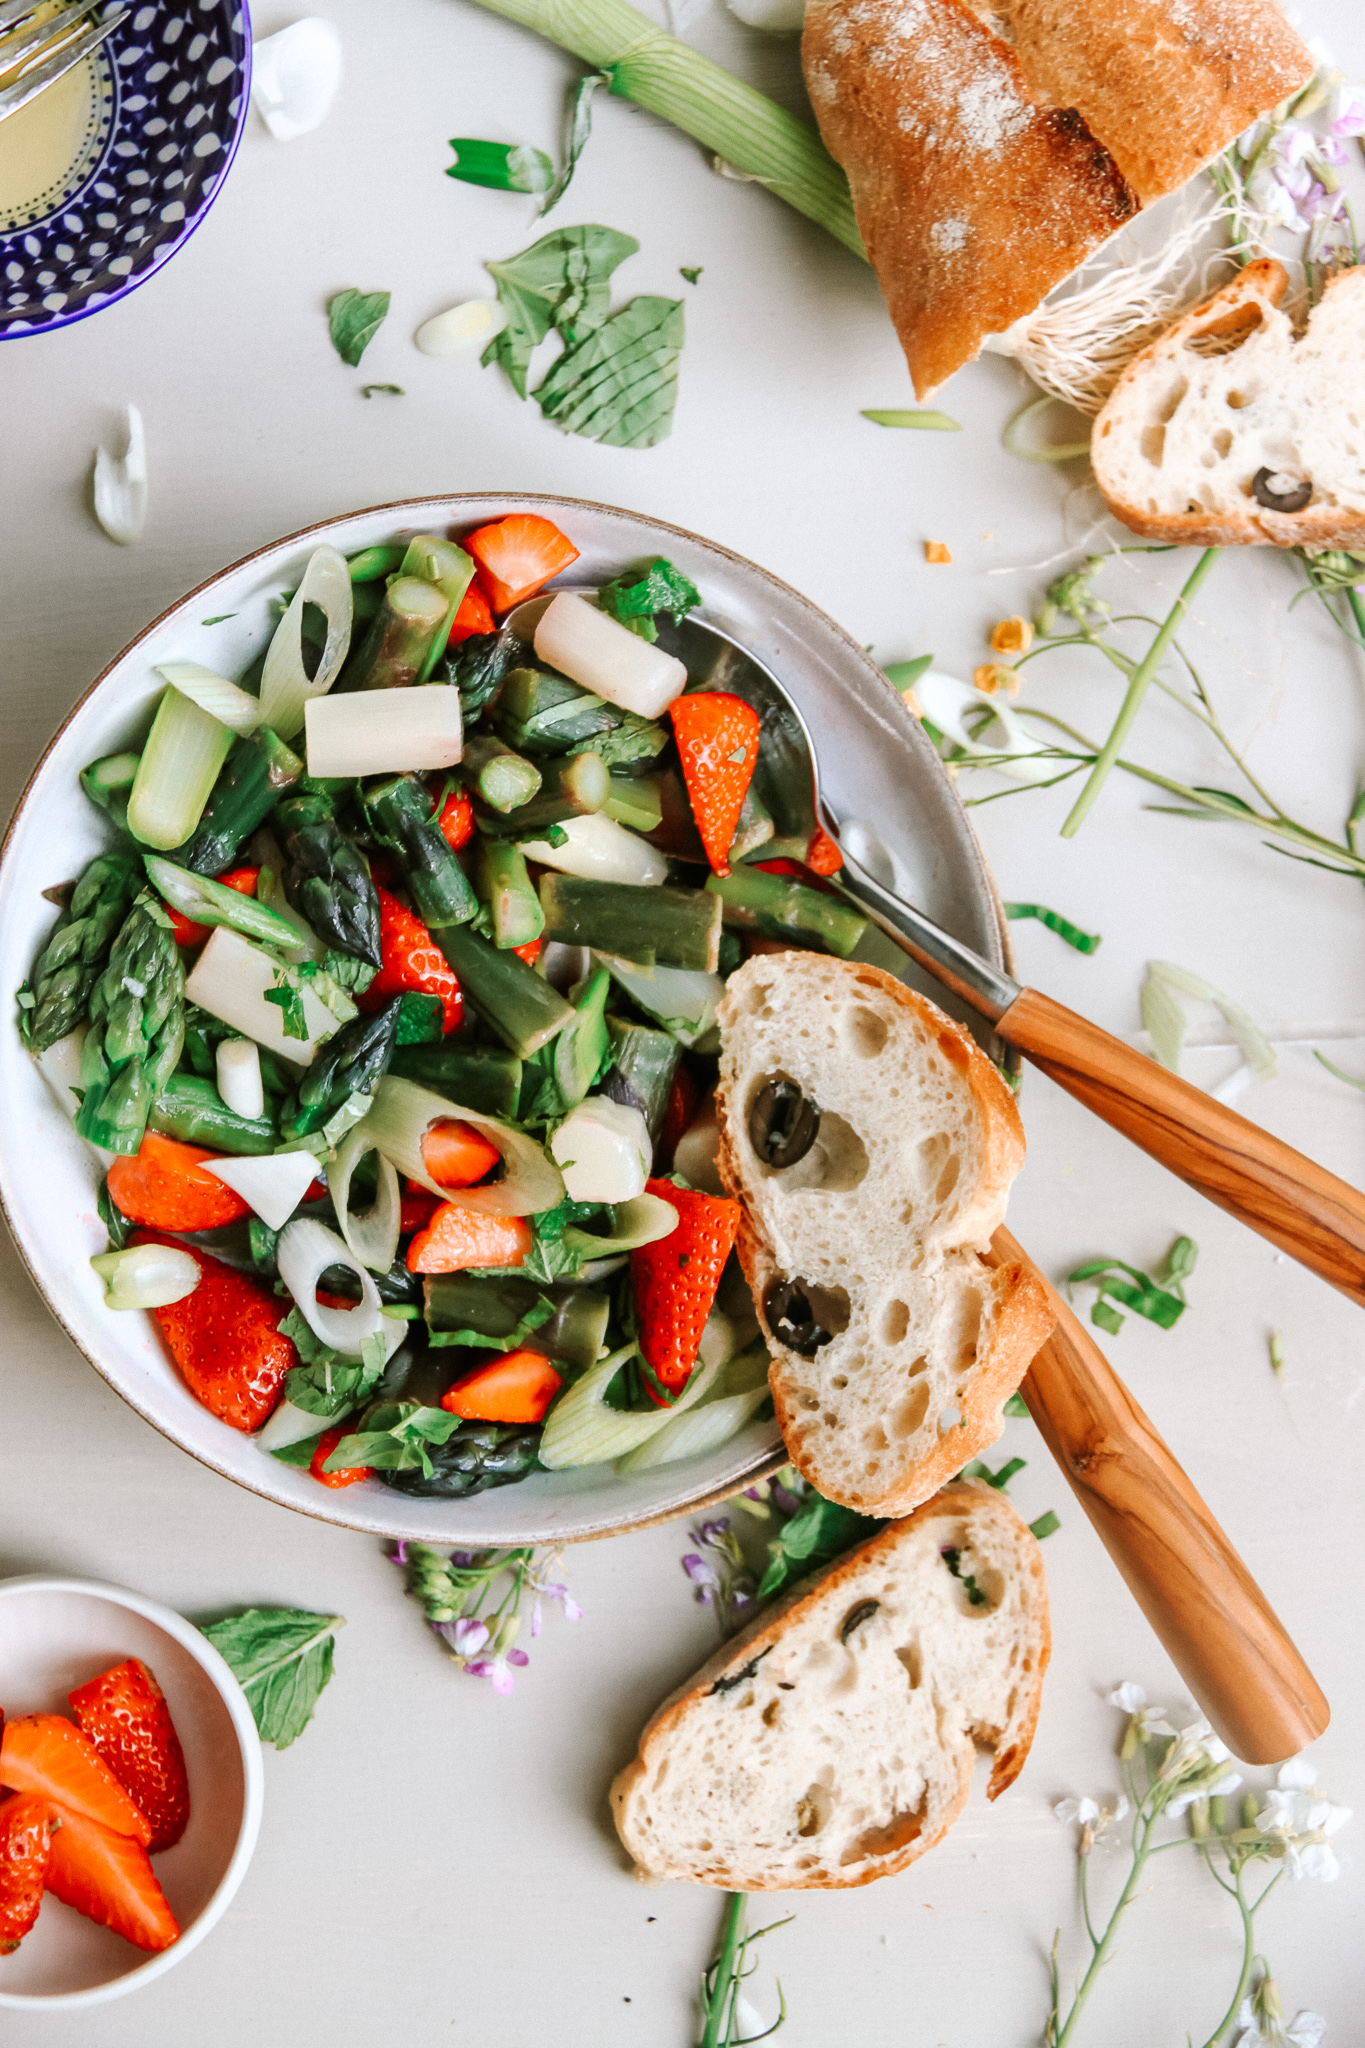
Definitely a mix! Use some white stalks and some greens because the combination of the slightly different flavours is just super good! If you want, you can also use purple asparagus although I would not necessarily recommend to buy it extra for this. I have tried it out with purple asparagus but it lost its colour while cooking and turned green. So it was a bit of a pity.

How to cook asparagus?

This actually is not as easy as many people think. I mean it is to hard but you just need to know how. Green Asparagus is super easy. You just need to cut off the ends of the stalks and boil it in salted water for about 5-10 minutes, depending on how thick the stalks are. White asparagus is slightly different. It also needs some boiling water, you need to salt it, and add 1 tablespoon of butter and 1 teaspoon of sugar. This takes out the bitterness of the asparagus and makes it really good!

Do you need to peel asparagus?

Depends. Green asparagus does not need to be peeled. Neither does purple one. White one on the other hand needs to be peeled!! Generously! I would recommend to peel it twice. If it is not peeled well it will have strings when eating and that’s not good tbh.

Fruit in salad?

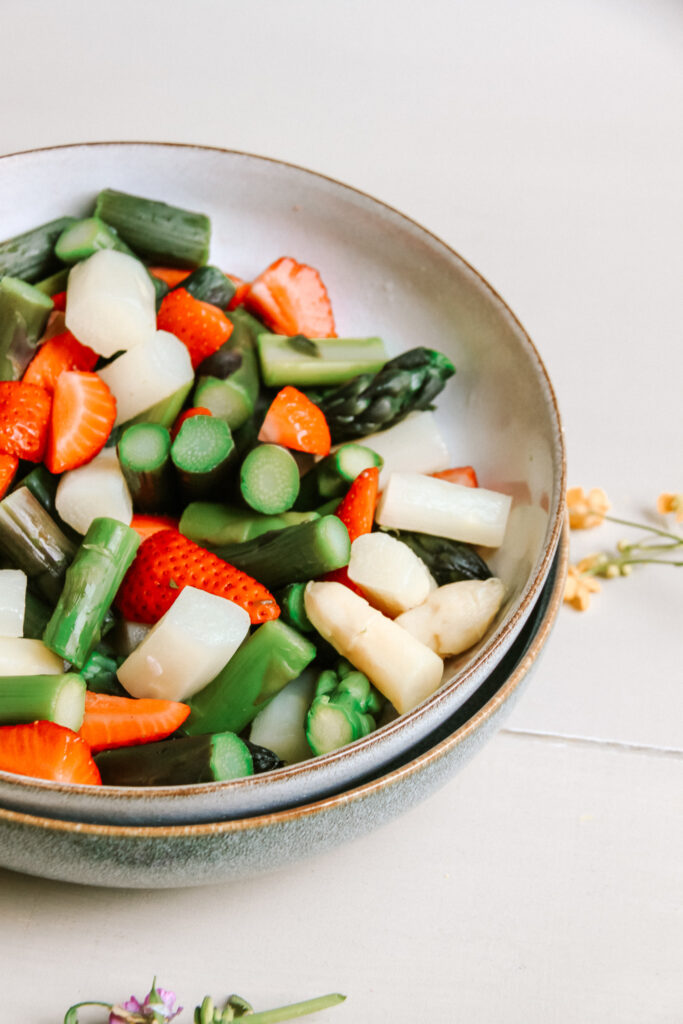
A big YES!!! This is game changing! Especially the combination of strawberries and asparagus is insane! The sweetness of the strawberry pairs perfectly well with the freshness of the asparagus. If you do not have strawberries on hand or do not like them, you can add in raspberries instead, which also must taste really good!

Other add-ins:

Here you can be really creative! What would 100% work well is some kind of cheese like mozzarella, burrata cheese, cottage cheese or feta. Those would make it really good! Also, grilled chicken breast or prawns would take this next level but also hard boiled eggs.

When & how to eat it?

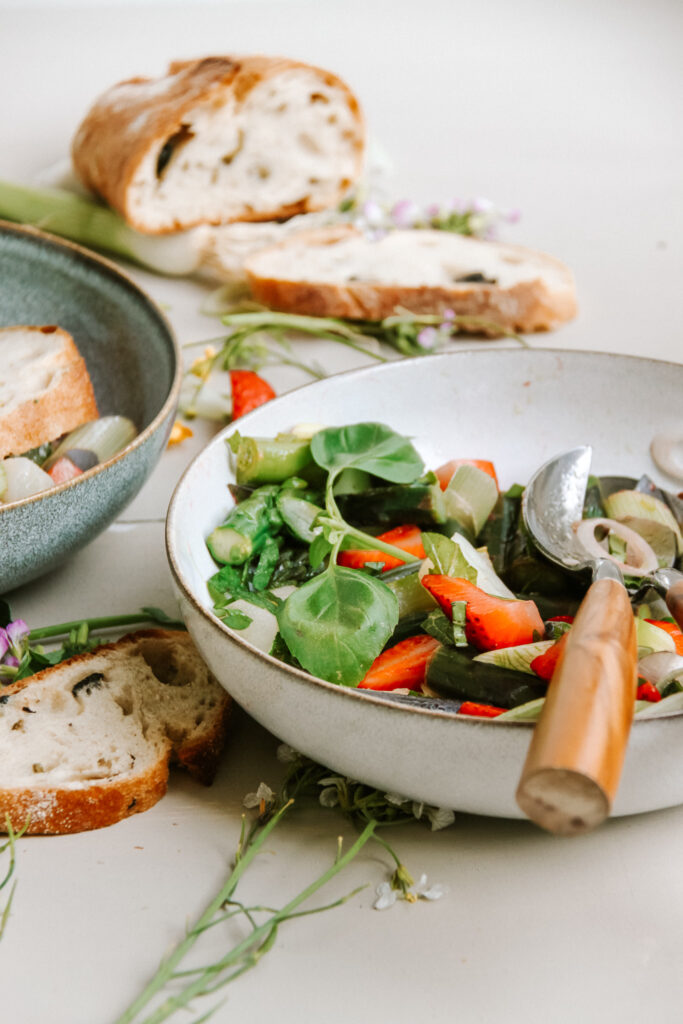
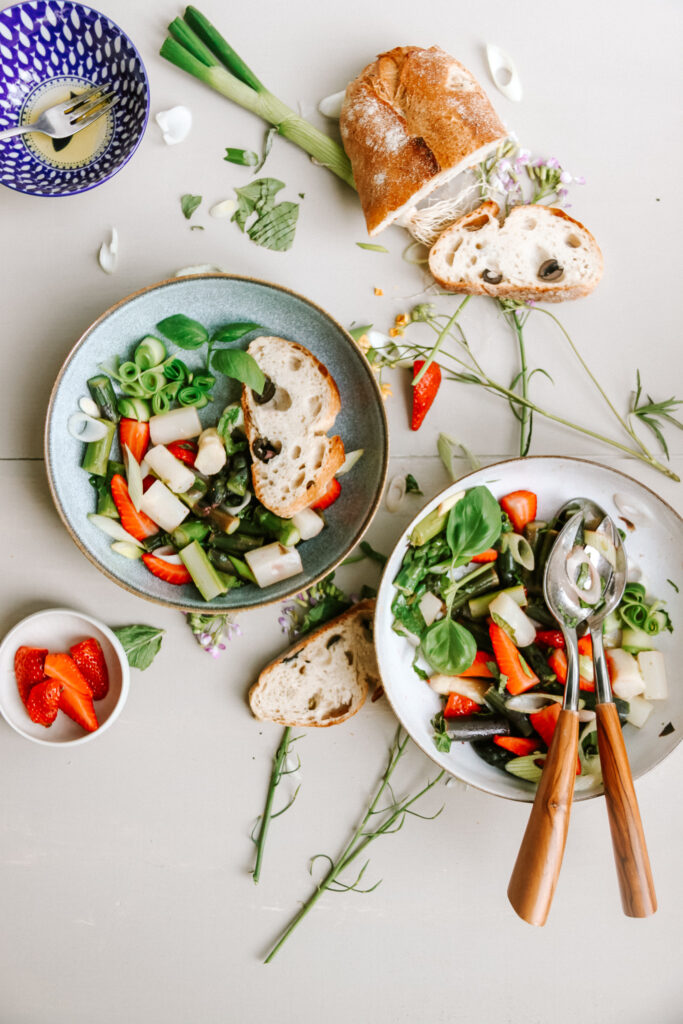
You can have this as a nice side dish and leave it as is or make a little more and add in something like hard boiled eggs for example and enjoy it with some freshly toasted bread or couscous to have it as a filling salad!

I hope that you like this recipe as much as I do and that you will make it many times this spring!

Happy cooking,
Enjoy,
Katie // Une Petite Cuisinière

Print

Asparagus and Strawberry Salad

Not your average asparagus side dish but much better! Sweetness of the strawberries paired with the taste of fresh asparagus is just heaavenly!

Course Appetizer, lunch, Salad, Side Dish
Prep Time 10 Minuten
Cook Time 20 Minuten
Total Time 30 Minuten
Servings 4 sides
Calories 149 kcal

What you will need

  • 500 g white asparagus
  • 500 g asparagus
  • 500 g strawberries
  • 2 spring onions
  • 1 handful mint
  • 1 handful basil
  • 1 handful parsley
  • 1 lemon
  • 1 tbsp olive oil
  • 1 tbsp maple or honey
  • 1 tbsp butter or magarine
  • 1 tsp sugar

How to

  1. Bring a large pot with water to a boil. Peel the white asparagus generously (about 2x). Cut the ends (about 3cm) of both, white and green asparagus and throw them away. Cut the asparagus into about 3-4cm sized pieces.

    Add the butter (or magarine) and sugar into the boiling water and salt it. Add in the white asparagus and cook for about 5 minutes. Then add in the green asparagus and cook for another 5-10 minutes, depending on how thick the stalks are. You can test if they are ready by pieking through them with a fork. If they almost fall off the fork, they are done. Then drain them.

  2. In the meantime remove the green part from the strawberries and half them or cut them into quarters, depending on how big they are. Slice the spring onions and seperate the onion rings from each other.

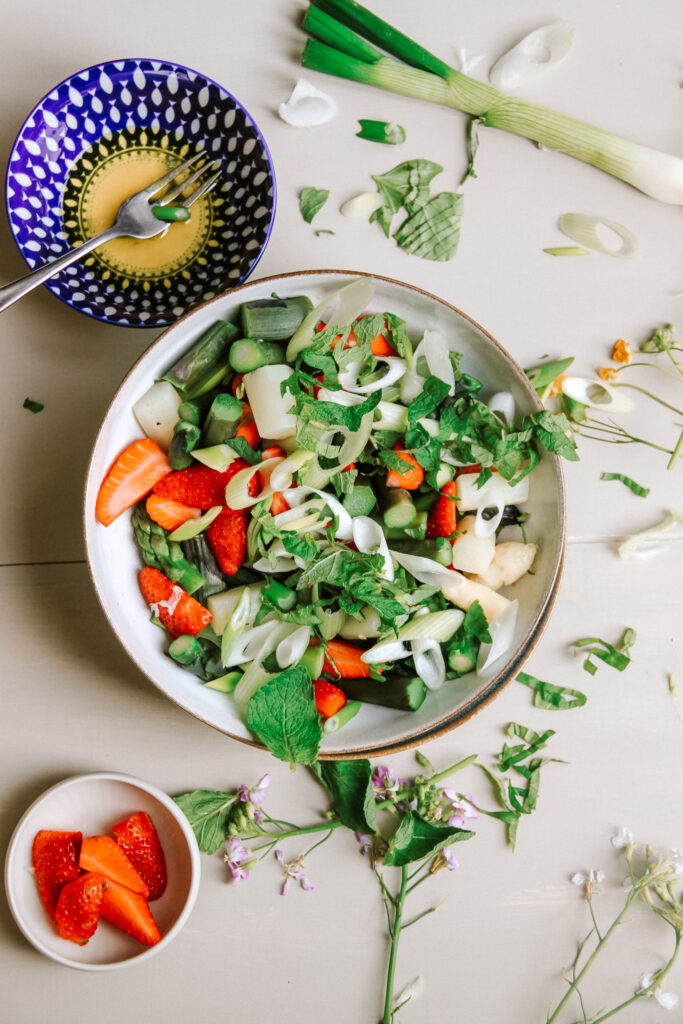
  3. Roughly chop up the basil, mint and parsley.

  4. Add the asparagus, strawberries, spring onions and herbs into a bowl. In a seperate small bowl combine the olive oil, the juice of 1 lemon and the maple syrup. Toss the salad in the dressing and serve!

    Enjoy!

Notes

If you want to have it as a main dish just make more (about half more, so 6 servings for 4 people). You can then also add in other things like hard boiled eggs, feta or mozzarella cheese, grilled chicken breast or prawns! 

Kategorie: Appetizers, Diet-Specific, Salad, Salads, Season, Side, spring, Vegan, Vegetarian Stichworte: asparagus, asparagus recipes, fancy salad, healthy, healthy asparagus recipes, healthy recipes, healthy salads, healthy spring, plant based, salad, side dish, side salad, spring, spring food, strawberries, strawberry season, vegan, vegan asparagus recipes, vegan recipes, vegan salads, vegan spring food

Best Cauliflower and Parmesan salad with Parsley vinaigrette

April 24, 2020 by katharina.kuehr Kommentar verfassen

Nothing beats a good side to go along with any meal. Adds the extra wow and takes anything to the next level. Just like this cauliflower and Parmesan salad. Its one of these non- boring but super easy sides that you will start wanting to make with everything.

I git the inspiration for this dish when I was out eating at a restaurant in Dubai. I order a side, a veggie salad and something really similar to this recipe arrive, and it was bomb amazing. I knew I had to recreate it but at first I wondered if anyone else would like it because I have a taste for very healthy things that barely anyone likes but my family loved it too! They enjoyed the recreation even more. 

Salads are always a great side dish, i believe. They are light, refreshing, and full  of vitamins. Just as this salad is, just without the greens. And it will even get people who don‘t enjoy eating vegetables a lot, to eat it because the parmesan in the dish really turns everything around. It does not taste super healthy anymore. 

And let me tell you so much, it is ready in 5 minutes. At least if you have a food processor, if you don‘t then you probably need 10. yes, it is that simple. You can just prepare it while your fish is sizzling in the pan or somethings roasting in the oven. The making, essentially is, cutting the cauliflower into really fine chunks, or pulse it in the food processor because it will save you a lot of time. Other, you simply need to grate some parmesan cheese and chop it even a bit smaller, finely chop some parsley and combine the ingredients for the vinaigrette. And its done. 

This „salad“ goes best with a simple main dish. A baked fish or a grilled chicken breast or anything Italian inspired because the cheese in the cauliflower salad matches the Italian spices a lot. Surprisingly, it even gies well with some asian inspired dishes such as my steamed salmon in chili lime sauce. It really works with most dishes, but these are the ones I would recommend! 

It also works for meal prep if you want to prepare it ahead of time and enjoy it throughout the week! Just, do not add the vinaigrette before, only when you want to eat it because otherwise it will get soggy and wont taste as good anymore! 

I hope that you will enjoy this recipe and make it oftentimes because it really is that good! 

Enjoy,

Katie // Une Petite Cuisinière

Print

Best Cauliflower and Parmesan Salad with Parsley Vinaigrette

Not your average side but much better. fresh cauliflower, hearty parmesan cheese, light and herby vinaigrette. Goes perfect with anything. A must.

Course Appetizer, Salad, Side Dish
Prep Time 5 Minuten
Total Time 5 Minuten
Servings 4 sides
Calories 142 kcal

What you will need

  • 1 head cauliflower
  • 40 g parmesan cheese
  • 2 tbsp olive oil
  • 1/2 large lemon, juiced
  • 1 tsp honey
  • 2 tbsp finely chopped parsley

How to

That is how it works:

  1. Cut the cauliflower into small florets. If you have a food processor, place them in it and pulse until they are fine chunks. If you do not have one, finely chop them into rice-sized pieces and place them in a large bowl.

  2. Grate the parmesan on the rather large side. Then roughly chop it again, to also reach the size of the rice corn. Add it to the cauliflower and generously salt.

  3. In a small bowl combine the olive oil, parsley, honey and lemon juice. Toss the "salad" in the dressing.

    Serve in bowls and enjoy!

Kategorie: Appetizers, Diet-Specific, Salad, Salads, Side, Vegetarian Stichworte: cauliflower, cheese, easy salad, easy side dish, extra side dish, healthy side, italian, parmesan, parmesan cheese, quick salad, quick side, salad, side dish, side salad, vegetarian

Shrimp, Carrot & Aubergine Mushroom Dumplings

März 27, 2020 by katharina.kuehr Kommentar verfassen

Dumplings are one of my absolutely favourite things to have. I always order them when going out to Chinese or Japanese restaurant but I have never dared to make them at home because I thought it was super complicated to make them. Wrong! They are not complicated at all, just require a little work, which is a lot of fun when doing it with someone else.

I do not know if anyone else loves the mix of textures and flavours or a decently spiced filling and a soft and doughy outer shell as much as I do. The combination always gets me and I believe that it is the perfect comforting and still healthy food. The great thing is that you can switch up the fillings and get so creative. There is nothing you cannot put into those cute, little dumplings.

Since everyone has different taste buds, I created 2 versions for this first dumpling blog post. A vegetarian (vegan actually) and one with seafood. They both are incredibly delicious. For the vegetarian I combined some super finely chopped eggplant and some super finally chopped mushrooms. The chopping really takes time but making it that small just changes the taste so much because it almost feels like ground meat, texture wise, and you have both veggies in one bite. This mixture is sautéed just for a minute or so and then tossed with a teriyaki sauce. The sauce really adds a lot of flavour and makes it so addictingly good.

The shrimp dumpling is even easier. I use frozen shrimps simply because they are easiest to get and to store. Before preparing them, they need to be defrosted, which you can either do by taking them out of the freezer a few hours before cooking or if you forgot to do that, you can place them in a bowl with warm water and let them defrost that way. The shrimps are also finely chopped. The other 2 ingredients are carrots, which are peeled and also chopped up really finely and wild garlic. I love to use wild garlic at this time of the year but if you do not have that on hand you can use normal garlic cloves instead. This mixture does not have to be pre cooked, because the shrimps I use are already cooked before frozen. If yours are not you can quickly pan fry them or you just cook them when steaming.

As for the outside dough, in this recipe we are using wonton wrappers. You can get those frozen at any asian market and sometimes even in supermarkets or speciality stores. Those are the same ones you would use for spring rolls. So you can deep fry, pan fry or steam them. Same with those dumplings. I am 100% down for steaming, simply because I believe they taste best and the flavours come out most, but you can also crisp them up in a pan. I would not recommend deep-frying them tough.

Here I decided to close them differently and bring them into diverse shapes but if this is too much work for you, leaving it with one is absolutely fine. The filling and shaping does take some time, because each wrapper is a bite, so it takes a while until you have gotten them all read but it is so worth it.

You can serve them as an appetiser when friends are over, or also if not, or just prepare more and make an asian spread for lunch or dinner (maybe with the satay skewers, which are coming up on the blog next week?). This recipe is totally family approved, not only everyone likes eating them, but the making them together part is. a lot of fun too!

When you serve them, then do so with some soy, teriyaki, chilli or peanut sauce to dip in!

I hope that you will love this recipe as much as I do!

Have fun cooking,

Katie // Une Petite Cuisinière

Print

Shrimp and Carrot Dumplings

Light, easy and super tasty. Crunchy carrot, soft prawns and fresh wild garlic, the result, an absoltue amazing dish!

Course Appetizer, dinner, lunch, Side Dish
Cuisine asian, Chinese
Prep Time 27 Minuten
Cook Time 8 Minuten
Total Time 35 Minuten
Servings 15 dumplings
Calories 48 kcal

What you will need

That is what you need:

  • 15 wonton wrappers
  • 3 carrots
  • 300 g prawns frozen and thawed
  • 1 handful wild garlic
  • 1 tbsp soy sauce
  • some sesame seeds

How to

This is how it works:

  1. Peel the carrot. Slice and cube it into mini chunks, about 2 mm large. The smaller you get them, the better they are. Or, grate them with a grater.

  2. Defrost the prawns and chop them very small too. Take the wild garlic, wash it and also cut this one into small sizes.

  3. Place all of those ingredients in a bowl and mix them together with the soy sauce.

  4. Take one wrapper at a time and place a teaspoon of the filling into the middle. Brush the edges of the wraper with some water and fold two diagonal edges together. Close the dumpling up by pressing the open sides to each other so they close.

  5. If you want to, you can make a small pattern by taking one end of the triangle and folding it towards the other side. The part of the wrapper where the dough has been folded over, now folds over in the same direction. Continue doing this until you have reached the other side of the wrapper.

  6. Repeat that with the remaining wrappers until the filling is used up.

    Bring some water to a boil in a pot. Take a steamer, a bamboo steamer preferably, and place the dumplings in it on top of some parchment paper to prevent them from sticking.

    Steam them for about 5-8 minutes until the dough is soft. Serve them with some sauces like soy sauce, chili sauce or peanut sauce, a sprinkle of sesame seeds and some fresh cilantro.

    Enjoy!

Print

Aubergine and Mushroom Dumplings

A vegan version of the best asian comfort food. Soft and tangy aubergine mushroom mix tossed in soft wrappers. INcredibly good.

Course Appetizer, dinner, lunch, Side Dish
Prep Time 27 Minuten
Cook Time 8 Minuten
Total Time 35 Minuten
Servings 15 wrappers
Calories 39 kcal

What you will need

That is what you need:

  • 15 wonton wrappers
  • 1/2 eggplant
  • 1 tbsp oil
  • 200 g mushrooms you can use champignons or oyster mushrooms
  • 2 tbsp teriyaki sauce can be substituted for 1 tbsp soy sauce and 1 tbsp honey
  • sesame seeds
  • fresh cilantro
  • 1 garlic clove
  • 3 cm ginger

How to

That is how it works:

  1. Finely chop the ginger, garlic, mushrooms and eggplant into about 2mm sized cubes. The smaller the better.

    In a pan heat up the oil. Sautée the veggies for about 2 minutes. Take them off the heat and stir in the teriyaki sauce.

    Take one wrapper at a time and place one teaspoon of the mixture in the middle. Brush all edges with some water. Take the four edges and pull them up to the center and press them together. Take the remaing open sides and also press those together so the dumpling is fully closed.

  2. Repeat that with the remaining wrappers until the filling is used up. 

    Bring some water to a boil in a pot. Take a steamer, a bamboo steamer preferably, and place the dumplings in it on top of some parchment paper to prevent them from sticking.

    Steam them for about 5-8 minutes until the dough is soft. Serve them with some sauces like soy sauce, chili sauce or peanut sauce, a sprinkle of sesame seeds and some fresh cilantro. 

    Enjoy!

Kategorie: Appetizers, Asian, Cuisine, Diet-Specific, Fish & Seafood, Japanese, Lunch/ Dinner, Poultry & Meat, Side, Vegan, Vegetarian, Vegetarian Stichworte: appetiser, asian, asian appetiser, asian food, Carrot, comfort food, dumplings, eggplant, family food, family friendly, family meal, healthy, healthy dumplings, healthy lunch, light lunch, prawns, teriyaki

Oven Baked Lemon Honey Feta

Februar 17, 2020 by katharina.kuehr Kommentar verfassen

Crispy and creamy cheese, lemony twist, honey tomatoes and tangy capers. Maybe with some baguette to dip everything up? Sounds pretty good – at least to me! 20 minutes, perfect for anyone, vegetarian, and pretty healthy too! This makes a perfect light lunch or a decent and quick weeknight dinner.  

I am a huge fan of feta cheese. I think it is a great addition to so many things such as pasta, eggs, on top of salads or bowl, or whatever. It just adds the finishing touch and takes everything next level. Especially in summer it is such an amazing food because it is a little fresh so it adds a summer twist to every dish. 

What is it like?

In summer when my uncle goes to Greece every year he always brings me a giant block of feta and it is like a dream. Then we´ll have Greek salads pretty much every day. They are just so simple in summer and take literally 10 minutes to make. This dish is pretty similar. Think Greek salad but baked. And without cucumber. It has very similar ingredients, tomatoes, feta, olives, herbs, olive oil. It is just a little different as it does not contain cucumbers (because baked cucumbers? I don’t know) and some lemon zest, which is like the best thing ever here. Plus some honey ad breadcrumbs to make it crispy and tangy. 

When you bake it and soak up the remaining sauce after with a baguette it just tastes sooo good! It is fresh, sweet, just super good. But my fvorite part of this dish is that the feta is turned into a creamy cheese but with a crispy crumble top and you just put a piece of it on some bread and have that creaminess and sweetness and crispyness all together in your mouth. 

But how do you actually make it?

Really easy – you take the feta cheese and place it in a baking dish. Throw some cherry tomatoes, olives and capers in and some grated lemon zest. You sprinkle some breadcrumbs on top and drizzle honey, olive oil and lemon juice. Place in the oven for 10 minutes and voila – there you go, done! This is how simple it is. That is so great! That simple but so flavorful! Honestly so good. 

When and for who?

This dish also is great for people with intolerances because you can use gluten free breadcrumbs if you can´t have gluten and feta cheese is not made out of cow´s milk but out of sheep’s milk, which means even people with intolerances can enjoy that. I would not recommend it for meal prep because then you loose the creaminess and crisp but I do not believe that this is necessary because it only takes 15 minutes!

I hope that you will make and enjoy this dish whenever you want! It is as good in winter as it is in summer so it really is up to you when you make it!

Happy cooking!

Katie // Une Petite Cuisinière

5 von 1 Bewertung
Print

Oven Baked Lemon Honey Feta

15 minute, tangy, sweet and fresh baked feta with a crispy crust and sweet tomatoes. Ideal dish for a light lunch or a quick dinner.

Course dinner, lunch, Main Course
Cuisine greek, Italian
Prep Time 5 Minuten
Cook Time 10 Minuten
Total Time 15 Minuten
Servings 2 servings
Calories 325 kcal

What you will need

That is what you will need:

  • 1 block Feta Cheese (150g)
  • 1 handful cherry tomatoes
  • 1 tbsp olives
  • 1 tbsp capers
  • zest of half lemon
  • juice of half lemon
  • 1-2 tbsp breadcrumbs
  • 1 tbsp olive oil
  • 1 tbsp honey
  • some thyme
  • some rosemary
  • some sea salt
  • some baguette and salad to serve with

How to

That is how it works:

  1. Preheat the oven to 240C or Grill.

  2. Place the feta on a baking tray or into a baking dish. Add the cherry tomatoes, capers and olives. Sprinkle the breadcrumbs, lemon zest and some sea salt on top.

  3. Drizzle to olive oil, honey and lemon juice and place the herbs on top.

  4. Put in the oven and bake for 10 minutes.

  5. Serve with some fresh beguette and some salad.

    Enjoy!

Kategorie: Appetizers, Greek, Lunch/ Dinner, Salad, Vegetarian, Vegetarian Stichworte: 15 minute, 20 minute, baked, baked feta, dinner, feta, feta cheese, fresh, greek, healthy, healthy lunch, honey, lemon, light lunch, oven baked feta, oven baked lemon feta#, quick, quick dinner, simple, tangy feta, tomato, unchaining, weeknight dinner

« Vorherige Seite
Nächste Seite »

Footer

What has been happening on my Instagram

Copyright © 2024 Une Petite Cuisinière on the Foodie Pro Theme