• Zur Hauptnavigation springen
  • Skip to main content
  • Zur Fußzeile springen

feel food club

  • Home
  • About me
  • My Recipes
  • Blog
  • Navigation Menu: Social Icons

    • Instagram

katharina.kuehr

The Easiest 20 Minute Garlic Curry Eggplant

März 24, 2021 by katharina.kuehr Kommentar verfassen

20 minutes in combination with curry and soft eggplant? Who can say no to that? Seriously, standing in the kitchen for hours when we are hungry and don’t have much time is just not great fun. So we often grab something quick and often not the healthiest options. But this does not have to be the case! It is sooo easy to make something healthy and delicious is like only twenty minutes! And really, these 20 minutes of cooking probably are the most meditative break during your busy day.

What’s special about this dish?

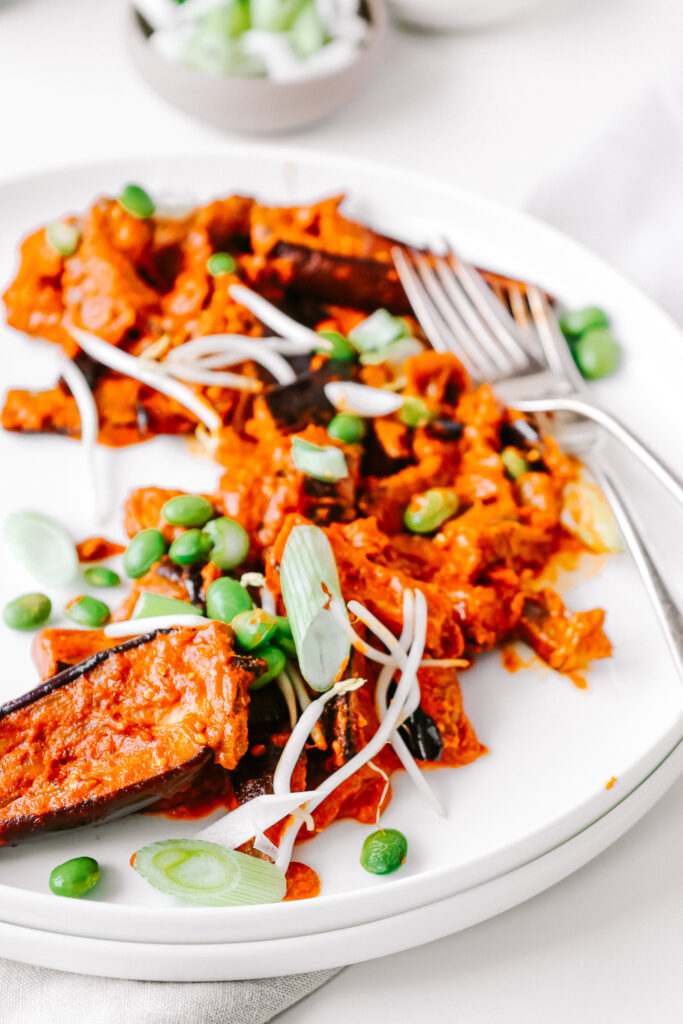
it is not quite a regular curry – but it also is not a stir fry. It is something inbetween. Actually I have been inspired by Baba Ganush when I came up with this dish (which is a middle eastern eggplant dip) and wanted to make a curry version of it that is not quite as creamy. And that kind of is what it turned out to be – a mix of Baba Ganush, Curry and Stir Fry. Anyway, no matter how you label it, it is super addicting.

Contrary to regular curry, it does not contain many different veggies and it not as saucy. The only veggies in it are the eggplant and the edamame. Why? Because we’re keeping it simple. This way the flavors also come through more intense and you can really focus on the eggplant and edamame. The eggplant is basically the base and adds some softness and the edamame gives a nice & fresh contrast.

Is this dish healthy?

OH YES! The main star of the show is eggplant! Besides being super tasty, eggplant also is super healthy! Eggplants are loaded with vitamins, minerals and fibre. Plus they come with a bunch of antioxidants and they are incredibly easy to cook! You could roast them like in the Sesame Roasted Miso Eggplant Recipe or you could add it to an italian tomato stew or throw it into a salad! Options are endless!

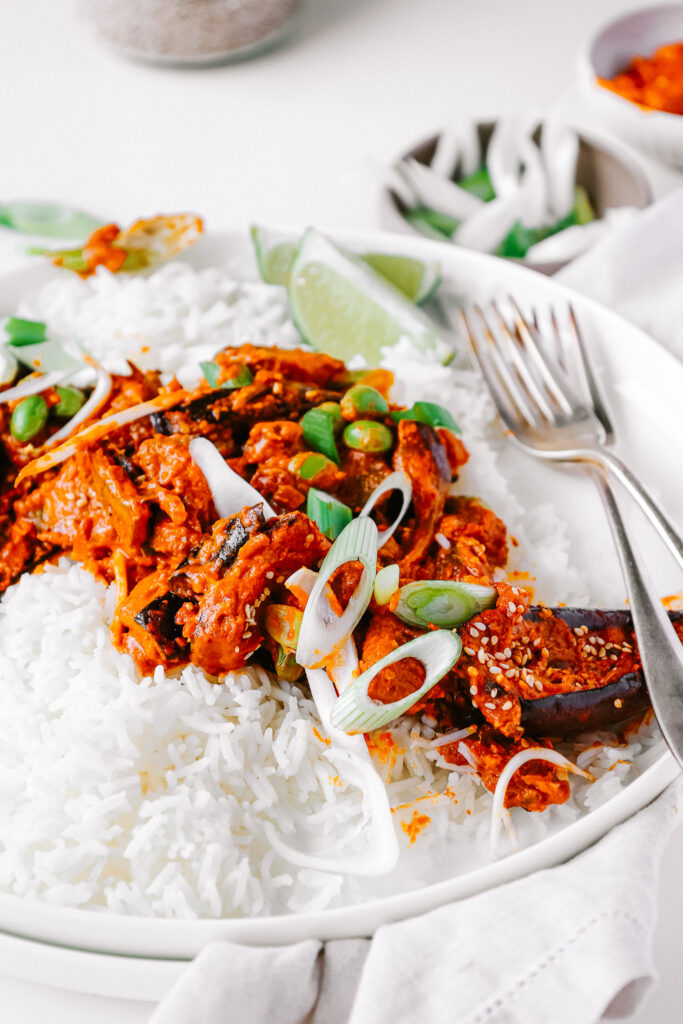
Then we also have edamame. Edamame actually is one of my favourite foods ever! The actually are a bean, and therefore extremely high in fibre and protein!! Plus, obv. a bunch of minerals! That all comes with a side of rice, which provides us the carbs to stay happy and healthy and full of energy throughout the entire day!

How to make this dish?

That now really is easy as pie!! It really only comes down to chopping garlic and eggplant and frying them in oil untl soft. Here we need to salt the eggplant, because the salt helps to get the water out of the eggplant, which makes it cook quicker. All that’s left to do now, is to add the edamame and the curry paste that has been mixed with the coconut milk and let it simmer. To garnish we only chop up some spring onions and cilantro and there you go! Easy as pie!

Meal prep friendly?

Yepyepyep! Curry actually is one of the foods that is the meal prep friendliest. It actually enhances in flavour when you let it stand overnight. You can just store it separately from the rice and either heat it up in a pot with a splash of water or in the microwave. This really makes it even more suitable as a quick lunch, because then it really only takes about 5 minutes!

Honestly, this has become one of my new favourites and it is soso good! Easy, quick, super tasty, and healthy! I do not know what you are waiting for any more and why you are not already in the kitchen cooking! Have fun cooking!

Print

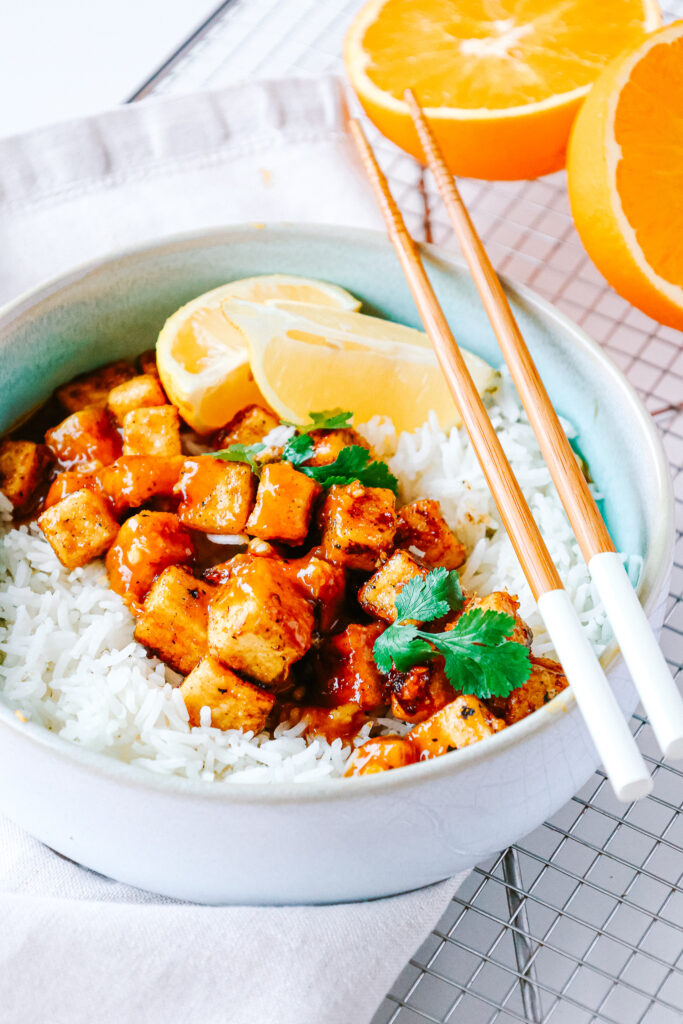
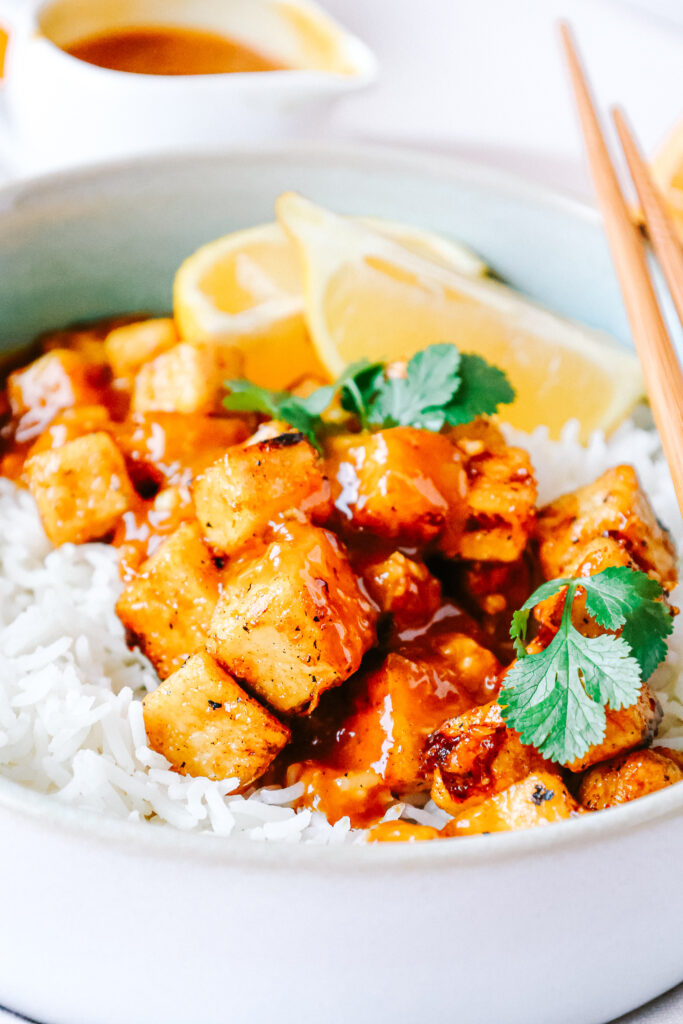
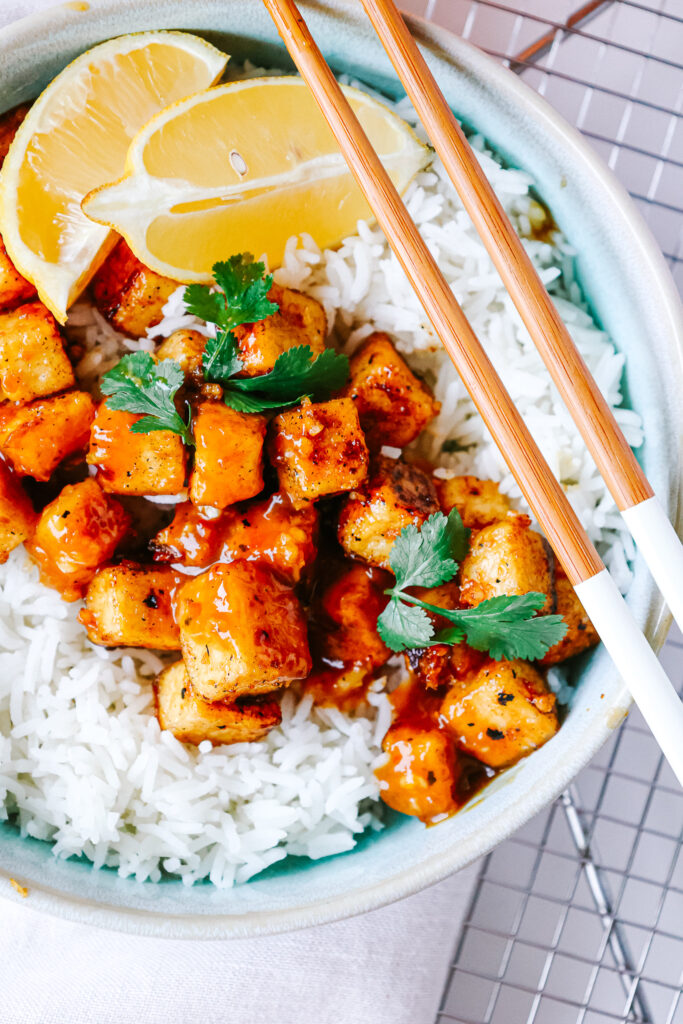
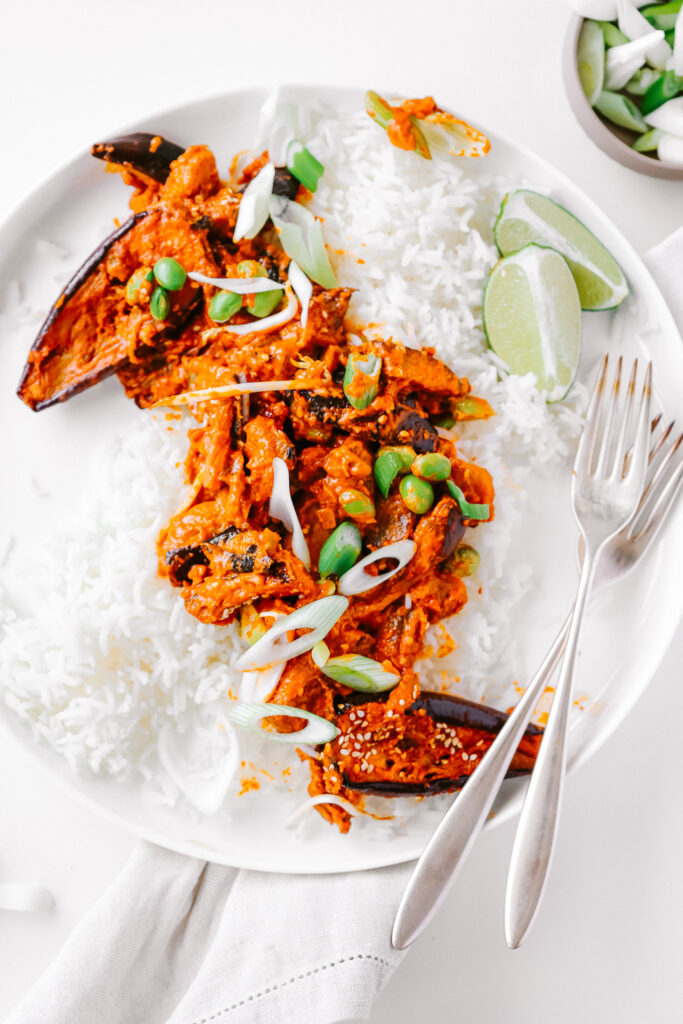
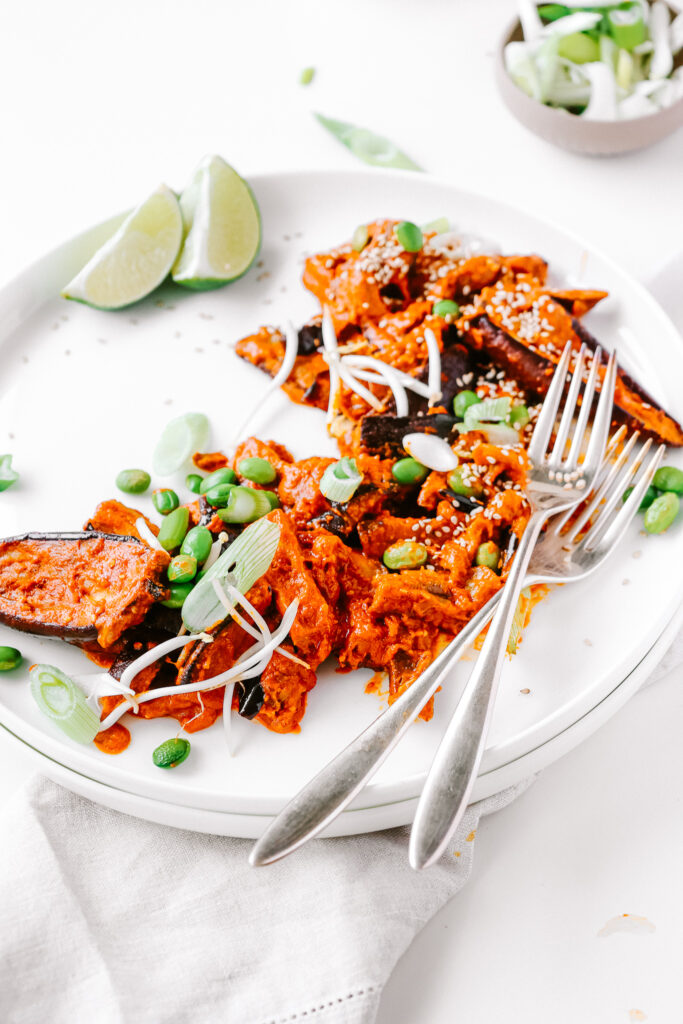
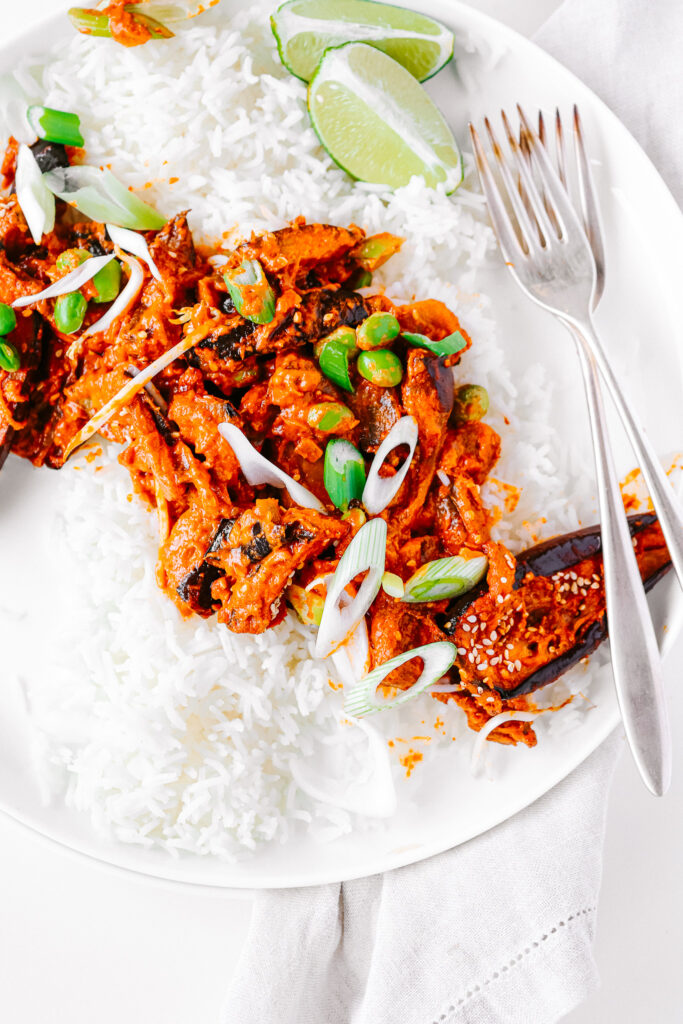
The easiest 20 minute garlic curry eggplant

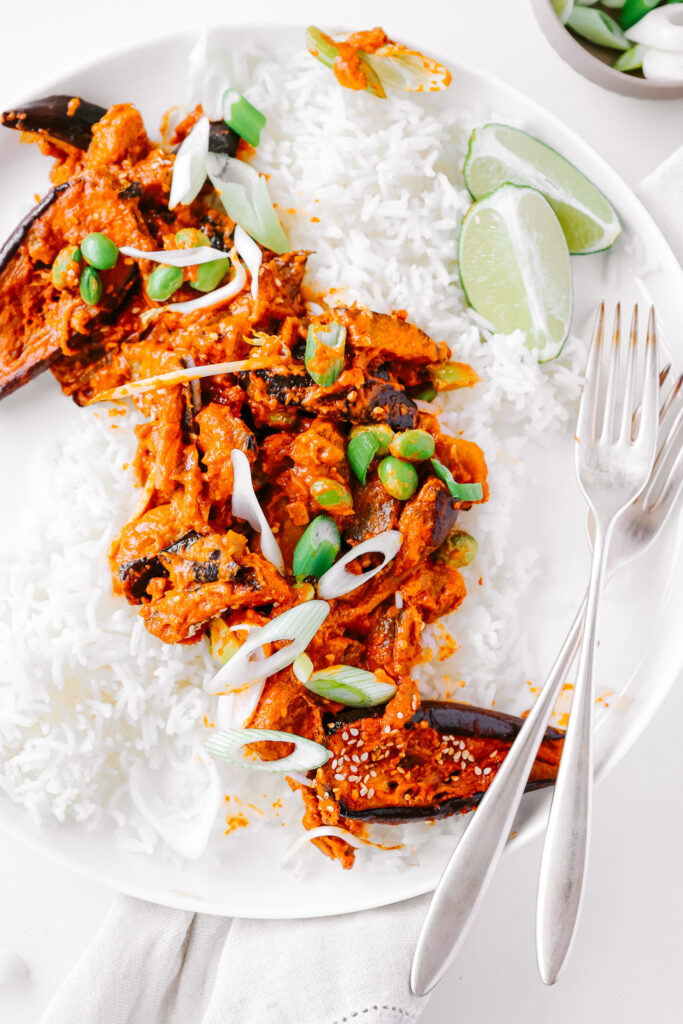
Ready in basically no time and yet so full of flavor and deliciousness. Th perfect dish for quick lunches or easy dinners. Soft and garlicy eggplant tossed in a spicy red curry sauce on a bed of fluffy rice. All you really need!

Course dinner, lunch, Main Course
Prep Time 5 Minuten
Cook Time 15 Minuten
Total Time 20 Minuten
Servings 2 servings

What you will need

  • 1 eggplant
  • 4 tbsp curry paste
  • 100 ml coconut milk
  • 1 tbsp oil
  • 2 garlic cloves
  • 1 tbsp soy sauce
  • spring onions & cilantro for garnish
  • 150 g rice

How to

  1. To a pot add the rice along with twice the amount of water and a generous pinch of salt. Bring to a boil, then reduce to a simmer. Once all water is absorbed turn down to very low heat and let the rice stand to fluff.

  2. In the meantime finely chop the garlic clove and roughly cut the eggplant into about 2-3cm sized chunks. In a pan heat up the oil, then fry the garlic in it for about 1-2 minutes until fragrant before adding the soy sauce. Then add the eggplant and fry on medium high for about 5-8 minutes.

  3. In the meantime combine the curry paste and coconut milk in a bowl and slice the spring onions.

  4. Then add the coconut-curry mix to the eggplant and stir it in. Turn down to medium heat and let cook for about 8 minutes, until the eggplant is nice and soft.

  5. By now the rice should be done too. Divide it onto the plates and top with the eggplant. Sprinkle some sesame seeds and spring onions and serve with a little cilantro!

    Enjoy!

Enjoy,
love,
Katie

Kategorie: Uncategorized Stichworte: 20 minutes, aubergine, easy, easy lunch, easy meal, eggplant recipes, einfach, family meals, gesund, healthy, healthy vegan, lunch, plant based, quick, quick meals, schnell, schnelles Essen, schnelles Mittagessen, vegan, vegetarian, vegetarisch, weeknight dinners

Super Easy 20-Minute Sticky Orange Tofu

März 18, 2021 by katharina.kuehr Kommentar verfassen

Put all our prejudices aside and make this recipe. If you used to think tofu is boring, you will be proven differently. We have got the sweet and slightly spicy flavours of orange and chilli combined in a sticky sauce that covers the tofu. Definitely not your average tofu.

Orange Tofu is a dish that originally is made with chicken instead of tofu and therefore also called orange chicken. Orange Chicken originated in China, where it is rarely found in traditional restaurants today. It got really popular in the US through Panda Express. There the chicken is battered, then fried and then tossed in a orange sauce, which thickens and caramelizes. 

What’s special about this dish?

It is a vegan version if the orange chicken and a mich healthier one too. It is not battered and deep fried and also not tossed in a sauce loaded with white refined sugar. It is a much healthier, easier and quicket version of the original and still tastes really intense and good! So you could say that it rather is a Chinese inspired dish and less the original one.

Is this dish healthy? 

Yep yep. What is it made of? Well our main ingredient is tofu. Tofu is really high in protein and also comes with some fiber. Then our main „ingredient“ is the orange sauce. This is mainly made from freshly squeezed orange juice, which is a vitamin C bomb. Then we have some soy sauce, vinegar, fresh ginger and garlic and some honey, plus some cornstarch in which the tofu is tossed and then fried in a little hot oil.

Contrary to regular orange chicken, we have rather little fat here because instead of deep frying it, it is simply stir fried in a pan. Also, we are using honey instead of white refined sugar. Honey still contains sugar but less per 100g in comparison to regular sugar and it actually comes with antioxidants. 

How to make this dish:

This is super simple. So, we start by pressing the tofu. To do so we just lay some kitchen paper beneath and on top of a block of tofu and them let something heavy press it down for a few minutes. This will make the liquid drain from the tofu so it gets crispier in the pan later on.

Next we just chop it up into about 1 cm sized cubes. These are then tossed in some cornstarch. The cornstarch binds the remaining liquid and kind of forms a crust when frying. After that, the tofu is fried in some hot oil from each side for about 1-2 minutes till crispy. 

In the meantime we combine the orange juice & zest, soy sauce, honey or maple, cornstarch, ginger, garlic and vinegar in a bowl and then pour it over the tofu and let it simmer on low heat for a few minutes. Because of the cornstarch the sauce will thicken and the honey makes it caramelise. That already pretty much is it, we now only have to divide it onto plates or bowls and garnish with some greens!

Meal prep friendly

You can easily make this dish in advance and reheat it. If you have a stove I would prepare everything in advance and store the tofu and sauce separately and heat it up together whenever you want to have it. If you do not have a stove when eating it, you can simply heat it up in the microwave all together. Maybe you’ll then need to add a little water.

Print

Super Easy 20-Minute Sticky Orange Tofu

Easy, delicious and healthy. A vegan and lighter version of the american-chinese classic and let me tell you, it at least is as delicious!

Course dinner, lunch, Main Course
Cuisine American, Chinese
Prep Time 10 Minuten
Cook Time 10 Minuten
Total Time 20 Minuten
Servings 2 servings

What you will need

  • 300 g tofu
  • 4 tbsp cornstarch
  • some rice or quinoa to serve with

For the sauce:

  • 1 orange zest & juice
  • 2 tbsp soy sauce
  • 1 garlic clove
  • 1 cm ginger
  • 1 tbsp cornstarch
  • 60 g honey or maple
  • 1 tbsp vinegar

How to

  1. Lay the tofu onto some kitchen paper and cover it iwth some more. Lay something heavy on top and let it press for abou 5-10 minutes, so as much liquid as possible goes out in order for the tofu to become crispy when frying. Then cut into 1 cm sized cubes and toss it in the cornstarch

  2. In the meantime grate the orange, then press it. Combine it with the remaining ingredients for the sauce.

  3. Heat up the oil in a pan and fry the tofu on each side for about 1-2 minutes until crispy and golden. Turn the heat down to medium heat and pour in the orange sauce. Give everything a good mix and let simmer for about 3-4 minutes until it has thickend a bit.

  4. Serve with some rice or quinoa and garnish with some cilantro! Serve and enjoy!

Honestly, this dish is so quick, so easy to make and so good! You’ll really, really love it and it is so so simple! I hope you’ll like it as much as we do and have a great time cooking it!

Enjoy!
Love,
Katie // Une Petite Cuisinière

Kategorie: American, Chinese, Cuisine, Diet-Specific, Lunch/ Dinner, My favorites, Vegan, Vegetarian Stichworte: 20 minutes, American, Chinese, easy tofu recipes, easy vegan, healthy lunch, healthy vegan, lunch, orange, plant based, quick, quick and easy, tofu, tofu recipes, vegan, vegan cooking, vegan lunch

Super Easy & Saucy 15-Minute Cajun Chickpea Bowl

März 16, 2021 by katharina.kuehr Kommentar verfassen

To be fair – I do not think you could ever go wrong with something saucy & spicy. And when you combine it with some chickpeas, tomato and coconut milk, there is no way you could go wrong. These soft beans in a creamy, rich and spicy sauce on top of fluffy quinoa and served with some thick greek yoghurt. The perfect lunch.

What is special about this dish?

Usually you you use cajun seasoning to marinate something, which you then fry or grill. So mostly that it becomes crispy. You could definitely do this with chickpeas but in this recipe it is used to make a sauce in which the chickpeas are in. It is not like any other sauce, maybe a bit like the tomato – coconut mixture in tikka masala but without the curry spices.

And we do no serve them on a regular salad or bowl but with some greek yoghurt, which adds a lot of flavour and its richness pairs perfectly with the sauciness of the chickpeas. Also the quinoa soaks up the sauce perfectly and completes the dish.

Is this dish healthy?

Yes, yes, yes! The quinoa, as a food of the month January, is loaded with protein, carbohydrates and fibre. Plus many essential vitamins and minerals. Then we have the greek yoghurt, which also is an excellent source of protein.

he chickpeas, also, are packed with fibre, which helps you with digestion and they are a great source of plant based protein. For all those who currently are or are considering a plant based diet – chickpeas are a great staple to always have at home. Plus, they are super handy and convenient since you can buy them pre-cooked and canned. Just make sure you drain and wash them before eating, otherwise you will eat the liquid they are stored in, which can cause you having gas in your stomach.

How to make this dish

This is one of those dishes, which you can make in one pan. You start by frying some onion and oregano in some oil. Once these become nice, glassy and fragrant, you can add the chickpeas and the (homemade) cajun spice mix. This is just fried for a few minutes, so the flavours really are absorbed. Now we are adding some tomato paste mixed with water to thin it out, and some canned coconut milk. This makes the sauce nice and rich. This can now simmer for about 5 minutes before we add in some sort of greens such as arugula or spinach. Once this has wilted down we are ready to serve it.

For this you quickly whip the greek yoghurt with a spoon, so it gets nice and creamy and then spread it on the bottom of a bowl or plate. Add the quinoa on top and then the chickpeas along with the sauce. You can garnish with some parsley and that’s already it! Fairly simple!

How and when to best have it + meal prep?

This works great as a quick lunch to have during a busy day. You could for example also make it a bit saucier and serve it with some naan bread as a comforting dinner. The chickpeas do work very well for meal prep. You can either reheat them in the microwave or with a splash or water or coconut milk on the stove.

Print

Super Easy & Saucy 15-Minute Cajun Chickpea Bowl

Creamy, saucy, spicy chickpeas flavoured with cajun spice and serve with some rich greek yoghurt and fluffy quinoa to round up the tanginess of the chickpeas.

Course dinner, lunch, Main Course
Cuisine American
Prep Time 5 Minuten
Cook Time 10 Minuten
Total Time 15 Minuten
Servings 2 servings

What you will need

  • 120 g quinoa
  • 1 yellow onion
  • 1 tbsp olive oil
  • 1 can chickpeas
  • 3 tbsp tomato paste
  • 3 tbsp water
  • 4 tbsp canned coconut milk
  • 1 handful arugula or spinach
  • 200 g greek yoghurt
  • 1 tsp oregano

For the Cajun Spice Mix: (or just use 1,5 tbsp cajun spice mix)

  • 2 tsp paprika powder
  • 1/2 tsp salt
  • 1/2 tsp cayenne pepper
  • 1 tsp cumin
  • 1/2 ts chili flakes
  • 1 tsp garlic powder
  • 1/4 tsp pepper

How to

  1. Prepare the quinoa according to package intructions or just cover it with twice the amount of water and add some salt. Then bring to a boil, the reduce to simmer and let simmer until all water is absorbed. Then turn down to very low heat, cover and let it stand and fluff until finished with the rest.

    In a pan heat up the oil. Finely dice the onion and fry it along with the oregano for 1-2 minutes until fragnant. Drain and wash the chickpeas and add them to the pan along with the cajun spice mix. Fry for about 2-3 minutes.

  2. Combine the tomato paste with the water. Add this and the coconut milk to the chickpeas and let simmer for about 5 minutes. Add in the arugula and let it wilt down.

  3. Whisk the greek yoghurt with a spoon so it is creamy and spread it onto the bottom of a bowl of plate. Top with the quinoa and the chickpeas. Serve with some parsley and enjoy!

I hope you’ll enjoy this and have fun cooking this!

Enjoy,
Love,
Katie

Kategorie: American, Cuisine, Diet-Specific, Lunch/ Dinner, Vegetarian, Vegetarian Stichworte: 15-minute, cajun, cajun recipe, chickpeas, creamy, easy cooking, easy lunch, easy recipe, healthy cooking, healthy eats, Kichererbsen, lunch, sauce, saucy, vegetarian, vegetarisch, vegetarisch kochen

Healthy-ish Double Chocolate Salted Caramel Brownies

März 12, 2021 by katharina.kuehr Kommentar verfassen

There is nothing like this. I promise. All of the good things combined and more than you have ever wanted. On the bottom we have the fudgy and chocolaty brownie (which already is so good on its own), then we have the creamy salted date caramel layer, which is just heaven and then everything is topped with a crunchy chocolate layer. If you are not hungry by now, I do not know what would make you hungry…

What’s special about this dish?

Well, a lot actually. The brownies are refined sugar and butter and made with wholewheat flour. So, they are pretty healthy actually. Then for the caramel, instead of cream, butter and sugar we are only blending dates, coconut milk and sea salt. This will become really creamy and thick and just tastes amazing!! Honestly, it was a mistake not having combined brownies and date caramel for such a long time! This combo is out of the world. Not exaggerating. So the brownie is pretty healthy, easy to make and still tastes really good!

Is this dish healthy?

Yepyep, as already mentioned, unlike regular brownies, this one is not loaded with sugar and saturated fats. It’s made out of eggs, coconut sugar (which still does contain sugar but less than white, refined sugar, plus it also comes with other nutrients), vanilla, oil (which is high in unsaturated fats), wholewheat flour (great source of fibre) and cacao powder (actually really good for you because it is super high in antioxidants)

Obviously we also have chocolate (super good for your soul 🙂 – when purchasing the chocolate, make sure to check the label to best get one that has been sweetened with any form of natural sweetener and does not contain a bunch of ingredients you don’t know and cannot pronounce). Plus, the dates, which also are really high in fibre, and dates in general are a super beneficial food for you as they are a great source of antioxidants and vitamins). So you see – all in all, pretty healthy. And especially healthy for your soul!

How to make this dish:

Easy peasy, chocolate squeezy. Or something like that. No, this is fairly easy. No eggs need to be separated, no complicated things need to be done. It essentially comes down to melting chocolate in the microwave, whipping eggs, sugar and vanilla till fluffy and then pouring in the chocolate and oil, as well as the flour-cacao powder mixture. That’s already it for the brownie, so very safe to make for everyone.

The caramel layer is not much more difficult. If you have soft dates (like medjool dates), then they blend perfectly fine. If yours are a bit harder, you can just soak them in hot water for a few hours and they will also become soft, which makes them easier to blend. So these are then just mixed with the coconut milk and the sea salt and that’s it. The chocolate layer on top is very self-explanatory, so you just need to melt the chocolate and pour it above. It’s easier if the other layers have cooled down a bit.

Meal prep friendly?

In theory yes! In real life, let’s say, I’d be surprised. Every time we make them, they’re gone within 3 days (If they even last this long). But yes, in theory they would definitely last up until a week in the fridge if covered or stored in an air tight container. If you have too many and make them on batch, you could also freeze some and slowly thaw them up before eating (so just placing them at room temperature and slowly letting them unfreeze).

In terms of how to best have these, there is no right answer. Breakfast, lunch, snack, dinner, dessert. Do we even need to ask when to best have brownies? Is there even a time where you cannot have brownies? I hope not. How to best have them is a different question. They are really good and rich on their own, so there is no need to add anything else, although they go great with some ice cream.

This recipe really is a must try for all chocolate lovers out there! Easy, healthyish and so worth it to make. They’ll upgrade ANY week! I hope you genuinely like them and enjoy making them!

Print

Healthy-ish Double Chocolate Salted Caramel Brownies

The best (and only) brownie recipe you'll ever need! This is easy, not your average brownie and so good.

Course Dessert, Snack
Prep Time 20 Minuten
Cook Time 20 Minuten
Total Time 40 Minuten
Servings 12 slices

What you will need

For the brownies:

  • 3 eggs
  • 180 g coconut sugar
  • 1/2 tsp vanilla powder
  • 100 g milk chocolate (preferably one that has been sweeneed with natural sweetener like coconut sugar)
  • 100 g dark chocolate (preferably one that has been sweeneed with natural sweetener like coconut sugar)
  • 120 ml oil (flavor neutral oil)
  • 120 g whole wheat flour
  • 40 g cacao powder
  • 1/2 tsp baking powder

For the rest:

  • 250 g dates (soft ones work best – if you do not have soft ones, you can soak them in hot water for a few hours)
  • 150 ml coconut milk
  • a pinch sea salt
  • 100 g chocolate (preferably one that has been sweeneed with natural sweetener like coconut sugar)

How to

For the brownies:

  1. Melt both chocolates in the microwave, then combine with the oil and let cool a bit. Whisk the eggs, sugar and vanilla for about 5 minutes until fluffy.

Love,
Katie // Une Petite Cuisinière

Kategorie: Desserts, My favorites, Snack, Sugar Free Stichworte: brownie, brownies, cacao, caramel, chocolate, dates, dessert, fudgy, healthy, Healthy Dessert, refined sugar feee, Snack, sugar free, veggie

« Vorherige Seite
Nächste Seite »

Footer

What has been happening on my Instagram

Copyright © 2024 Une Petite Cuisinière on the Foodie Pro Theme