• Zur Hauptnavigation springen
  • Skip to main content
  • Zur Fußzeile springen

feel food club

  • Home
  • About me
  • My Recipes
  • Blog
  • Navigation Menu: Social Icons

    • Instagram

vegan

Easy and healthy Vegan Cookie Dough Sandwiches with Fig Ice Cream

September 18, 2019 by katharina.kuehr Kommentar verfassen

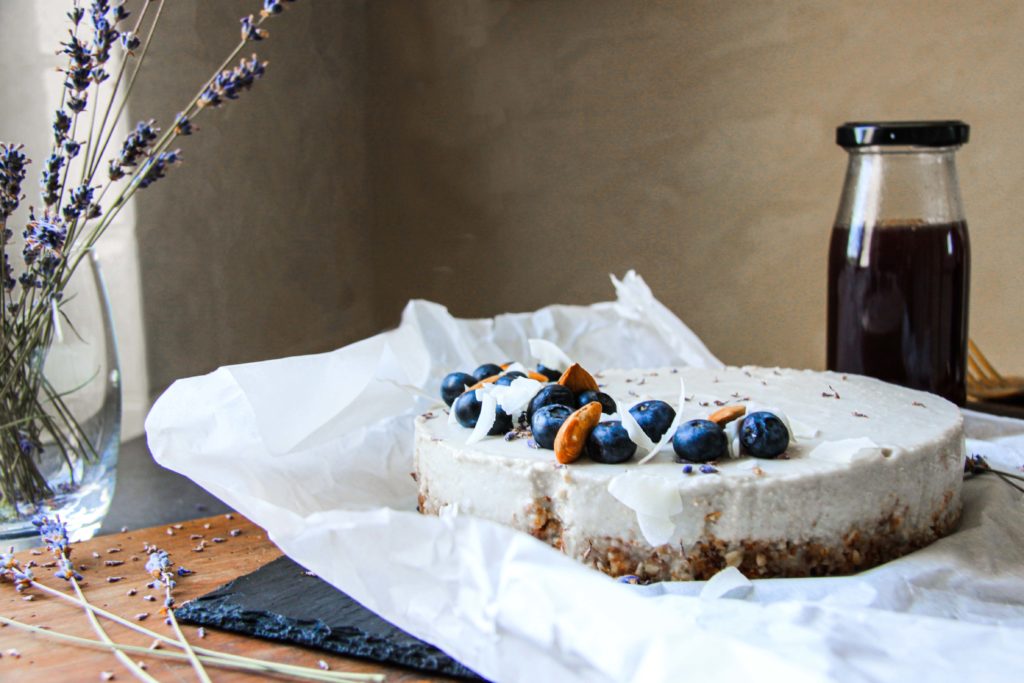
So summer is basically over, but who says that you only can have ice cream in summer? Well, I definitely don’t! I think you can have Ice cream all year round! Well, at least these really delicious healthy, vegan ice cream sandwiches. 

In summer there are soo many ice cream sandwiches at every corner. And they are delicious. But if you eat one of them every day that (unfortunately) can’t be too healthy. But they are so delicious, right? So that’s why I made this healthy version of cookie dough ice cream sandwiches so you can indulge with your sweet tooth but still nourish your body. And they are really delicious! They are sweet, chewy, and really delicious.

Just to tell you, the cookie dough does not exactly taste like the one you would have when baking cookies with butter, eggs and white flour. But it tastes similar. And really delicious. And it is healthier, way healthier. These super delicious bars are even keto & low carb. I just really like every single bite I take of them and they are so addictive. Like so. I feel like you can always eat them no matter what time. They are just so quick and easy to grab which makes a perfect snack. Simply store them in the freezer and you can just get one whenever passing by.

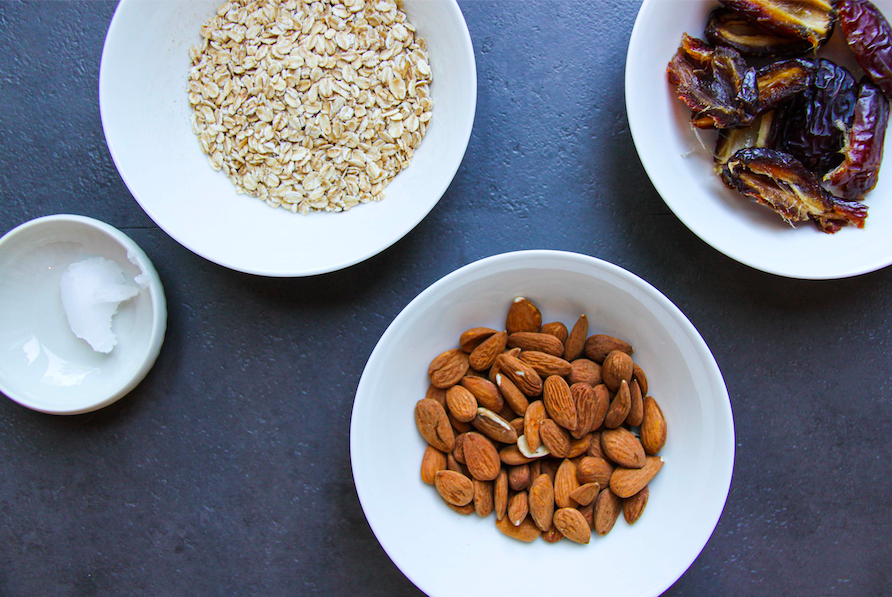
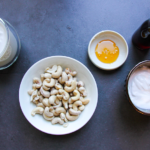
The cookie dough is made out of simple ingredients. I used dates for sweetness, which are really high in fiber, antioxidants, other health benefits, some almond butter, for some creaminess and healthy fats, vanilla extract, to get that cookie flavor, apple sauce for sweetness and texture, and coconut flour to reach a cookie consistency, and flavor but still get some protein and fiber. So good. And so simple to make. Just blend it all up, so simple, no?

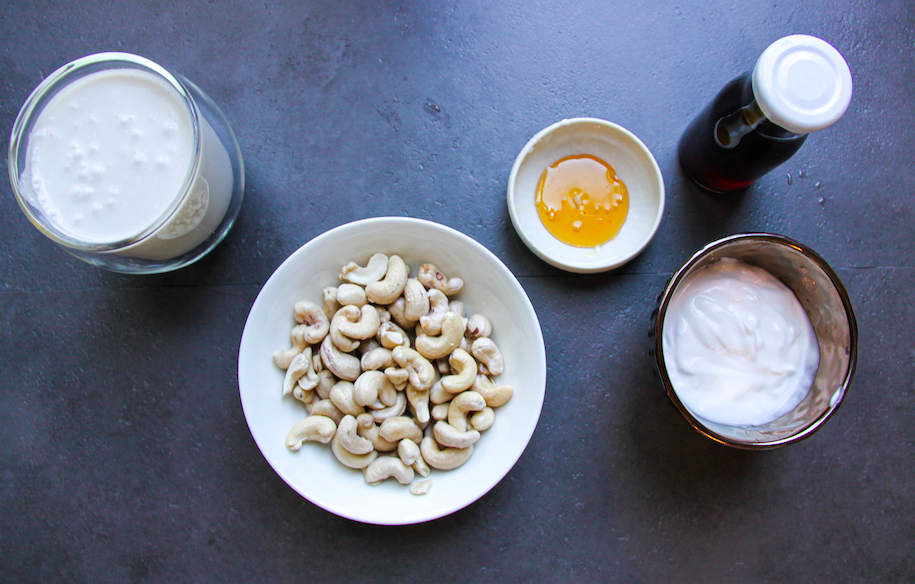
The filling is even easier. It’s 4 ingredients. It’s just frozen bananas, coconut yoghurt, vanilla extract, and figs. The vanilla extract does make such a difference in it as it turns the ice cream from average banana tasting nice cream into vanilla ice cream which is sooo good in-between the two layers of cookie dough. The fresh figs just give it some freshness and fall – like feeling but you can leave them out or substitute them with any other fruit if you don’t like figs. I just really like their sweetness and think they work so well in it.

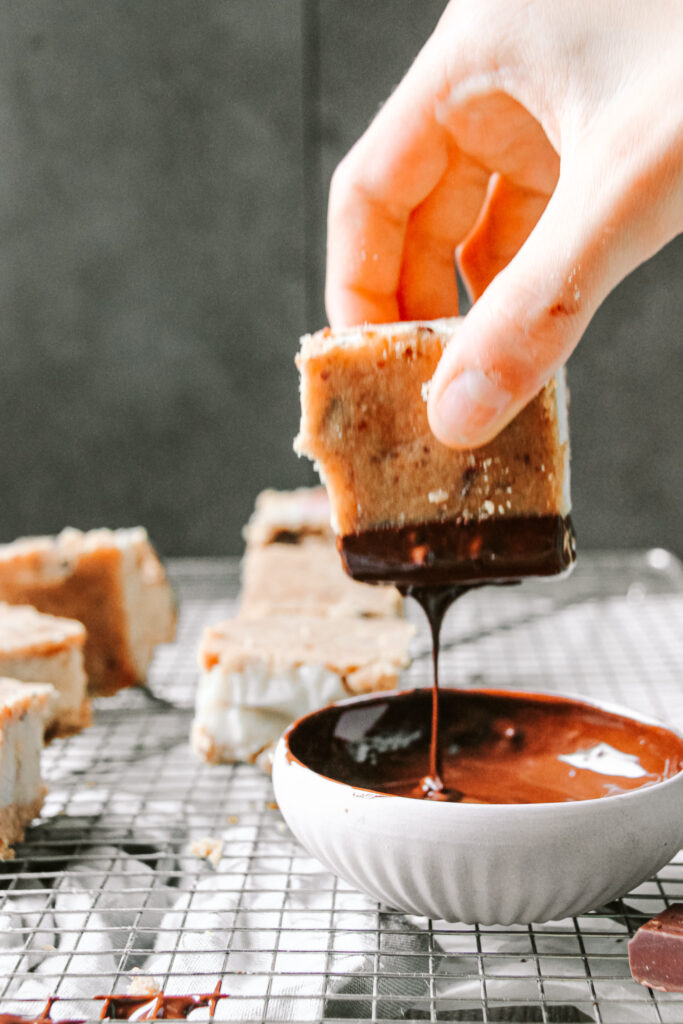
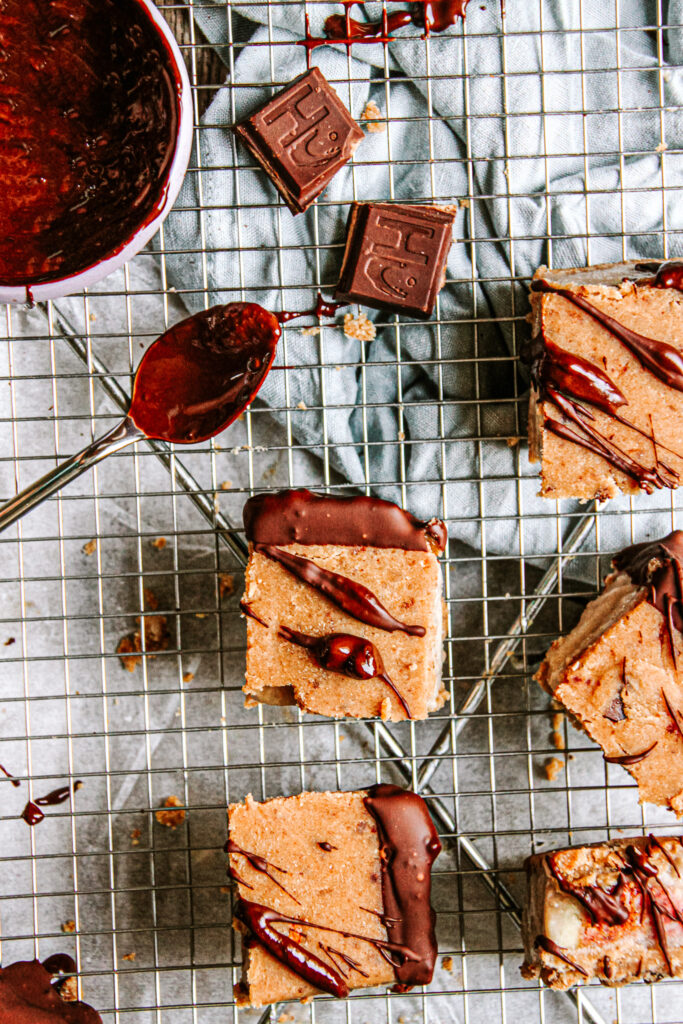
To give everything the cherry on top I dipped the frozen sandwiches into melted chocolate and drizzled some extra on top. So good!! I used my favorite brand of all time, which is HU Chocolate. It’s so simple ingredients without any refined sugar, or preservatives, just simple and wholesome ingredients. They have so many different flavors but I went for basic sea salt as I think the sandwiches are already really packed with awesome flavor! I hope that you will like this super easy dessert/ snack and it will help you to find an excuse for also being able to eat ice cream in winter. If you do recreate it be sure to tag me with @uneptcuisiniere or with #unepetitecuisiniere!

Print

Healthy Vegan Cookie Dough Ice Cream Sandwiches

Perfect dessert or snack (not only in summer!!) and so good!

Course Dessert
Prep Time 20 Minuten
Freezing 9 Stunden
Total Time 9 Stunden 20 Minuten
Servings 16 slices
Calories 156 kcal

What you will need

For the cookie dough

  • 9 small dates about 200g
  • 3 tbsp almond butter
  • 140 g coconut flour
  • 150 g apple sauce apple butter works too
  • 30 g dark chocolate

For the Ice cream

  • 3 bananas sliced up and frozen
  • 1.5 tsp Vanilla Extract
  • 80 g coconut yoghurt or any non-dairy yoghurt

Other

  • 70 g dark chocolate or chocolate chips

How to

Thats how it works:

The dough:

  1. Cut the chocolate into small chunks.

  2. Take out the cores of the dates and place them in the food processor until they create a sticky paste. Then add the almond butter and the apple sauce and blend to combine. Add the coconut flour and chocolate chips and pulse until well combined and having a sticky-like texture.

  3. Take a loaf pan and lay it out with parchment paper. Press half of the cookie dough into the pan, on the bottom to create a flat layer. It should be about 7mm thick. Place it in the freezer and store the remaing cookie dough in an air tight tupper ware in the fridge.

The Ice cream:

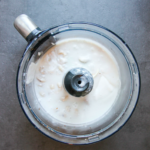
  1. Place the frozen bananas in the food processor or high speed blender (it has to be a really strong one because otheriwse it wont break the frozen pieces apart. Add some of the coconut yoghurt, but not too much to start with as you can still thin it out as you go. Lastly add the vanilla extract and blend until creamy. if too thick add more yoghurt.

  2. Take the cookie dough out of the freezer and pour the ice cream on top. Put it back and let it freeze for at least 6 hours to overnight.

To finish:

  1. Once frozen, place the remaing cookie dough on top of the ice cream layer and freeze for another 2-3 hours. Then take them out and cut them into 16 equal slices.

  2. Melt the 70g of chocolate and dip the sandwiches in it with one side, then place it back in the freezer. Continue until all of the slices are covered with chocolate on one side. .

  3. Store them in the freezer and they will last upto one month.

Kategorie: Desserts, Snack, Sugar Free, Vegan Stichworte: cookie, cookie dough, dessert, figs, icecream, icecreamsandwiches, sandwiches, vegan, vegancookiedough, vegansandwiches

No-bake Vegan Cashew Lavender Cake

September 8, 2019 by katharina.kuehr Kommentar verfassen

When it comes to making vegan desserts, I am usually not the first person to be asked. Don´t get me wrong, I do like desserts, although they cannot be too sweet, and I do like vegan food but I just have so little experience with making vegan desserts. I am all into that richness and creaminess of dairy products as cream, mascarpone and cream cheese. Especially in summer, when I do not want to turn the oven on but still have a slice of cake. 

This cake has definitely changed my mind though. I do not need the rich milk products (which are not necessarily healthy) in order to make a no-bake cake. A plant based version definitely is an alternative. It still contains a richness and a lot of flavor but is healthier and vegan! I do not want to call it a vegan cheesecake as others might do, because I do not believe that it tastes like cheese and in my opinion a CHEESE cake can´t be vegan. 

I made this recipe using a sugar free syrup and only sweetened it up with a little maple syrup because I wanted to make it a healthier and refined-sugar free version but also not have it too sweet. The coconut milk and the cashews already give it some sweetness so I did not believe that it is necessary to add a lot more. If you are a sweet person, you can add as much syrup as you desire!

For the crust I decided to use few ingredients and make it simple. It uses dates, for binding and natural sweetness, almonds, for texture and healthy fats, oats for carbohydrates, protein, fiber, and lots of vitamins, a pinch of salt to bring out the flavor, and lastly some coconut oil to bind it all together. I think that this tastes like rawnola, basically like a muesli and I loooove it. If you want to you can absolutely make the recipe for the crust and eat it with some milk or yoghurt or even form it into energy balls to eat them as a snack. 

The cream layer is made with full fat coconut milk, to keep that richness but still lighten it up a little )if that makes sense), cashews, that give the cake a sweet hint, add texture and creaminess and loads of healthy fats and proteins, some coconut yoghurt for more creamy deliciousness (I think b now you can tell that this is going to be a creamy cake!), some agave to sweeten, sugar free lavender syrup to add some flavor and agar to bind it all. If you cannot find a sugar free lavender syrup or a lavender syrup at all, this recipe works very well with any other syrup as well. 

If you are allergic, or do not like almonds you can substitute them with any nuts of your desire, which is the same for the dates. They can be replaced with any dried fruit you like, as apricots or figs or else something. If you want to get a little fancier with the crust and add some seeds such as chia, hemp, or sunflower, feel free to do that but I decided to keep it simple and use few ingredients. 

I like the cake most when it is enjoyed cold, straight out of the fridge. When it is frozen it loses some of the flavor so I would not recommend doing that. This cake works perfect if you have a group of friends over and some are vegan as this is a delicious desset for anyone vegan or non-vegan. It is pretty healthy as it contains lots of healthy fats, protein, carbs, and vitamins so it is a balanced and delicious snack. 

Print

Vegan Cashew Lavender Cake

A really delicious vegan dessert

Course Dessert
Prep Time 30 Minuten
Soaking & Cooling time 10 Stunden
Servings 12 slices
Calories 221 kcal

What you will need

For the crust:

  • 130 g Dates about 5
  • 50 g Oats
  • 80 g Almonds
  • 1 tsp Coconut Oil

For the cream layer

  • 115 g cashews
  • 1 can full fat coconut milk
  • 150 g coconut yogurt
  • 20 g agar-agar
  • 60 ml sugar free lavender syrup can substitute for any other fruit syrup
  • 1 tbsp maple syrup

How to

  1. Put the cashews in a bowl and let them soak for at least 6 hours or overnight.

  2. Blend the dates in a food processor until it forms a paste. Add the oats, almonds, coconut oil and a pinch of salt and blend again until it becomes firm texture. Line out an 18cm springform pan with parchment paper. Add the crust into the pan and press it to the ground and all the edges. Place it in the fidge.

  3. Drain the cashews and place them in a food processor. Add the coconut yoghurt, the maple syrup, and the lavender syrup and blend until smooth.

  4. Place the coconut milk in a sauce pan along with the agrtine. Bring it so a boil and let cook for 2 minutes. Add one tablespoon of the cashew cream into the coconut milk mixture and mix well. Pour it back into the rest of the cashew cream and mix it well (by hand!). It works best with a spatula. If you prefer it sweeter, add a little more lavender or maple syrup here.

  5. Take the springform pan with the crust out of the fridge and pour the cashew cream on top. Place in the fridge for at least 5 hours to overnight to let the agartine get firm.

  6. When ready take it out of the fridge and garnish with almonds, blueberries and some fresh lavender.

    Serve and enjoy!

Kategorie: Desserts, Vegan Stichworte: cake, cashew, dessert, lavender, vegan, vegan cheesecake

Creamy Vegan Summer Pasta

September 1, 2019 by katharina.kuehr Kommentar verfassen

This Summer Veggie Pasta is going to be your new weeknight favorite. It is so simple to prepare but yet so flavorful and nutrient dense. Seasonal summer vegetables in a light and creamy coconut sauce with our all-time favorite carb – pasta!

I was going to our local farmers market and I saw all the fresh veggies. Mushrooms, tomatoes, rhubarb, potatoes, peas, like every summer vegetable I could think of. When walking by that it just made me really want to eat all of them at once. I love going to local markets since buying products there is way more sustainable.

Later, I wasn´t sure what to make with the huge basket of vitamins, so I thought about pairing it with pasta, because with pasta you can never go wrong. Sure, this dish is not a traditional Italian pasta dish as it is made with coconut milk – but I promise you, it is at least as delicious as in Italy.

It is really simple to prepare, which is perfect after a long and hot day of work. The recipe only requires 9 ingredients, which you are very likely to have on hand anyway. For the peas you do not have to use fresh ones – you can go with frozen instead, same with the corn, you could use frozen or canned one instead of fresh one. If you do not have some of the vegetables on hand but still want to make this recipe, feel free to simply substitute one ingredient for another.

I would recommend using normal wheat or whole wheat pasta for this recipe since it brings out the flavor most. If using a rather dry pasta like chickpea pasta I would recommend using more coconut milk to not make the dish taste dry.

I think this is a great recipe if you are a vegan and want to in cooperate more veggies into your diet without giving up the good taste of pasta or even if you are not vegan or vegetarian but want to create a plant-based recipe. I hope that you will enjoy this dish and if you do so be sure to tag me on Instagram with @unptcuisiniere when sharing it!

Print

Creamy Vegan Summer Pasta

This is a really delicious summer pasta recipe that will safe you your weeknights. Super falvorfull, quick, simple, and vegan

Course Main Course
Prep Time 6 Minuten
Cook Time 10 Minuten
Total Time 16 Minuten
Servings 2 people
Calories 763 kcal

What you will need

  • 250 g pasta
  • 1 tbsp Olive oil
  • 2 stalks spring onion
  • 100 g cherry tomatoes
  • 100 g corn cooked or canned
  • 100 g chanterelles
  • 160 ml coconut milk
  • 1 handful basil

How to

  1. Bring the water for the pasta to a boil. Add a lot of salt and cook the pasta according to the package instructions. In the meantime finely chop up the spring onions. Half the cherry tomatoes and mushrooms. Then heat up the olive oil in a big pan. Once hot sweat the onions in there for about 2 minutes. Add all the other vegetables and let cook for another 4-5 minutes. If needed add some more water or oil to help cook. Once the vegetables are mostly cooked through, add the coconut milk and some water to thin out the sauce.

    Reserve one cup of pasta water and drain the rest of the pasta. Add it into the pan with the sauce along with a little of the pasta-water. Here it really matters which type of pasta you have chosen to use. If it is a ather dry pasta, I would recommend adding more water.

    Serve with some fresh basil leaves and enjoy!

Notes

if you are not vegan, a great idea is to add some crumbled feta cheese on top for more flavour and texture. If you are recreating this dish be sure to tag me on instagram with @uneptcuisiniere.

Kategorie: Lunch/ Dinner, Summer, Vegan, Vegetarian Stichworte: coconut milk, healthy, summer, tomato, vegan

Tomato Sauce (V,SF,S)

Juli 15, 2019 by katharina.kuehr Kommentar verfassen

Tomato season – aka my favorite season – is finally here! Isn´t it the best time of the year when there is red, yellow, orange, and green balls in every size around? Every restaurant offers fresh tomato dishes and there is no excuse needed for snacking on small tomatoes all day long? Yep – it is the best time of the year.

Tomatoes are my favorite fruits (Yes, they are fruits! Berries to be exact)! have been eating them every day since I have been little. My mom used to buy baskets of small cherry tomatoes at some point in the morning, and by the time she wanted to prepare dinner they were all gone. I don´t know how often it has happened that I´ve snacked all the tomatoes away that we would have needed for dinner. Too often!

Tomatoes do not only taste ah-mazing!, but they are also super healthy. Unlike other fruits or vegetables tomatoes do not loose nutritional value when being cooked. They do loose vitamin C, but their content of their beneficial trans-lycopene increases immensely when being cooked. They offer a great spectrum of vitamins and antioxidants, are heart healthy and reduce your blood pressure. They are loaded with vitamin C, potassium, folate, and vitamin K. They are super hydrating and contain about 95% water. They are also super skin-healthy and can help to prevent sunburns. I loved eating them before I knew all of those nutritional benefits but now I love it even more to in cooperate them into my diet!

This sauce recipe is pretty traditional as you would find it in Italy. It is made with celery and carrots, as done in the home country of tomato sauce, but I believe that this also is a great way to sneak in more vegetables. You cannot taste the celery or the carrot in the sauce but it still adds a nice earthy note to the sauce.

The fresh oregano and basil add a fresh flavor and the chili, which is optional, give the sauce a spicy kick. But be careful with the amount you add in, and the spiciness of the chili as you can easily go overboard with it. When I made this recipe I added a whole lot of chili flakes (which I have stupidly never tried before), and the sauce turned out sooo spicy. My family and me were sweating quite a lot when eating it hahaha, so be careful!

Some people like to add sugar into the sauce to make it sweeter but I do not think that this is necessary when using the right tomatoes. If you buy the tomatoes make sure to ask which ones are best to use for sauces as different tomatoes have different qualities. Another tip of mine when cooking with tomatoes is salt! Salt is the key to bring out the flavors in tomato sauce. Best to use is salt that is very little processed such as Himalaya salt or sea salt.

I decided to use fresh onions and garlic in this recipe as I always prefer the fresh products over the powder. I believe that the powdered spice version is a great substitute when only cooking a small amount or when wanting to spice something only a little but I personally prefer fresh vegetables. They just add more flavor and texture into the dish.

This tomato sauce could be served very well traditionally, with pasta or I do really like it with meatballs to. It can also be used to make a shakshuka or even in an Indian curry, like Tikka Masala. I like to prepare a rather big batch of it, so I can freeze it easily and just heat it up whenever I need it or am in a rush. Simply stored in the fridge it would last for about 1 ½ to 2 weeks.

Print

Italian Tomato Sauce (V, SF, S)

This is a very easy recipe for a traditional recipe for our loved tomato sauce. Only a few ingredients and packe with flavor to make use of the delicious red fruits that are in season right now. (Vegan, Sugarfree, Seasonal)

Course Main Course
Cuisine Italian
Prep Time 15 Minuten
Cook Time 15 Minuten
Simmer Time 1 Stunde 30 Minuten
Total Time 2 Stunden
Servings 8 people
Calories 117 kcal

What you will need

  • 1,5 kg tomatoes about 4 medium to big ones
  • 4 tbsp olive oil
  • 2 red onions
  • 4-5 cloves garlic
  • 1 carrot
  • 2 sticks celery
  • 1 tbsp tomato paste
  • 1 tbsp salt at least! Preferably sea salt
  • chili flakes as desired
  • 1/2 tbsp pepper
  • 1 handful oregano
  • 1 handful basil

How to

  1. Start by removing the green stem from the tomatoes. Then turn the tomato around so that the top side, where the stem has been is facing down. Take a sharp knife and carefully slice a small cross into the skin. This will help you later when cooking and peeling.

  2. In a pot bring water to a boil and reduce to a simmer. Place the tomatoes into the pot and let them simmer for about 30-45 seconds. Flip them around and simmer for another 30-45 seconds. Take them out and transfer them into an ice bath so they cool quickly.

  3. While the tomatoes are cooling, finely peel and chop up the onion and the garlic and set them aside. Peel the carrots and chop it up along with the celery. Heat up the olive oil in a big pot. When hot add the onion and garlic and let sweat for about 2 minutes on medium heat.

  4. Take the tomtatoes out of the ice bath and you will notice that the skin has taken off a little where you have cut the tomatoes before. You can now easily peel of the skin, you wont need it anymore. Cut the tomatoes into chunks and add them to the other vegetables in the pot. Let that simmer for about 20-30 minutes.

    When the liquid has reduced and thickend pour the cooked tomato-vegetable mix into a blender. If you prefer to have some tomatoe chunks in you sauce, then reserve some of them and set them aside. Blend the rest until smooth and pour back into the pot along with the chunks if you reserved some. Add the tomato paste, salt, pepper, oregano, and chili.

    Let the sauce simmer at low heat for another 45 minutes at least. The longer the sauce simmers, the more the flavor will come out, this can be simmered for several hours if the time is available.

    A few minutes before chop up the basil and add into the sauce. The sauce can be served with pasta, rice, meatballs or anything you like. The sauce can be stored in the fridge for about 1 1/2 to 2 weeks. It can be kept in the fridge for several months, just thaw before using and heat it up again.

  5. I hope that you will enjoy the recipe!

Kategorie: Summer, Vegan Stichworte: herbs, italian, pasta, sauce, sugarfree, summer, tomato, vegan

« Vorherige Seite

Footer

What has been happening on my Instagram

Copyright © 2024 Une Petite Cuisinière on the Foodie Pro Theme