• Zur Hauptnavigation springen
  • Skip to main content
  • Zur Fußzeile springen

feel food club

  • Home
  • About me
  • My Recipes
  • Blog
  • Navigation Menu: Social Icons

    • Instagram

plant based

Incredibly Easy Kiwi Chia Pudding (Vegan)

Juni 26, 2020 by katharina.kuehr 2 Kommentare

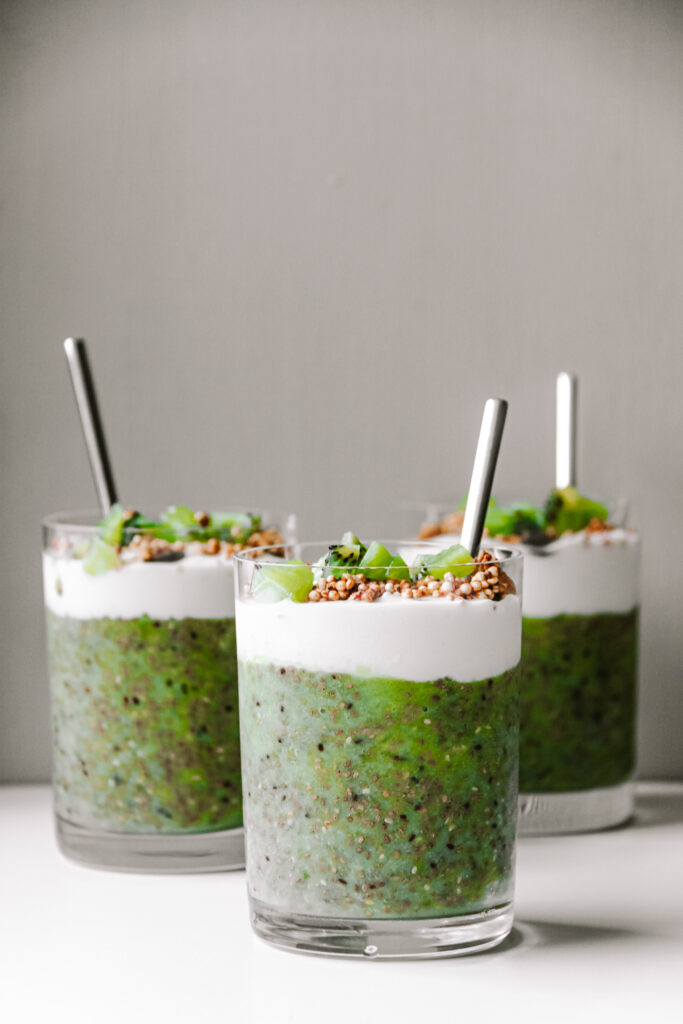
As a child we often get pudding. But usually it is made out of the package, contains hundreds ingredients we cannot even pronounce and it is really unhealthy. But it does not have to be. Neither does it have to be the classic vanilla or chocolate flavour. No, we are being way fancier and healthier here. Kiwi Chia Pudding.

Why is pudding not healthy?

Usually pudding is made out of a lot of milk, sugar, cream or butter. None of which really is healthy. Sugar, obviously is pretty unhealthy for our bodies. Cream and butter are really high in fat, which also is not healthy. And when you get chocolate pudding, you even have chocolate in there, which means you have even more sugar and fat. So this is why pudding is not healthy.

How to make healthy pudding:

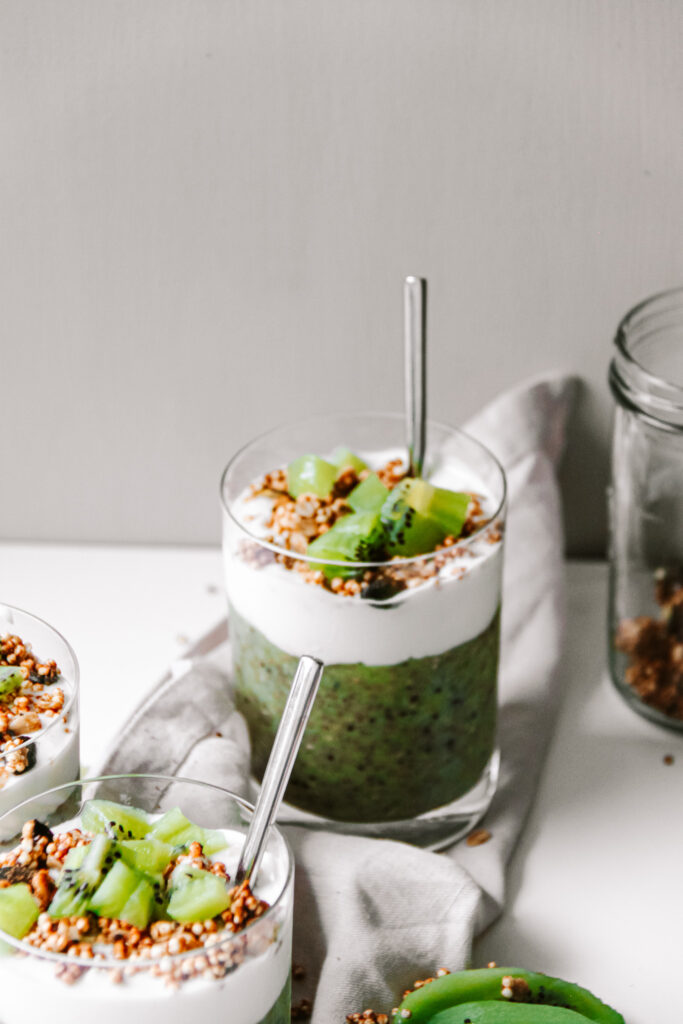
This probably is way easier than you think. And you do not need super fancy ingredients. This one only contains 3 ingredients, so it is super easy. Instead of the usual cornstarch to thicken everything up, we use chia seeds. When you let them sit in a liquid overnight, they will form sort of a jelly around them, making it into a pudding consistency. It actually is way easier than traditional pudding, because you do not need to heat anything up.

Are chia seeds healthy?

Totally. You probably know this by now because you can find them in every health food store or in the health section of you food store. But why are they actually healthy? They are high in healthy Omega-3 fats (just as salmon is), in protein and also in fibre. That way they help your digestion and also provide you many other vitamins and minerals. So they basically are a super food.

What else is in this pudding?

3 more ingredients in the base. Which makes 4 in total. Isn’t that amazing? I definitely believe so! Other than the chia seeds, we have Kiwi, milk, and a sweetener. For the milk I like to use oat milk, but you can use regular milk or any other milk alternative. The sweetener I like most here is maple syrup. Other sugar alternatives are coconut sugar or date sugar.

Does it only work with Kiwis?

No! Definitely not. This is what I love about this, you can make this with any fruit you like! Use the same amount but any you love. I am sure that works just as well with berries, cherries, mango, pineapple, or whatever. This is so amazing and versatile. A great dish.

When to have it?

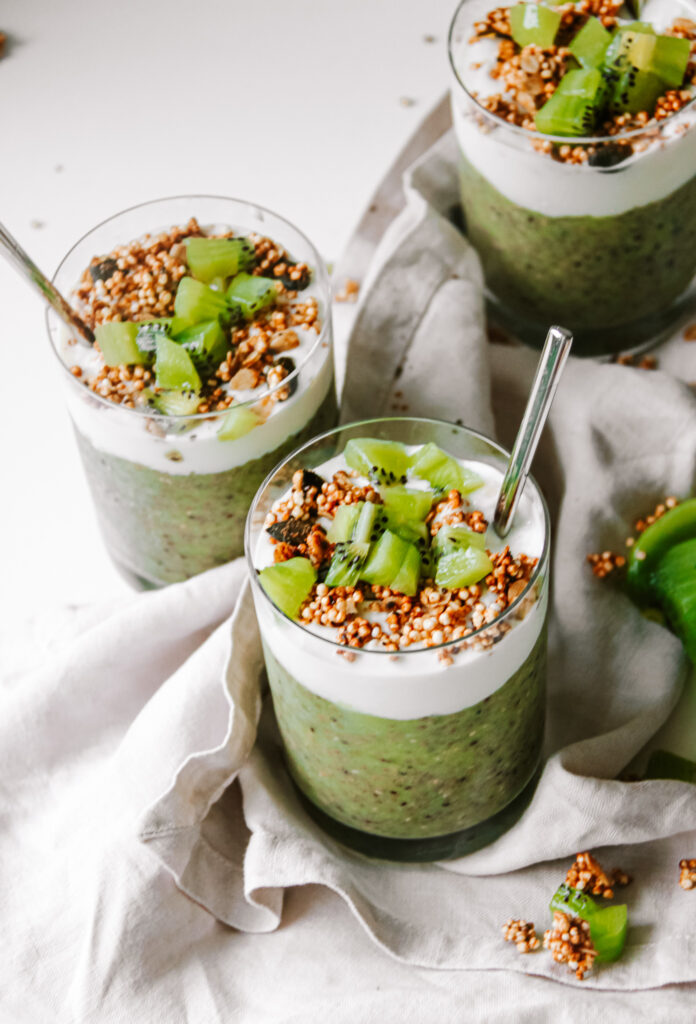
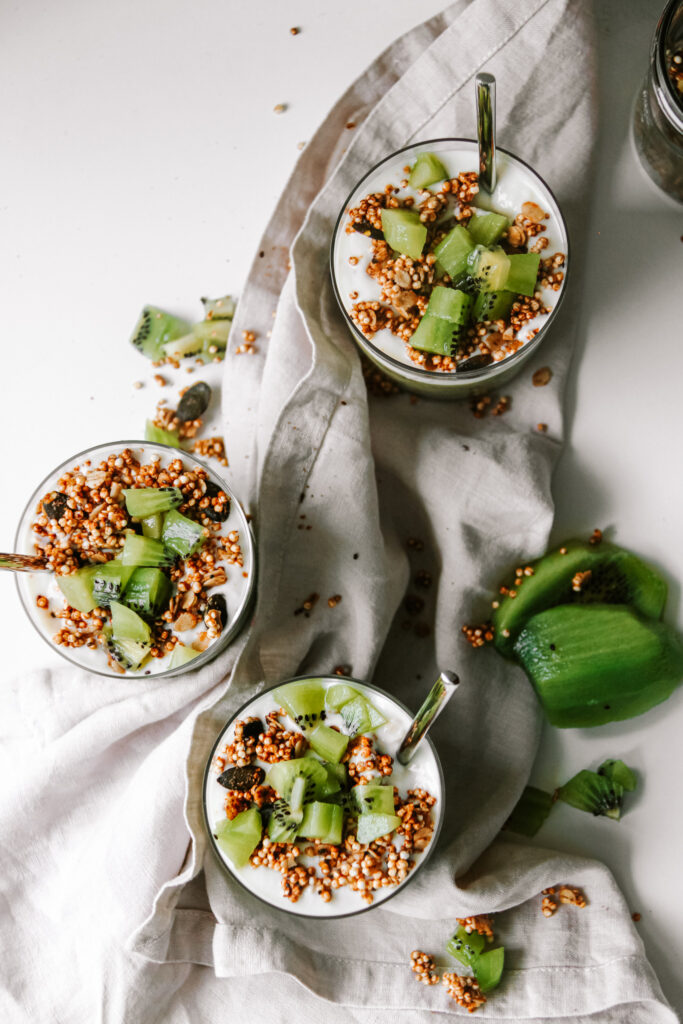
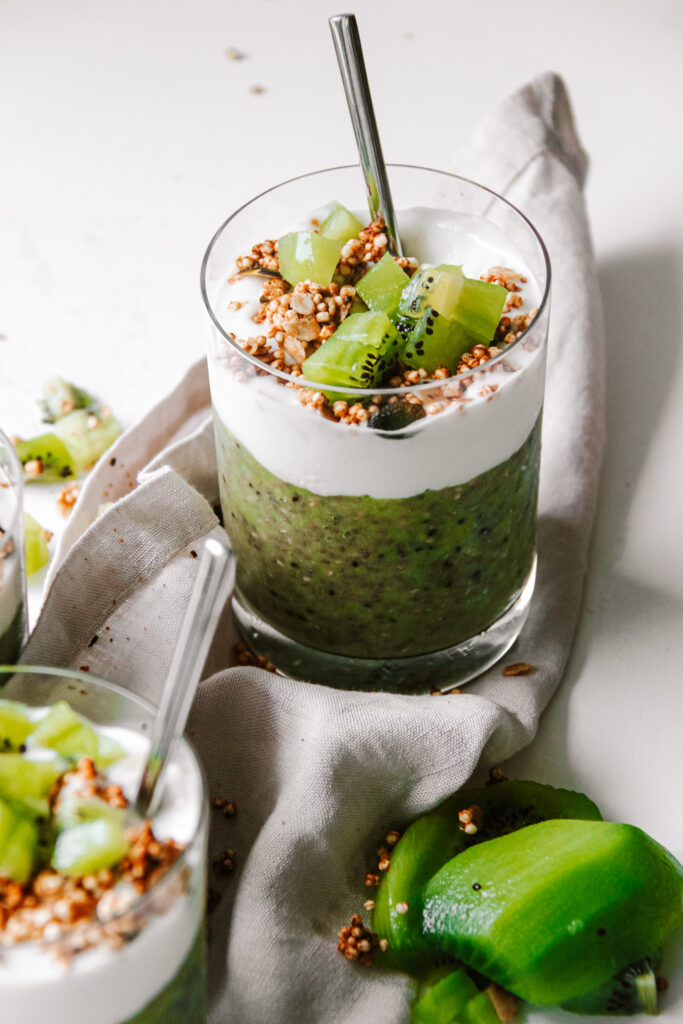
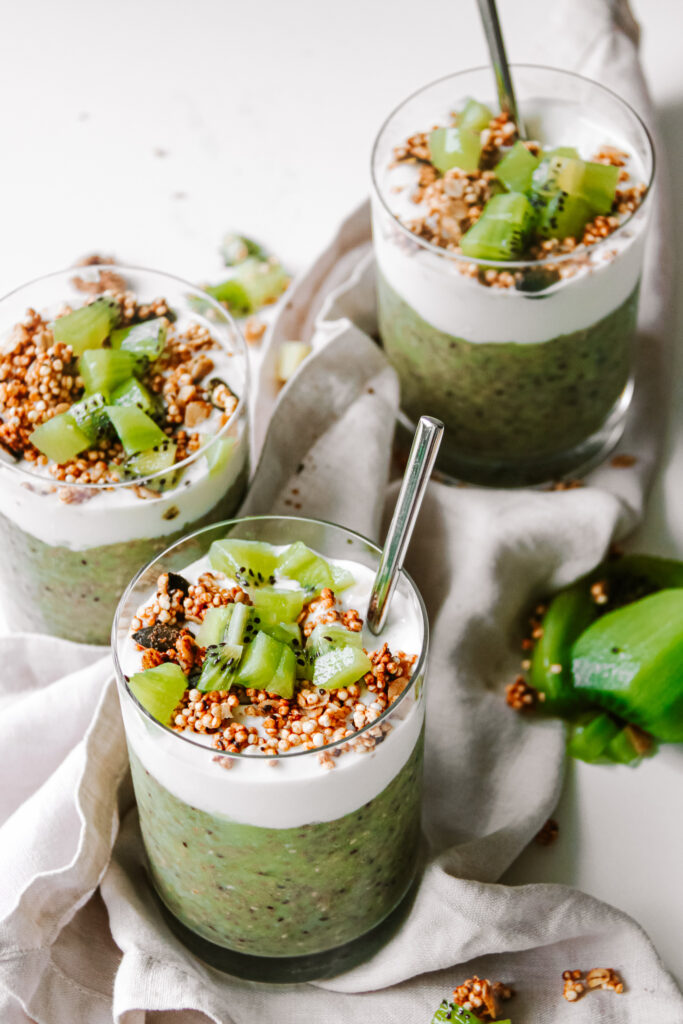
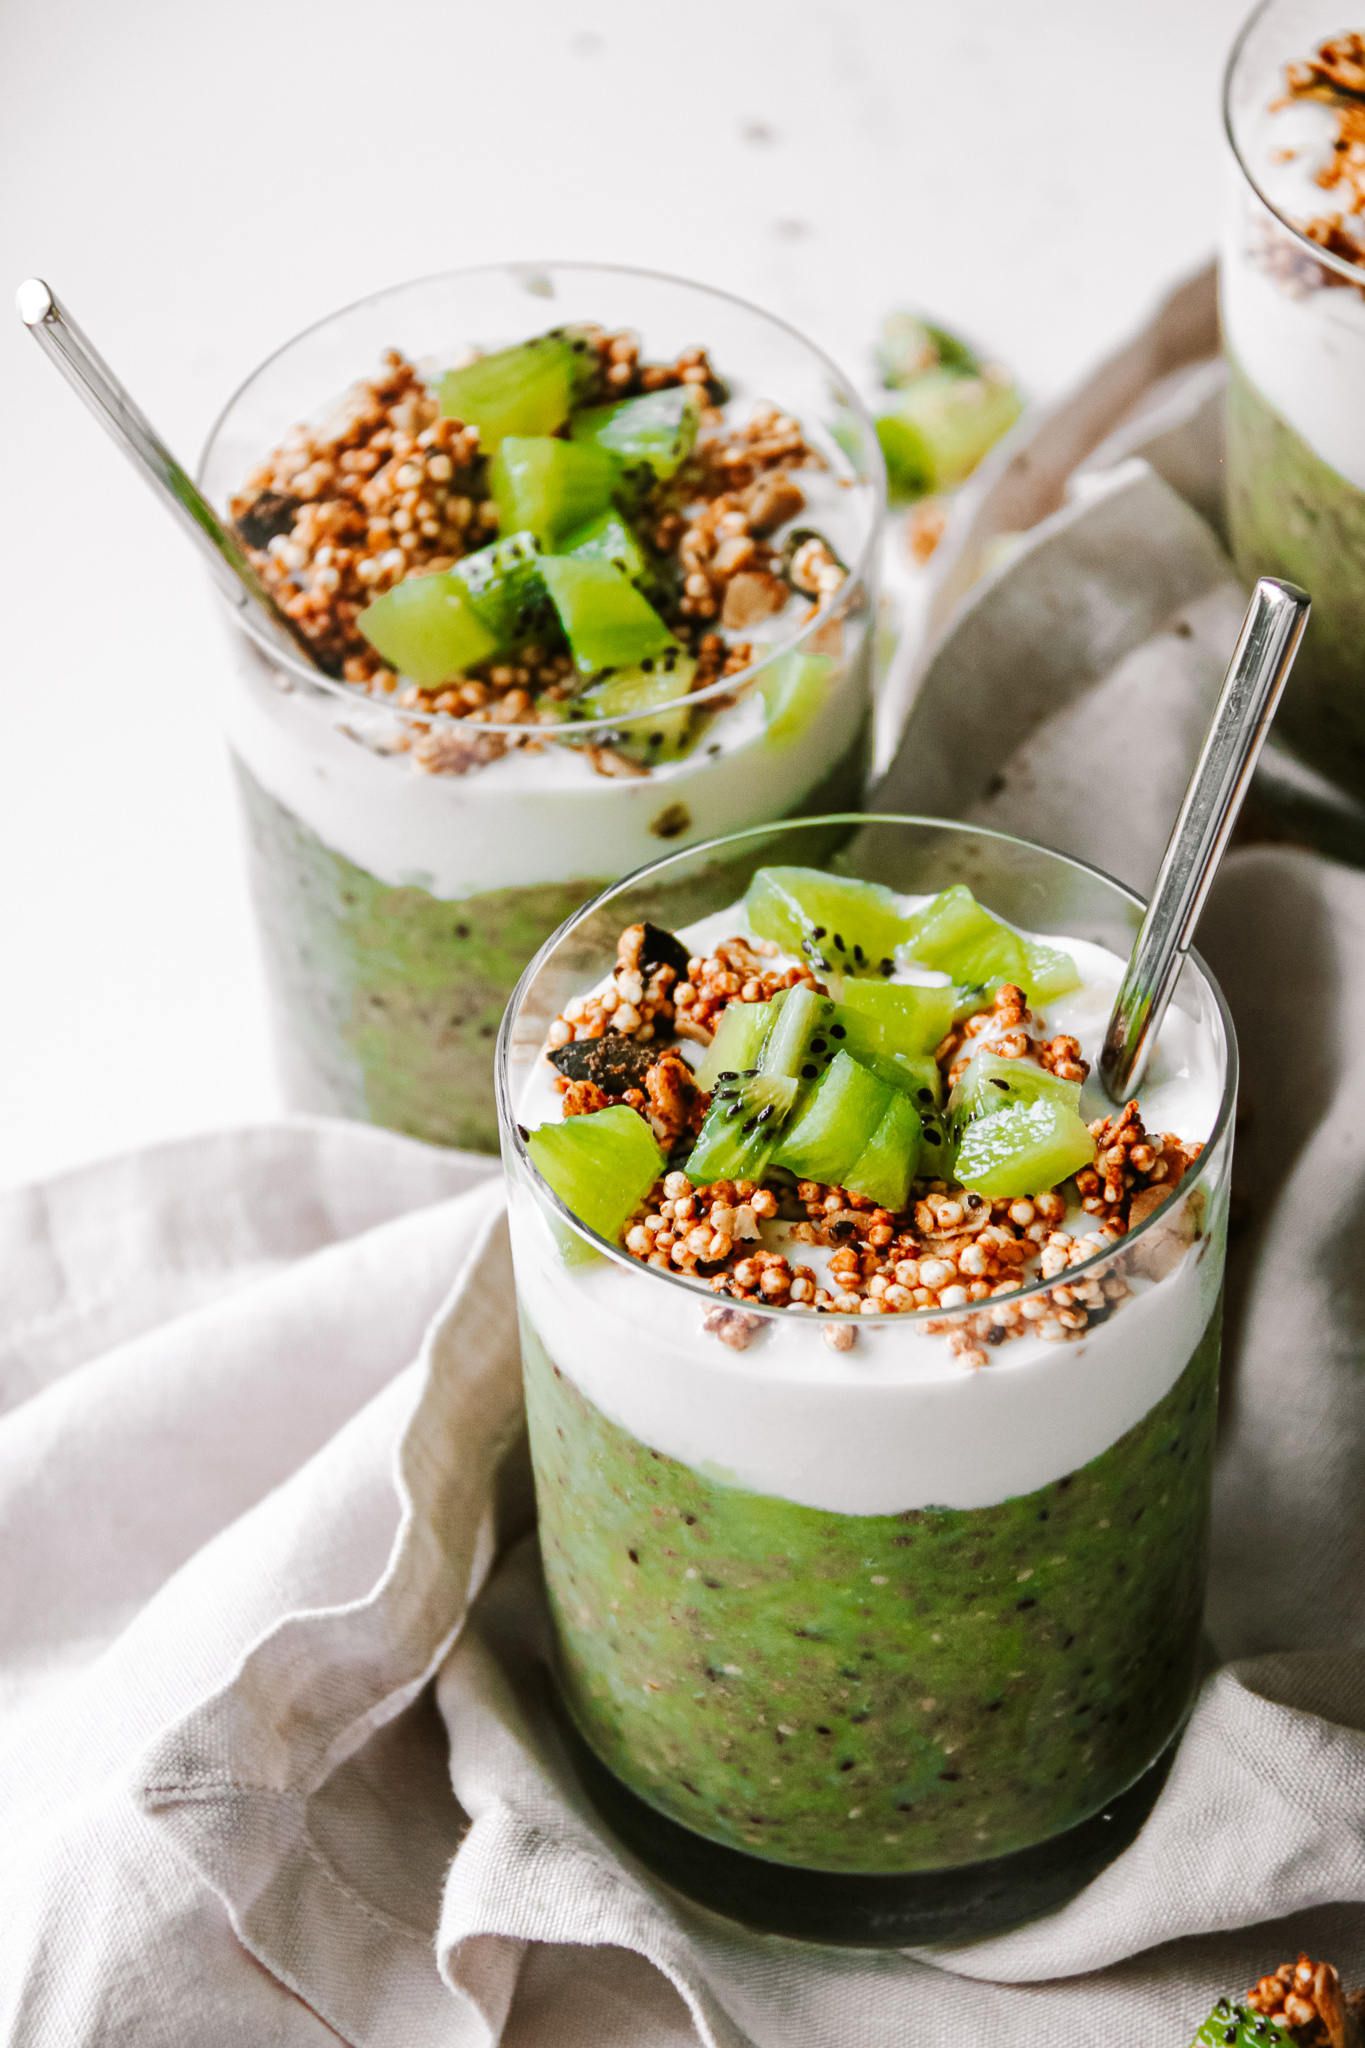
You can have this as a snack, a breakfast or as a dessert. I love and have it as all of those. The best way to eat it (I believe) is to top it with some (plant based) yoghurt, some more fresh fruit and granola. This combination is simply amazing!

I hope that you will enjoy this recipe and that it helps you to make healthy and tasty swaps more often! If you like it, you are free to leave a comment!

Print

Kiwi Chia Pudding

4 ingredients, healthy, super flavorful and extremly easy. Perfect summer dessert!

Course bowl, Breakfast, Dessert, Snack
Prep Time 5 Minuten
Chill time 4 Stunden
Total Time 4 Stunden 5 Minuten
Servings 4 puddings
Calories 245 kcal

What you will need

  • 5 kiwis
  • 50 g maple syrup
  • 80 g chia seeds
  • 200 ml oat milk

For topping:

  • 200 g yoghurt plant based if wanted
  • some granola

How to

  1. Peel the kiwis and purée them in a food processor or a high speed blender. Add the milk and liquid sweetener and mix again. Mix in the chia seeds. Divide it onto the jars. refridgerate for at least 4 hours till overnight.

  2. Before eating top with the yogurt, fresh fruit and granola.

Enjoy,
Happy Cooking,
Katie // Une Petite Cusinière

Kategorie: Breakfast, Desserts, Diet-Specific, Snack, spring, Vegan, Vegetarian Stichworte: breakfast, chia jam, chia pudding, chia seeds, healthy, healthy breakfast, Healthy Dessert, healthy plant based, healthy pudding, healthy snack, healthy vegan, kiwi, plant based, pudding, tropical, vegan

Vegan Magnum

Juni 13, 2020 by katharina.kuehr Kommentar verfassen

Summer is around the corner. It is finally officially time to eat ice cream (not that we wouldn’t have been eating any for the rest of the year). I think pretty much everyone is excited about this like a little child. However, as tasty as it is, it most of the time is not healthy. Unfortunately. So, guess what?! We are making it ourselves and making a healthy version of the classic.

My Ice-Cream Love ??

I have always been a fan of ice cream. Even when I was super little, or maybe especially then! We have a series of pictures showing meaning eating an ice cream and it is hilarious. The first picture, me sitting in the sand with the ice cream in the hand. The second one was me (still sitting at the same place) with ice cream all over my mouth. And the third one, the best one, me looking really sad at the scoop of ice cream that is not in the cone any more but all over my dress. Yes, I always had a passion for food, and no I was not always a clean and tidy eater. My parents always said that one could read the Manu off of my shirt because I pretty much ALWAYS stained it with what I was eating.

But fast forward, plenty years later I still really enjoy eating ice cream, although it ends up in my mouth and not on my shirt now. In my family, to. be honest we eat lots of ice cream. We rarely (maybe like twice a year) have cake after lunch as a dessert or in the afternoon, as it is really common in Austria, but we most of the time we’ll have ice cream.

Why is Ice cream not healthy?

Next time you buy some at the super market you can check the ingredients. You’ll be surprised by all of the ingredients used. Besides some chemicals and flavour extracts (or „natural flavours“) in most ice creams you will find a ton of sugar and a good amount of cream in them. This quickly loads up to about 20 g of sugar per ice cream and 15 g of fat. And all of this in one single ice cream!

How to choose a healthier ice cream

Of course, not every single ice cream has this nutritional value. There are simple and easy ways to choose a healthier ice cream, both in a supermarket but also in a fresh Gelateria. Always remember that fruit – based ice cream is healthier than non fruit based ice cream. Because of three reasons: Fruits are already sweet themselves, so there is no need to add much sugar, the have more vitamins and fibre and usually, in fruit Ice creams you will not find heavy cream or other fatty add-ins. Without the addition of sugar or cream, these ice cream usually tend to be half or 2/3 as high in calories as cream based ice cream like chocolate, stracciatella or hazelnut. So when you want to opt for a healthier version, be more on the fruitier side.

How to make healthy ice cream

There are several ways on how to make ice cream yourself. This depends on what ice cream you want to make. If you want to make something similar to what you can get in a Gelateria, a super simple version of this is to simply make nice cream/ smoothie bowls. You can find many many recipes of such on my Instagram (every week there is a new one coming).

In this blog post I am going to show you how to make a popsicle one. This also is really simple. It is easiest if you have a form for popsicles at home (you can find plenty of those on amazon). If you do not want to purchase one that is fine too. What you should do then is to pour the ice cream mixture into a loaf pan and freeze it in such. Before dunking it in the melted chocolate take it out of the fridge. Take a sharp knife and dip it in hot water. Then carefully cut the big block of ice cream apart into popsicle sized squares. On the lower end (the thin side) cut a small whole in the ice cream with the knife. It should be just big enough to fit a wooden skewer to hold the ice cream. Dip the skewer in the molten chocolate nd stick it into the ice cream. Let this freeze until it all sticks together. Once it holds well, you can dip it in the molten chocolate.

Summer can come!

Yes, making ice cream yourself is not difficult. Neither is making healthy ice cream yourself. With just very few ingredients you can make a super tasty and healthy ice cream yourself to have healthy treats in the freezer all summer long!

I hope you’ll love this recipe as much as I do and enjoy summer!

I hope you’ll love this recipe as much as I do and enjoy summer!

Print

Healthy Vegan Magnum

A vegan version of the classic summer popsicle. Too good to be true, plus it is super healthy & vegan!

Course Dessert, Snack
Prep Time 10 Minuten
Chilling time 6 Stunden
Total Time 6 Stunden 10 Minuten
Servings 8 popsicles
Calories 273 kcal

What you will need

  • 1 banana
  • 200 ml coconut milk
  • 200 g soy yoghurt
  • 60 g maple syrup
  • 1 tbsp vanilla extract
  • 160 g dark chocolate (vegan)
  • 1 tbsp coconut oil
  • 50 g cashews Soaked in water for at least 4 hours

How to

  1. In a bowl or a blender mash the banana. Drain the cashews. Add them along with the coconut milk, soy yoghurt, maple syrup and vanilla to a blender or a bowl with a hand blender and mix until everything is well combined and a smooth consistency is reached. Pour into the ice cream form (if you do not have one check out the paragraph in the blog post that says "How to make healthy ice cream").

    Freeze for at least 5 hours to overnight.

    After 5 hours melt the chocolate and coconut oil in either the microwave or on a double boiler. Take the popsicle form out of the freezer and run it under hto water so you can easily get the popsicles out. Place some parchment paper on a large plate.

  2. Dip each ice cream in the molten chocolate and place on the plate. Once you have done this with every ice cream place it in the freezer again for at least 30 minutes.

    Enjoy!

Happy cooking,
Enjoy,
Katie // Une Petite Cuisinière

Kategorie: Desserts, Diet-Specific, Snack, Vegan Stichworte: chocolate, dessert, easy ice cream, healthy ice cream, healthy magnum, healthy popsicles, homemade ice cream, homemade popsicles, ice cream, magnum, plant based, popsicle, Snack, summer food, vegan

Black Quinoa Teriyaki Burger (vegan)

Juni 5, 2020 by katharina.kuehr Kommentar verfassen

Burgers; the ultimate comfort and fat food. The embodiment of unhealthy. But can you make it healthy? I can tell you, yes you can! This is a healthy, plant based and incredibly delicious version of the most popular fast food. A healthy black quinoa teriyaki burger.

Why aren’t burgers healthy?

First things first. We always hear burgers aren’t healthy. But what exactly is it that is not healthy? A lot of people think it is the bun. Because bread has the reputation to be unhealthy. But I need to disappoint you if you were believing that because this is not true. Bread is a good source of carbohydrates and vitamins. Also it has some protein and little fat and sugar (although store bought burger buns may have a lot of sugar, so keep an eye out for that). Sure, if you choose a wholewheat burger bun it would be healthier. But this is not what I am referring to. The unhealthy parts of most burgers are the meat, cheese, bacon and sometimes even sauces.

The meat oftentimes is not healthy because usually fatty meat is used. This adds more flavour but also more calories and more fat. Bacon goes along the same way. Bacon mainly is made of fat and sodium. Which both is not healthy for us. And of course the cheese. Sure, cheese does have protein but again, the fat is the less healthy macronutrient here. Do not get me wrong, fat is not necessarily bad for our bodies and we do need it to live but the amount which is in one burger is not really healthy anymore.

The when I said that sauces aren’t always healthy, this may have surprised you. Why , you think? In most burgers you can find mayonnaise. High quality mayonnaise is made out of oil and egg yolk. This is not unhealthy when consumed in right amounts. It is high in calories but those calories have a nutritional value. But most store bough mayonnaises have hundreds of other ingredients in them. Most of which you cannot pronounce. This is not very good for our bodies. To summarise: high quality mayonnaise can be healthy when consumed in right amounts, highly processed ones are not good for us.
But mayonnaise isn’t the only sauce. In many other sauces there is a lot of butter or sugar added to get more flavour. Butter and sugar both, I think most people are aware of that, are not great sources of nutrients. While oftentimes we assume that the sauces do not make much of a difference, they actually do. 2-3 tablespoons of high calorie sauces can quickly add up to 200-300 kcal. So be aware the next time you choose it.

About balance

But please, after reading about the nutritional information about burgers, do not say that you will not have them again. Having a good and super tasty burger once in a while is more than alright. Not stressing out about it too much also is important for a healthy relationship with food. Just be aware that this is not the ideal meal to nourish your body and it should be consumed in moderation if you want to eat a healthy diet.

How to make it healthy

I think we now have talked enough about why it is not healthy. So let’s focus on making it healthy. This comes down to super easy swaps. For example instead of taking a beef patty you can substitute it for a plant based one. Here we are making one out of black quinoa from Reishunger (you can get it here). But you can also long for one made out of beans of ground turkey for example. Instead of bacon we are using mushrooms. May sound a little boring at first, but once you’ll try it out, you’ll be convinced. Instead of store bought low quality mayonnaise, you can use a homemade one. Or you can use ketchup without added sugar. If that’s too boring for you, I am sure you are going to find sauces at the supermarket that do not have a lot of added sugar. Last but not least, we probably need something else. Avocado. Don’t be fooled thinking that this is just another ago trend because it isn’t. Avocado in your burger is life changing.

How to build the perfect burger:

This is a very important part. This can change your burger 180°. No but honestly you can ruin so much when you build it the wrong way.

  1. toast your bun. This crispness it up and adds a lot of flavour. No matter whether you are doing this in a toaster of a pan, this step is essential.
  2. Sauce. Right on top of the bun that is the first layer, we are adding a sauce. Ketchup, homemade mayonnaise, barbecue sauce. Whatever.
  3. Greens. They won’t change much of the taste but much of the vitamins you get in. Also it is important to add a layer of greens before adding something else because when you add the patty or something else like tomatoes or cucumber right onto the bun it will get soggy.
  4. The patty. Pretty self-explanatory.
  5. Bacon/Mushrooms/other add ins. they have a good flat surface to lay on.
  6. Soggy veggies. Now you can add tomatoes, cucumber, or anything else containing a lot of water. It s not next to a bun so it won’t turn anything soggy.
  7. Avocado/ sauces. To finish it up, a nice layer of sauce or smashed avocado to add extra flavour and consistency.
  8. the top bun. Again, I would recommend to toast it.

The Quinoa Patty

Making a burger out of quinoa may sound a little weird but it is so good and so easy. The black quinoa adds an extra bit of flavour and depth to it. You can find black quinoa at Reishunger.com . It is important to completely cook the quinoa through until it has absorbed all of the liquid. This way it will give a perfectly mushy consistency when blending. What also is important is the seasoning. Since it does not have as a strong flavour itself as meat does, we need to season it well. Here we are doing it with a super simple teriyaki sauce.

Meal prep and serving:

You can batch make the quinoa patties and freeze them before cooking. Whenever you wanna have one, let them thaw a little bit and fry them up in a pan.
The burgers are best served with some homemade fries or sweet potato fries or just a simple little salad.

I hope that you enjoy this recipe as much as I do and have fun cooking it!

Print

Black Quinoa Teriyaki Burgers

Healthy Plant Based Burgers. A ton of flavor. A ton of goodness. Pretty easy, pretty good.

Course dinner, lunch, Main Course
Prep Time 10 Minuten
Cook Time 25 Minuten
Total Time 35 Minuten
Servings 2 burgers
Calories 695 kcal

What you will need

  • 100 g quinoa
  • 5 tbsp soy sauce
  • 1.5 tbsp cornstarch
  • 1 tsp sriracha or hot sauce
  • 1 tbsp maple syrup
  • 2 tbsp oil
  • 200 g mushrooms
  • 1/2-1 Avocado
  • 2 burger buns
  • a handful greens

For the vegan mayonaise (makes about 8 servings)

  • 125 ml soy milk can use any plant based milk alternative
  • 1 tbsp vinegar
  • 200 ml oil
  • 1 tsp mustard
  • 1 tsp salt

How to

  1. Add the quinoa to a pot along with 200 ml of water. Bring to a boil and then reduce to a simmer. Let simmer for about 10-15 minutes until all water is absorbed completely.

  2. In the meantime make the vegan mayo. Add the milk alternative, oil, salt and vinegar into a tall container. Take an immersion/ hand blender and place it on the very bottom. Turn the speed onto low and pull it up in one go until you have reached the surface of the liquids. Keep blending until it begins to emulsify and becomes creamy. Add the mustard and continue to blend for about 1 minute until it if smooth and creamy. Place in the fridge.

  3. Slice the mushrooms into about 0,5 cm thick slices.

  4. In a small bowl combine the soy sauce, maple syrup, hot sauce and conrnstarch. Make sure there are no big lumps of cornstarch in the mixture.

  5. When the quinoa is done transfer it to a food processor. But make sure it has really absorbed all liquids, otherwise the burger patty will fall apart. Add about 2/3 of the teriyaki mixture to it and blend well. It should all stick together and form a big ball.

    Slightly flour your hands so they are dry. Divide the quinoa mixture into 2 and form them into patties. Do this by first rolling a ball in your hand and laying it on a flat surface. Then press it down with the palm of hand to make a flat surface.

  6. Heat up half of the oil in a pan. Sautée the mushrooms in there for about 3 minutes. reduce the heat and add the remaining teriyaki sauce.

  7. Mash the avocado. Half the burger buns and toats the bottom half.

  8. Heat up the remaining oil in another pan. Once hot add the quinoa patties and fry on each side for about 3-4 minutes.

  9. Once the bottom bun is toasted add a generous spread of mayonaise. Top it with some salad. Add the black quinoa patty on top. Then theh mushrooms and some sliced cucumber if using. Lastly, add the mashed avocado and the top half of the burger bun. Serve and enjoy!

Happy cooking,
Enjoy,
Katie // Une Petite Cuisinière

Kategorie: American, Cuisine, Diet-Specific, Lunch/ Dinner, spring, Vegan, Vegetarian, Vegetarian Stichworte: barbecue, barbecue season, burger, comfort food, healthy, healthy burgers, healthy comfort food, healthy fast food, lunch, plant based, plant based burgers, quinoa burger, quinoa recipes, reishunger, teriyaki burger, vegan, vegan burger recipe, vegan burgers

Asparagus and Strawberry Salad

Mai 22, 2020 by katharina.kuehr Kommentar verfassen

This salad is like spring in a bowl. So mush freshness, fruitiness but also savoury goodness. Super easy to make, full of vitamins, perfect side dish or light main course. Absolutely in love!

Spring honestly is my favourite season. Everything is starting to bloom and coming back to life. Flowers are so colourful and the markets are full of fresh fruits and vegetables. Including two of my favourites: Asparagus and strawberries.

How we typically eat Asparagus

Asparagus is something very typical in Austria. We usually have it with Risotto, as a side or very very typical with potatoes, ham and molten butter or sauce hollandaise. But while this is good once in a while I feel like it is really heavy and not healthy in the long term. This salad, on the other hand is something very light and refreshing.

Which Asparagus works best?

Definitely a mix! Use some white stalks and some greens because the combination of the slightly different flavours is just super good! If you want, you can also use purple asparagus although I would not necessarily recommend to buy it extra for this. I have tried it out with purple asparagus but it lost its colour while cooking and turned green. So it was a bit of a pity.

How to cook asparagus?

This actually is not as easy as many people think. I mean it is to hard but you just need to know how. Green Asparagus is super easy. You just need to cut off the ends of the stalks and boil it in salted water for about 5-10 minutes, depending on how thick the stalks are. White asparagus is slightly different. It also needs some boiling water, you need to salt it, and add 1 tablespoon of butter and 1 teaspoon of sugar. This takes out the bitterness of the asparagus and makes it really good!

Do you need to peel asparagus?

Depends. Green asparagus does not need to be peeled. Neither does purple one. White one on the other hand needs to be peeled!! Generously! I would recommend to peel it twice. If it is not peeled well it will have strings when eating and that’s not good tbh.

Fruit in salad?

A big YES!!! This is game changing! Especially the combination of strawberries and asparagus is insane! The sweetness of the strawberry pairs perfectly well with the freshness of the asparagus. If you do not have strawberries on hand or do not like them, you can add in raspberries instead, which also must taste really good!

Other add-ins:

Here you can be really creative! What would 100% work well is some kind of cheese like mozzarella, burrata cheese, cottage cheese or feta. Those would make it really good! Also, grilled chicken breast or prawns would take this next level but also hard boiled eggs.

When & how to eat it?

You can have this as a nice side dish and leave it as is or make a little more and add in something like hard boiled eggs for example and enjoy it with some freshly toasted bread or couscous to have it as a filling salad!

I hope that you like this recipe as much as I do and that you will make it many times this spring!

Happy cooking,
Enjoy,
Katie // Une Petite Cuisinière

Print

Asparagus and Strawberry Salad

Not your average asparagus side dish but much better! Sweetness of the strawberries paired with the taste of fresh asparagus is just heaavenly!

Course Appetizer, lunch, Salad, Side Dish
Prep Time 10 Minuten
Cook Time 20 Minuten
Total Time 30 Minuten
Servings 4 sides
Calories 149 kcal

What you will need

  • 500 g white asparagus
  • 500 g asparagus
  • 500 g strawberries
  • 2 spring onions
  • 1 handful mint
  • 1 handful basil
  • 1 handful parsley
  • 1 lemon
  • 1 tbsp olive oil
  • 1 tbsp maple or honey
  • 1 tbsp butter or magarine
  • 1 tsp sugar

How to

  1. Bring a large pot with water to a boil. Peel the white asparagus generously (about 2x). Cut the ends (about 3cm) of both, white and green asparagus and throw them away. Cut the asparagus into about 3-4cm sized pieces.

    Add the butter (or magarine) and sugar into the boiling water and salt it. Add in the white asparagus and cook for about 5 minutes. Then add in the green asparagus and cook for another 5-10 minutes, depending on how thick the stalks are. You can test if they are ready by pieking through them with a fork. If they almost fall off the fork, they are done. Then drain them.

  2. In the meantime remove the green part from the strawberries and half them or cut them into quarters, depending on how big they are. Slice the spring onions and seperate the onion rings from each other.

  3. Roughly chop up the basil, mint and parsley.

  4. Add the asparagus, strawberries, spring onions and herbs into a bowl. In a seperate small bowl combine the olive oil, the juice of 1 lemon and the maple syrup. Toss the salad in the dressing and serve!

    Enjoy!

Notes

If you want to have it as a main dish just make more (about half more, so 6 servings for 4 people). You can then also add in other things like hard boiled eggs, feta or mozzarella cheese, grilled chicken breast or prawns! 

Kategorie: Appetizers, Diet-Specific, Salad, Salads, Season, Side, spring, Vegan, Vegetarian Stichworte: asparagus, asparagus recipes, fancy salad, healthy, healthy asparagus recipes, healthy recipes, healthy salads, healthy spring, plant based, salad, side dish, side salad, spring, spring food, strawberries, strawberry season, vegan, vegan asparagus recipes, vegan recipes, vegan salads, vegan spring food

« Vorherige Seite
Nächste Seite »

Footer

What has been happening on my Instagram

Copyright © 2024 Une Petite Cuisinière on the Foodie Pro Theme