• Zur Hauptnavigation springen
  • Skip to main content
  • Zur Fußzeile springen

feel food club

  • Home
  • About me
  • My Recipes
  • Blog
  • Navigation Menu: Social Icons

    • Instagram

Desserts

Healthy cookie dough bites

Juni 1, 2020 by katharina.kuehr Kommentar verfassen

If I ask you what the best part about baking cookies is, what are you gonna tell me? I think most people are going to say that their favourite thing is to snack on the dough. Because, let’s be honest, isn’t the dough even better Tham the baked cookie? I, at least think so. But it also is even unhealthier. So, we are taking the classic and making it healthier.

Why is cookie dough unhealthy?

Let’s ask it the other way around? What is healthy about cookie dough. When answering this we are done pretty quickly. Pretty much nothing. Butter is loaded with fats, sugar is sugar and not good for our bodies, raw eggs are harmful and so is unbaked flour. Plus, white flour is not very healthy anyway.

How can I make it healthier?

It already starts with swapping out little ingredients if you want to keep it basic. Instead of white flour use wholegrain. And if you plan on eating the dough raw, toast the flour in the oven before adding it to the dough. Leave out the egg or replace it with apple sauce. Instead of butter you could use a nut butter or margarine. Both, have a lot of fat too, but it is unsaturated fat, which is far better for your body. And last, instead of white sugar use a more natural sweetener. This can be maple syrup, honey, coconut sugar. Yes, they all have a decent amount of sugar too but it comes along other nutrients.

What is in THIS dough?

Not many ingredients. As a base we are using a mix of almond butter, margarine and liquid sweetener. Something like maple syrup works really well here. But also a non-liquid sweetener works such as coconut sugar. When this is blended up it tastes a little bit like caramel to be honest. And it is so incredibly good. Then we are adding in flour. I like to use coconut flour, oat flour (which is finely processed oats) or almond flour. Coconut and almond flour are a little dry so if you do not like their taste at all, I would recommend using another one. You can also use wholegrain flour. But then again, make sure you toast it in the oven at 180°C for about 5 minutes. Then it is safe to eat.

Add-ins

This is such a fun part. It adds a personal twist to the cookie dough. I absolutely love to go for chocolate chips or chopped up chocolate but you can also try something different. You could long for dried fruits such as cranberries or if you are more of a funfetti person, you can add in some sugar sprinkles (but be aware that those are not healthy). You can also add in some chopped nuts or seeds. Or swap the almond butter for peanut butter to make it more peanuty. Whatever you want.

When and how to eat it

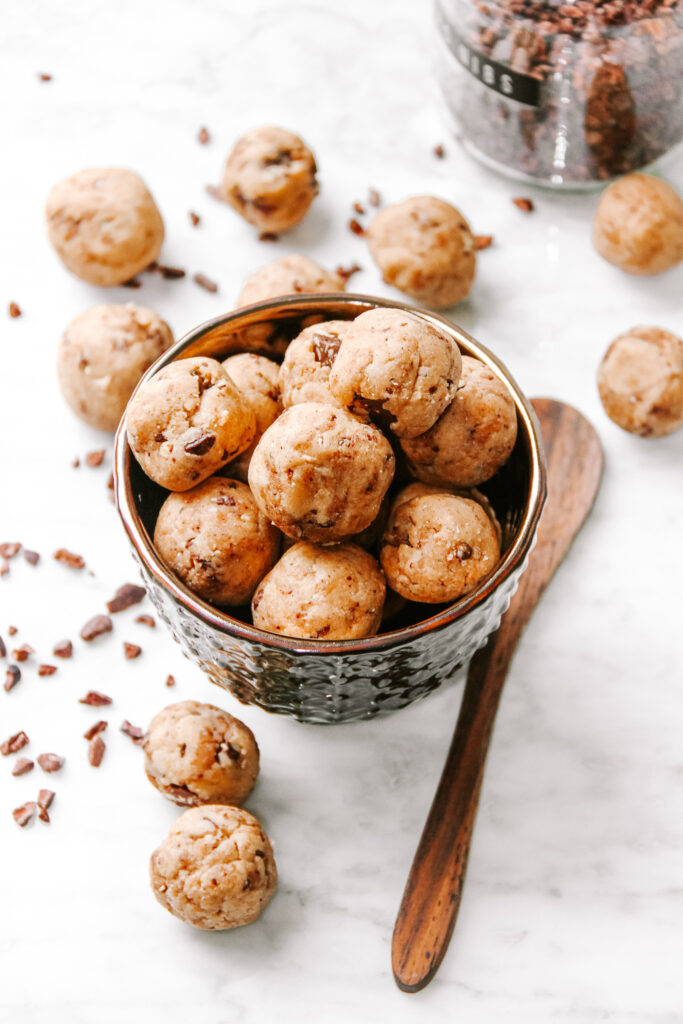
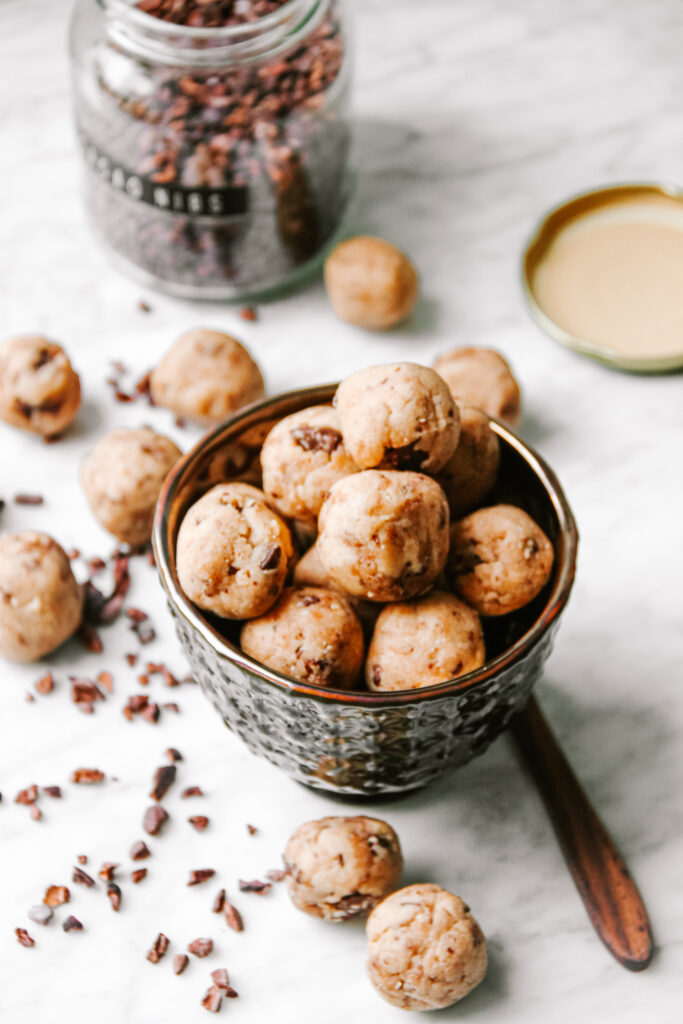
There are so many ways to have this. You could either spoon it right out of the food processor, which is legit amazing. You can also roll it into small balls as pictured. Those work as a great snack or dessert whenever you are craving something sweet. You can also add it to your yoghurt, ice cream, nice cream or smoothie bowls. As I said, the options are endless.

This really is ready in 10 minutes maximum. The dough is bests stored in the fridge and enjoyed whenever you want. I hope that you will love this recipe and enjoy it many many times!

Print

Healthy cookie dough

Packed with healthy fats, chocolate and simple ingredients. Ready in less than 10 minutes and a perfect dessert and snack!

Course Dessert, Snack
Cuisine American
Prep Time 10 Minuten
Total Time 10 Minuten
Servings 12 balls
Calories 114 kcal

What you will need

  • 30 g margarine can sub for coconut oil but won´t be as good
  • 40 g almond butter
  • 60 g maple syrup
  • 1 tsp vanilla extract
  • 100 g coconut flour see notes for substitutions
  • 60 g chocolate (chips)

How to

  1. In a food processor or a bowl combine the margarine, almond butter, vanilla extract and liquid sweetener of choice until smooth and creamy. Then add the coconut flour and mix or pulse until combined.

    When using a whole chocolate chop it up into small pieces. About the size of chocolate chips. Add that to the remaining dough aswell and gently mix to combine everything well. This works best by hand.

    Take about 2 heaped teaspoons or 1 tablespoon at a time and roll the dough into small balls between your hands. Place them on a plate and let chill in the fridge for about 30 minutes. Enjoy!

Notes

Substitutions:

Instead of coconut flour you can use almond flour or oat flour (process to oats until they reach a flour-like consistency in a food processor). Or, you can also use wholewheat flour. This can not be consumed in its raw state, so you need to bake this at 180°C for 5 minutes in the oven. 


Store the cookie dough in the fridge. It lasts about a week.

Happy cooking,
Enjoy,
Katie // Une Petite Cuisinière

Kategorie: Desserts, Diet-Specific, Snack, Sugar Free, Vegan

Healthy Rhubarb Crumble Cake

Mai 29, 2020 by katharina.kuehr Kommentar verfassen

A nice, fluffy and juice layer of cake underneath a fresh and sweet layer of rhubarb topped with a healthy and crispy almond oat crumble. Is there anything else you want? Maybe having this healthy rhubarb crumble cake with a nice cup of coffee? you better don’t say no!

Why crumble cake?

Crumble cakes are one of my favourites. I love the different tastes and textures in each layer and the combination of them melting together in my mouth. Also, I think they are very fun to make and they always have something fresh in them with the fruits. I already have one crumble cake on my blog, an apple crumble cake, and it is so good! In this recipe I just added a spring twist on it instead of a fall one! Imagine this cake as a mix between my healthy apple crumble cake and my rhubarb compote!

I had my first crumble cake about 2 years ago. It actually also was a rhubarb one, and it was amazing! I can remember it very well because it was at a small café in Dublin where they had soo many different cakes! I shared one piece with my friends and let me tell you, it was amazing! So when I saw all the fresh rhubarb at the farmers market the other day, I decided to try to recreate it, but make it healthier. And let me tell you, I did not expect it to turn out THAT GOOD. I thought it would be fine but when I tried the first slice, I just wanted to eat the whole tray before photographing it. It is insane!! And really, it does not taste healthy or boring at all.

The layers:

The first layer is kind of a biscuit layer but a little healthier. It essentially comes down to only 5 ingredients! Who thought that you could make a cake with 4 ingredients only? Eggs, maple syrup, apple sauce (Apfelmuß in German, because so many asked me what this was), wholegrain flour, baking powder. That is it. The egg whites are separated from the yolks and whipped up until super fluffy and stiff. This makes the cake really airy. The applesauce makes it really juicy and the maple syrup makes it sweet. Both are combined with the egg yolk. Afterwards, the flour and baking powder as well as the egg whites are folded in. This need to be pre-baked a little.

The second, and middle layer is a fruit layer. This is even easier than the first one. You do not even need to peel the rhubarb (if you buy organic one preferably), just cut it into smaller pieces. Add it to a pot with some lemon juice and a date to sweeten it up (could use sugar or honey as well) and a splash of water. The heating up helps it to get a little softer and absorb the flavour of the lemon and date. Then this is added on top of the biscuit layer.

The last but definitely not least layer is the crumble. Contrary to conventional crumbles it is not based of sugar, butter and flour. NO. The base are oats and almonds. I like to use sliced ones but you could also just chop the up a little. Together with some chia seeds (optional) and coconut sugar (again, another sweetener works fine too, just a liquid one will not have the same crunch effect, so I would recommend substituting it out for white or brown sugar), and a little coconut oil it creates a sticky consistency. This on top of the fruit just tastes bomb. It is kind of like granola just on top of a cake. So good.

When to enjoy best?

So honestly, you are going to want to eat this at every time of the day. And basically you could. It would even work as a nice breakfast. It has about than 2.6g fibre, 3.3g of protein, and 14.2g of carbohydrates per slice. So having two slices for breakfast with some yoghurt on top wouldn’t be unhealthy. But this also makes a great snack or dessert. Even when having guests over this will be amazing! Or take it to a picnic?

Substitutions

If you do not like rhubarb at all, but still want a crumble cake, you can also substitute them out for berries, such as strawberries. It really is versatile but I believe that the little sour taste of the rhubarb just goes really well with the sweetness of the cake. Instead of whole grain flour, you could use plain one, and instead of the maple syrup you can totally go for honey, agave of coconut sugar. If you do not have almonds on hand, you can use any other nuts as well!

I hope that you like this recipe and it gives you some inspiration for cooking healthy! Enjoy!

Happy cooking,
Katie // Une Petite Cuisiniere

Print

Healthy Rhubarb Crumble Cake

The best cake you´ll ever have! Fluffly and juice biscuit, topped with fresh and tangy rhubarb and a healthy and crispy crumble! SO good.

Course brunch, Dessert, Snack
Cuisine austrian
Prep Time 20 Minuten
Cook Time 15 Minuten
Total Time 35 Minuten
Servings 12 slices
Calories 113 kcal

What you will need

For the first layer:

  • 2 eggs
  • 100 g unsweetend apple sauce (Apfelmuß in Deutsch)
  • 60 g Maple syrup agave, honey or sugar work too!
  • 125 g wholegrain flour normal flour is fine as well
  • 1 tsp baking powder

For the second layer:

  • 250 g Rhubarb
  • 1/2 lemon, juiced
  • 1 large date (or 2 small ones, about 30g)
  • a splash of water

For the thrid layer:

  • 50 g oats
  • 25 g sliced almonds or any nuts
  • 1 tbsp chia seeds (optional)
  • 1 tbsp coconut sugar (or any other sweetener of choice)
  • 1 tsp vanilla extract
  • 1 tbsp coconut oil

How to

  1. Preheat the oven to 180°C.

    For the first layer seperate the egg yolks from the whites. Whip the whites until fluffy and stiff. In the meantime combine the yolks with the apple sauce and maple syrup. Combine flour and baking powder.

    Once the egg whites are stiff gently fold them under the yolk mixture, along with the flour, one at a time. When combined pour it onto a baking tray lined with parchment paper. Bake for 8 minutes.

  2. In the meantime cut the ends of the rhubarb and wash it gently. Cut it into about 3cm (1 inch) sized pieces. Take the pit out of the date and chop it finely. Add both to a pot along with the lemon juice and a splash of water (about 2 tbsp). Bring it to a boil and simmer until the first layer is done baking.

  3. While the rhubarb is simmering, combine the oats, nuts and seeds in a bowl. Melt the coconut oil and combine with the sugar and vanilla. Pour it over the mixture and combine everything well. It should all stick together a bit.

  4. When the frist layer is done baking take it out of the oven. Add the rhubarb evenly on top and sprinkle with the crumble. Bake for another 7-10 minutes.

  5. Take out of the oven and let cool. Serve with some ice cream, whipped cream or a dollop of yoghurt and enjoy!

Kategorie: Austrian, Cuisine, Desserts, Season, Snack, spring, Sugar Free, Summer Stichworte: cake, healthy, healthy baking, healthy cake, Healthy Dessert, healthy treat, lemon, no refined sugar, refined sugar free, rhubarb, rhubarb cake, rhubarb crumble cake, rhubarb crumble cake recipes, rhubarb recipes, spring, spring baking, spring dessert, sugar free, treat

3 Ingredient Strawberry Chia Jam (healthy & vegan)

Mai 15, 2020 by katharina.kuehr Kommentar verfassen

It is the perfect combination of sweet, creamy and tangy. But instead of a lot of white sugar we are using whole food sweeteners, fresh fruits and seeds to achieve the best taste, texture and color. An essential staple in my household. It pairs perfectly with literally anything from yoghurt bowls, to bread and rice cakes.

An Austrian Tradition

In Austria, where I am from, it is very common to eat jam. And lots of jam with bread and butter. It is an Austrian tradition I guess, and both of my grandmothers have taught me how to make the classic. You will find it on every single typical Austrian breakfast table or in any breakfast restaurant. We love it. Most of the time it is paired with a Semmel (a white bread) and some butter. The go-to breakfast.

Why is jam not healthy?

And because it is so typical and popular I decided to make it a little healthier. But what actually is not healthy in it? I mean there is fruit in it! – That is right. There is fruit in it. But because we cook it, a lot of vitamins get to loss. Not all of them but many. Additionally, when we add lots of sugar and gelatine this is not healthy either. We all know that sugar is not the best friend of a healthy diet, especially not white and refined one. To make it healthier I recommend using a healthy sweetener such as raw honey, pure maple syrup or coconut sugar. These still contain sugar but also other nutrients, such as antioxidants and fibre which helps control the sugar rush in your blood.

Is jam vegan or vegetarian?

The answer might surprise or shock you: no it is not. At least most you can find in a supermarket are not. The reason for this is that they contain gelatine in some form. Either pure gelatine or mixed into the sugar. And gelatine is made from animal bones. This means that it is neither vegetarian nor vegan. When you want to buy one that is vegetarian or vegan you have to carefully study the labels and check that it doesn’t contain any gelatine. What is used in most places is called agar-agar or agartine.

How to make homemade jam:

This actually is really simple. Probably easier than you think. And it does not differ much from regular jam. As a first step you add your raspberries to a pot. They can be fresh or frozen, whatever you have on hand. Depending on ho sweet your berries are and how sweet you like your jam to be, you add as much or as little sweetener as you like. If you want, and it makes it really tasty, you can now add a squeeze of lemon juice. It adds some freshness and brings out the flavours even more. Then we let everything simmer for a little while until the strawberries have softened up a lot. Now it is time to transfer it to a blender. If you really do not like the texture of chia seeds in your jam, add them now but adding them later really adds a nice texture to it! So we are blending it up, adding it back to the pot and bringing it to a boil again. Then we let it cool a bit and you will immediately see how it starts to thicken up. After cooling, transfer it to a jar and store in the fridge for a few weeks.

Does it only work with strawberries?

NO! Definitely not. You can make this jam with any fruit of your preference. I also find it to be super tasty with raspberries, apricots, pineapple or orange. Do it with whatever sounds good to you!

How to best eat it:

So, this really is up to an individual! I personally like it most with a rice cracker and some cream cheese. This combination is just out of this world and makes a great snack or dessert. But in a yoghurt bowl, on a toasted slice of sourdough bread or with some brownies it tastes amazing too! Even with cake it works well! Just use it for whatever you would use normal jam too.

I hope that you like this recipe and that you will try it out soon!
Stay healthy & have fun cooking!
Love,
Katie // Une Petite Cuisinière

Print

Strawberry Chia Jam (healthy & vegan)

A healthy version of the classic. Quick, simple and so good! Crazily addicting, perfect addition to any sweet meal!

Course Breakfast, Dessert, Snack
Prep Time 5 Minuten
Cook Time 15 Minuten
Total Time 20 Minuten
Servings 15 servings à 2 tablespoons
Calories 83 kcal

What you will need

  • 750 g strawberries
  • 150 g chia seeds
  • 100-200 g pure maple syrup or honey or cocnut sugar (a healthy sweetener of choice)
  • juice of 1 lemon (optional)

How to

  1. Remove the green leaves from the strawberries and then cut them in half or in quarters. Add them to a pot along with the maple syrup and the lemon juice.

  2. Bring to a boil and let them boil until they are soft and mushy, for about 5 to 10 minutes. If you have one that is heat safe, transfer it to a blender or a food processor, otherwise purée it with a hand blender.*

  3. Pour it back into the pot and add the chia seeds. Bring to a boil again and then take it off the heat and let it cool for about 5 minutes. You will immediately see how it starts to thicken.

    Transfer to jars and store in the fridge for up to 5 weeks.

Notes

* you can add the chia seeds before blending if you want a smoother consistency. But adding them after makes it really interesting!

Kategorie: Breakfast, Desserts, Diet-Specific, Sugar Free, Vegan, Vegetarian, Vegetarian Stichworte: chia, chia jam, chia pudding, chia seeds, dessert, healthy, healthy yam, jam, plant based, raspberries, raspberry jam, strawberries, strawberry jam, sugar free, superfood, vegan, vegan jam

Vegan Coconut Mango Panna Cotta

April 29, 2020 by katharina.kuehr Kommentar verfassen

Take a creamy panna cotta but image it being healthy and with a twist of coconut and mango. And there you go! This incredibly flavourful dessert is what you should make next! The layers are just THE BEST!

Why is Panna Cotta not healthy?

Panna Cotta is, besides Tiramisu, my favourite dessert. I love the creaminess, the consistency and the taste. It just is so good. But, unfortunately, it is not very healthy. IT contains a lot of cream and sugar which really make it a treat but it is not very good for you.

What is this „Panna Cotta“ like?

But as I still want to get that amazing creamy consistency and that sweet taste, I decided to make one that is healthy and a little different. It still has a rich and creamy consistency but also a nice gel-ly like layer of mango, which is so refreshing and sweet.

How to make it healthier:

To make it healthier we need to substitute a few ingredients. Instead of heavy cream we use coconut milk or coconut yoghurt. To cut out the processed sugars, we do not use white one but we use maple syrup or honey. I would not recommend using fresh dates because that would ruin the nice whitish colour. Contrary to maple white sugar, maple syrup and honey also do have some other vitamins and fibre which makes them easier to digest and they are absorbed slower into your blood.

How can you make it vegan?

Since we are wanting to make it vegan, we are of course not using gelantine. If you are not that strict on using vegan products you can also use it. But in this recipe we are going to use agar agar, also known as plant based gelatine. This helps to bind everything together and achieve the pan cotta consistency. We will use this both, for the coconut and the mango layer.

The mango layer:

The mango layer also is super simple. We blend, either fresh or frozen and thawed mango up so it gets saucy. If you like to have a few chunks left, you can blend it a little less. Depending on how sweet your mango is, and how sweet you want it to be, you can add a little sweetener here too.

How to serve them?

I like to poor them in really small jars or bowls so you can have one (or probably more) as a small snack or a dessert. I love how cute they look when serving them and they also have a nice serving size. If you do not have such on hand, you can just pour it into a large dish and scoop a bit out whenever you want to enjoy it.

Final important words:

As already mentioned, it works great as a snack or dessert! Half an hour before serving it, take it out of the fridge. This is an important step. If you serve it cold, it has way less flavour, which would be sad because it tastes really amazing when served at room temperature! The fresh flavours make it a really nice thing to have during hot days in spring and summer!

I hope that you like this recipe and it gives you some inspiration to cook healthy!

Happy cooking,
Enjoy,
Katie // Une Petite Cuisinière

Print

Vegan Mango Coconut Panna Cotta

A healthy and vegan version of the italian classic! WIth an exotic twist, it is just an amazing snack or dessert!

Course Dessert, Snack
Cuisine Italian
Prep Time 10 Minuten
Cooling time 1 Stunde
Total Time 1 Stunde 10 Minuten
Servings 6 servings
Calories 164 kcal

What you will need

  • 450 g coconut yogurt alternatively: Coconut milk
  • 4 g Agar Agar or 2 pieces of gelatine
  • 50 g maple syrup
  • 450 g mango (can be frozen and thawed)
  • 50 ml water
  • some shredded coconut

How to

  1. In a small pan add the agar agar and the water and heat it up.

    Meanwhile pure the mango so it has a sauce consistency.

    Bring the agar agar mixture to a boil. Once boiling, reduce to a simmer and cook for 1 minute, stirring continuesly. Take off the heat and divide it into 2 bowls. In one bowl mix in about 1/3 of the coconut yoghurt or milk and stir through until well combined. Then add the agar agar coconut mixture to the remaining coconut yoghurt/ milk and combine.

    Repeat his process with the mango.

    Into small jars or a large dish add the coconut layer first and make it even. Then add the mango layer on top and put it into the refridgerator for at least an hour.

    Half an hour before serving, take it out and sprinkle with some shredded coconut.

    Serve (at room temperature) and enjoy!

Kategorie: Desserts, Diet-Specific, Snack, Sugar Free, Vegan

« Vorherige Seite
Nächste Seite »

Footer

What has been happening on my Instagram

Copyright © 2024 Une Petite Cuisinière on the Foodie Pro Theme