• Zur Hauptnavigation springen
  • Skip to main content
  • Zur Fußzeile springen

feel food club

  • Home
  • About me
  • My Recipes
  • Blog
  • Navigation Menu: Social Icons

    • Instagram

Oriental

30-minute spicy Muhammara Breakfast Shakshuka (w/ NENI am Tisch)

Februar 5, 2021 by katharina.kuehr Kommentar verfassen

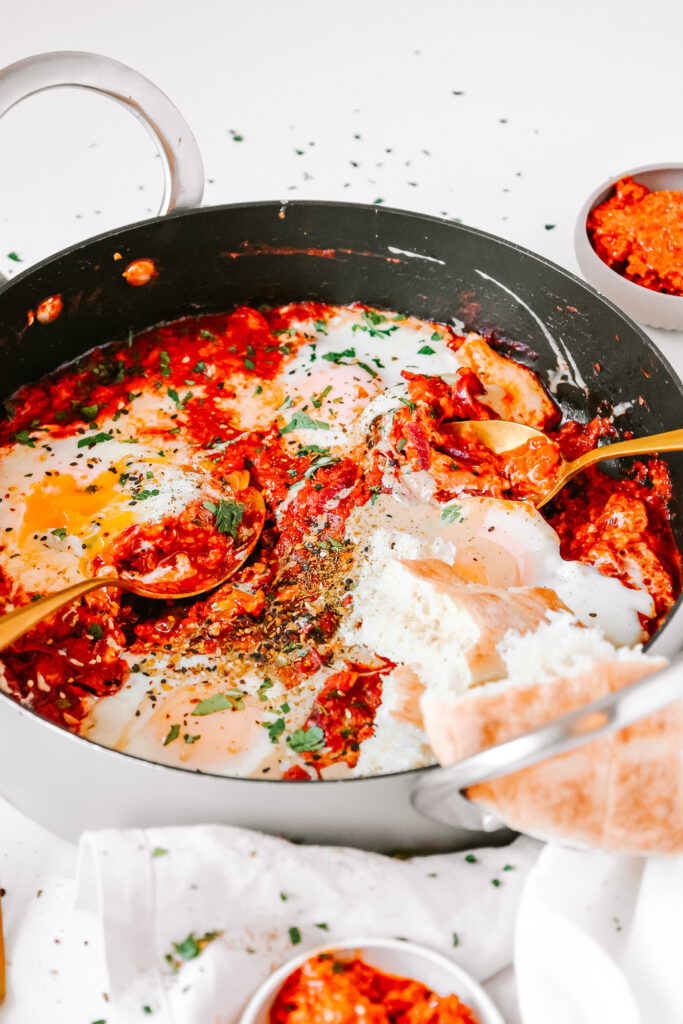
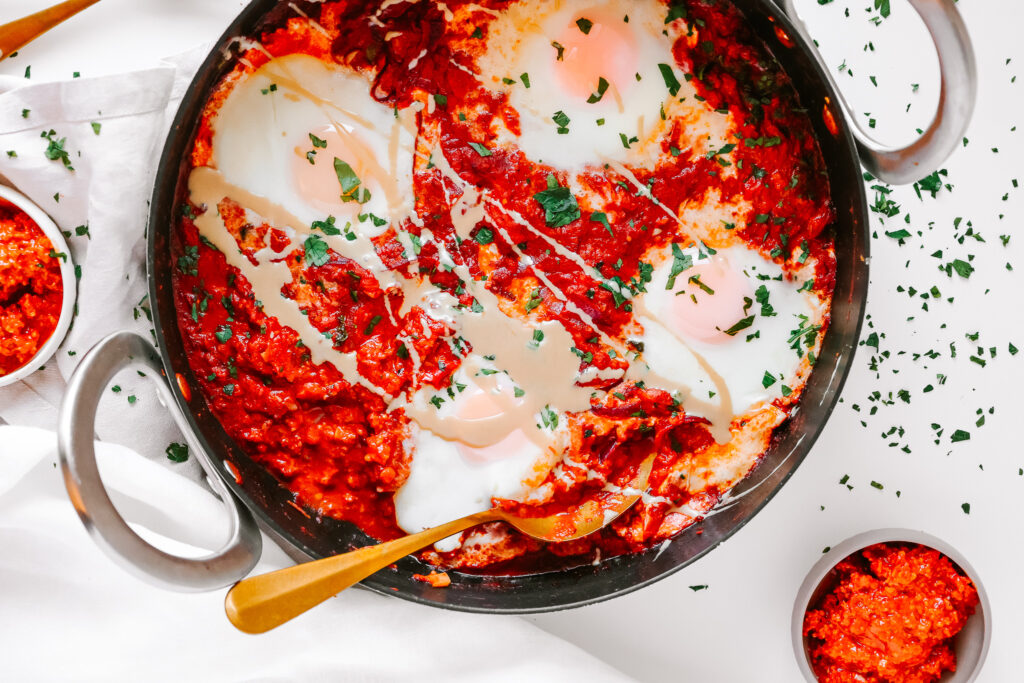
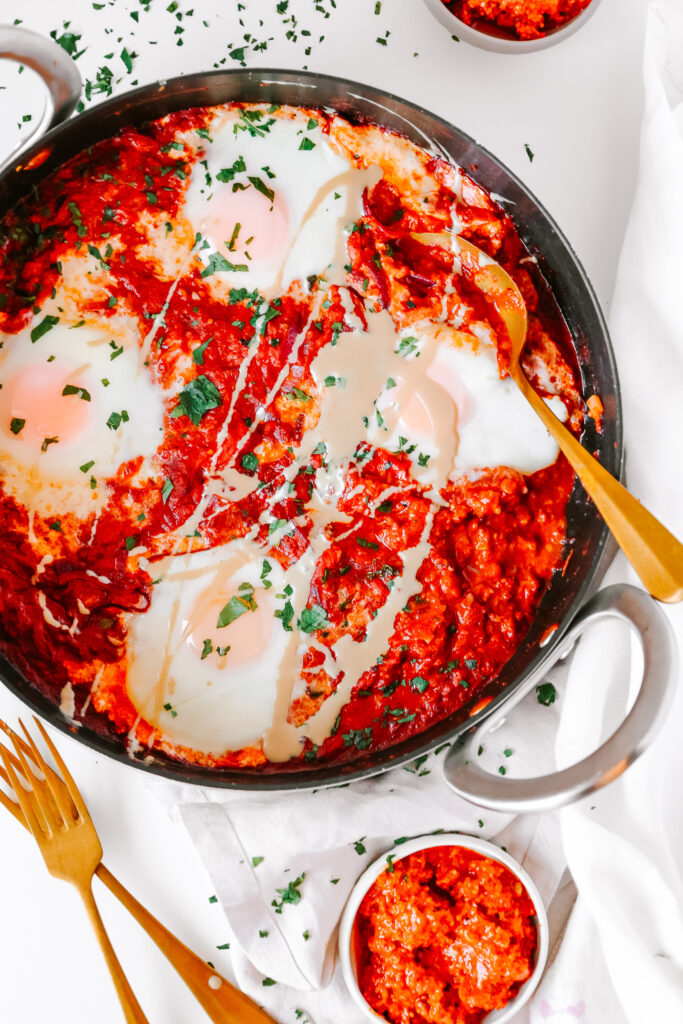
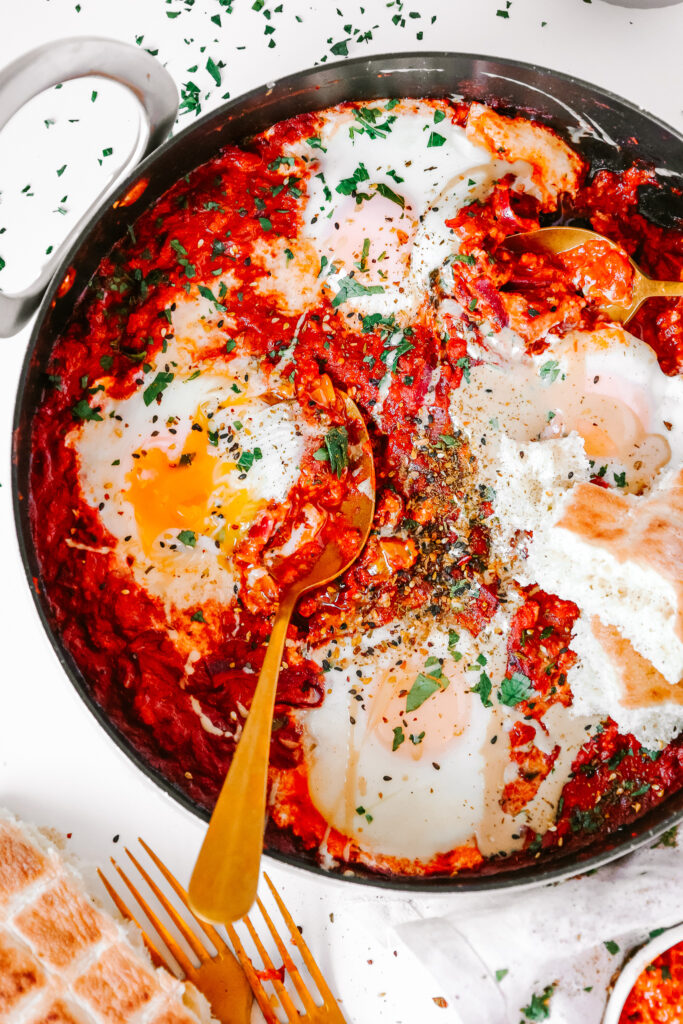
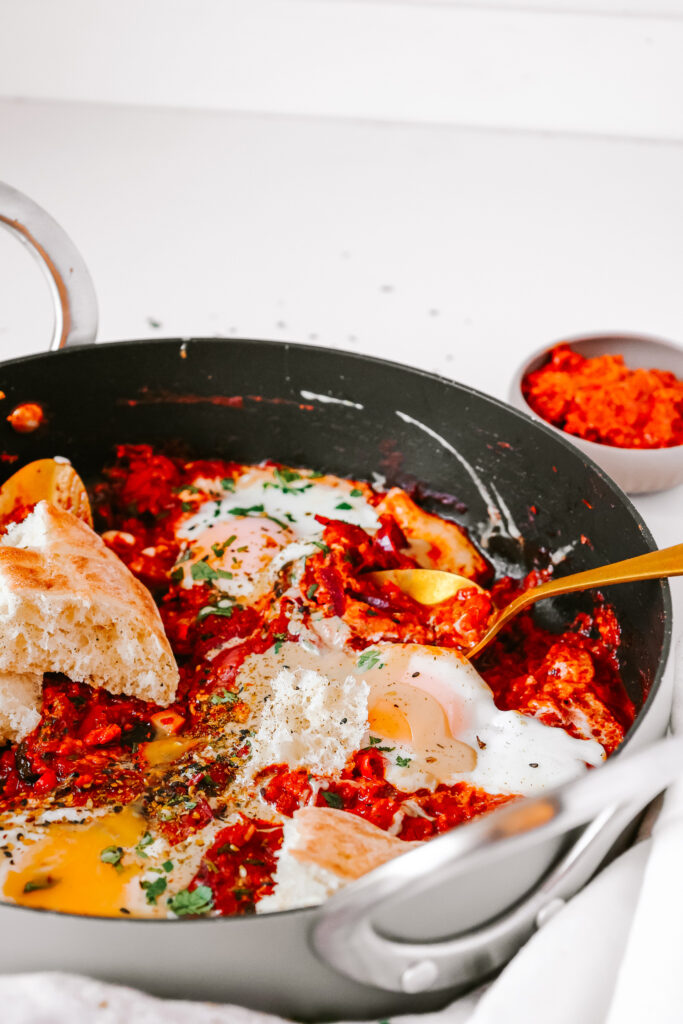
A creamy, spicy, tangy and so flavourful tomato sauce with muhammara. In it, perfecty baked eggs with runny yolks, set whites and topped off with some fresh Tahin and paisley. Dip it with some warm and soft pita bread and your brunch is perfect!

What is shakshuka?

Shakshuka is a dish that is believed to have originated in the Middle East, although it is not sure. It usually consist of olive oil, onion, garlic, tomatoes, peppers and sometimes cooked vegetables and minced meat. In this sauce there are poached eggs, which then are baked. It most of the times is sprinkled with a spice mixture of cumin, paprika, cayenne pepper and nutmeg. Today you can find it at many brunch spots or oriental restaurants.

What is special about this dish?

Instead of regular bell peppers, we are using Muhammara. What is Muhammara? This is a dip or spread made out of red bell peppers, walnuts and olive oil and it is SOSO good! It originally comes from Syria and now is very popular in oriental Cuisinie. Where do I get it? It is possible to make it yourself, but it definitely is easier, more convenient and quicker if you buy it ready! And there truly is no better one than the one from NENI am Tisch! You can get this at SPAR, EDEKA, Globus & tegut, so there are many supermarkets! If you do not have one of those near you – it is worth a little trip!

Besides our star of the show, it also is pretty spicy, although this is optional. If you like spicy, go for it (because chilli makes everything better) and if you don’t, just leave it out!

Is this dish health?

Yepyepyep. The muhammara is, as previously mentioned, made from roasted red peppers, and walnuts, which means you are getting a lot of Vitamins, healthy fats and protein. Besides, we have the tomato sauce, also high in vitamins and has some fibre. The extra onions and garlic do not only add more flavour but also more nutrients and the eggs add extra protein and healthy fats! That already is it – super simple!

How to make it?

Also not difficult! You start by frying the onions, garlic and chilli to the oil and let them sautés until soft. Next you add the Muhammara and stir it in so it cooks a little. Then we’ll add some canned (and crushed) tomatoes as well as tomato paste, water, salt and pepper and let it simmer for a few minutes to get really flavourful. If you want, you could now also add some kale or spinach to it to add some extra greens!

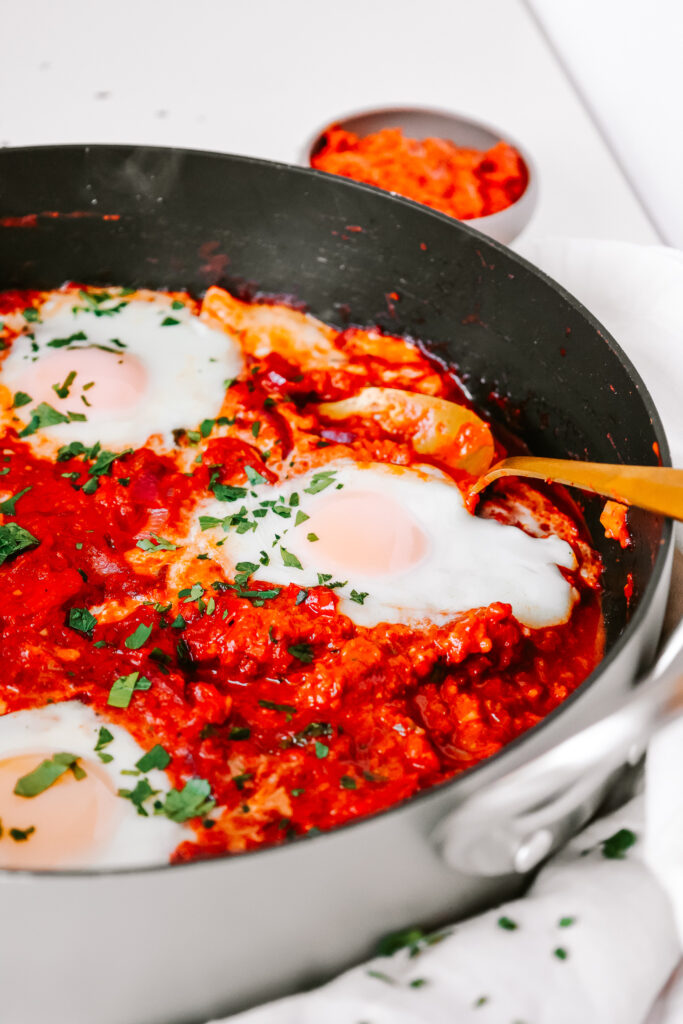
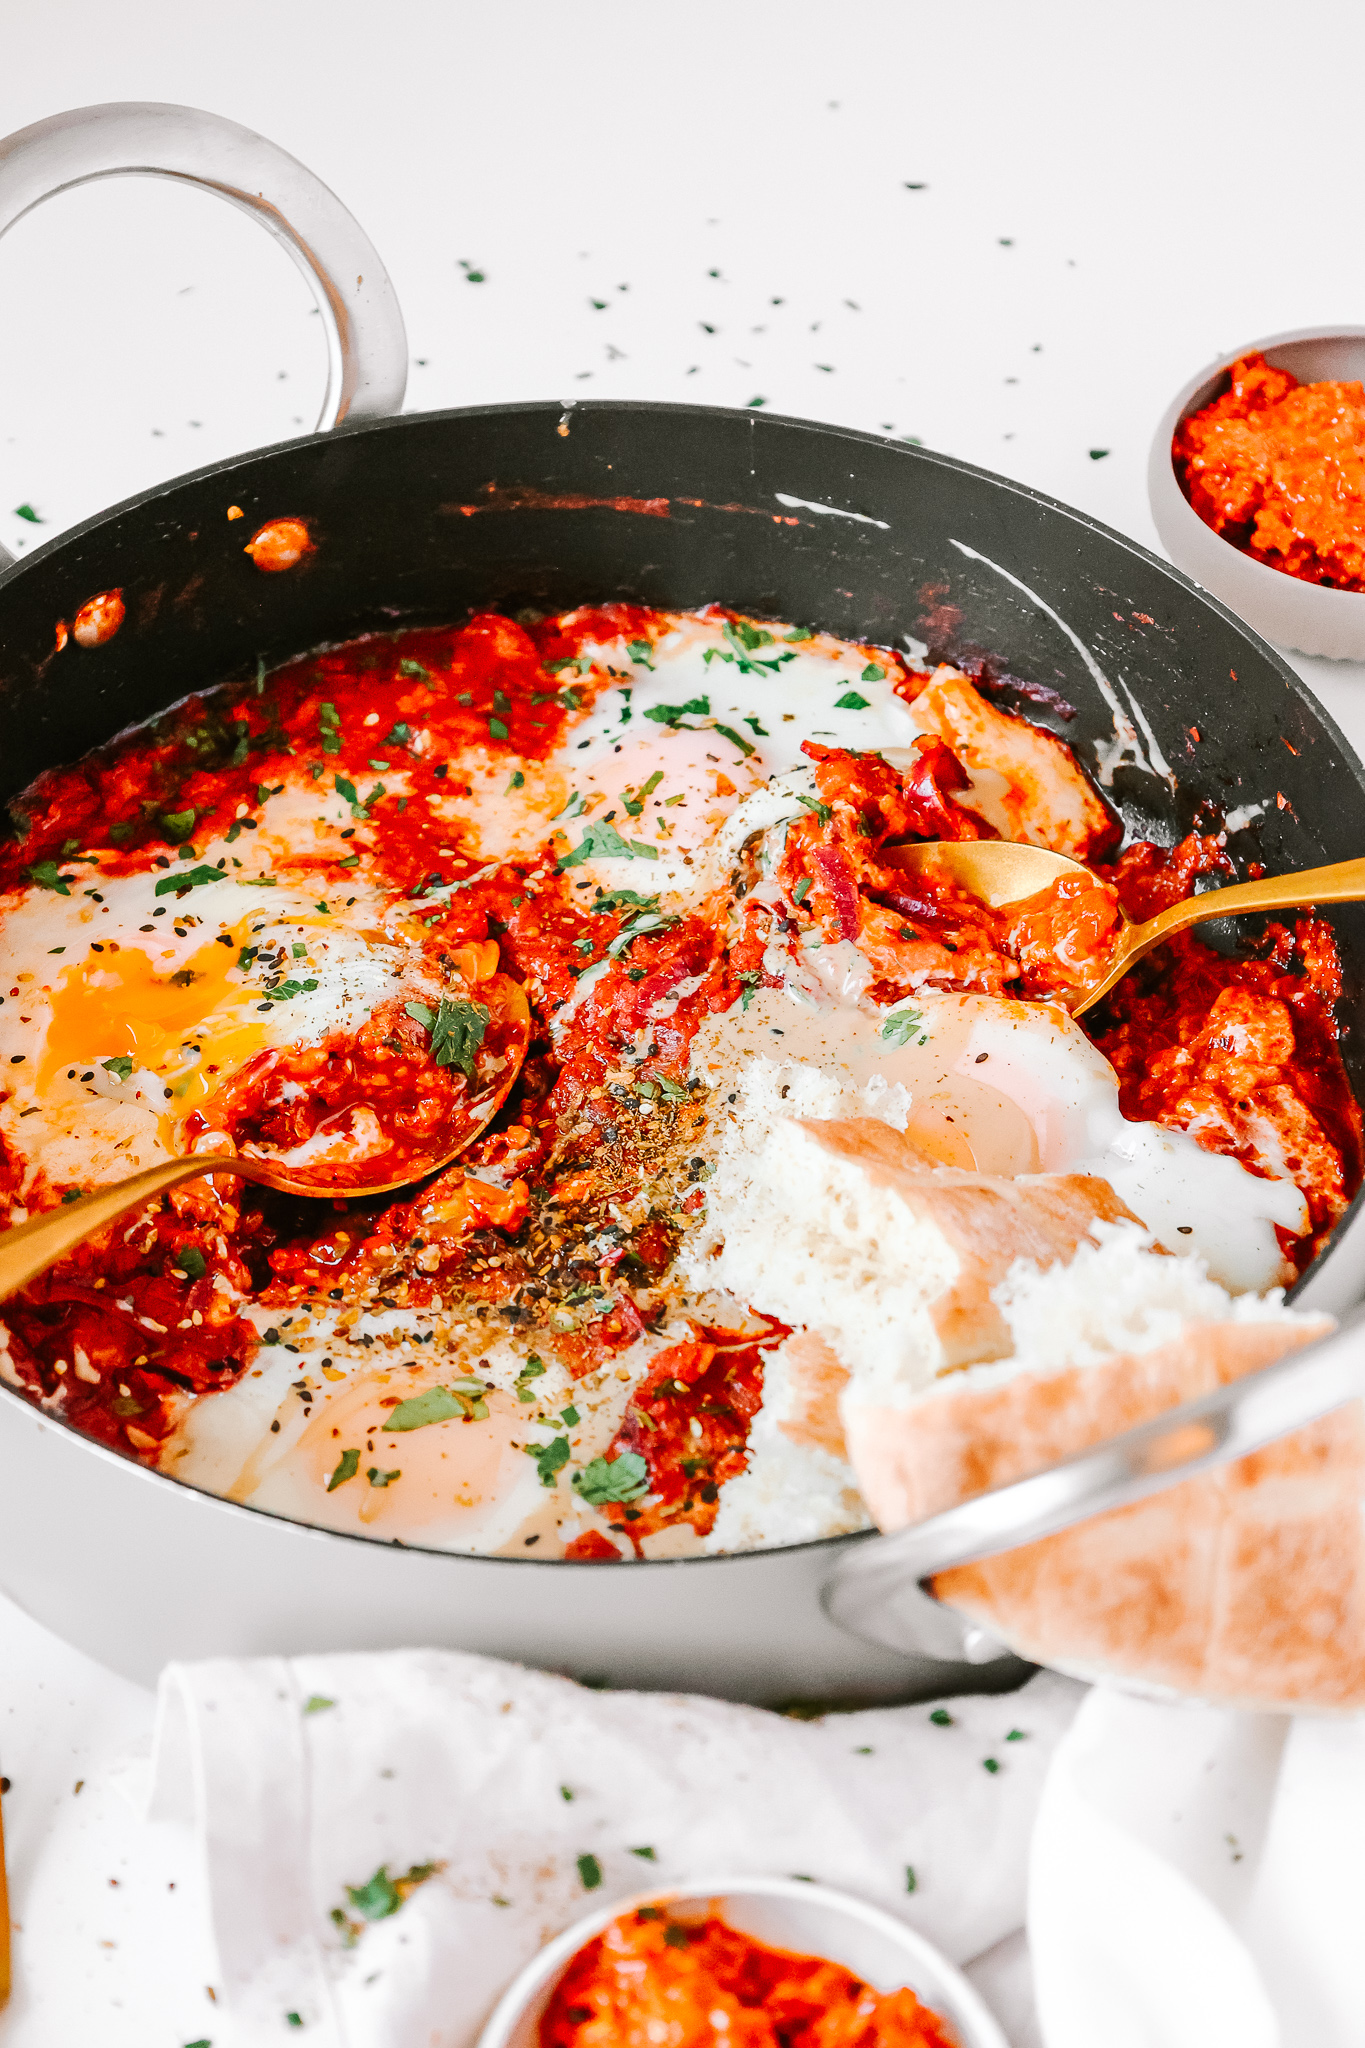
To poach the eggs, we are creating some mould in the sauce with the spoon. Then we’ll crack the eggs in and it already goes into the oven for 10-15 minutes until the whites has set and the yolks are still runny. To serve, we are just garnishing it with some parsley and dipping some pita! That is it – super delicious and super easy!

When to best have it?

This is great for a brunch with the family, as it is easy to prepare beforehand if you premake the sauce! Another great occasion is a quick lunch as it really comes together quite quickly and still is full of flavour. Or you could have it as a light dinner – I also really love that!

I hope you are enjoying this at least as much as we did, and that you’ll be making it on repeat! I would love to hear how you like it

Print

30-Minute Easy Muhammara Shakshuka

A delicious, spicy and creamy tomato – red pepper sauce (with the best Muhammara from NENI), along with some poached eggs and warm pita. Breakfast dreams coming true!

Course Breakfast, brunch, Main Course
Cuisine middle eastern
Prep Time 15 Minuten
Cook Time 15 Minuten
Total Time 30 Minuten
Servings 2 servings

What you will need

  • 1 tbsp olive oil
  • 1 red onion
  • 2 cloves garlic
  • 1 chilli (optional)
  • 1 package muhammara (125g)
  • 1 can tomatoes (400g)
  • 2 tbsp tomato paste
  • 3-4 tbsp water
  • 1 handful greens such as spinach or kale
  • 4 eggs
  • fresh pita to serve with

How to

  1. Finely slice the red onions and chop the garlic and chili and add them into a cold pan with the oil. Heat it up and fry for 2-3 minutes until soft and glassy.

  2. Add the Muhammara, stir in and let simmer for about 2 minutes.

  3. Add in the canned and crushed tomatoes, tomato paste, water, salt & pepper and let simmer for another 3-4 minutes.

  4. Then grab a wooden spoon and make four molds into the tomato sauce. Crack one egg into each mold and then bake for 10-15 minutes until the whites set and the yolks are still runny.

  5. Take out of the oven, serve with some fresh Tahin and warm pita bread! Enjoy!

Happy cooking & enjoy,
Love,
Katie // Une Petite Cuisinière

Kategorie: Breakfast, Cuisine, Diet-Specific, Middle Eastern, Oriental, Vegetarian Stichworte: 30 minutes, breakfast, brunch, easy, eggs, family meals, healthy, healthy breakfast, healthy brunch, Muhammara, Neni, peppers, quick, Shakshuka, tomatoes, vegetarian, walnuts

Easy Oriental Baked Pumpkin with Creamy White Bean Hummus

November 13, 2020 by katharina.kuehr Kommentar verfassen

It’s finally the season of our all-beloved veggie! Soups, stews, carving, roasting. No matter when and it which way, pumpkin always is a great idea! But the good same old soup can also get a little boring after a while. So let’s bring some new spices into your kitchen and try out having pumpkin in a different way! Soft roasted pumpkin on a bed of creamy white bean hummus, topped with pine nuts and a good drizzle of olive oil. Perfect fall lunch or dinner and great for meal prep! 

What is special about this dish? 

The combination of pumpkin with oriental flavors and the slightly different variation of hummus! Hummus usually is made out of chickpeas, tahin and olive oil. In this recipe, we are using white beans, also called butter beans instead of chickpeas. They make it equally as creamy and taste very similar. The major difference is that compared to chickpeas, white beans have a milder and slightly buttery taste. This goes in great harmony with the roasted pumpkin. This is flavored with an oriental spice mix and then baked. To finish off we are topping it with roasted pine nuts. This gives the final touch and is really delicious! 

Is this dish healthy?

Yes and yes! Let’s start with the white bean hummus. Beans have a great nutritional value. They are an incredibly good source of plant based protein and fibre. Plus, the addition of the olive oil and tahin not only make it super creamy but they also add a decent amount of healthy fats.

Pumpkin, as you can read in my November Top 5 as my food of the month, is also super nutritious. Lots of vitamins such as B1, B2, B6, C and E as well as other minerals. Plus it contains a lot of fibre, which is really beneficial for your digestion. 

Also the pine nuts are really nutritious, as all nuts! Protein, unsaturated fats and minerals. Brainfood at its finest! 

How to make this dish

This actually is super simple. To start, you need to combine the spices with some olive oil and brush the pumpkin with it. Then pop it in the oven for half an hour and that’s all you got to do for the pumpkin! 

Next up, making the hummus. For this you need a food processor or at least a blender! Into this you add the white beans, olive oil, tahin, salt, paprika and garlic powder. And VERY important: you need to add a little splash of vinegar! Sounds a bit unusual at first, but believe me, it makes the difference. The slight acidity makes the hummus so super addicting, I promise, soso good! And last, but not least we also need to add some of the liquid the beans were preserved in. This helps to make it super creamy! 

When and how to best have it

If you are wondering when to best have it, I can only tell you so much: it works at any time of the day! It is a great addition to your brunch, works great as a lunch or a comforting dinner! What is great about this is, that it works amazing for meal prep too! You just need to make the hummus first. This you can store in the fridge for up to a week. The hummus need to be baked and stored separately and can be reheated when you want to eat it! 

In terms of how to best have it, I recommend serving it either with some kind of bread such as pita bread or with some cooked grain as quinoa! If you are not super hungry, it also works great with a green salad on the side!

Perfect comforting and healthy dish for fall to make use of all of the pumpkins that are in season! Easy and delicious! 

Print

Oriental Spiced Baked Pumpkin with Creamy White Bean Hummus

Creamy, tangy white bean hummus topped with super flavorful, oriental spiced pumpkin and topped with crispy nuts. Fall comfort at its finest.

Course Appetizer, dinner, lunch, Main Course
Cuisine oriental
Prep Time 10 Minuten
Servings 4 servings
Calories 391 kcal

What you will need

For the pumpkin:

  • 1 hokkaido squash
  • 1/2 tsp chili flakes
  • 1/2 tsp salt
  • 1/2 tsp oregano
  • 1/2 tsp cumin
  • 1/2 tsp thyme
  • 2 tsp sesame seeds
  • 2 tbsp olive oil

For the rest:

  • 1 can white beans
  • 1 tbsp tahin (this is a paste made out of sesame seeds. If you do not have this, simply add more olive oil)
  • 2 tbsp olive oil
  • 1 tsp vinegar
  • 1/2 tsp salt
  • 1/4 tsp paprika powder
  • 2-3 tbsp of the liquid the white beans were canned in
  • 2-3 tbsp parsley
  • 2 tbsp pine nuts
  • some PIta bread to serve

How to

  1. Preheat the oven to 200°C. Slice the pumpkin into about 1-2cm thick slices. Lay them out on a baking tray. mix the spices with the olive oil and brush the pumpkin with the mixture. Bake in the oven for 20-30 minutes until soft.

  2. In a food processor combine the drained white beans, tahin, olive oil, salt, paprika, vinegar and the preserved liquid in which the beans have been stored. Blend until creamy. If not creamy enough add more of the liquid or more olive oil.

    Add the pine nuts to a pan and heat them up. Fry them until golden brown, then immediately take them off the heat.

  3. Divide the white bean hummus onto plates. Top with the pumpkin when done. Sprinkle with the pine nuts and parsley. Enjoy!

I hope you will enjoy this recipe!
Happy cooking,
Katie // Une Petite Cuisinière 

Kategorie: Appetizers, Cuisine, Diet-Specific, Fall, Lunch/ Dinner, Oriental, Season, Vegan, Vegetarian Stichworte: easy, easy dinner, fall, fall food, fall vegan, family friendly, healthy lunch, healthy pumpkin recipes, healthy recipes, healthy vegan, hokkaido sqush, lunch, meal prep, plant based, pumpkin, pumpkin recipes, vegan, vegan pumpkin recipe

Quinoa Breakfast Bowls with Herbed Tahini and Perfect Poached Egg

Oktober 23, 2020 by katharina.kuehr Kommentar verfassen

If you know me, you know I L-O-V-E brunch! Like a lot! I have got brunch guide and brunch recipes to celebrate this part of the day! And to add to this collection I had to include a bowl! This combination of fluffy quinoa, yammy eggs and that delicious creamy tahini sauce is absolutely amazing!!! 

Whoever says breakfast is not the best meal of the day must be from another planet. It truly is the best! It is the thing you start your day with, the first thing you put into your body. It sets the tone for the day and it is soso delicious! 

What is special about this dish? 

A bowl for breakfast. With greens and quinoa? I do not think that this is the average breakfast. It is a combination of 2 amazing things: breakfast + bowls. So it can only be good! So I think this whole dish is special. But also the Tahini Sauce is kind of pretty amazing! 

How to make it:

It actually is not very hard to be honest! Cooking quinoa is not difficult at all! It is like cooking rice actually. So taking 1 prt quinoa, 2 parts water and some salt, bringing it to a boil, reducing it to a simmer and letting it simmer until soft and the water is soaked up! Preparing the veggies is not complicated either. I prefer to sauté the chili garlic greens and baking tomatoes and mushrooms because The greens shrink down and soften best when made in a pan and the tomatoes get most flavor when prepared in the oven. For the sauce we only need to blend up all of the ingredients and that’s it! 

I know that most people will be afraid of poaching eggs. And yes, it is a little tricky at first, but it won’t take long and you know how to do it! To start, bring a large but rather flat pot with water to a boil. Once it started boiling, turn down the heat so it only simmers slightly. Then we add a generous splash of vinegar to the water. Crack each egg into a small bowl, but be careful so the yolk does not break apart. Once the water simmers, we take a wooden spoon and create a swirl in the water. It will keep that swirl for a while itself (without having to do it with the wooden spoon anymore) and that is when we gently and carefully slide the egg in. Then we let it sit for a bit before repeating it with the next one! I know that this may sound a little overwhelming at first but when following it step by step it will work out!

Is this healthy?

It is not only yummy but it is healthy too! Quinoa is super nutritious and high in protein and carbs! The eggs also contain lots of protein. The veggies help you to get your vitamins in and the green Tahini sauce adds some unsaturated fats and more vitamins to keep you full! It is a very balanced meal all in all and super delicious! 

I really like to have this as a weekend brunch, a meal prep breakfast or even lunch! You can truly have this at any time of the day and you will enjoy it! The flavors work in such great harmony together and it all just is an explosion of flavors in your mouth! 

I hope that you will enjoy this and that this will be a fun twist to your regular breakfast game!

Print

Quinoa Breakfast Bowls with Herbed Tahini and Perfect Poached Egg

Delicious. Easy. Healthy. And so so good. Perfect for brunch, breakfast, lunch, dinner or anything inbetween.

Course bowl, Breakfast, brunch, Main Course
Cuisine oriental
Prep Time 10 Minuten
Cook Time 15 Minuten
Total Time 25 Minuten
Servings 2 bowls
Calories 583 kcal

What you will need

  • 150 g Quinoa
  • 4 eggs
  • 4 handful spinach (you can also use something like kale for example)
  • 1 tbsp olive oil
  • 2 garlic cloves
  • 1 chili
  • 100 g cherry tomatoes
  • 100 g mushrooms
  • 2 tsp honey

For the green Tahini Sauce

  • 2 tbsp Tahini
  • 2 tbsp plant based yoghurt
  • 1 tbsp chopped Parsley
  • 1 tbsp chopped basil
  • 1/2 lemon juiced
  • 1 tsp chopped mint

How to

  1. Preheat the oven to 180°C. Add the tomatoes and halfed mushrooms to a baking tray. drizzle with the honey, some olive oil and sea salt. Bake in the oven for 10 minutes.

  2. In the meantime add the quinoa to a pot along with 300ml water and a pinch of salt. Bring to a boil, reduce the heat and let simmer for about 10-15 minutes until the liquid is soaked up and the quinoa is fluffy.

  3. In a pan heat up the olive oil. finely slice the garlic clove. Cut the chili in half and remove the seeds. Slice the rest into thin slices too. Once the oil is hot, add the garlic and chili and fry for 1 minute. Add the greens (that have been chopped into bite sized pieces before) and let cook on medium high heat for 5-8 minutes.

  4. For the poached egg bring a large, flat pot with water to a boil then reduce the heat so a slight simmers. Add a generous splash of vinegar. Crack each egg into a small bowl, but be careful not to break the yolk. Take a wooden spoon and create a swirl in the water and carefully slide the egg in. Then we let it sit for a bit before repeating it with the next one! Let each one in the water for about 3-4 minutes, then take out and let the excess water drip off on some kitchen paper.

  5. Blend all the ingredients for the Tahini sauce in a blender.

  6. To assemble the bowls add the quinoa, greens and veggies to each one. Top with the eggs and finish off with the green sauce. Enjoy!

Happy cooking,
Enjoy,
Katie // Une Petite Cuisinière 

Kategorie: Breakfast, Cuisine, Diet-Specific, Lunch/ Dinner, Oriental, Vegetarian, Vegetarian Stichworte: bowl, breakfast, breakfast bowl, brunch, brunch feast, greens, healthy, healthy breakfast, nourish bowl, quinoa, Sunday brunch, vegetables, vegetarian, weekend

The Best Healthy Falafel-style Pita with Dreamy Pink Goddess Sauce

August 31, 2020 by katharina.kuehr 1 Kommentar

That bite into a warm and soft pita filled with a giant dollop of hummus, that coleslaw, the crispy deep fried falafel and that yummy yoghurt-mayonnaise sauce on top. Sounds heavenly doesn’t it? As good as it sounds, it is really everything else than healthy. But we do not want to miss out on that deliciousness. So why not making it healthy?

What is special about this dish?

A lot to be fair. We have falafel, that are not deep fried, as traditional falafel would be but pan fried. Then we have a pink tahini and greek yoghurt sauce (which I have never seen at any of those falafel stands before) instead of the mayonnaise yoghurt dressing and we have a homemade tzatziki and self-made hummus for that extra flavour .

First, what is falafel and where does it come from?

Falafel is a ball made out of chickpeas or cassava beens combined with different spices and herbs before it is deep fried. Usually it is served in a pita bread or to go with hummus or other mezze appetisers. It is believed to have originated in Egypt and can be found in the Middle Eastern cuisine today.

Why are falafel not very healthy?

While many people would believe that falafel are healthy because they are made out of chickpeas and are vegan, that is not quite the case. That is true, that the base of the falafel is healthy, so the „dough“ is healthy. But what is not nutritious about them then? The fact that they are deep fried. All of the oil adds a lot of fat and calories. It is more than fine to have fried food once in a while but it is not something that is healthy, one needs to be aware of that.

Authentic falafel are made with raw chickpeas that have been soaked. This way they are soft enough to blend but not too soft so you do not have a mushy consistency. But since we do not all have the time to soak falafel (especially when we want a quick meal), in here we use flour for the right consistency and canned falafel. This way they will not be white as crispy, but they are way quicker and still delicious!

How to make this dish healthy

Instead of deep frying the falafel, we prepare them in a pan with just a little oil. Yes, you can also bake them in the oven but to be honest, I never find that those get really crispy when being prepared in the oven. When making them in the pan, we still get that crisp (not the exact same of course, but a really good one) while keeping things healthy.

Also, to replace the mayo dressing that often comes on top we make a beetroot-greek yoghurt – tahini dressing. While homemade mayonnaise, in moderation is not unhealthy, store bought ones often have a lot of additives and preservatives in them and making your own one is a little tricky. The sauce we are making is high in protein, from the greek yoghurt, tastes delicious with the beets (and also has a nice colour), and has a good amount of healthy (or unsaturated fats) from the Tahin.

To make this entire dish even healthier you can substitute the normal pita with whole grain pita. This just is pretty difficult to find, which is the reason I stick with normal pita.

How do you make healthy falafel

This is super easy, to be honest. You need to drain canned chickpeas and add them to a food processor along with a bunch of parsley, onion, garlic, spices, and (wholewheat) flour. Then you just pulse everything together until you have reached a sticky, doughy consistency. (if you do not have a food processor or blender you can also add everything to a bowl, very finely chopped and mix it with a fork or your hands). Then you form little balls with your hand, one at a time and roll them in breadcrumbs.
In a hot pan with oil, you add the falafel and let them fry until crisp for about 3 minutes on each side. That is it!

Meal prep friendly?

I would say so. Pack everything separately and mix together before eating. The falafel will not be quite as crisp anymore but they’ll be just fine when you heat them up in the oven.

I hope that you will enjoy this recipe and please your family and friends with it!

5 von 1 Bewertung
Print

The best falafel-style pita with dreamy pink goddess sauce

A healthy version of the dreamy Middle Eastern classic. A little crispy on the outside, super soft soft on the inside falafel with a creamy delicious Tahini-Beetroot Sauce, Tzatziki and Hummus. Not difficult, but really healthy.

Course Appetizer, dinner, lunch, Main Course
Cuisine middle eastern
Prep Time 25 Minuten
Cook Time 10 Minuten
Total Time 35 Minuten
Servings 4 servings
Calories 397 kcal

What you will need

For the falafel:

  • 1 can chickpeas
  • 2-3 tbsp flour (whole grain is prefered)
  • 1/2 red onion
  • 1 bunch parsley
  • 3 cloves garlic
  • 1 tsp salt
  • 1/2 tsp cayenne pepper
  • 1/2 tsp cracked black pepper
  • 1/2 tsp cumin
  • breadcrumbs
  • 2 tbsp olive oil

For the beet sauce

  • 1 small beetroot (precooked)
  • 100 g greek yoghurt
  • 1 tbsp Tahin
  • 1/2 lemon juiced
  • 1 clove garlic
  • 2 tsp honey

For the rest:

  • 1 cucumber
  • 200 g greek yoghurt
  • 1 clove garlic
  • 2 pita breads
  • some hummus
  • fresh radishes & tomatoes
  • 2 handful salad

How to

  1. For the falafel combine all the ingredients, except the breadcrumbs, flour and olive oil in a food processor and pulse until combined (do not blend until smooth!!!). Then add the flour a tablespoon at a time and pulse it in (not blending fully, again!) until the dough is not sticky anymore. Chill in the frisge for half an hour.

  2. In the meanwhile peel the cucumber. Then cut into very thin slices (preferably with a mandoline). Add it into a bowl and salt generously. Let sit for 20 minutes.

  3. In the meantime slice up the raidshes and tomatoes and wash the salad.

  4. For the beetroot sauce add all of the ingredients to a food processor and blend until smooth. If the sauce is too thick add some water or olive oil!

  5. After chilling take about 1 tablespoon at a time of the falafel dough and roll out in your hands into a small ball. Toss in the breadcrumbs until they cover the ball fully. Repeat with the rest of the dough. Heat up the oil in a pan and add the falafel. Let fry on this side for about 2-3 minutes on medium high heat before tossing. Do not toss around in the pan immediately since the dough still is a little bit soft. After those 2-3 minutes, start tossing them around in a pan softly and fry for another 5-6 minutes until they are golden brown on each side and crispy.

  6. Prepare the Tzatziki. Take a clean kitchen towl and place the salted and sliced cucumber in it. Squeeze out all of the remaining water of the cucumber and put it back into the bowl. Press the garlic and add it along with the greek yoghurt. Combine everything well and season with more salt if desired.

  7. To serve fill the pita with hummus, the veggies and the tzatziki. Add the falafel on top and drizzle with the sauce. Serve and enjoy !

Happy cooking,
Enjoy,
Katie // Une Petite Cusinière

Kategorie: Appetizers, Cuisine, Diet-Specific, Lunch/ Dinner, Middle Eastern, Oriental, Vegetarian, Vegetarian Stichworte: beetroot, beetroot sauce, best falafel, chickpea, chickpea recipes, crispy falafel, cucumber, falafel, falafel pita sandwich, family friendly, healthy, healthy chickpea recipes, healthy falafel, healthy family friendly, healthy pita, pita, pita sandwich, tahini, tahini sauce, tzatziki, vegan meals, vegetarian, vegetarian dinner

Nächste Seite »

Footer

What has been happening on my Instagram

Copyright © 2024 Une Petite Cuisinière on the Foodie Pro Theme