• Zur Hauptnavigation springen
  • Skip to main content
  • Zur Fußzeile springen

feel food club

  • Home
  • About me
  • My Recipes
  • Blog
  • Navigation Menu: Social Icons

    • Instagram

Appetizers

The Best Healthy and Crispy Cauliflower Tacos with Spicy Mango Salsa

November 10, 2020 by katharina.kuehr Kommentar verfassen

Tacos. One of the best foods ever invented. Even if most Tacos, especially the ones in Europe are everything else than traditional, they still are incredibly delicious. And what I love most about them is that they are so versatile!! You can have them with meat, fish, tofu, mushrooms, lentils, chicken or with cauliflower. Just a huge disclaimer: this cauliflower is NOT BORING. Everything else than boring!

What is special about this dish?

The filling of the Taco. My Mexican friends explained me that in Mexico, the real, authentic, filling is prepared greatly different than in most other parts of the world. There, you have a huge stick with lots of meat on it, that is turning over heat. When it is cooked, you slice down the meat and add it into the tortillas. A bit similar to Kebap I believe.

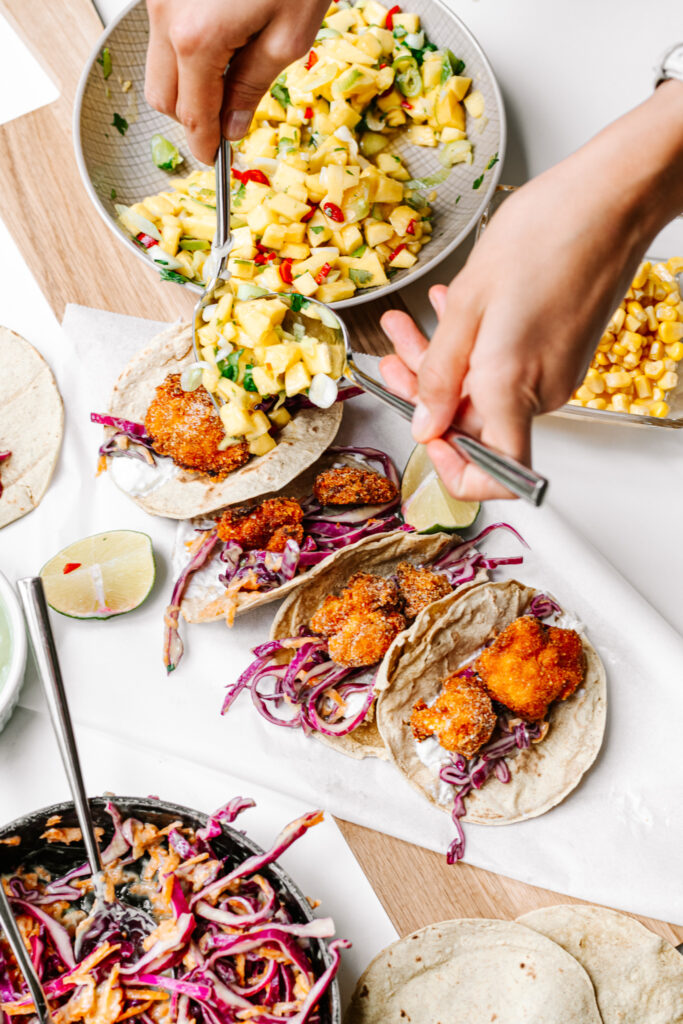
So yes, this would be the traditional. But if you look at that picture, you c an see that this cauliflower obviously has not been sliced down from a stick. No, not at all. This cauliflower is tossed in a super delicious, very non traditional marinade made out of Ajvar, samba olek, olive oil, maple, tomato paste, garlic cloves and sesame oil, then tossed in breadcrumbs and baked until crispy. This adds SO much flavour to the cauliflower and will make it taste amazing! This recipe will really convince all meat eaters and non-cauliflower fans of this vegan version of tacos.

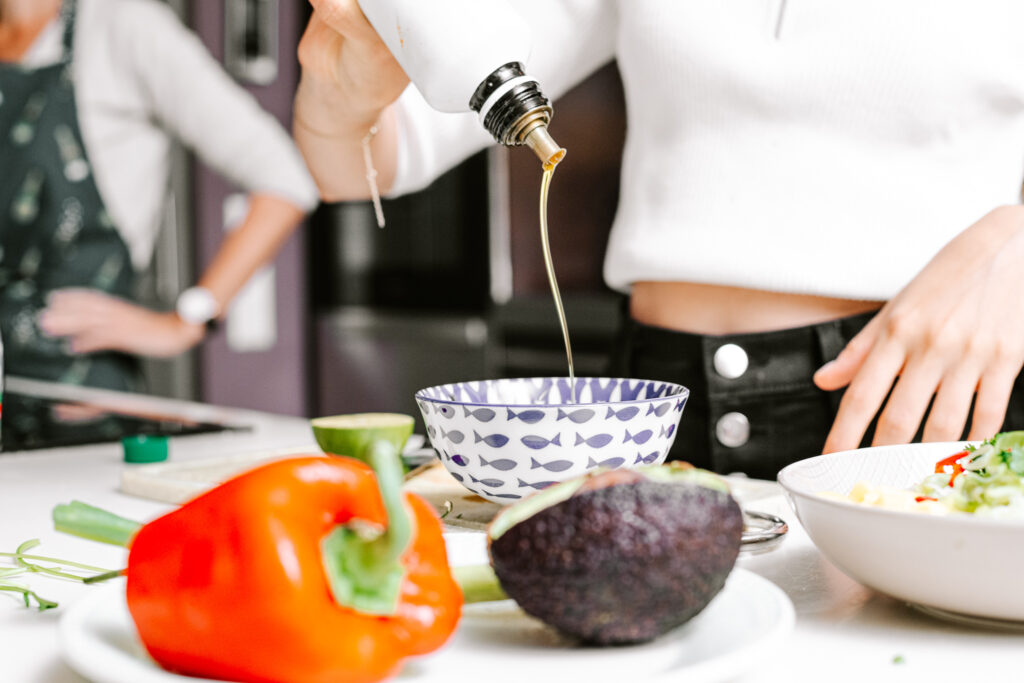
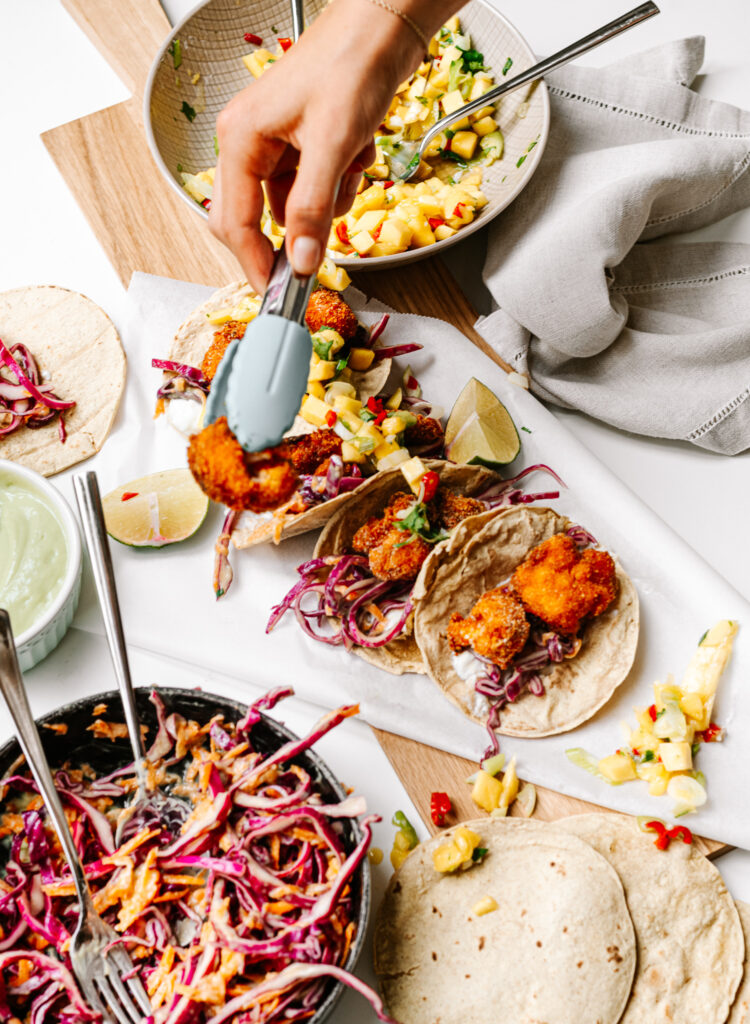
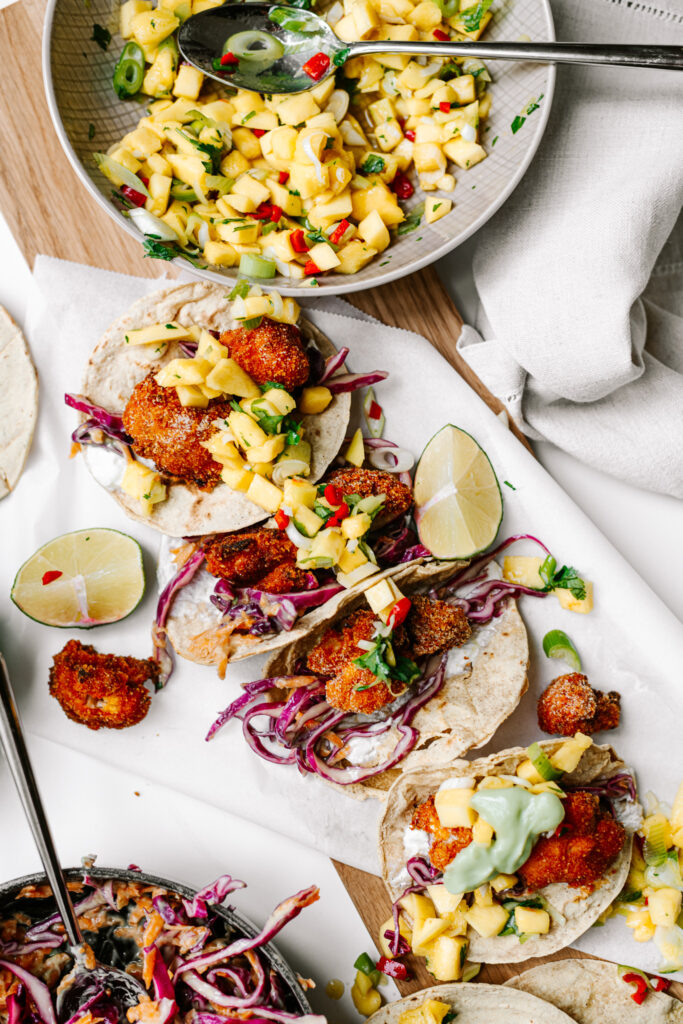
Besides the star of the show we also have a creamy avocado-yoghurt sauce on top and some spicy mango salsa. More flavour, more color, more explosion in your mouth. The combination of all of these work in perfect harmony and make the ideal taco party.

Are these healthy?

Yep! Contrary to the meat in traditional tacos, cauliflower is low in calories, high in nutrients and low in fat. The marinade is also pretty healthy since it mainly consists of roasted red peppers. To make the cauliflower crispy, we are also not frying it but baking it in the oven, which is a game changer in terms of nutrients.

Other than the cauliflower we have an avocado yoghurt dip, which gives us the healthy fats we need (and the avocado that we need in tacos). The mango salsa, is another vitamin bomb and the child in there, helps to keep your immune system fit. Important for the cold season that’s about to come up!

How to make them:

This actually is super simple. You need to blend the ingredients for the marinade up and break up the cauliflower into small rosettes. Then you let it marinate in the sauce for at least one hour to really absorb as much flavour as possible. Before baking we need to toss them in breadcrumbs and lay them on a baking tray. Drizzle them with oil, and really make sure that there is some oil on every cauliflower bite. Now, it just needs to go into the oven!

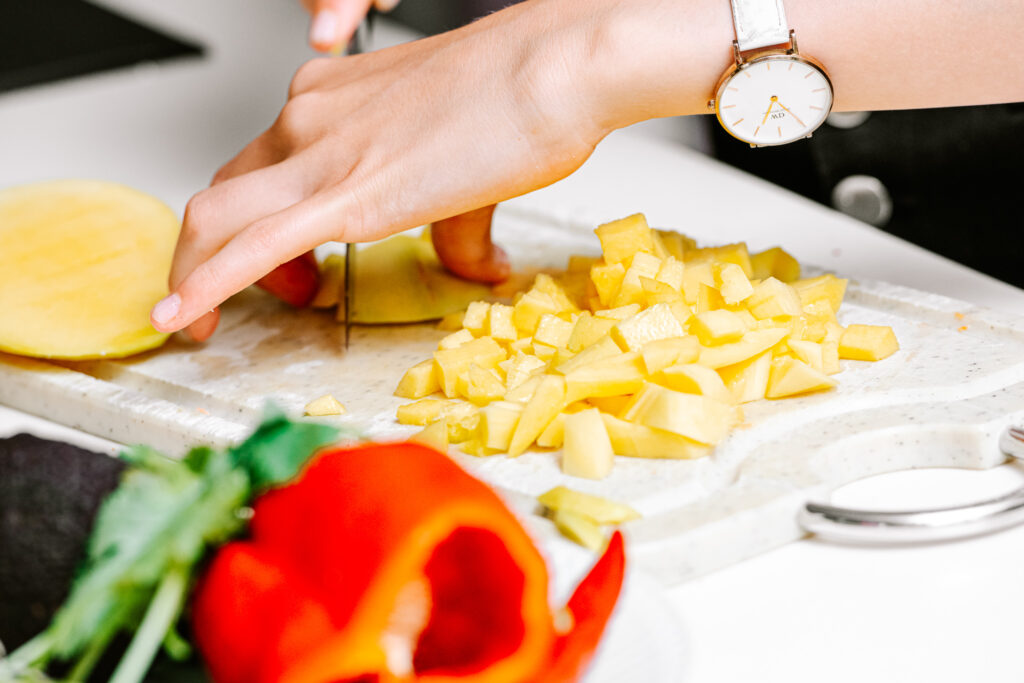
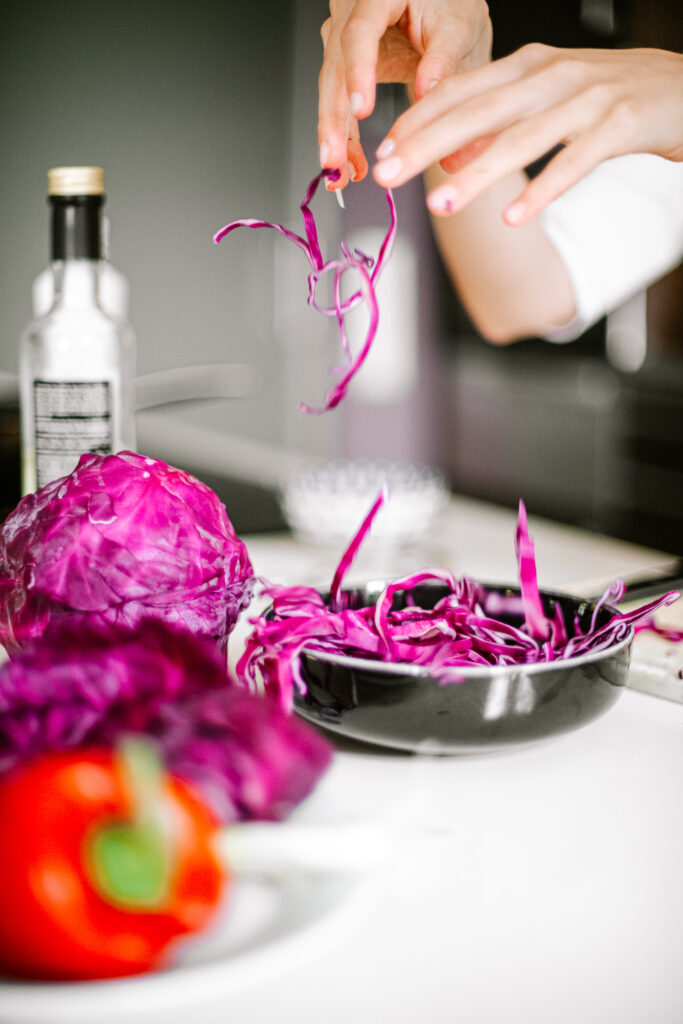
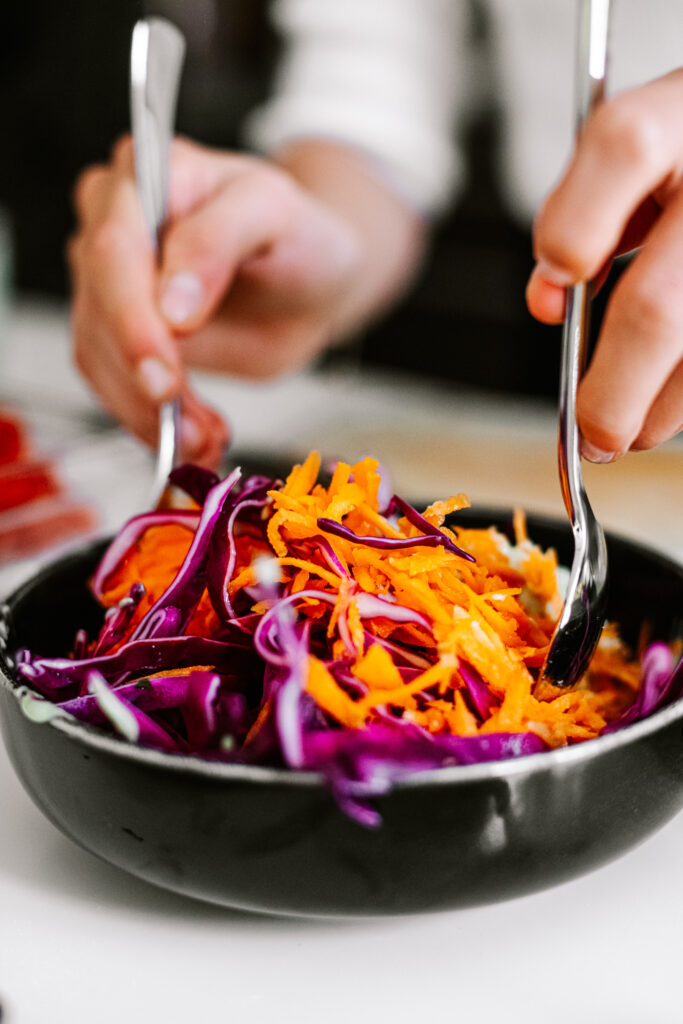
In the meantime we are just smashing the avocado and mixing it with the yoghurt. Also, we chop up the mango along with some chilis, spring onions, cilantros and mix it with the juice of a lime, some soy sauce and sweetener. Serve it all up with some Cole slaw if wanted (for this you could mix some shredded cabbage with vinegar, carrot and a little of the avocado sauce) and let the taco party begin!

A meal the whole family LOVES

You really will not have a hard time to convince meat eaters of this dish. Doesn’t taste healthy, does not taste boring, easy to make and heavenly when served in a warm taco shell!

I really hope and I am pretty sure that you will love this recipe at least as much as my family and I do! I promise you, it will taste pretty amazing!

Print

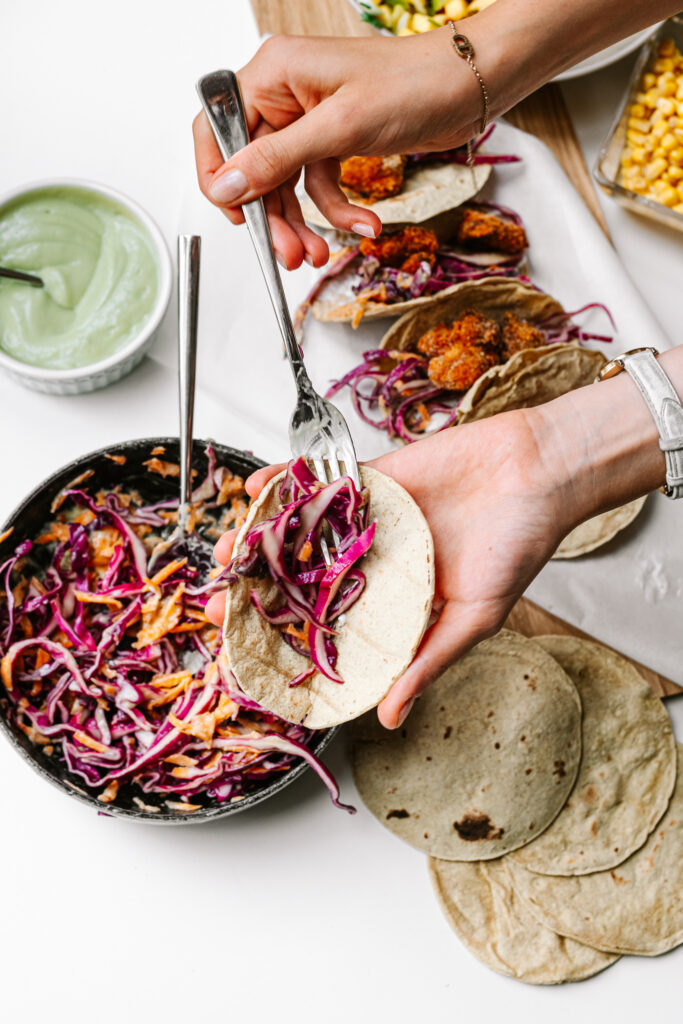
The Best Healthy & Crispy Cauliflower Tacos with Spicy Mango Salsa

They are not even in the slightest bit boring. An explosion of falvor in your mouth from a cirps on the outside and soft on the inside baked cauliflower along with a creamy avocado sauce and a spicy mango salsa. Taco dreams coming true.

Course Appetizer, dinner, Main Course
Cuisine Mexican, texmex
Prep Time 30 Minuten
Cook Time 30 Minuten
Marinating 1 Stunde
Total Time 2 Stunden
Servings 4 servings
Calories 456 kcal

What you will need

For the cauliflower:

  • 1 head cauliflower
  • 6 tbsp ajvar
  • 2 tsp sambal olek
  • 3-4 garlic cloves
  • 2 tbsp tomato paste
  • 1 tbsp olive oil
  • 2 tbsp maple syrup
  • 2 tsp sesame oil
  • salt & pepper
  • 50 g breadcrumbs
  • oil

The rest:

  • 1 avocado
  • 200 g (plant based) yoghurt
  • 1 mango
  • 2 chilis deseeded
  • 4 spring onions
  • 1 lime
  • 2 tbsp soy sauce
  • 1 tsp maple syrup
  • 12 taco shells

Optional:

  • shredded red cabbage
  • shredded carrot
  • a splash vinegar

How to

  1. Break or cut the cauliflower into small florets. Blend all the ingredients except the cauliflower, breadcrumbs and the normal oil in a blender. Add the cauliflower to a large bowl and toss in the marinade. Let sit for at least 1 hour. The longer the better.

  2. Heat up the oven to 180°C. Take the cauliflower out of the marinade and toss them in the breadcrumbs. Line a baking tray with parchment paper and add the cauliflower on top. Drizzle with oil and make sure that every piece has some oil on it. Bake for 15-20 minutes, then turn up to 200°C and bake for 5 minutes until crispy and golden brown.

  3. IN the meantime mash the avocado and mix with the (plant based) yoghurt! Peel the mango and chop in small cubes. Add to a bowl along with the deseeded and finely sliced chili, the spring onions and the cilantro. Combine soy sauce, lime jice and maple and mix it with the rest.

  4. Optional: Toss the cabbage and carrots with a splash of vinegar and about 2-3tbsp of the avocado cream.

  5. Heat up the taco shells.

  6. Fill each taco shell with some cabbage (if making some), a few cauliflower florets, the salsa and avocado cream! Serve and enjoy!

Happy cooking,
Enjoy,
Katie // Une Petite Cuisinière

Kategorie: Appetizers, Diet-Specific, Lunch/ Dinner, My favorites, Vegan, Vegetarian

Better than Store-bought 15-minute beetroot hummus

September 7, 2020 by katharina.kuehr Kommentar verfassen

Hummus. We all know it – we all love it! That creamy, tangy goodness that we spread onto bread, enjoy in pita, top every bowl with and dip our veggies in to make them more delicious! A staple in most households – and still, most people buy it at the store while it is SO easy to make!

What is hummus?

Hummus is a dip or a spread that originated and nowadays is found in Middle Eastern cuisine. It has a very smooth consistency and is made out out chickpeas, tahini (which is a sesame paste), olive oil, garlic, and spices. It typically is enjoyed with some fresh Pita bread. Hummus is very popular among the vegan nutrition because it works great as a spread on bread or as a dairy free dip and is pretty healthy!

What is special about this dish?

Regular hummus, as I said is made out of chickpeas as its main ingredient. But this one is a little bit different and perfect for fall! Besides Chickpeas, the star of the show is beetroot. Beetroot is a quite popular ingredient to be added to hummus because its slightly sweet flavour just works in perfect harmony with the creaminess and tanginess of the hummus. So instead of plain hummus, we are switching things up a little bit and making a delicious beetroot hummus!

How do you make hummus?

The entire process is pretty simple, and will take you a maximum of 10 minutes. To make it, you definitely need canned chickpeas. It is possible to use dried ones, but you will have to cook those for 1,5-2 hours before being able to make the hummus, which is pretty time consuming! So I prefer to go for canned ones. You add those to a blender or a food processor (either works) along with a few other ingredients and blend it until it’s creamy. It really is this simple and does not ask for any other cooking!

The secrets to making a really good hummus

There are a few things you can look out for when making hummus to take it next level. First, use canned chickpeas or ones that are boiled really softly. Second, use a good Tahini. This is a sesame paste you can find at most supermarkets and has a runny consistency but I would recommend buying it at an asian store. The Tahini there is just more liquid and will make the hummus creamier! If you cannot make it to an asian store, I recommend at least checking the ingredients list. A good Tahini has Sesame seeds as its only ingredient.

My third tip is to preserve some aquafaba (this is the liquid the chickpeas come in when canned). Adding this will keep the hummus really creamy. My fourth, and last tip is to use a splash of vinegar. As weird as it may sound, it really makes a difference! It adds this tanginess that makes a hummus really good. Sometimes lemons are used, but I would really recommend doing some vinegar!

Is beetroot hummus healthy?

It definitely is! Chickpeas are very healthy since they are high in protein and high in fibre. The Tahini and Olive oil add some healthy unsaturated fats, which makes a great nutritional value for a dip! The beetroot adds some natural sweetness and vitamins! Another reason why it is loved by the food industry is because it is healthy!

How to best have it

Really with anything, you would have regular hummus with. On top of some toasted bread with some avocado, or to dip some veggies in. Also works great on top of (buddha) bowls, in pita bread or on top of a rice cracker. You can even just thin it out with water and lemon juice to make a salad dressing! So the options are endless… and all delicious!

I hope that you will love this recipe and I am sure you’ll be making this on repeat in your kitchen! A great & healthy fall food!

I hope that you will love this recipe and I am sure you’ll be making this on repeat in your kitchen! A great & healthy fall food!

Print

Better than Store-bought 15-minute beetroot hummus

The best creamy & delicious beetroot hummus ever. Better than any premade takeout version!

Course Appetizer, Side Dish, Snack
Cuisine arabian, middle eastern
Prep Time 10 Minuten
Total Time 10 Minuten
Servings 5 servings
Calories 144 kcal

What you will need

  • 1 can chickpeas
  • 2 small beetroots (precooked)
  • 1 tbsp Tahini
  • 2 tbsp Olive Oil
  • 2 tsp vinegar (white wine vinegar works best)
  • 3-4 tbsp aquafaba (the liquid canned chickpeas come in)
  • 1/2 tsp garlic powder
  • 1/2 tsp salt
  • 1/2 tsp paprika powder

How to

  1. Drain the chickpeas but preserve the liquid they were in. Add them to a blender along with all the other ingredients and 3-4 tbsp of that preserved liquid. Blend until smooth! If it is too firm, add more olive oil or aquafaba. But be aware that beetroot hummus will not be as creamy as normal hummus because of the beets in it! Enjoy!

Happy cooking,
Enjoy,
Katie // Une Petite Cuisinière

Kategorie: Appetizers, Asian, Cuisine, Diet-Specific, My favorites, Vegan Stichworte: beetroot, beetroot hummus, beetroot recipes, easy snack, healthy dips, homemade hummus, hummus, hummus recipe, vegan, vegan dips, vegan eats, vegan recipes

The Best Healthy Falafel-style Pita with Dreamy Pink Goddess Sauce

August 31, 2020 by katharina.kuehr 1 Kommentar

That bite into a warm and soft pita filled with a giant dollop of hummus, that coleslaw, the crispy deep fried falafel and that yummy yoghurt-mayonnaise sauce on top. Sounds heavenly doesn’t it? As good as it sounds, it is really everything else than healthy. But we do not want to miss out on that deliciousness. So why not making it healthy?

What is special about this dish?

A lot to be fair. We have falafel, that are not deep fried, as traditional falafel would be but pan fried. Then we have a pink tahini and greek yoghurt sauce (which I have never seen at any of those falafel stands before) instead of the mayonnaise yoghurt dressing and we have a homemade tzatziki and self-made hummus for that extra flavour .

First, what is falafel and where does it come from?

Falafel is a ball made out of chickpeas or cassava beens combined with different spices and herbs before it is deep fried. Usually it is served in a pita bread or to go with hummus or other mezze appetisers. It is believed to have originated in Egypt and can be found in the Middle Eastern cuisine today.

Why are falafel not very healthy?

While many people would believe that falafel are healthy because they are made out of chickpeas and are vegan, that is not quite the case. That is true, that the base of the falafel is healthy, so the „dough“ is healthy. But what is not nutritious about them then? The fact that they are deep fried. All of the oil adds a lot of fat and calories. It is more than fine to have fried food once in a while but it is not something that is healthy, one needs to be aware of that.

Authentic falafel are made with raw chickpeas that have been soaked. This way they are soft enough to blend but not too soft so you do not have a mushy consistency. But since we do not all have the time to soak falafel (especially when we want a quick meal), in here we use flour for the right consistency and canned falafel. This way they will not be white as crispy, but they are way quicker and still delicious!

How to make this dish healthy

Instead of deep frying the falafel, we prepare them in a pan with just a little oil. Yes, you can also bake them in the oven but to be honest, I never find that those get really crispy when being prepared in the oven. When making them in the pan, we still get that crisp (not the exact same of course, but a really good one) while keeping things healthy.

Also, to replace the mayo dressing that often comes on top we make a beetroot-greek yoghurt – tahini dressing. While homemade mayonnaise, in moderation is not unhealthy, store bought ones often have a lot of additives and preservatives in them and making your own one is a little tricky. The sauce we are making is high in protein, from the greek yoghurt, tastes delicious with the beets (and also has a nice colour), and has a good amount of healthy (or unsaturated fats) from the Tahin.

To make this entire dish even healthier you can substitute the normal pita with whole grain pita. This just is pretty difficult to find, which is the reason I stick with normal pita.

How do you make healthy falafel

This is super easy, to be honest. You need to drain canned chickpeas and add them to a food processor along with a bunch of parsley, onion, garlic, spices, and (wholewheat) flour. Then you just pulse everything together until you have reached a sticky, doughy consistency. (if you do not have a food processor or blender you can also add everything to a bowl, very finely chopped and mix it with a fork or your hands). Then you form little balls with your hand, one at a time and roll them in breadcrumbs.
In a hot pan with oil, you add the falafel and let them fry until crisp for about 3 minutes on each side. That is it!

Meal prep friendly?

I would say so. Pack everything separately and mix together before eating. The falafel will not be quite as crisp anymore but they’ll be just fine when you heat them up in the oven.

I hope that you will enjoy this recipe and please your family and friends with it!

5 von 1 Bewertung
Print

The best falafel-style pita with dreamy pink goddess sauce

A healthy version of the dreamy Middle Eastern classic. A little crispy on the outside, super soft soft on the inside falafel with a creamy delicious Tahini-Beetroot Sauce, Tzatziki and Hummus. Not difficult, but really healthy.

Course Appetizer, dinner, lunch, Main Course
Cuisine middle eastern
Prep Time 25 Minuten
Cook Time 10 Minuten
Total Time 35 Minuten
Servings 4 servings
Calories 397 kcal

What you will need

For the falafel:

  • 1 can chickpeas
  • 2-3 tbsp flour (whole grain is prefered)
  • 1/2 red onion
  • 1 bunch parsley
  • 3 cloves garlic
  • 1 tsp salt
  • 1/2 tsp cayenne pepper
  • 1/2 tsp cracked black pepper
  • 1/2 tsp cumin
  • breadcrumbs
  • 2 tbsp olive oil

For the beet sauce

  • 1 small beetroot (precooked)
  • 100 g greek yoghurt
  • 1 tbsp Tahin
  • 1/2 lemon juiced
  • 1 clove garlic
  • 2 tsp honey

For the rest:

  • 1 cucumber
  • 200 g greek yoghurt
  • 1 clove garlic
  • 2 pita breads
  • some hummus
  • fresh radishes & tomatoes
  • 2 handful salad

How to

  1. For the falafel combine all the ingredients, except the breadcrumbs, flour and olive oil in a food processor and pulse until combined (do not blend until smooth!!!). Then add the flour a tablespoon at a time and pulse it in (not blending fully, again!) until the dough is not sticky anymore. Chill in the frisge for half an hour.

  2. In the meanwhile peel the cucumber. Then cut into very thin slices (preferably with a mandoline). Add it into a bowl and salt generously. Let sit for 20 minutes.

  3. In the meantime slice up the raidshes and tomatoes and wash the salad.

  4. For the beetroot sauce add all of the ingredients to a food processor and blend until smooth. If the sauce is too thick add some water or olive oil!

  5. After chilling take about 1 tablespoon at a time of the falafel dough and roll out in your hands into a small ball. Toss in the breadcrumbs until they cover the ball fully. Repeat with the rest of the dough. Heat up the oil in a pan and add the falafel. Let fry on this side for about 2-3 minutes on medium high heat before tossing. Do not toss around in the pan immediately since the dough still is a little bit soft. After those 2-3 minutes, start tossing them around in a pan softly and fry for another 5-6 minutes until they are golden brown on each side and crispy.

  6. Prepare the Tzatziki. Take a clean kitchen towl and place the salted and sliced cucumber in it. Squeeze out all of the remaining water of the cucumber and put it back into the bowl. Press the garlic and add it along with the greek yoghurt. Combine everything well and season with more salt if desired.

  7. To serve fill the pita with hummus, the veggies and the tzatziki. Add the falafel on top and drizzle with the sauce. Serve and enjoy !

Happy cooking,
Enjoy,
Katie // Une Petite Cusinière

Kategorie: Appetizers, Cuisine, Diet-Specific, Lunch/ Dinner, Middle Eastern, Oriental, Vegetarian, Vegetarian Stichworte: beetroot, beetroot sauce, best falafel, chickpea, chickpea recipes, crispy falafel, cucumber, falafel, falafel pita sandwich, family friendly, healthy, healthy chickpea recipes, healthy falafel, healthy family friendly, healthy pita, pita, pita sandwich, tahini, tahini sauce, tzatziki, vegan meals, vegetarian, vegetarian dinner

Summer Rolls with Peanut Tofu

Juli 10, 2020 by katharina.kuehr Kommentar verfassen

Picture summer in a better way than having summer rolls in the sunshine with your loved ones on a picnic, maybe at a lake. Doesn’t this sound like a dream? To me it does. But wait, where’s the catch? Oh yes, maybe to get those summer rolls. I mean, sure you could order them at your favourite Vietnamese restaurant but why not making them yourself? It is so easy and way cheaper.

If you have been a little active in the food scene of instagram you probably have already seen those. I think summer rolls have become very popular a few years ago and have become part of the whole health food industry. Besides that they are super duper tasty. So here we are, and I have made a recipe for you to make them at home. If you are not very familiar with summer rolls here is just a brief introduction!

What are summer rolls?

Summer rolls is a dish popular in Vietnam. They are also called rice paper rolls, or fresh spring rolls. It is believed though, that they originally come from China and only became popular in Vietnam. Anyway, today you can find them in most asian restaurants, even in Japanese or Thai ones.

These cute rolls look very much like spring rolls. Same size and shape. The difference is the filling and the preparation. Spring rolls are mostly filled with pork and vegetables and then deep fried. Summer rolls on the other hand are filled with vegetables, prawn, pork or tofu and oftentimes also rice vermicelli (super thin rice noodles). Also those are not deep-fried or prepared with any oil and they are served at room temperature or cold. Both, spring and summer rolls, come with a sauce on the side.

Are summer rolls healthy?

Definitely! Since the main component are vegetables, they are super healthy. Other than vegetables you often have rice vermicelli, which also are not unhealthy. They are not high in sugar or fat but also not super nutritious. For your source of protein you can use prawns, pork or tofu. They are all great sources of protein. Prawns and they also are not high in fat at all. Pork on the other hand can be high in fat, depending on which part you use.

Summer rolls kn general are not high kn fat because, unlike spring rolls they are not deep fried, and prepared with rarely little fat. The only fat may be used when preparing the protein source or in the sauce.

The sauce is the only thing you should look out for when you have those. They often are served with a sweet chili sauce or lots of soy sauce. Sweet chili sauce mostly has a lot of sugar in it and soy sauce is high in sodium. If you only get a little on the side, that’s more than fine just be aware of that!

so what’s in these summer rolls?

This is a vegetarian (actually vegan) version. I do not use rice vermicelli because I prefer them without (plus it is less work). So, as a base we have a bunch of vegetables. We use a mix of carrots, bell pepper, cucumber, lettuce and radishes. You could also add red cabbage or anything else of your preference.

To not keep it boring we also are adding some fruit. I absolutely love mango in here but papaya also works. But mango is better tbh. And of course avocado. What would a meal be without avocado? (btw, did you know that avocado is a fruit?) And of course, our source of protein, the peanut tofu. It adds a bunch of flavour and is so tasty. But still, it is not so flavourful yet, that’s why we are adding some more peanut sauce and, if you want, also some sriracha or hot sauce.

The rice paper

Rice paper is not such an easy thing to find. You will probably not find it at your regular supermarket but you can find it in pretty much and asian store. It has the form of a circle and is almost see through but a little white-ish. I get mine from Reishunger because it is super good, easy to get and they ship it right to your door!

I think that you will love this recipe for summer and I hope that you will enjoy both, making and eating it.

Print

Summer rolls with peanut tofu

a perfectly fresh and light summer dish for those hot days!

Course Appetizer, dinner, lunch
Cuisine Chinese, Vietnamese
Prep Time 25 Minuten
Cook Time 5 Minuten
Servings 2 servings
Calories 564 kcal

What you will need

  • 10 rice papers
  • 200 g tofu
  • 2 carrots
  • 1/2 cucumber
  • 1 red bell pepper
  • 100 g radishes
  • 1/2 mango
  • 100 g lettuce
  • 1/2 avocado
  • 1 tbsp oil

For the peanut sauce:

  • 150 ml light coconut milk
  • 2 tbsp peanut butter
  • 4 tbsp soy sauce
  • 2 tsp sriracha hot sauce
  • 1/2 lime
  • 1 tbsp coconut sugar or brown sugar
  • 1-2 tbsp water

How to

  1. Combine all the ingredients for the peanut sauce. Slice the tofu into 1 cm thick and about 6-7cm long strips (or hwo ever it works best for you).

    Place them in the peanut sauce and let them marinate for about 1 h or longer if possible.

  2. Peel the carrots and either grate them or slice them into thin strips. Also slice the peper and cucumber into thin strips. Peel the mango and also cut it into bite sized pieces. Finely slice the radishes and chop up the lettuce.

  3. Heat up a pan with the oil. Take the tofu out of the sauce and fry on each side for about 2 minutes. Set it aside.

  4. To assemble prepare the rice paper according to package instructions. It most of the time works best when you take a kitchen towel and make it wet. Lay that on a flat surface. Then run the rice paper under water for about 3-4 seconds. Place them on the wet kitchen towl. Add a little bit of each filling and some of the remaining peanut sauce into the rice paper, rather on th elower end but not on the edge.

    First, fold in the rice paper from the bottom. Then fold in the sides and roll it up, so all of the fillings are in the rice paper and it is tightly closed. This takes a little practice but after a few it will work out.

  5. Pour the remaining sauce in a little conatiner and serve it with the summer rolls! Serve and enjoy!

Happy cooking,
Enjoy,
Katie // Une Petite Cuisinière

Kategorie: Appetizers, Diet-Specific, Lunch/ Dinner, Summer, Vegan, Vegetarian, Vietnamese Stichworte: good food, healthy, healthy food, healthy light dishes, healthy plants, healthy recipes, healthy summer recipes, light dishes, light food, plant based, plants, rice paper, summer food, summer rolls, vegan, vietnamese rolls

« Vorherige Seite
Nächste Seite »

Footer

What has been happening on my Instagram

Copyright © 2024 Une Petite Cuisinière on the Foodie Pro Theme