• Zur Hauptnavigation springen
  • Skip to main content
  • Zur Fußzeile springen

feel food club

  • Home
  • About me
  • My Recipes
  • Blog
  • Navigation Menu: Social Icons

    • Instagram

summer food

Summer Poke Bowl

Juni 22, 2020 by katharina.kuehr Kommentar verfassen

The all beloved and super trends bowl. I mean, how can you not love it? Rice, fresh seafood (or tofu), all the veggies, fresh fruits, covered with a super good sauce. What do you need more? Step away from classic and make this super tasty summer version!

What even is poke?

Poke is a traditional dish that originated in Hawaii. It usually is raw fish (just like Sashimi) over rice. This rice mostly is prepared as sushi rice. The fish usually is marinated before with soy sauce and then it all is assembled in a bowl with lots of veggies.

My poke bowl love

I have always been loving sushi. I also have always loved all kinds of bowls. And therefore I love poke bowls. Before it even was a trend I would always get it when I saw it on the menu. Because it is so good. And then, luckily, it became a trend and now you can find lots of places in Vienna that serve extremely delicious poke bowls. My absolute favourite one is HONU TIKI Bowls because they are just the best ones! Me and my bestie almost always go there to have them! Insanely good.

Since we went there (and still go there) very often, we also spent a lot of money on them. And they are not cheap. Raw and fresh seafood is pretty expensive and so are other fresh ingredients. So I thought, why not making it at home? It is easy, healthy and pretty tricking tasty.

How to build up a poke bowl:

Similar to my guide for a buddha bowl I am now gonna explain to you how to best build up a poke bowl.

  • We need to start with a base. Traditionally I would use white rice or best, – – Sushi rice if you have that on hand. It is filling and adds a nice texture. If you want to can also use greens as a base to have more of a salad version or you could also do half half.
  • Next we need our source of protein. Raw (or also cooked works fine) fish such as tuna or salmon but you can also long for tofu or grilled chicken, prawns or beef.
  • Next up our marinade. This is important because it adds a lot of flavour to your protein and the entire bowl. I love doing a teriyaki sort of marinade but feel free to do something else.
  • Of course we also need some veggies. Here you are totally free and you can add whatever you want. For me, edamame or peas, cucumbers and tomatoes are always a must! But honestly, everything works well here!
  • Not to forget: Fruits! May sound a little weird a first but it is a game changer. It adds so much sweetness and freshness to it, that’s insane! I promise you, you will love it
  • A crunch: Here I love to use spring onions, sesame seeds, nori, or some sort of nuts. This just adds such a nice twist to the texture! Absolutely love it!
  • The sauce: Maybe this is the most important part of the entire bowl! Why? Because you are going to mix everything with it, and if it is not good, everything won’t be good. Here you can long for a mayo based one (which not always is the healthiest choice) or some soy sauce or peanut sauce.

What is in this bowl?

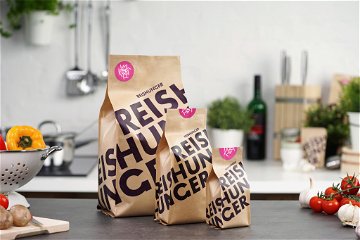
As a base we are using Sushi rice. The one I use is from Reishunger and it is super tasty! Btw: with the code REISKATIE you can get your favourite rice for free there!

Get the rice here!

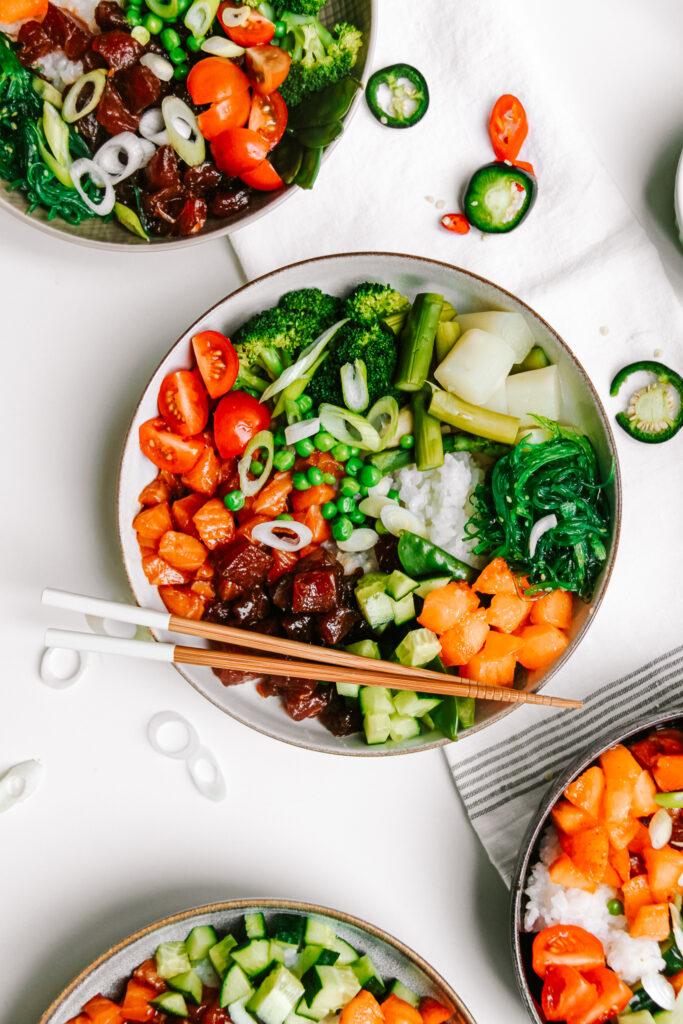
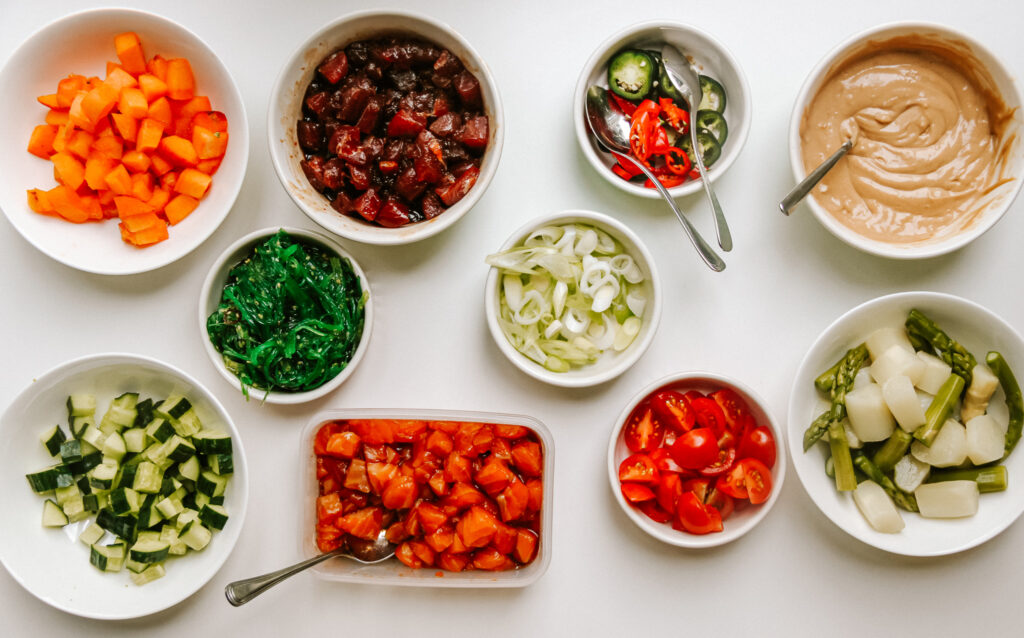
As for veggies we use peas, broccoli, tomatoes, asparagus, cucumber and wakame (these are alleges which you can get at your asian restaurant or your fish market).

Fruitwise, we are going for apricots. they are coming into season now and they are regional. If you don’t like those, go for mango instead.

Our protein is salmon or tuna. I always make both of them because in my family we like different ones. But you can also use tofu if you want a vegan version, and leave out the fish sauce in the marinade

So next on to the marinade, it is sort of a teriyaki one. Super good and addicting!

Our crunch are spring onions, which are super good here! They add a crunch and some freshness.

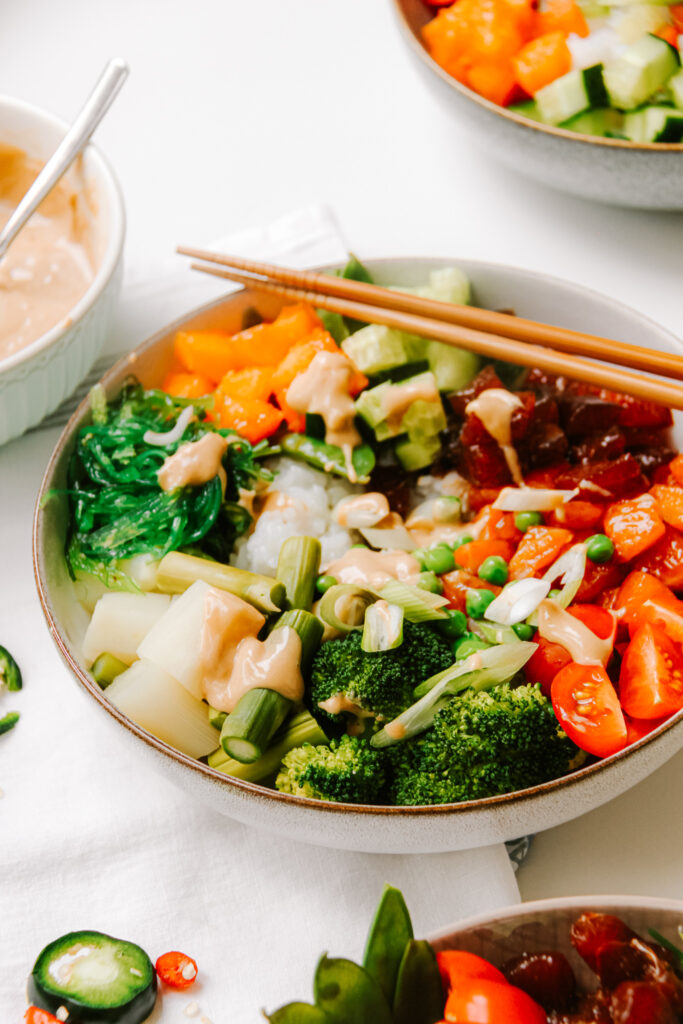
Last but not least: the sauce. A peanut sauce. This stuff is seriously good. And seriously addicting. But also super easy!

Are poke bowls healthy?

Yes they are! Well usually, you always have exceptions. But rice is not unhealthy, raw fish is healthy because of its high protein content and it is not fried or prepared with a lot of oil. Plus, in poke bowls you always have tons of veggies, which also give you loads of vitamins, just as the fruits does. The sauce on top is not always healthy, so make sure to check what you are using. Mayo-based ones are not always healthy. What you should also look out for is that you do not always choose soy sauce based sauces because they are loaded with vitamins. So all in all, pretty healthy.

I hope you love this recipe as much as I do (because I am obsessed with it) and enjoy it all throughout summer. It is such an easy one, I would really recommend making it!
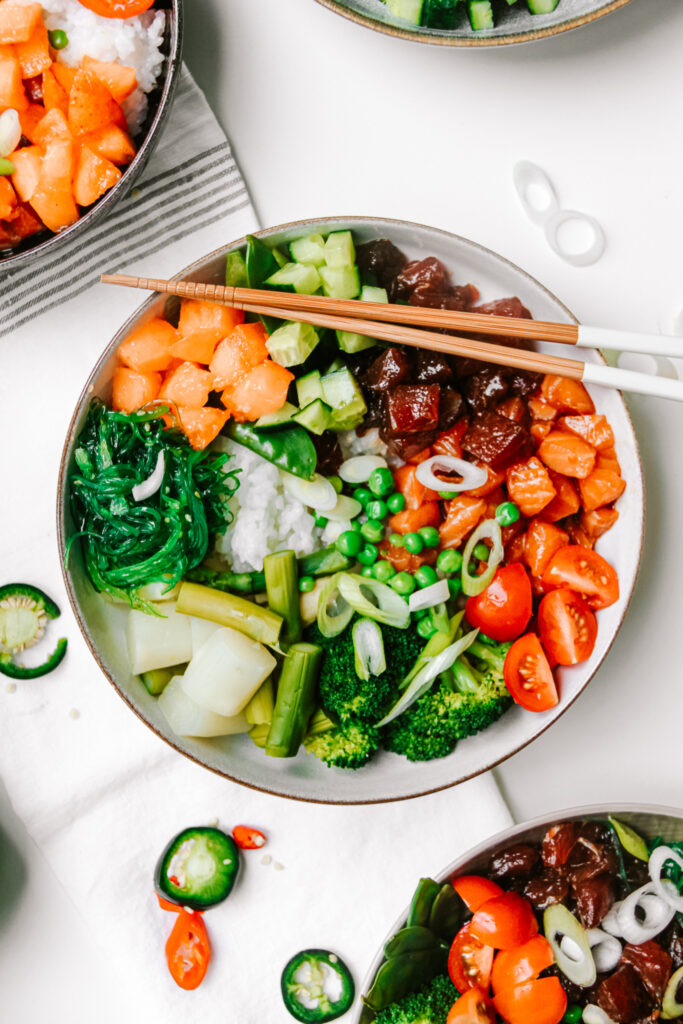
Print

Summer Poke Bowl

A summery version of the all time favorite and healthy dish! Raw fish with plenty of veggies, rice and a super tasty peanut sauce!

Course bowl, dinner, lunch, Main Course
Prep Time 15 Minuten
Cook Time 15 Minuten
Marinating 2 Stunden
Servings 4 servings
Calories 590 kcal

What you will need

  • 600 g tuna or salmon in sashimi quality (meaning you can eat it raw)
  • 250 g rice
  • 1 tbsp rice wine vinegar
  • 1 tsp sugar
  • 200 g broccoli
  • 100 g peas
  • 200 g asparagus green or white whatever you want, but when using white you need to peel it first
  • 1/2 large cucumber
  • 200 g tomatoes
  • some wakame optional
  • 4 apricots
  • 1 spring onion

For the marinade:

  • 50 ml soy sauce
  • 2 tbsp fish sauce
  • 1 tbsp oyster sauce optional
  • 2 tbsp coconut sugar
  • 1 lime juiced
  • 1 tbsp sriracha/ hot sauce optional
  • 1 tbsp honey or maple

For the peanut sauce

  • 100 ml full fat coconut milk
  • 30 g peanut butter about 2 tbsp
  • 30 g soy sauce about 2 tbsp
  • 1 tsp hot sauce
  • 1/2 lime juiced

How to

For the fish:

  1. Combine all the ingredients for the marinade in a large bowl. Cut up the fish into 1-1.5 cm sized cubes and add to the marinade. Marinate for 2 hours or longer. The longer, the more intense the flavor will be.

The rice:

  1. Prepare the rice according to package instructions. When done, remove from the heat and let cool for about 5 minutes. Then mix the rice wine vinegar with the sugar and mix it into the rice. Set aside.

The veggies & fruit:

  1. Steam or boil the broccoli, (green) asparagus, and peas for about 5 minutes in salted water, then drain. Cut the cucumber into small cubes. Half the tomatoes when using cherry tomatoes or also cut them into small cubes when using large ones.

    Depit the apricot and also cut it into small cubes. Finely slice the spring onions.

The sauce.

  1. Mix all of the ingredients for the sauce in a bowl. When it is too thick, add some water to thin it out.
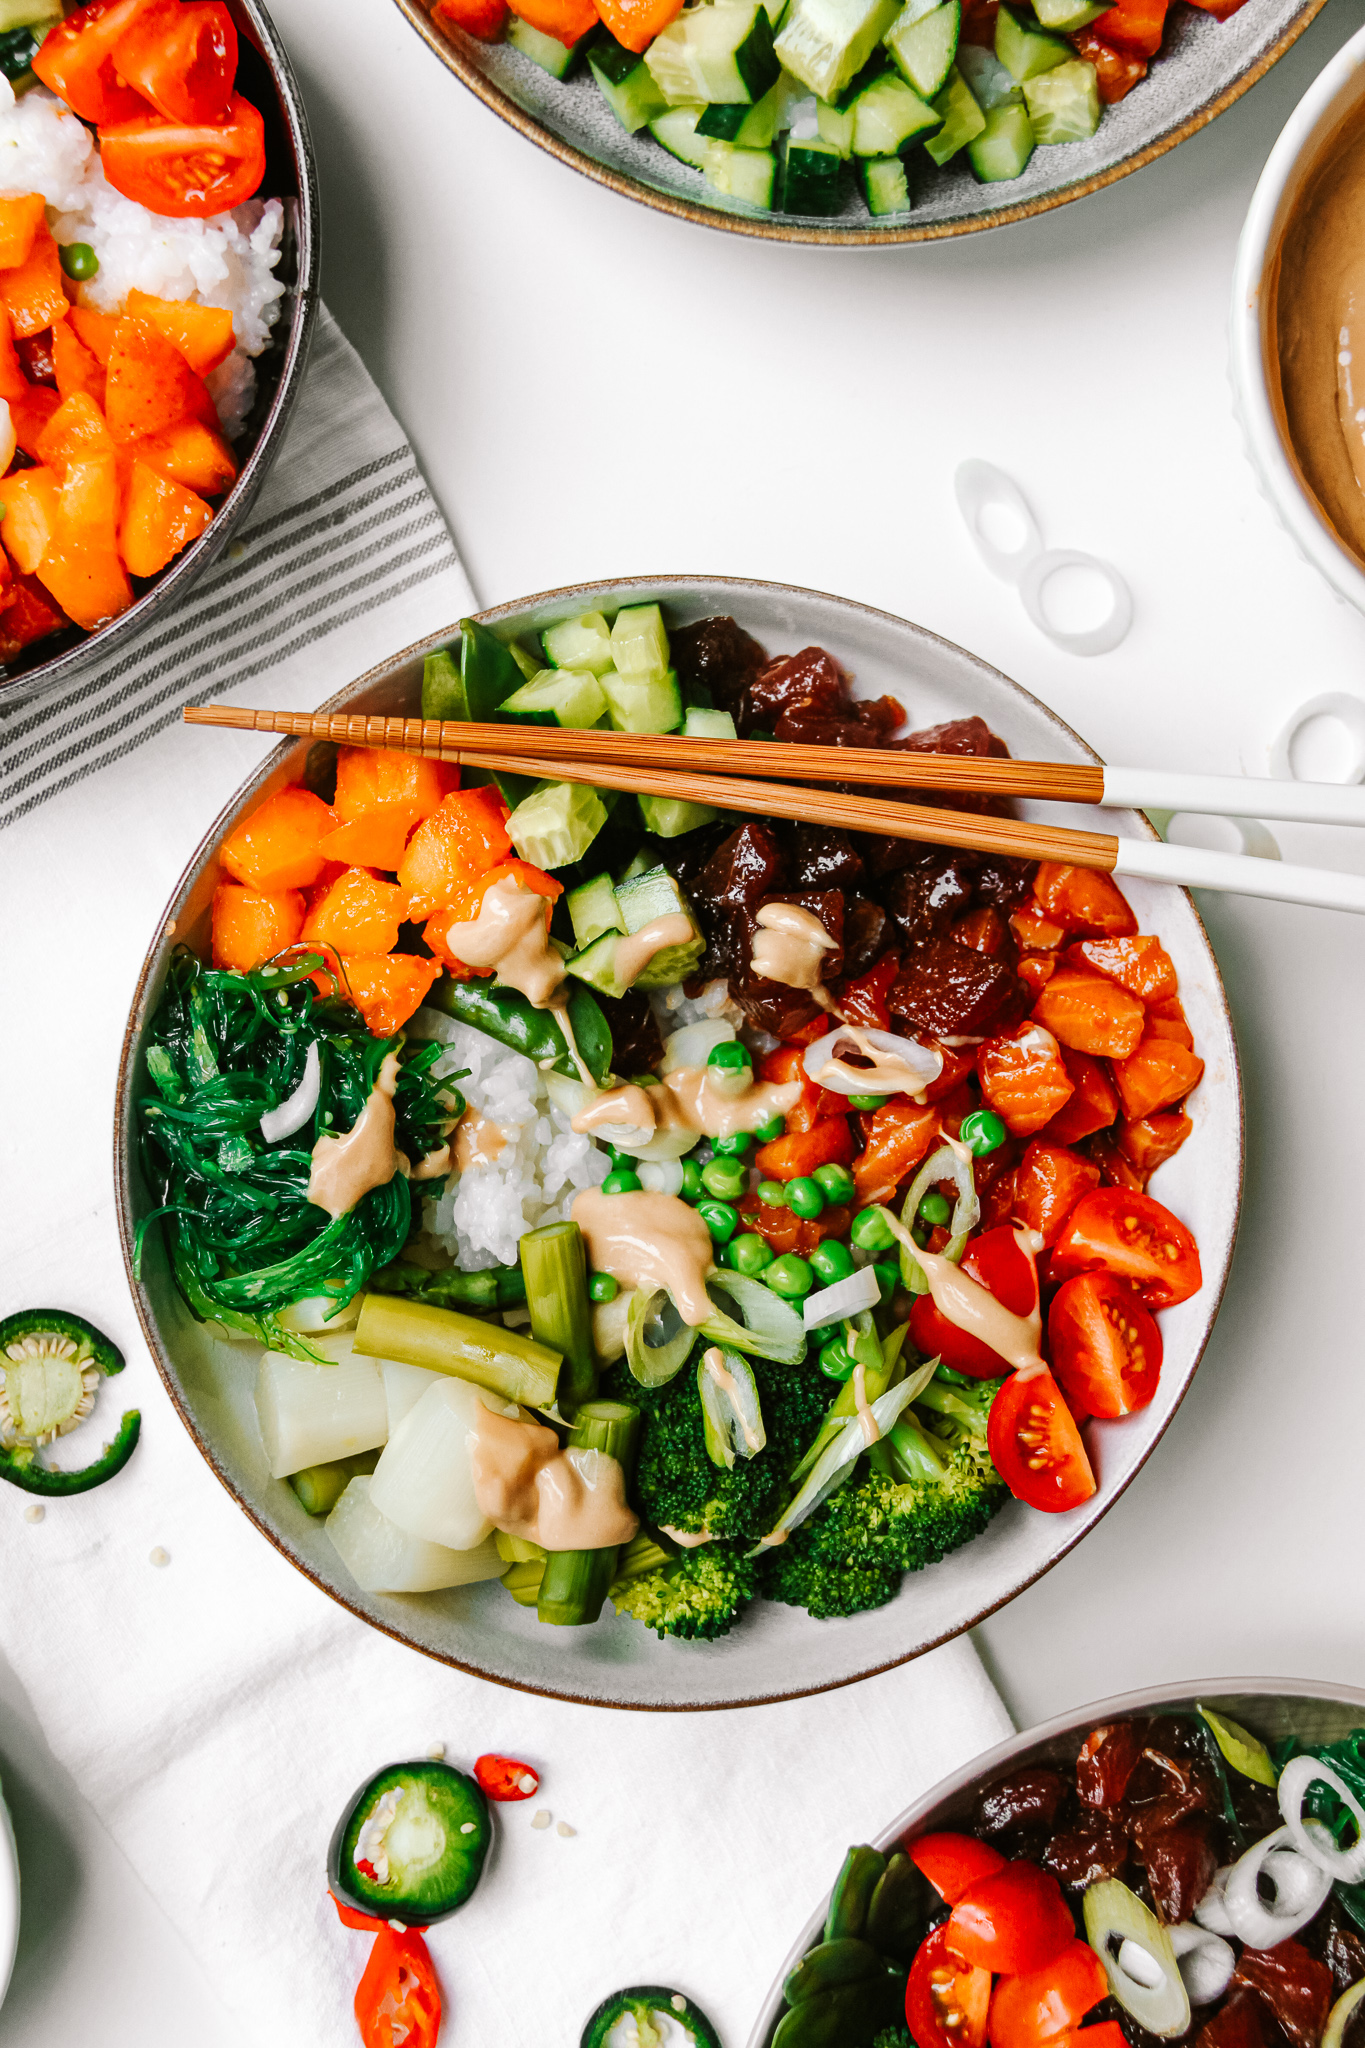
Assemble!

  1. Divide the Sushi rice onto the bowls. Next add the fish with the marinade followed by all the veggies and fruit except for the spring onions. Top with the sauce and then lastly add the spring onions! Serve and enjoy!

Enjoy,
Happy cooking,
Katie // Une Petite Cuisinière

Kategorie: Fish & Seafood, Hawaiian, Lunch/ Dinner, Season, spring, Summer Stichworte: bowl, dinner, fish, healthy, healthy poke bowl, healthy summer food, healthy sushi bowl, lunch, poke bowl, raw fish, sashimi, summer, summer bowl, summer food, sushi, sushi bowl

Vegan Magnum

Juni 13, 2020 by katharina.kuehr Kommentar verfassen

Summer is around the corner. It is finally officially time to eat ice cream (not that we wouldn’t have been eating any for the rest of the year). I think pretty much everyone is excited about this like a little child. However, as tasty as it is, it most of the time is not healthy. Unfortunately. So, guess what?! We are making it ourselves and making a healthy version of the classic.

My Ice-Cream Love ??

I have always been a fan of ice cream. Even when I was super little, or maybe especially then! We have a series of pictures showing meaning eating an ice cream and it is hilarious. The first picture, me sitting in the sand with the ice cream in the hand. The second one was me (still sitting at the same place) with ice cream all over my mouth. And the third one, the best one, me looking really sad at the scoop of ice cream that is not in the cone any more but all over my dress. Yes, I always had a passion for food, and no I was not always a clean and tidy eater. My parents always said that one could read the Manu off of my shirt because I pretty much ALWAYS stained it with what I was eating.

But fast forward, plenty years later I still really enjoy eating ice cream, although it ends up in my mouth and not on my shirt now. In my family, to. be honest we eat lots of ice cream. We rarely (maybe like twice a year) have cake after lunch as a dessert or in the afternoon, as it is really common in Austria, but we most of the time we’ll have ice cream.

Why is Ice cream not healthy?

Next time you buy some at the super market you can check the ingredients. You’ll be surprised by all of the ingredients used. Besides some chemicals and flavour extracts (or „natural flavours“) in most ice creams you will find a ton of sugar and a good amount of cream in them. This quickly loads up to about 20 g of sugar per ice cream and 15 g of fat. And all of this in one single ice cream!

How to choose a healthier ice cream

Of course, not every single ice cream has this nutritional value. There are simple and easy ways to choose a healthier ice cream, both in a supermarket but also in a fresh Gelateria. Always remember that fruit – based ice cream is healthier than non fruit based ice cream. Because of three reasons: Fruits are already sweet themselves, so there is no need to add much sugar, the have more vitamins and fibre and usually, in fruit Ice creams you will not find heavy cream or other fatty add-ins. Without the addition of sugar or cream, these ice cream usually tend to be half or 2/3 as high in calories as cream based ice cream like chocolate, stracciatella or hazelnut. So when you want to opt for a healthier version, be more on the fruitier side.

How to make healthy ice cream

There are several ways on how to make ice cream yourself. This depends on what ice cream you want to make. If you want to make something similar to what you can get in a Gelateria, a super simple version of this is to simply make nice cream/ smoothie bowls. You can find many many recipes of such on my Instagram (every week there is a new one coming).

In this blog post I am going to show you how to make a popsicle one. This also is really simple. It is easiest if you have a form for popsicles at home (you can find plenty of those on amazon). If you do not want to purchase one that is fine too. What you should do then is to pour the ice cream mixture into a loaf pan and freeze it in such. Before dunking it in the melted chocolate take it out of the fridge. Take a sharp knife and dip it in hot water. Then carefully cut the big block of ice cream apart into popsicle sized squares. On the lower end (the thin side) cut a small whole in the ice cream with the knife. It should be just big enough to fit a wooden skewer to hold the ice cream. Dip the skewer in the molten chocolate nd stick it into the ice cream. Let this freeze until it all sticks together. Once it holds well, you can dip it in the molten chocolate.

Summer can come!

Yes, making ice cream yourself is not difficult. Neither is making healthy ice cream yourself. With just very few ingredients you can make a super tasty and healthy ice cream yourself to have healthy treats in the freezer all summer long!

I hope you’ll love this recipe as much as I do and enjoy summer!

I hope you’ll love this recipe as much as I do and enjoy summer!

Print

Healthy Vegan Magnum

A vegan version of the classic summer popsicle. Too good to be true, plus it is super healthy & vegan!

Course Dessert, Snack
Prep Time 10 Minuten
Chilling time 6 Stunden
Total Time 6 Stunden 10 Minuten
Servings 8 popsicles
Calories 273 kcal

What you will need

  • 1 banana
  • 200 ml coconut milk
  • 200 g soy yoghurt
  • 60 g maple syrup
  • 1 tbsp vanilla extract
  • 160 g dark chocolate (vegan)
  • 1 tbsp coconut oil
  • 50 g cashews Soaked in water for at least 4 hours

How to

  1. In a bowl or a blender mash the banana. Drain the cashews. Add them along with the coconut milk, soy yoghurt, maple syrup and vanilla to a blender or a bowl with a hand blender and mix until everything is well combined and a smooth consistency is reached. Pour into the ice cream form (if you do not have one check out the paragraph in the blog post that says "How to make healthy ice cream").

    Freeze for at least 5 hours to overnight.

    After 5 hours melt the chocolate and coconut oil in either the microwave or on a double boiler. Take the popsicle form out of the freezer and run it under hto water so you can easily get the popsicles out. Place some parchment paper on a large plate.

  2. Dip each ice cream in the molten chocolate and place on the plate. Once you have done this with every ice cream place it in the freezer again for at least 30 minutes.

    Enjoy!

Happy cooking,
Enjoy,
Katie // Une Petite Cuisinière

Kategorie: Desserts, Diet-Specific, Snack, Vegan Stichworte: chocolate, dessert, easy ice cream, healthy ice cream, healthy magnum, healthy popsicles, homemade ice cream, homemade popsicles, ice cream, magnum, plant based, popsicle, Snack, summer food, vegan

Italian Tomato and Eggplant Stew with fried Halloumi and Pita

Mai 26, 2020 by katharina.kuehr Kommentar verfassen

Fresh and sweet tomatoes with soft and slightly mushy eggplant plus tangy capers and olives. Oh, and not to forget about the good herbs and the Goey fried halloumi with fresh pita. Hard not to get hungry when reading this right?!

To be honest I have never had Halloumi until a few months ago. I spent a day with my besties in Bratislava and we were so tired after this super long day and went into a super cute little café. We just ordered some small snack like avocado toast and a greek bowl and in this bowl there was halloumi. And let me tell you, I instantly loved it. Maybe it is because I am a huge salt-addict (I know, that’s not very healthy but I just love it). Halloumi is pretty salty but tbh, that makes it real good right?

What goes well with Halloumi?

So I believe that everything that is with Mediterranean flavours goes super well with it! And everything with lots of herbs because herbs + halloumi is just the best combination. It tastes really yum with tomatoes, cucumber, olives, eggplant (=aubergine). Also, this might sound a little weird but believe me, it is also really good with oriental things like curry, hummus, falafel. Yes curry and halloumi goes with with each other. Might sound a little off but it is really good. If you want another halloumi recipe you can check out my Honey Eggplant and Chickpea Salad with Grilled Halloumi because that’s also really good!

Why Eggplant & Tomato?

Well because this combination with Halloumi is just so good. And Eggplant works so well in stews because it has a rather soft texture and makes it a little creamy-ish. Also it adds such a nice flavour. And tomatoes are always good. Especially in sauces or stews they are a must! They kind of build a „base“ for it and makes it saucy. And they are coming into season, so why not?

Fresh or canned tomatoes?

This really is up to you. They both work perfectly fine. If they are in season and you have them on hand, I would always recommend using fresh produce! But if you used canned ones make sure they are not all puréed. The best is if you mix them both. So use some fresh ones and some puréed sauce. That way you get some texture and sauciness. All the good things in it.

30-minute meal

You thought this couldn’t get any better? Well, it can! Because this comes together in less than 30 minutes. I know, so easy. Which means, it is perfect for a quick and healthy lunch or a cozy and simple dinner. Also, making it is not complicated at all! Actually the opposite is the case. It essentially comes down to chopping the ingredients and throwing them all together into a pot plus frying the halloumi in an extra pan. Yes, that simple.

What to have it with

Pita is my favourite go-to here because it is perfect to soak up the sauce and it has such a nice texture and taste. But if you do not like it or are intolerant to gluten or cannot find a good one you can also substitute it out for other things. Something like Quinoa, Pasta, Couscous or Rice would also work really well here. If you want to on the lighter side, you can also just serve it with a salad, which also is really good!

This is such a tasty meal for whenever you ar craving something comforting but healthy. Comes together really quick, is super family friendly, has lots of vitamins (& cheese ofc) and tastes amazing!

I hope that you will love this recipe as much as I do and that it will become a staple in your household!

Print

Italian Tomato and Eggplant Stew with fried Halloumi and Pita

Healthy, comforting and so full of flavor. A 30-minute, super quick and good weeknight dish!

Course bowl, dinner, lunch, Main Course
Prep Time 10 Minuten
Cook Time 20 Minuten
Total Time 30 Minuten
Servings 4 servings
Calories 456 kcal

What you will need

  • 1 red onion
  • 1 tbsp Olive Oil
  • 650 g Eggplant about 2 medium sized ones
  • 300 g tomatoes fresh ones (best is a mxi of large ones and cherry tomatoes)
  • 1 tbsp tomato paste
  • 200 g canned tomatoes (puréed)
  • 2 tbsp rosemary
  • 2 tbsp oregano
  • juice from 1/2 lemon
  • 60 g Capers about 3-4 tbsp
  • 40 g Olives about 3 tbsp, sliced olives
  • 300 g Halloumi
  • 2 Pita

How to

  1. Finely dice the onion. Heat up the olive oil in a pan and add the onion when hot. Sautée for about 2 minutes until fragnant.

    In the meantime chop the eggplant and tomatoes into about 2 cm sized chunks or half the cherry tomatoes, if using. Add them into the pan and sautée for another 2 minutes on high heat. Reduce the heat to medium high and stir in the tomato paste and sauce and the herbs. Let simmer for 10 minutes and then add in the juice from half a lemon, the capers, olives, some freshly cracked black pepper and some salt. Let simmer for another 10 minutes.

    While this is simmering slice the halloumi into about 1/2 cam thick slices. Place them on a grill or a preheated (grill)pan and fry them on medium high heat for about 3 minutes on each side until golden brown.

    Heat up the Pita in the oven.

    When everything is ready add the stew onto the plates and place the fried halloumi on top. Serve with the fresh pita and enjoy!

Happy cooking,
Enjoy,
Katie // Une Petite Cuisinière <3

Kategorie: Uncategorized Stichworte: cheese, comforting food, cozy food, eggplant recipe, family friendly, halloumi, halloumi recipe, healthy, healthy halloumi recipe, healthy stew, healthy summer food, healthy weeknight dinner, stew, stew recipe, summer food, tomato, tomato recipe

Vegan Kale Ceasar Salad

März 2, 2020 by katharina.kuehr Kommentar verfassen

Summer is (luckily) getting closer and closer, which means so do salads for summer bodies. But please, it shouldn’t be about the way you look but the way you feel! For me plantbased or veggie heavy dishes always make me feel the best, give me tons of vitamins, a lot of energy, make my sleep be that best it could possibly be and just shine grin the inside and out. 

But I know for a lot of people when they read „salad“ they either think of rabbit food (as my brother likes to say :)) or some green leaves underneath a ton of dressing. So today, we are doing none of those. Neither super boring and leaving us hungry, nor drenched in a fat heavy dressing. No. We a re doing a super delicious vegan and healthy version of the super popular ceasar salad. Still a little cheesy, with self dried tomatoes (best thing ever!) and crispy pan fried rosemary chickpeas. Sounds like a pretty solid dish to me and it definitely is! 

Why Kale?

That’s super simple: to switch things up. As good as Romain lettuce is sometimes, it is good to change things every now and then. And kale is a true superfood. Super high in fiber, minerals, vitamins, iron, antioxidants, and all of that other healthy stuff. And no, it’s not the raw one that is hard to chew but we are steaming it so it is softer, easier to digest and tastier. I know that there are a lot of people that absolutely can’t stand kale at all, no matter in which form, then I would recommend using spinach or lambs lettuce as this would work best for this. Also a mix with arugula would be great!

What else?

That’s a good question. Where to start? The oven roasted tomatoes, the incredible dressing, the crispy chickpeas or the croutons? 
One after the other. So what else is super typical for ceasar salad are the croutons. No normal croutons here but whole wheat garlic ones. You heard me right. A little healthier but so good! Pan fried with fresh garlic and a little olive oil, it’s the best add in (to any salad actually).

Homemade dried tomatoes

Next up; oven roasted tomatoes. If you have never made this before, you sure missed out on something and spent way too much money on store bought ones before. It is essentially 3 steps: cut the tomatoes, place them in the oven, take them out. Oh, yeah and eat them of course! That’s how easy it is. You just leave them in the oven for an hour and go take a bath in the meantime. After an hour they are going to be somewhat I like to call semi-dried. They are dried, but still a little juice and not tough like leather. 

Best crispy chickpeas

Next up, the crispy chickpeas. That’s THE way to do crispy chickpeas. So good you drain them from the can and rinse them. After tap them dry (this is important bc otherwise they are not gonna be crispy) with a kitchen paper. In a pan we add olive oil, garlic and rosemary and let them fry for 2 minutes to infuse the water. Rosemary and garlic out, chickpeas in and crisp them up for 5-10 minutes with some smoked paprika powder and sea salt. If you like the fried garlic and rosemary, go ahead and add them to your salad, otherwise don’t. 
You can make those chickpeas ahead of time and just keep in a jar to snack on every now and then. A life changer.

The dressing:

And lastly to top it all off, the star of the show: the vegan Caesar dressing. Yep. Vegan. No cheese and no sardines. No mayo. Good and good. Instead of Parmesan cheese (not that Parmesan wouldn’t be good, it’s delicious, but sometimes it’s better not to have too much cheese) we are using nutritional yeast (German: Hefeflocken)! You can get those in your local health store (Reformhaus) or in some organic shops. It is made out of yeast, high in protein and really resembles the taste of cheese. The base of the dressing are cashews. Ideally we soak them a few hours or the night before so they get softer and easier to blend. They will ensure everything to get really creamy and add a really nice flavor. We also have some Dijon mustard and capers in it, to replace the sardines, a little vinegar and that’s it. It actually is not super difficult but tastes amazing! 

So now, it’s just left to be mixed up! Nothing more nothing less! The steamed kale, the oven dried tomatoes, the croutons, and the dressing. Toss it all and enjoy! 

Note:

If you want to meal prep this, make sure to leave the chickpeas aside to keep the crunch. You can already toss the salad in the dressing because when using kale, it doesn’t really matter, since the kale then absorbs the flavor and gets softer! 

Happy cooking!
Katie // Une Petite Cuisiniere

Print

Vegan Ceasar Salad with Crispy Chickpeas

A vegan twist on the classic and it is so good! Super delicious dressing, best ever chickpeas, oven roasted tomatoes and homemade croutons.

Course Appetizer, bowl, brunch, dinner, Main Course, Salad
Cuisine American
Prep Time 10 Minuten
Cook Time 1 Stunde
Soaking Time: 2 Stunden
Total Time 3 Stunden 10 Minuten
Servings 2 servings
Calories 411 kcal

What you will need

For the salad:

  • 4 handful kale off the stem
  • 15 cherry tomatoes
  • 1 slice bread
  • 4 cloves garlic
  • 2 tbsp olive oil
  • 120 g chickpeas

For the dressing:

  • 25 g cashews
  • 2 tsp dijon mustard
  • 2 tsp capers
  • 1/2 lemon, juiced
  • 2 tbsp plant milk
  • 2 tbsp water
  • 1 tbsp nutritional yeast

How to

That is how it works:

  1. Soak the cashews for about 2 hours to overnight in water. 

    Preheat the oven to 100*C. Slice the tomatoes in half and lay them on a baking tray lines with parchment paper. Bake them in the oven for an hour.

  2. In the meantime bring a pot with water to a boil. Take a sieve and place the kale leaves, that have been removed from the stem in there. Let them steam for 2-3 minutes. After remove them and drain under cold water. This will ensure the color to stay and the kale to cool down quicker.

  3. Take the bread and cut it into 1 cm cubes. Press out or grate 2 garlic cloves and combine them with the olive oil. Toss the bread cubes in the oil mixture and then fry them in a pan for about 2 minutes until crispy. 

  4. Take the chickpeas out of the can. Drain and rinse them to get rid of the liquid around them because this would make you go gasy. Tap them dry with some kitchen paper. In a pan heat up the olive oil. Once hot add the garlic and rosemary and fry for about 2 minutes, then take them out. After, you throw the chickpeas along with the sea salt and smoked paprika in and let them fry on medium high for about 5-10 minutes until super crispy.

  5. Drain the cashews from the water. Add them to a food processor and add the nutritional yeast, Dijon mustard, capers, salt, pepper, water and plant milk. Blend until smooth. If too thick, add some more water, if too thin, some more cashews! 

  6. Place the kale in a bowl and mix with the dressing. Separate it into bowl. Take the tomatoes out of the oven and add them into the bowls with the croutons. Top with the chickpeas and if you like it, the fried garlic.

    Serve and enjoy!


Kategorie: American, Cuisine, Diet-Specific, Lunch/ Dinner, Salad, Salads, Side, Vegan, Vegetarian, Vegetarian Stichworte: cashews, Ceasar, cheese, chickpeas, crispy chickpeas, dried tomato, dried tomatoes, garlic, nutritional yeast, plant based, plant based salad, salad, salad season, savoryvegan, summer, summer food, tomato, tomatoes, vegan, vegan Ceasar, vegan dinner, vegan lunch, vegan salad

« Vorherige Seite
Nächste Seite »

Footer

What has been happening on my Instagram

Copyright © 2024 Une Petite Cuisinière on the Foodie Pro Theme