• Zur Hauptnavigation springen
  • Skip to main content
  • Zur Fußzeile springen

feel food club

  • Home
  • About me
  • My Recipes
  • Blog
  • Navigation Menu: Social Icons

    • Instagram

nuts

Tomato white wine pasta with pistachio breadcrumbs

Mai 12, 2020 by katharina.kuehr Kommentar verfassen

I am gonna be honest. This is addicting! A creamy, fresh, quick, full of flavor and so many nutrients! You won‘t go back to store bought pasta sauces! Plus, its dairy free and vegan because we are topping it with pistachio breadcrumbs. You are NOT missing the parmesan in top! All in all it is just so tasty!

Is Pasta unhealthy?

I honestly love pasta, and despite all rumors it is not unhealthy. Well, at least not as is because it is a great source of carbohydrates. If you make wholegrain pasta, it is even healthier because you get an extra portion of fiber with it! But yes, just as everything else it can be prepared really unhealthy. Not the actual pasta itself but the sauce it comes with. If ypu use a very oil heavy or cream, cheese or butter based sauce such as alfredo or carbonara or one with fatty meat like bacon or salami, it can load up on calories and fats really quickly. But when you pair it with a rather light sauce like a tomato one or one with fresh vegetables it is not unhealthy at all! Also pesto is a good choice. I mean, yes it has cheese but it also has oil, nuts and fresh basil. Oil and nuts are high in healthy fats and fresh basil has so many vitamins!

What is special about this dish?

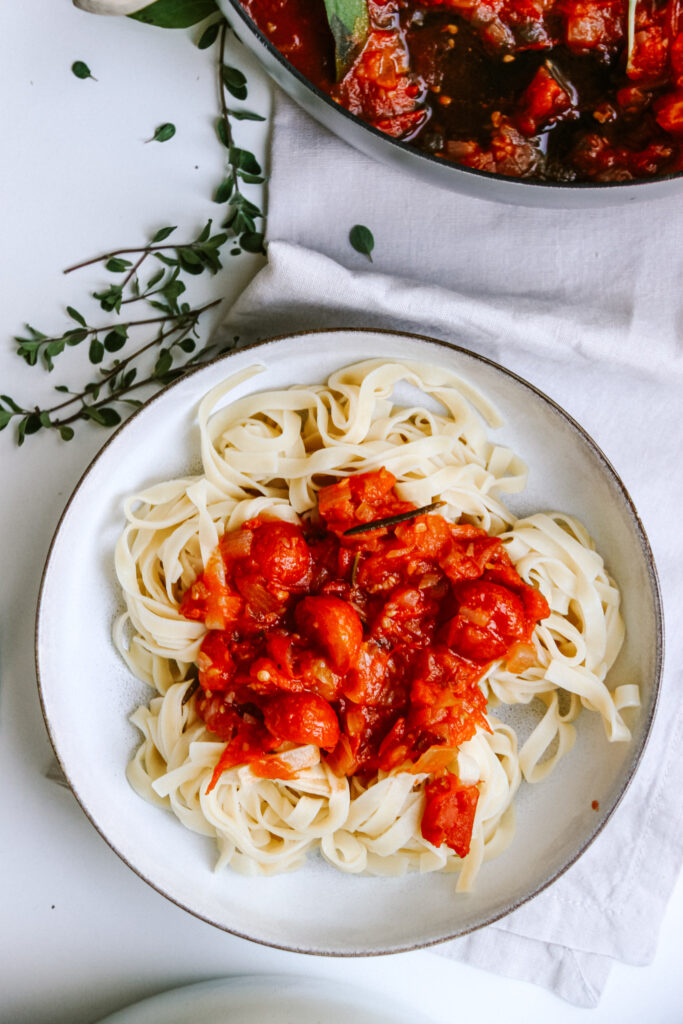
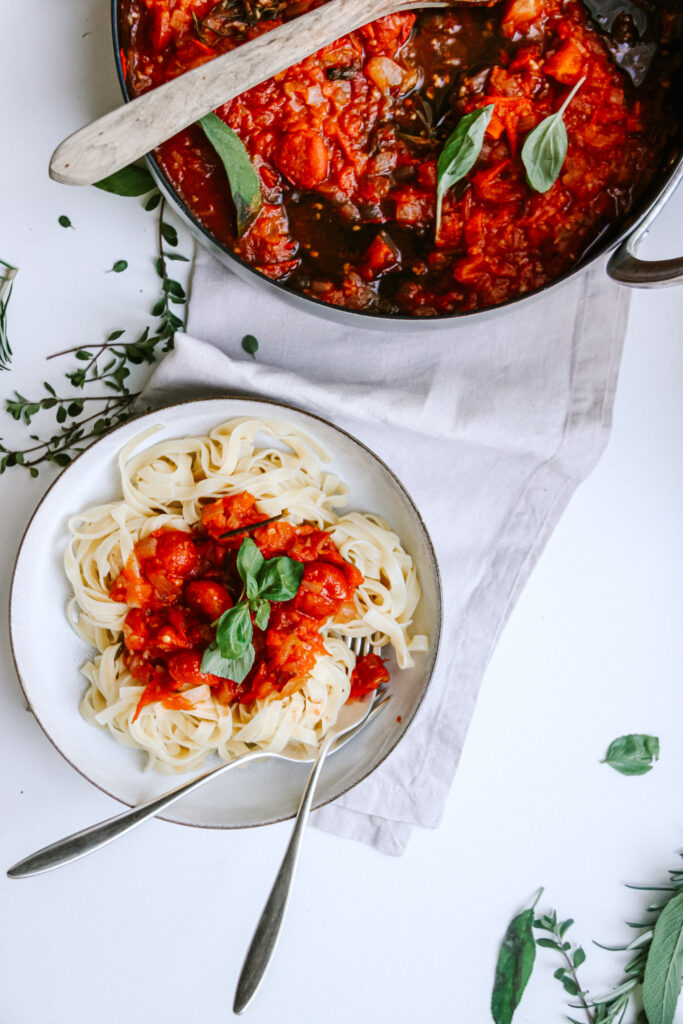
100% the sauce! Why? Because it is not your regular tomato sauce. And by „white wine tomato sauce“ I don‘t mean that you poor half a bottle if wine into your regular sauce (although this would probably also be super tasty :)). No, its a sauce made of only fresh tomatoes – of all sizes and colors, a good splash of white wine and lots if fresh herbs. And of corse, not to forget the pistachio breadcrumbs. They just take it next level!

Which tomatoes work best for this dish?

I believe that a mix of many different ones work best! A mix of large ones, cherry tomatoes or san Marzanl works best. Also, if you have access to it or can find them, feel free to add yellow, orange or brown tomatoes. The more you add, the more of a diverse, intense and interesting flavor and many different textures! So, use whatever you have on hand! The more different ones you have, the better!

Which wine works best?

As the name says, white wine! This can be a fruitier one or one that is rather on the dry side. This is up to you and what you like to drink! My dad always says „use a wine for cooking that you will also drink with the dish“. So use a good and tasty wine because you will also taste it in the sauce. It is as important to use a good quality product in a dish as it is to drink it. You could, however, also use some sparkling wine because the carbon dioxide will cook down anyway. If you only have red wine on hand, you can use this too but be aware that this will make it more of a heavier dish whereas the white wine makes it rather lighter.

Pistachio breadcrumbs?! What and how?

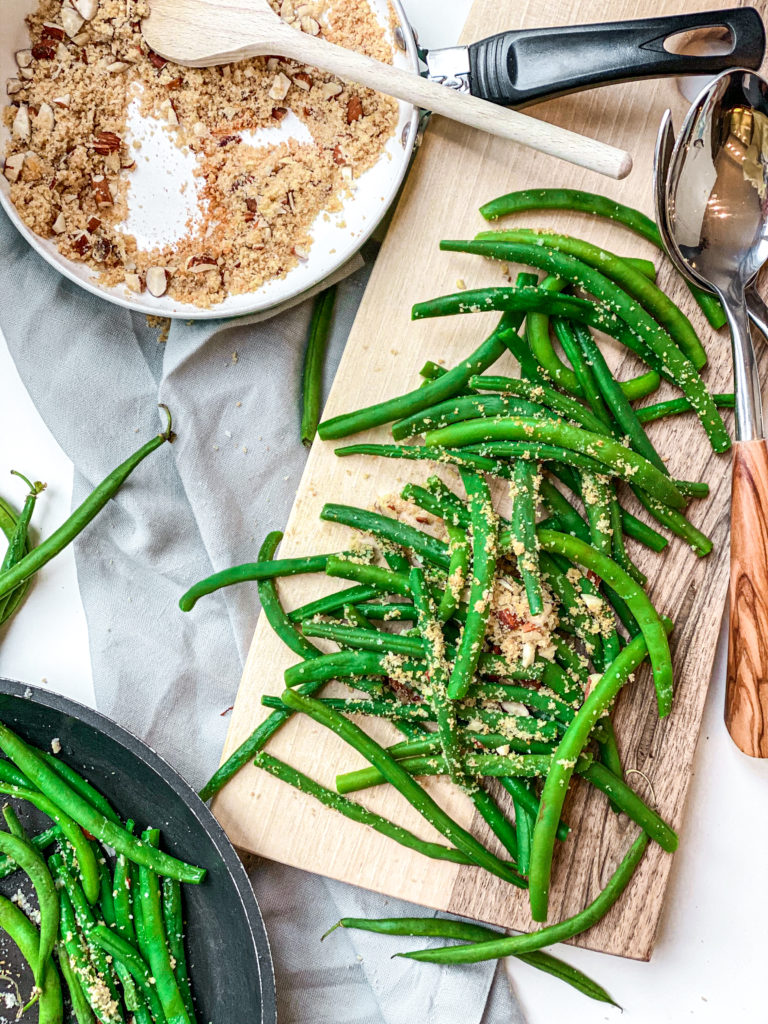
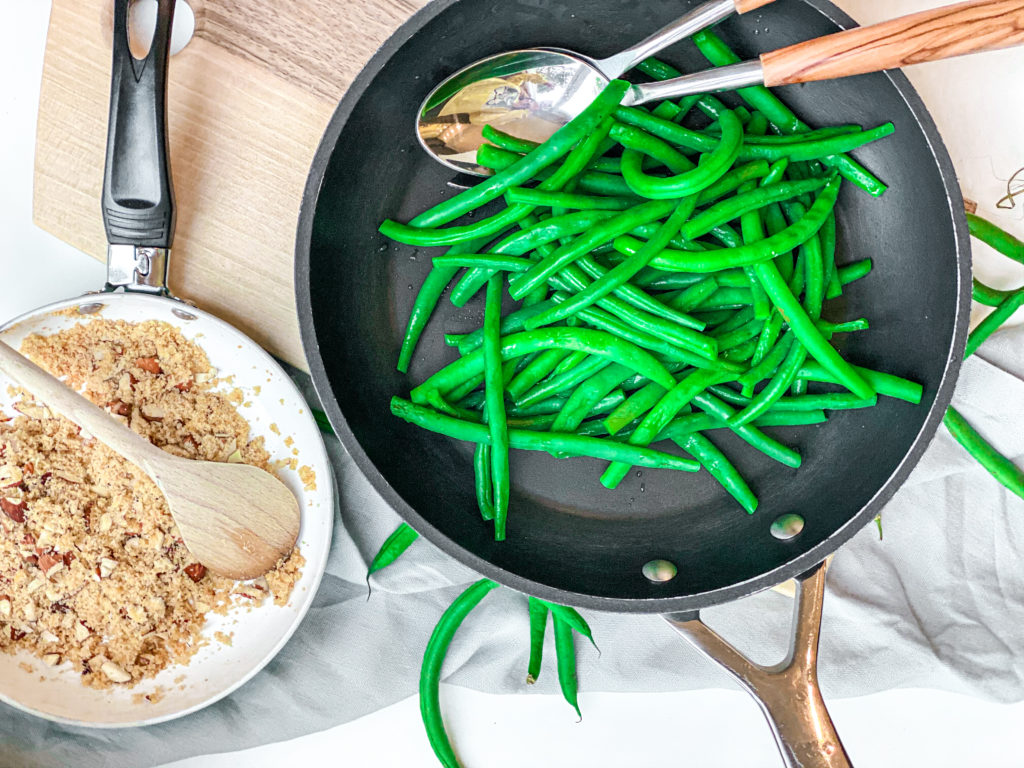
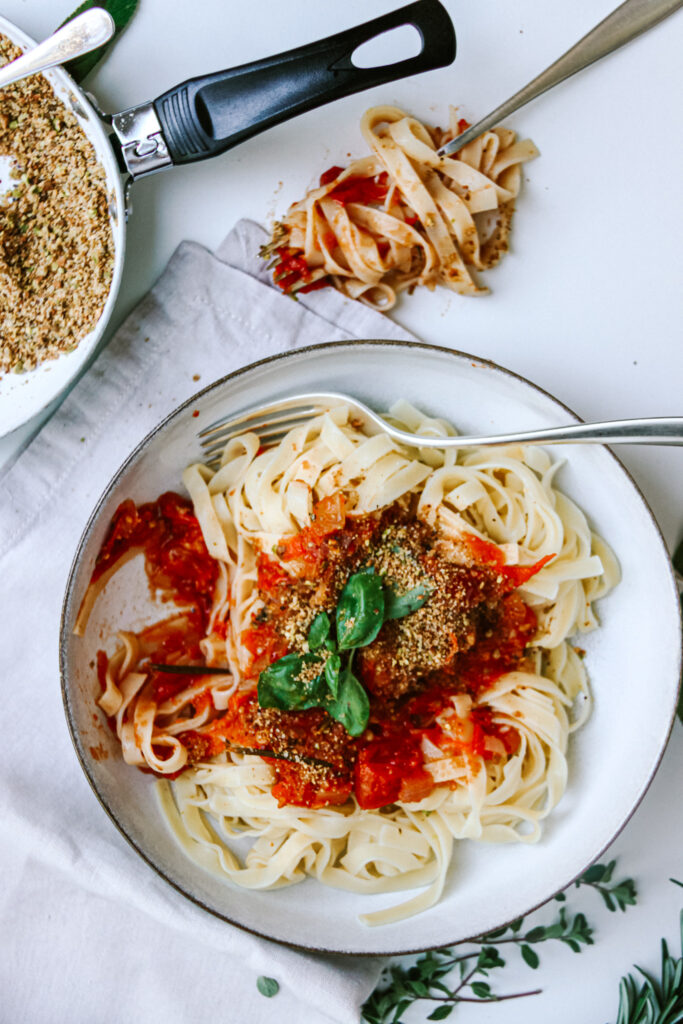
I have never eaten that before. Neither at a restaurant not at someone’s home! But it is game changing. I know, we all love some parmesan on top of our pasta, but if we are longing for a dairy-free, healthier and vegan option, this is amazing! And so simple. 3 ingredients and addicting! The only ingredients you really need are pistachios (whole grain) bread crumbs, and olive oil. The pistachios are chopped finely and mixed with the breadcrumbs. After they are pan fried in some olive oil to get them crispy and bring out the flavor. If you want a slight cheesy flavor, you can also add in some nutritional yeast (Hefeflocken) if you want but it definitely is not necessary! When putting them on top of the pasta, the add a nice crunch and texture and also some saltines as cheese would do! You need to try this! I swear it is so good!

Is it family friendly?

Yes! 100%! You do add wine, but the alcohol boils away, so even kids can eat it! And it is vegan (if you use vegan pasta of corse) but if you want to add some parmesan or mozzarella on top you of course can do so! Ir if you want some prawns of grilled chicken with it, it works as well. Plus, it is less than 30 minutes, so it‘s a great weeknight dinner!

We absolutely love having this dish in pur house and make it pretty often! Its super tasty, simple, and full of vitamins! I hope that it gives you some inspiration to cook something healthy & tasty!

Happy cooking,
Katie || Une Petite Cuisinière

Print

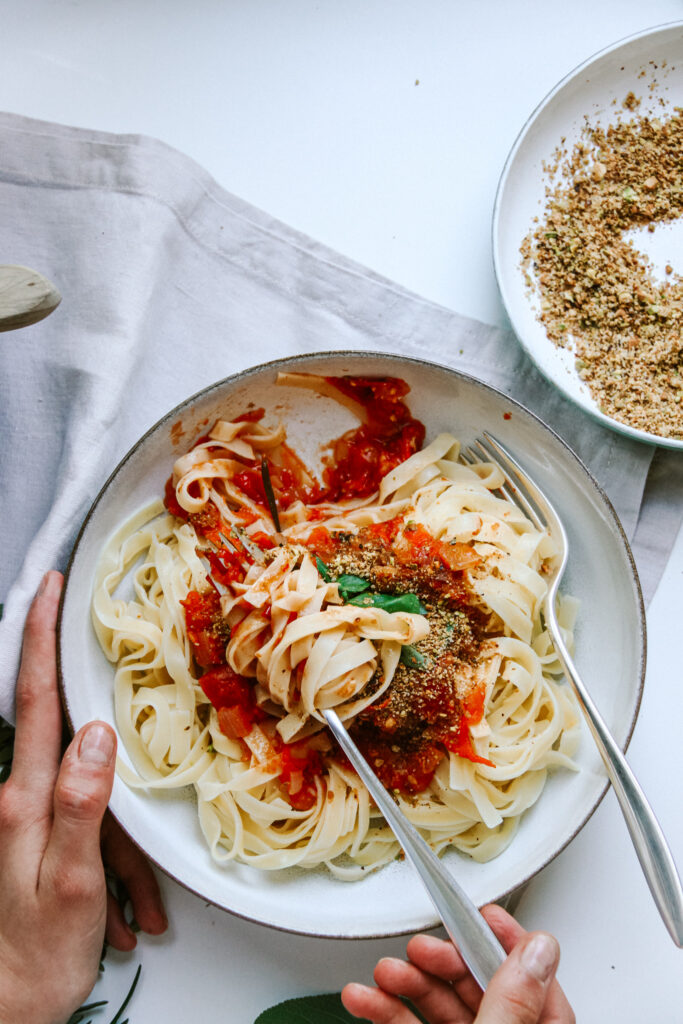
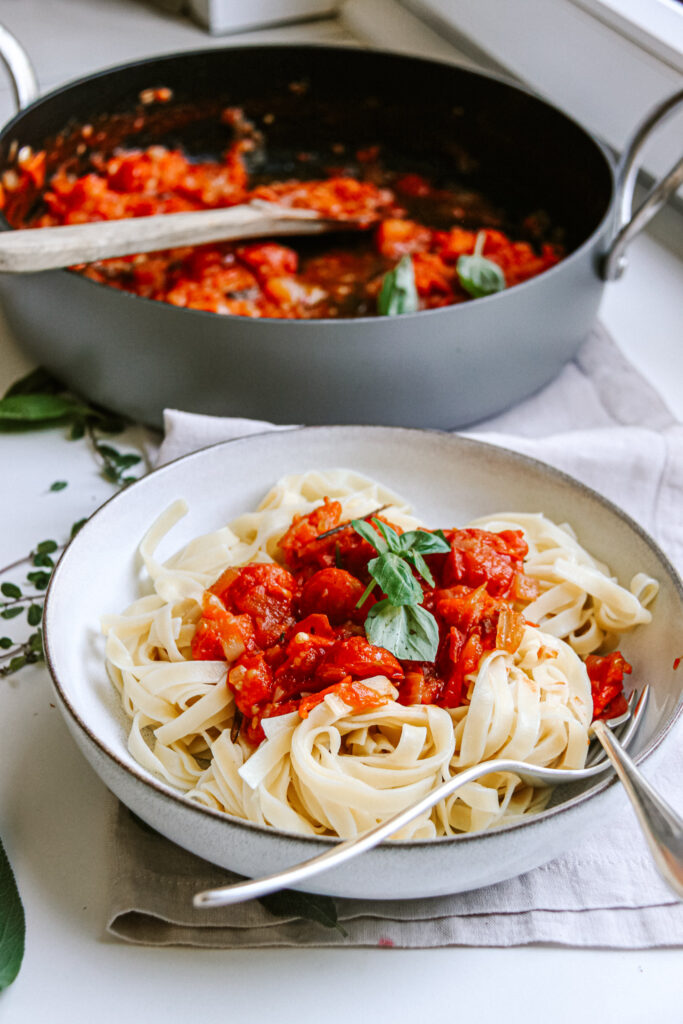
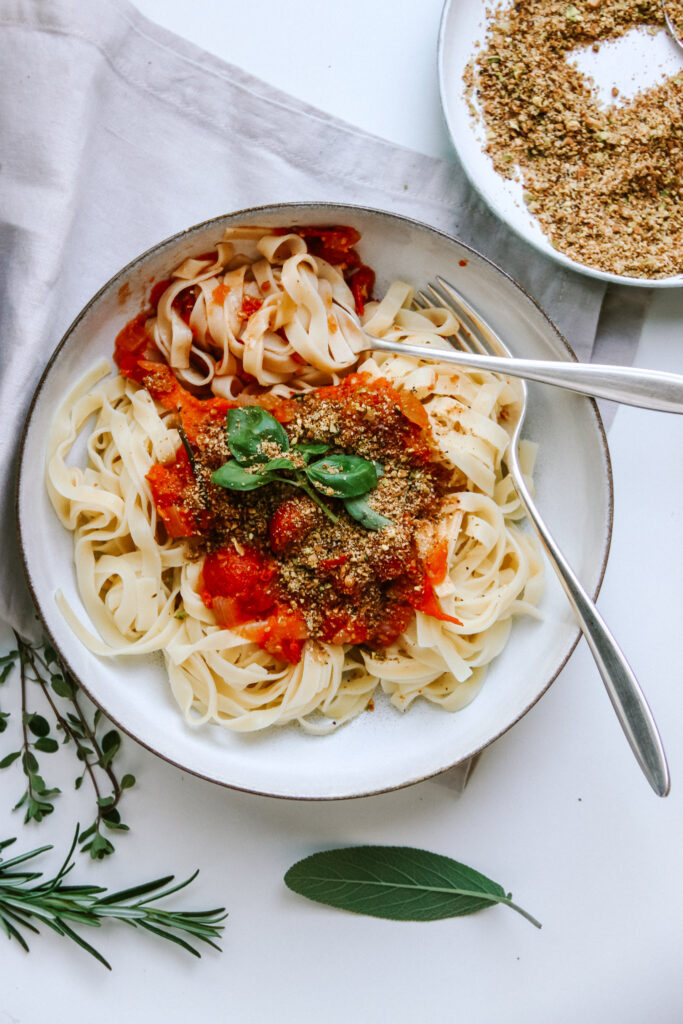
Tomato White Wine Pasta with Pistachio Bread Crumbs

Quick, simple, healthy, tasty. Fancier than your average tomato sauce, full of vitamins, 30 minute and tastes so incredibly good!

Course bowl, dinner, lunch, Main Course
Cuisine Italian
Prep Time 5 Minuten
Cook Time 25 Minuten
Total Time 30 Minuten
Servings 4 servings
Calories 627 kcal

What you will need

For the tomato sauce:

  • 400 g tomatoes large ones, can be any color
  • 300 g cherry tomatoes or any other small ones, it is best to mix the colors
  • 1 tbsp olive oil
  • 1 white onion
  • 1/8 l white wine
  • 1 tsp chili flakes (optional)
  • 2 small branches rosemary and oregano
  • 1 garlic clove grated
  • 1/2 lemon juiced

For the pistachio breadcrumbs:

  • 20 g pistachios
  • 20 g breadcrumbs
  • 1 tsp olive oil

Other:

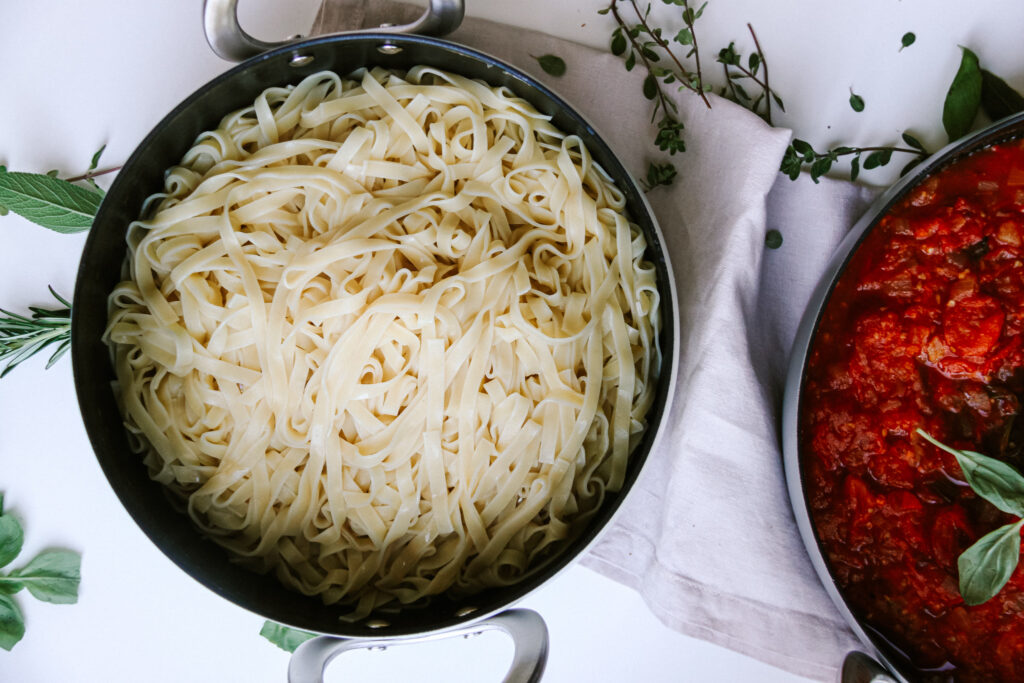
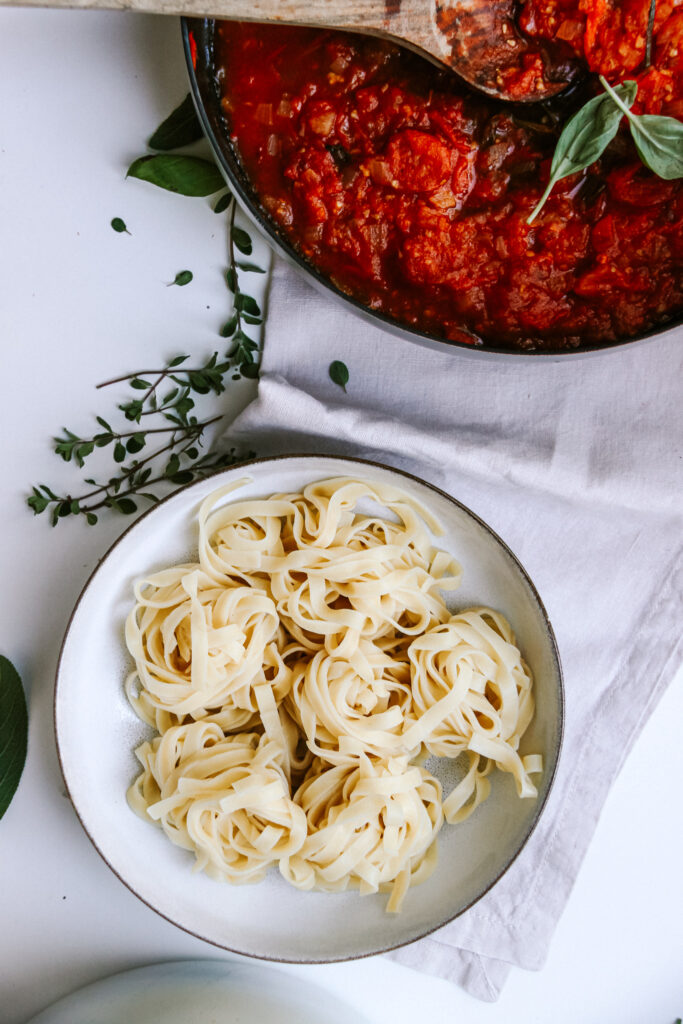
  • 500 g Pasta tagliatelle work best

How to

For the tomato sauce:

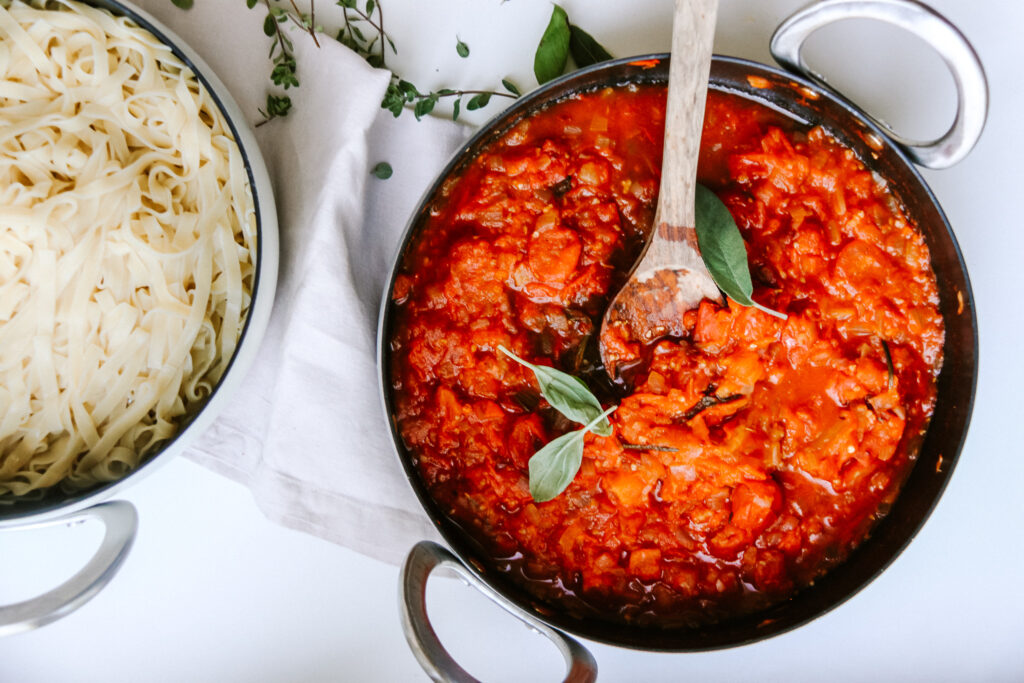
  1. Chop the large tomatoes into about 1cm sized cubes. Half the cherry tomatoes. Finely mince the onion. In a large pot heat up the olive oil. Add the onion and sautée it until it is translucent. Then add in the chopped tomatoes and reduce to medium high heat. Also add the herbs and the garlic clove (and the chili flakes if using) into the pot and give it a stir. Add the white wine and let simmer for about 10 minutes on medium heat. Then add the lemon juice and salt generously and let simmer for another 10 minutes on low heat. Before serving take out the herbs.

For the Pistachio Breadcrumbs:

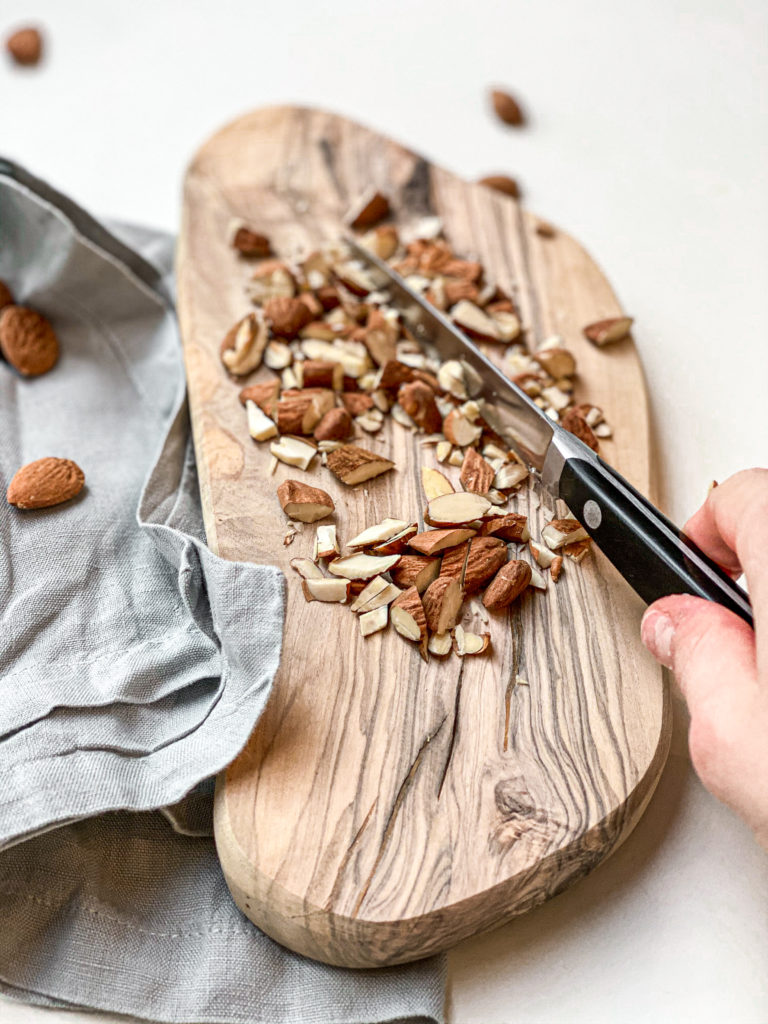
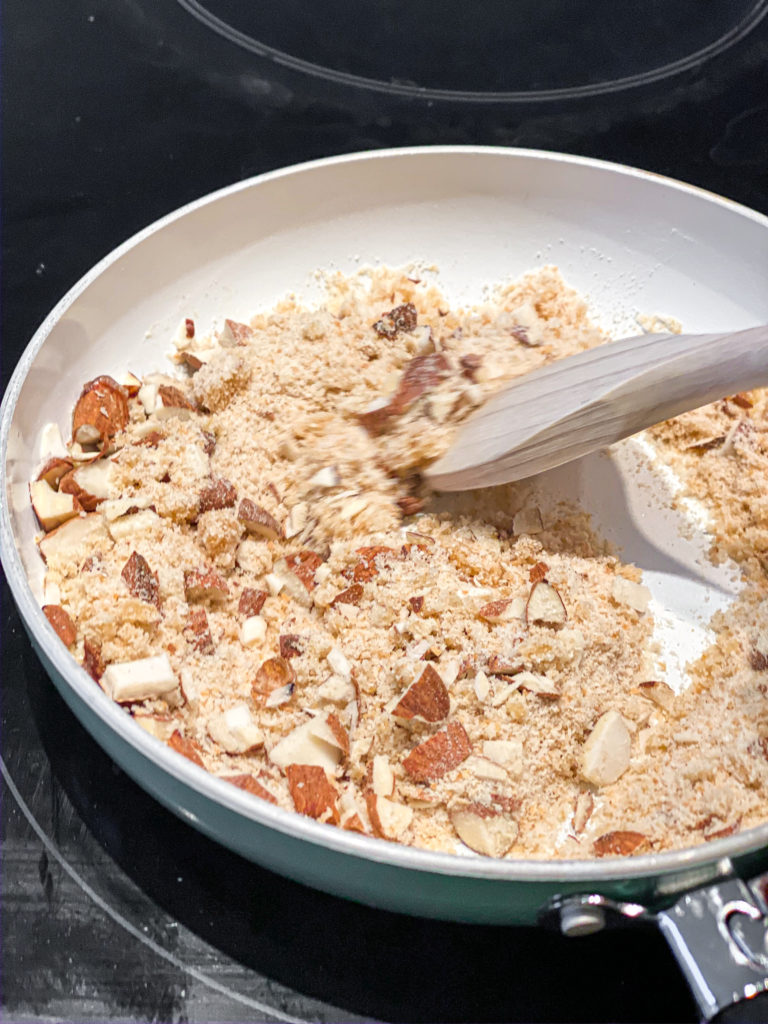
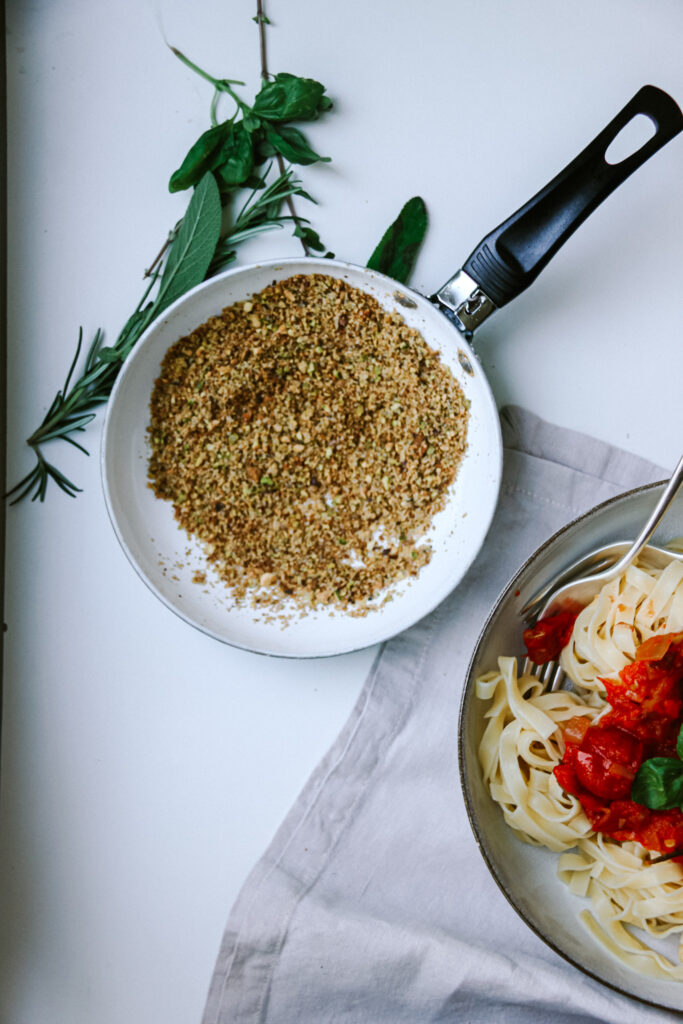
  1. In the meantime make the pistachio breadcrumbs. Therefore add the pistachios to a food processor and pulse until they have gotten a fine consistency. If you do not have a food processor, chop them up with a knife. Combine them with the breadcrumbs. heat up the olive oil in a pan and fry the mixture on high heat for about 2 minutes, stirring constantly so they do not burn. Take them off the heat and set them aside.

  2. In the meantime cook the pasta according to package instructions. Once done reserve 1/2 cup (about 100ml) of pasta water and drain them. Add the drained pasta, along with the reserved water to the sauce and mix through. Seperate them onto 4 plates and top with the pistachio breadcrumbs and serve.

    Enjoy!

Kategorie: Cuisine, Diet-Specific, Italian, Lunch/ Dinner, Season, spring, Vegan, Vegetarian, Vegetarian Stichworte: breadcrumbs, carbohydrates, carbs, family friendly, family meal, fresh tomatoes, healthy vegan, italian, Italian dish, noodles, nuts, pasta, pasta dish, pistachios, plant based, savoury vegan, tomato, vegan, white wine

Bircher Muesli with Honey Poached Apple

November 24, 2019 by katharina.kuehr 1 Kommentar

This Swiss style overnight oats is going to bring your breakfast to the next level! It is a great meal if you don’t have too much time in the morning because it littleraly takes 5 minutes when you have prepared it the night before. 

What even is Bircher muesli?

Bircher Müsli has actually been invented around 1900 by a Swiss doctor called Maximilian Bircher Brenner who served it his patients in the hospital as a medicine. The original recipe calls for rolled oats, water, cream, lemon juice, Apple and honey. In my recipe I have used almost the same ingredients but even made it a bit healthier.

Overnight oats vs Bircher muesli

Overnight oats are traditionally made either only rolled oats and milk soaked overnight. Bircher muesli also is made with oats being soaked in milk overnight but most of the time. To make it « Bircher » usually there are some nuts, seeds, dried fruits and yoghurt added overnight. When making “normal” overnight oats, you would only top them with fresh fruit, granola, nut butter and yogurt (usually but really depending on the preference) while for Bircher rules like the recipe calls for a freshly grated apple that you add to the yoghurt base. It then is topped with berries, bananas or apple, so just fruit. 

What do I need for this?

My basic recipe is really simple. You just have to add almond milk, yoghurt, rolled oats, seeds and/ or nuts, and some dried fruit to a jar and let them soak overnight! In the Morning all you have to do is take it out of the hat, mix under some grated apple and more yoghurt and serve! Honestly it already is incredibly delicious like that!! I love to eat it that way! 

But in case you want to go next level, you can add the poached apple on top. This is not difficult either but takes some time. You can make this by adding an Apple into some simmering water with honey and apple sauce and let it simmer for about 20 minutes. Then you take it out, peel it if you want but it’s not necessary, drizzle some more honey and add it to the muesli! This takes it next level and is super good

My favourite honey utensil!

I think if you have been following me along on the blog, you probably know that I am in love with honey. The only thing is that it always is some plastic whenever you finish a packaging when squeezing it out. Because of this reason I have ordered the honey spoons from Tuuli kitchen ( http://www.tuuli-kitchen.com )! They are made out of natural wood and such a great utensil for honey! This way I can always buy and use honey from glasses and produce less waste. Plus they look super cute when serving! 

Is this Healthy?

Also the Bircher muesli is really healthy and nutritious. The oats provide you with good carbs, essential fiber, a good amount of protein and a lot of vitamins. The ains milk also adds some vitamins and liquids while the Greek yoghurt is packed with protein. The nuts and seeds give you the healthy fats you need and the dried fruit add some natural sweetness. The Apple also provides you a lot of vitamins and deliciousness. 

I hope that you will really enjoy this recipe! I honestly do and think that you will do so too! If you decide to recreate it be sure to tag me with @uneptcuisiniere or #unepetitecuisiniere! If you have time it would mean a lot to me if you would leave a comment and rating here on the blog too! 

Enjoy! 

Katie 

Print

Bircher Muesli

A delicious swiss breakfast recipe. It is similar to overnight oats, packed with nutrients and incredibly delicious! Enjoy!

Course bowl, Breakfast, brunch
Cuisine swiss
Prep Time 10 Minuten
Total Time 10 Minuten
Servings 3 servings
Calories 250 kcal

What you will need

The night before:

  • 100 g rolled oats
  • 200 ml almond milk
  • 1 heaped tbsp greek yoghurt can be substituted for a thick plant based yoghurt if making it vegan
  • 1 tbsp sunflower seeds
  • 1 tbsp pumpkin seeds
  • 1 tbsp dried cranberries or raisins
  • 1 tsp honey

The morning of:

  • 1 large apple
  • 3 tbsp yoghurt preferably thick such as greek yoghurt or skyr
  • a few nuts
  • some fresh berries for serving

How to

That is how it works:

  1. In a large jar or bowl add all the ingredients for "the night before" and stir until all mixed up. Place it in the fridge for at least 6 hours to overnight.

  2. In the morning take the jar out of the fridge and transfer it into a bowl. Grate an apple and add it to the soaked oats along with the yoghurt. Gently mix until evrything is combined. Sprinkle some more nuts or seeds and top with some fresh fruit or honey poached apple (see recipe below). serve and enjoy!

Print

Honey Poached Apple

This is a great way to prepare apples to use as a topping for bircher muesli, overnight oats, yoghurt or anything you like!

Course Breakfast, brunch, Dessert, Snack
Prep Time 5 Minuten
Cook Time 20 Minuten
Total Time 25 Minuten
Servings 1 apple
Calories 171 kcal

What you will need

  • 1 Apple
  • 2 tbsp apple Sauce
  • 1 tbsp honey

How to

This is how it works:

  1. Bring a pot with water to a boil. Add the apple sauce and honey and reduce to a simmer. Add in the Apple and let it simmer for 20 minutes.

    Once done take the apple out. You can peel the apple if you want, but it is not necessary. Drizzle some more honey and enjoy!

Kategorie: Breakfast, Desserts, Diet-Specific, Fall, Snack, Sugar Free, Swiss, Vegan, Vegetarian, Vegetarian Stichworte: Apple, appleseason, breakfast, breaky, brunch, fall, fallbreakfast, fallfood, healthy, healthy fall, honey, nut, nuts, plantbased, vegan, veganfall

Green Beans with Almond Bread Crumbs

November 20, 2019 by katharina.kuehr 1 Kommentar

It’s Thanksgiving next week and Christmas very soon! Although here in Austria we do not celebrate thanksgiving, I know that a lot of people around the world do! November and December are the months for family come-togethers and dinner party’s with friends. I don’t think that in any other month there are that many big meals. 

For us, at Christmas we always make a huge Roastbeef with some potatoes and a salad but this year, for sure, I am going to change the usual game and make these beans instead of the salad! They are so good! I made them once when friends were over for dinner and they immediately asked for the recipe. 

Since it always is difficult to cook for so many people and still chat with them while being a host, I have made a super quick and simple side dish for you. I really love to make this whenever someone is over at my house because it is something almost every one likes, plus it is super simple to make. Also, you can make it vegan, which is perfect for anyone who has a dietary restriction. It is a side that goes with really any dish. 

This green bean recipe works great with meaty dishes such as a Roastbeef, a meatloaf, turkey, a roasted chicken or pork. If you add a little twist to it, such as adding some lemon zest, it already is completely different and works perfectly with some fish or seafood. Also if you make a vegetarian or vegan pie, this is a great and fresh addition! If you already have a carby and filling side, this is a great addition in place of the boring green salad to get some more veggies. 

It is as quick as preparing a salad and really good! Just boiling the beans, tossing them in olive oil. Roasting the breadcrumbs and chopped almonds in some butter or olive oil and assemble. If you are vegan, use oil, if you are gluten free, go for only nuts or some gluten free breadcrumbs. If you do not like almonds, switch them out for any other nuts (but believe me, almonds work really good in here)! It is super versatile.

What I also really like about this recipe is that if you do not eat all of it you can use it for lunch next day or you can even meal prep it! Store the almond breadcrumbs in a separate container and it will last in the fridge for a few days! When I have this for lunch, I like to pair it with some boiled eggs as whole-wheat bread or some Quinoa to make it more filling. This is a really delicious and balanced meal then, as you have a lot of vitamins from the beans and eggs, a healthy amount of protein from the eggs, healthy fats from the almonds and oil, and some whole grain carbs from the bread or the Quinoa. 

So stop looking for a side dish recipe for thanksgiving or Christmas! Make these healthy and flavorful cream beans with almond bread crumbs to make everyone happy! And a little tip: try it before the big event to convince yourself that it is REALLY good! So if you do like it, it would mean a lot to me if you could leave a rating and/ or a comment here on the blogpost. Also if you decide to try it out be sure to tag me on Instagram with @uneptcuisiniere or #unepetitecuisiniere !

Enjoy!

Print

Green Beans with Almond Breadcrumbs (Vegan)

This is a great side dish for Christmas Eve or Thanksgiving, or litteraly any occasion. It is super versatile and incredibly delicious.

Course Appetizer, dinner, lunch, Side Dish
Prep Time 5 Minuten
Cook Time 5 Minuten
Total Time 10 Minuten
Servings 4 people
Calories 166 kcal

What you will need

That is what you will need:

  • 400 g green beans
  • 40 g breadcrumbs preferably whole wheat
  • 20 g almonds
  • 20 g Butter if wanting it vegan, use Olive Oil or vegan Butter instead
  • 1 tbsp Olive Oil
  • optional some lemon zest see recipe notes

How to

That is how it works:

  1. Bring a large pot with water to a boil. Generously salt. Cut of the ends of the green beans, and if they are very long cut them in half too. Add them to the boiling water and let them cook for about 5-7 minutes until ready. You will be able to notice that once you can stab through with a fork easily.

  2. In the meantime chop up the almonds into small chuncks. Heat up the butter in a small pan. Once hot add in, both the breadcrumbs, and the almonds and fry them for about 2-3 minutes on medium heat.

  3. Once the beans are done, rinse them and shock them with cold water. This helps to preserve the colour and the vitamins. Toss them in some Olive Oil and add them onto a pretty serving plate. Add the breadcrumbs on top and serve!

    Enjoy!

Notes

Feel free to add some lemon or orange zest to give it some freshness. This addition would make the dish a perfect match to fish and seafood! 

If you do not like almonds, you can use any other nut, but almonds work really great in here!

You can also use gluten free breadcrumbs. 

Kategorie: American, Appetizers, Diet-Specific, Fall, Lunch/ Dinner, Side, Vegan, Vegetarian, Vegetarian Stichworte: 10minute, almonds, beans, christmas, friendsgiving, green beans, healthy, healthy fall, nuts, quick, quickside, side, sidedish, thanksgiving, vegan, veganfall

Breakfast Quinoa 2 Ways

November 10, 2019 by katharina.kuehr 1 Kommentar

This recipe is for all of the breakfast lovers out there who want to switch up their usual morning game. With these breakfast quinoa recipes you can add a healthy twist to the absolutely best meal of the day, which, with no doubt is breakfast! If you do not know what breakfast is so important you can go check out my Ultimate Breakfast Tacos Blog Post. 

Ok, I get it, you know how important this meal is but still do not want to spend a lot of time in the mornings cooking your meal because sleep?! Well, no problem! I got you. These recipes are super quick and come together in under 10 minutes in the morning, which is so amazing! This also works great if you are the type of person, which I am, who eats breakfast food for every meal of the day, no matter what time it is, because these meals are perfectly balanced meals with great nutritional value. The contain carbohydrates, protein, fibre, vitamins, and fats. So what do you want more? Delicious, quick, healthy, and super nutritious!

Although I rather am the savory type of person, I know that not all of you are so I decided to make both, a version for the sweet tooth, and one for hearty lovers. And honestly, I could not say, which one I like more. They are both super delicious and can be adapted to whichever season it is if you want. 

The sweet breakfast bowl is made with frozen fruit to sweeten it up and give it flavor, which I love because if you buy frozen fruit you 1) can be sure it is fresh because it is frozen directly after being harvested and 2) it does not vary depending on the season, which means you can have berries in winter, since they have been grown and frozen in summer. The frozen berries are mixed with the pre cooked Quinoa, the sweetener of your choice and the Almond milk when the grain is reheated. This actually is great because you do not have to heat them up separately! 

Once this mixture is heated up it can be transferred into a bowl and topped with whichever toppings are at your preference. Here you can totally decide on what you like most and be creative. I like to top mine with some plant based yoghurt, some fresh fruits such as bananas or other seasonal fruits, nuts and nut butters and some granola for that extra sweetness and crunch. That’s it is what you are thinking? Yes! It is as simple as that. And with such little effort you just created a super delicious and nutritious breakfast. Amazing, no?

The savory option is not much more complicated but you do need one more pan than for the sweet one (but it actually is not necessary). So first you fry up the bacon in a pan to get it nice and crispy. When it is done, you take it out of the pan and lay it out onto a kitchen paper to let any excess fat drip off. The bacon grease that remains in the pan does not have to wasted because we can use this to fry up an egg if you want to. I personally prefer poached eggs over fried ones so I would use the bacon grease if I wanted to add some more sautéed vegetables, but this is optional. 

So if you want to poach an egg you have to bring a small pot with water to a boil. Once it boil, add about 1 – 2 tablespoons of vinegar to it and reduce it until it barely simmers. Crack a room temperatured egg into a small bowl and let it slide into the hot water slowly and carefully. The whites will set around the yolk and the egg can be taken out of the pot after 3-6 minutes depending on how soft you want the yolk to be. Place it on a kitchen paper to let any water that is still on it drain off. Meanwhile reheat the quinoa in a small frying pan with some fat. Here you can use olive oil, butter, or even the bacon fat. When I made this I actually had some truffle butter leftover in the fridge and heated it up in this and it was heavenly. You can also find truffle oil in any supermarket which will totally bring this to the next level for your upcoming Sunday brunch. Once this is reheated you can assemble everything. The quinoa on the bottom, topped with the egg, bacon, some fresh greens, and some sliced up avocado. If you feel like doing it, add some hot sauce on top or sprinkle some grated cheese. This is a perfectly balanced meal which is so decadent and delicious while still being healthy!

I hope that you will really like these recipes and if you do so be sure to show me if you recreate them and tag me with @unptcuisiniere or #unepetitecuisiniere! 

Enjoy!

5 von 1 Bewertung
Print

Sweet breakfast Quinoa (Vegan)

This breakfast recipe is a new way to switch up your breakfast game with adding some more nutrients into your first meal, plus making it super delicious!

Course bowl, Breakfast, brunch, Dessert
Prep Time 4 Minuten
Cook Time 6 Minuten
Total Time 10 Minuten
Servings 2
Calories 310 kcal

What you will need

For the base:

  • 250 g cooked quinoa equals 100g raw
  • 140 g frozen blueberries can be substituted for other frozen fruit
  • 150 ml almond milk
  • 2 tsp cinnamon
  • 1 tbsp agave or sweetener of choice

For the toppings:

  • 3 tsp nut butter
  • 4 tbsp plant based yoghurt
  • some fresh fruit & nuts

How to

That is how it works:

  1. Into a small pot add the pre cooked quinoa, the frozen fruits, almond milk, cinnamon, and sweetener of choice. Bring it to a boil. Once hot transfer it into two bowls.

  2. Add the yoghurt and nut butter and whichever topping you desire. I really love fresh fruit such as banana as well as granola on top!

    Serve and enjoy!

5 von 1 Bewertung
Print

Savoury breakfast Quinoa

This is my savoury twist on the breakfast quinoa recipe. It is perfect for all those who love something hearty in the morning but healthy, plus it comes together in only 10 minutes!

Course Breakfast, brunch, lunch
Prep Time 3 Minuten
Cook Time 7 Minuten
Total Time 10 Minuten
Servings 2 servings
Calories 355 kcal

What you will need

  • 250 g Cooked Quinoa equals 100g raw
  • 2 eggs
  • 1/2 avocado
  • 1 handful greens
  • 4 thin strips of bacon
  • 2 tsp oil

How to

That is how it works:

  1. Heat up the bacon in a pan until crispy on both sides for about 4 minutes.Tka it out of the pan and place it on some kitchen paper so the remaining fat can drip off.

    Meanwhile bring a pot with water to a boil. Once it is at a boil add in the vinegar and reduce the heat so it barely simmers. Crack two room temperature eggs into two seperat bowl and gently slide one after the other into the hot water. allow the first egg to set a little bit before adding the second. Let them simmer in the water for abou 3-6 minutes depending on how soft you want to yolk to be. Then take them out and place them on a kitchen paper so the excess water can drip off.

  2. If this is too much work for you you can also simply fry up an egg or use a soft boiled one.

  3. In the meantime heat up the oil in a pan or simply use the dripped off fat from the bacon. Once hot, add the quinoa into it and stir it around until it is reheated and a little crispy.

  4. Seperate the quinoa onto 2 bowls. Top with the eggs, the bacon strips, the fresh greens, the sliced up avocado and a generous pinch of sea salt. Serve and enjoy!

Kategorie: Breakfast, Desserts, Lunch/ Dinner, Poultry & Meat, Sugar Free, Vegan, Vegetarian, Vegetarian Stichworte: avocado, bacon, berries, berry, blueberry, breakfast, breaky, eggs, healthy, healthy breakfast, healthy-ish, nut, nutbutter, nuts, omnivore, quinoa, rasberry, strawberries, vegan

Nächste Seite »

Footer

What has been happening on my Instagram

Copyright © 2024 Une Petite Cuisinière on the Foodie Pro Theme