• Zur Hauptnavigation springen
  • Skip to main content
  • Zur Fußzeile springen

feel food club

  • Home
  • About me
  • My Recipes
  • Blog
  • Navigation Menu: Social Icons

    • Instagram

Snack

No-blending & easy 1 Bowl Healthy Apple Pie Baked Oats

März 30, 2021 by katharina.kuehr Kommentar verfassen

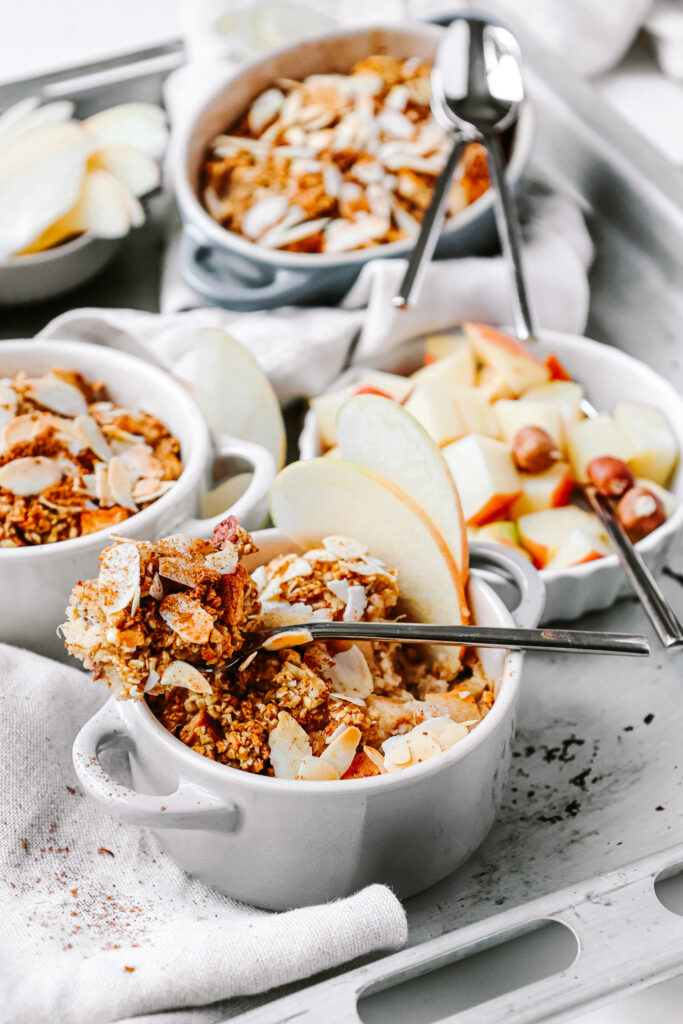
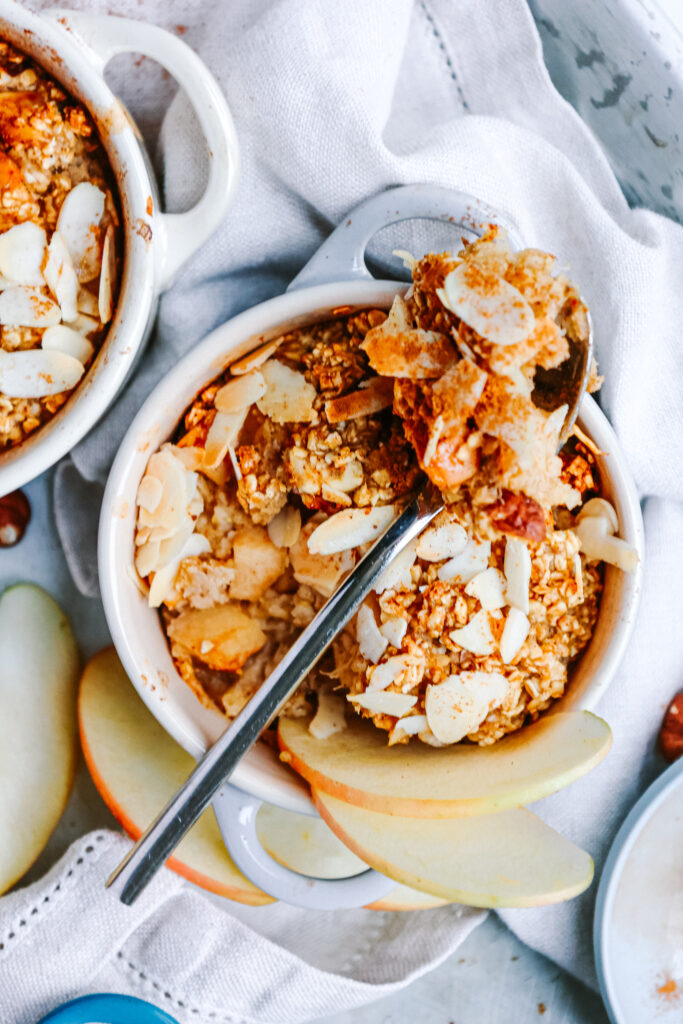
Baked oats – aka just a name for a dish that makes it sound reasonable to have oats for breakfast. And really, it is one of the best things ever. If you have never had it before and are wondering what it tastes like – kind of like oatmeal flavor-wise, but kind of goey and soft like a muffin texture-wise. Plus, those nice and soft cinnamony apples in the middle. So basically, like a mix of apple pie, oatmeal and muffin. Who would not want this?

Since I am not the biggest oatmeal fan I actually have never tried making this when it became a trend. And then one of you asked me whether I could create a recipe for a baked oatmeal. This pushed me out of my comfort zone, and leaving it was a great decision because this recipe turned out! So, also if you are not a huge oatmeal lover but you do like apple pie or muffins, you should still give this recipe a shot!

What’s special about this recipe?

It is not regular oatmeal and it´s not a regular muffin. It is way easier than a muffin and way more special than an oatmeal. Plus, you really only need one bowl to make this, which makes it a great dish for all those who want to avoid washing the dishes! Plus, you only need an oven and no stove, no constant stirring. You can just pop this into the oven, sit back and enjoy it half an hour later.

Is this dish healthy?

Yep, yep, yep! Let’s start with the oats! Oats are a real superfood actually. Loaded with carbs, fibre, protein and antioxidants. They keep you full for hours, give you energy and a bunch of protein to kick-start your day. Oats really are one of the best things you could have in the morning! Then we also use a bit of coconut sugar to sweeten the apples, which does still contain sugar, but also comes with other nutrients and fiber.

What else do we have in here?

Banana. The banana works as a natural sweetener in this recipe, and also adds even more fiber and vitamins to the dish. Besides, we have the apples, more fruits, so more fiber and vitamins, some plant-based milk, an egg for extra protein, and a bunch of cinnamon and cardamon. If you want to find out more about why cinnamon is so healthy, you can check out my December favorites! And last, which is optional but should not be left out, are the nuts! In here I would recommend using hazelnuts or walnuts, both are great sources of healthy fats and protein! So, all in all, really healthy!

How to make this dish?

As already mentioned, this is super simple. We start by chopping up our apple into small cubes. These are then tossed with some cinnamon, cardamon, oil & coconut sugar and pre-baked in the oven. This pre-baking makes them softer, enhances the flavor, and also gives us time to prepare the rest in the meantime!

Then we only need to combine the rest. For this we need to mash a banana, combine it with the egg, plant-based milk, spices, oats, salt & nuts. This can easily be combined in a bowl. If you want to have it really muffin-like you could also blend it with a blender, so you really have a smooth, cakey dough without chunks. If we are just mixing it in a bowl, it has more of an oatmeal vibe. This we can now add to the baked apple and give it a mix and then we’ll bake it for 35-40 minutes until it is crispy on the top.

When and how to best have it:

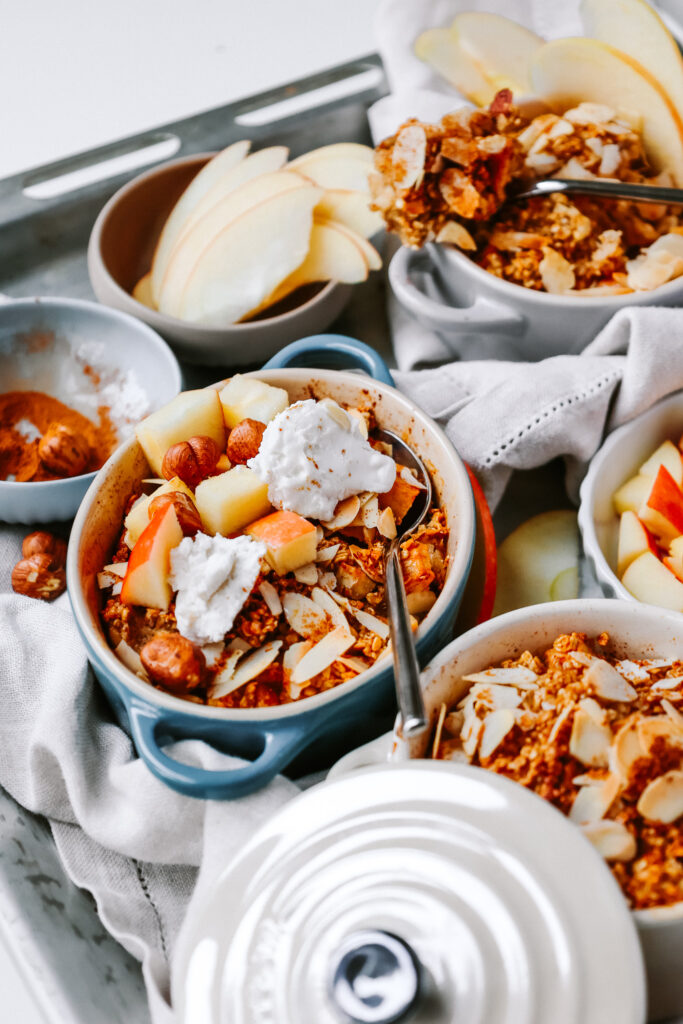
When I think is pretty irrelevant. It works great as a breakfast, a dessert, a snack, a breakfast for dinner kind of situation, just for whenever you want it. How to best have it depends a little on when you have it. I loveee it with some yoghurt and nut butter (like almond butter) or also some ice cream and whipped cream when having it as a dessert. You could even serve it with some more (sautéed or fresh) apple or banana if that’s what you want!

Also, very important; this dish works great for meal prep! So you can make it on a Sunday or in the beginning of a week and let it chill in the fridge. Whenever you then want to have it, you can just pop it into the oven for 10 minutes until it is warm and crispy again!

Print

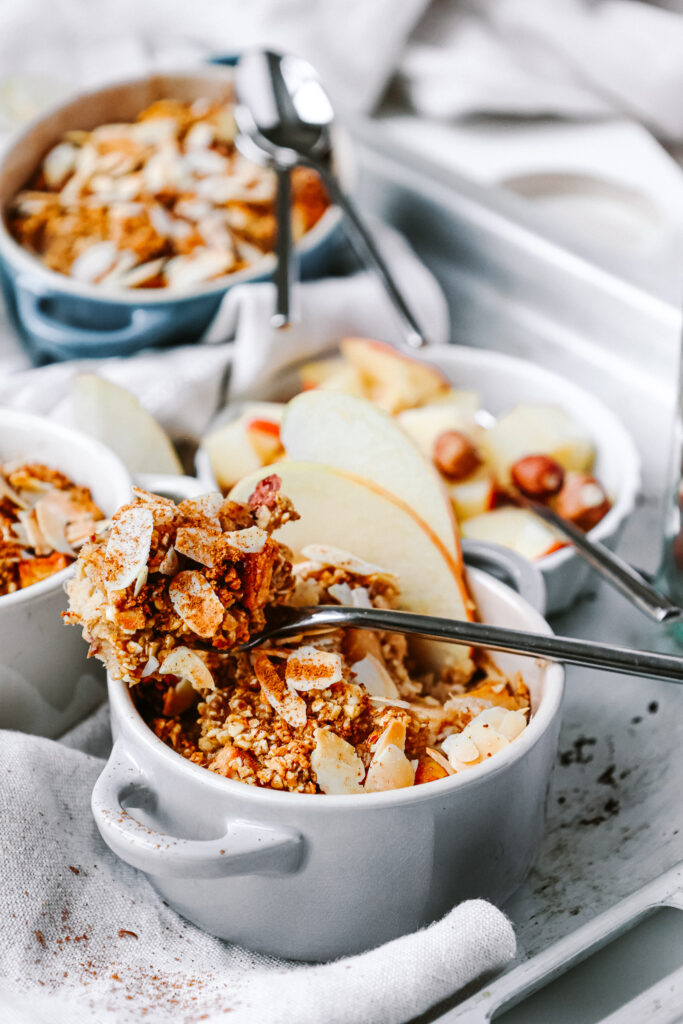
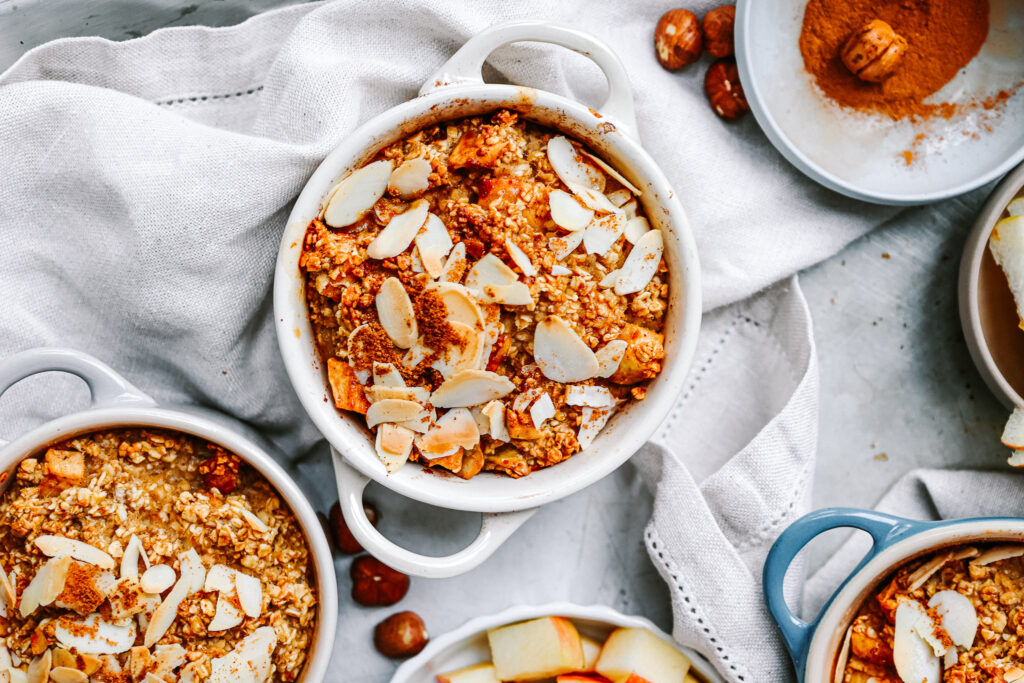
1 Bowl Apple Pie Baked Oats

Like porridge just better. Imagine this as a crossover of apple pie, porridge and muffins but as a breakfast version. Really. really good and really, really easy! A must try!

Course Breakfast, Dessert, Snack
Prep Time 5 Minuten
Cook Time 45 Minuten
Total Time 50 Minuten
Servings 2 servings

What you will need

  • 1 apple
  • 1/2 tsp cinnamon
  • a pinch nutmeg
  • 1 tsp oil
  • 2 tsp coconut sugar
  • a pinch salt

For the oats:

  • 1 banana (the browner the better)
  • 1 egg
  • 100 g oats
  • 1/2 tsp cinnamon
  • 1 tbsp honey (optional)
  • 75 g (plant based) milk
  • 1 tbsp nuts of choice (walnuts, hazelnuts,…)

For the toppings:

  • shredded almonds
  • coconut sugar

How to

  1. Preheat the oven to 180°C.

  2. Remove the core and cut the apple into 1cm sized pieces. Toss them with the cinnamon, cardamon, salt, oil and coconut sugar. Bake them in an oven safe dish for 10 minutes.

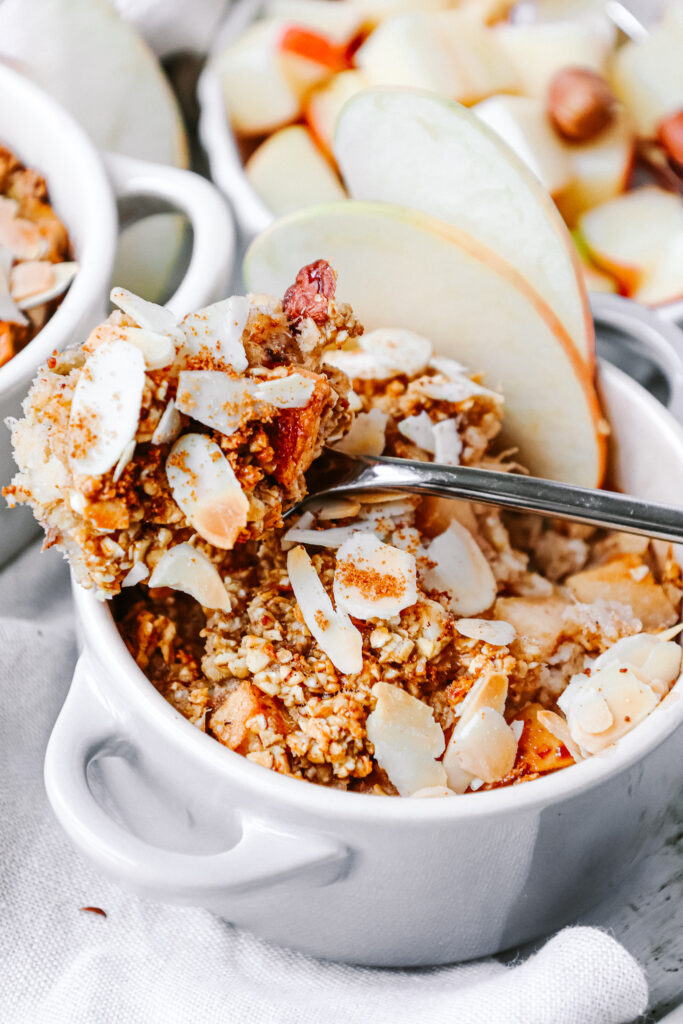
  3. In the meantime you can mash the banana till it's creamy, combine it with the rolled oats, egg, cinnamon, plant based milk, nuts and honey. If you want the baked oats to be really muffin-like, you could also blend this dough until it has no chunks left. If you do not blend it, it will me more like a porridge consistency.

  4. Once the apples are done, we can mix them into the remaining batter. Then we can pour it into oven safe bowls of any other oven safe dish and top it with the almonds and coconut sugar. Bake them for 30-35 minutes at 180°C until crispy and golden and enjoy!

I genuinely hope that you will enjoy this recipe as much as we do and that you’ll have a lot of fun making it!

Enjoy,

Love,
Katie

Kategorie: Breakfast, Desserts, Snack, Vegetarian Stichworte: apple pie, baked oat recipe, baked oats, baked porridge, brunch, cake, dessert, healthy, healthy breakfast, Healthy Dessert, healthy oats, healthy vegan, muffin, oat recipe, oatlover, oats, porridge, sugar free, tik tok, tik tok food, vegan breakfast

Healthy-ish Double Chocolate Salted Caramel Brownies

März 12, 2021 by katharina.kuehr Kommentar verfassen

There is nothing like this. I promise. All of the good things combined and more than you have ever wanted. On the bottom we have the fudgy and chocolaty brownie (which already is so good on its own), then we have the creamy salted date caramel layer, which is just heaven and then everything is topped with a crunchy chocolate layer. If you are not hungry by now, I do not know what would make you hungry…

What’s special about this dish?

Well, a lot actually. The brownies are refined sugar and butter and made with wholewheat flour. So, they are pretty healthy actually. Then for the caramel, instead of cream, butter and sugar we are only blending dates, coconut milk and sea salt. This will become really creamy and thick and just tastes amazing!! Honestly, it was a mistake not having combined brownies and date caramel for such a long time! This combo is out of the world. Not exaggerating. So the brownie is pretty healthy, easy to make and still tastes really good!

Is this dish healthy?

Yepyep, as already mentioned, unlike regular brownies, this one is not loaded with sugar and saturated fats. It’s made out of eggs, coconut sugar (which still does contain sugar but less than white, refined sugar, plus it also comes with other nutrients), vanilla, oil (which is high in unsaturated fats), wholewheat flour (great source of fibre) and cacao powder (actually really good for you because it is super high in antioxidants)

Obviously we also have chocolate (super good for your soul 🙂 – when purchasing the chocolate, make sure to check the label to best get one that has been sweetened with any form of natural sweetener and does not contain a bunch of ingredients you don’t know and cannot pronounce). Plus, the dates, which also are really high in fibre, and dates in general are a super beneficial food for you as they are a great source of antioxidants and vitamins). So you see – all in all, pretty healthy. And especially healthy for your soul!

How to make this dish:

Easy peasy, chocolate squeezy. Or something like that. No, this is fairly easy. No eggs need to be separated, no complicated things need to be done. It essentially comes down to melting chocolate in the microwave, whipping eggs, sugar and vanilla till fluffy and then pouring in the chocolate and oil, as well as the flour-cacao powder mixture. That’s already it for the brownie, so very safe to make for everyone.

The caramel layer is not much more difficult. If you have soft dates (like medjool dates), then they blend perfectly fine. If yours are a bit harder, you can just soak them in hot water for a few hours and they will also become soft, which makes them easier to blend. So these are then just mixed with the coconut milk and the sea salt and that’s it. The chocolate layer on top is very self-explanatory, so you just need to melt the chocolate and pour it above. It’s easier if the other layers have cooled down a bit.

Meal prep friendly?

In theory yes! In real life, let’s say, I’d be surprised. Every time we make them, they’re gone within 3 days (If they even last this long). But yes, in theory they would definitely last up until a week in the fridge if covered or stored in an air tight container. If you have too many and make them on batch, you could also freeze some and slowly thaw them up before eating (so just placing them at room temperature and slowly letting them unfreeze).

In terms of how to best have these, there is no right answer. Breakfast, lunch, snack, dinner, dessert. Do we even need to ask when to best have brownies? Is there even a time where you cannot have brownies? I hope not. How to best have them is a different question. They are really good and rich on their own, so there is no need to add anything else, although they go great with some ice cream.

This recipe really is a must try for all chocolate lovers out there! Easy, healthyish and so worth it to make. They’ll upgrade ANY week! I hope you genuinely like them and enjoy making them!

Print

Healthy-ish Double Chocolate Salted Caramel Brownies

The best (and only) brownie recipe you'll ever need! This is easy, not your average brownie and so good.

Course Dessert, Snack
Prep Time 20 Minuten
Cook Time 20 Minuten
Total Time 40 Minuten
Servings 12 slices

What you will need

For the brownies:

  • 3 eggs
  • 180 g coconut sugar
  • 1/2 tsp vanilla powder
  • 100 g milk chocolate (preferably one that has been sweeneed with natural sweetener like coconut sugar)
  • 100 g dark chocolate (preferably one that has been sweeneed with natural sweetener like coconut sugar)
  • 120 ml oil (flavor neutral oil)
  • 120 g whole wheat flour
  • 40 g cacao powder
  • 1/2 tsp baking powder

For the rest:

  • 250 g dates (soft ones work best – if you do not have soft ones, you can soak them in hot water for a few hours)
  • 150 ml coconut milk
  • a pinch sea salt
  • 100 g chocolate (preferably one that has been sweeneed with natural sweetener like coconut sugar)

How to

For the brownies:

  1. Melt both chocolates in the microwave, then combine with the oil and let cool a bit. Whisk the eggs, sugar and vanilla for about 5 minutes until fluffy.

Love,
Katie // Une Petite Cuisinière

Kategorie: Desserts, My favorites, Snack, Sugar Free Stichworte: brownie, brownies, cacao, caramel, chocolate, dates, dessert, fudgy, healthy, Healthy Dessert, refined sugar feee, Snack, sugar free, veggie

Healthier and Incredibly Simple 4-ingredient Bounty Bars

Januar 19, 2021 by katharina.kuehr Kommentar verfassen

Bounty. The bar we all love. I mean, who can resist some sweet coconut covered in crunchy chocolate. That bite into it is like a bite of heaven. But unfortunately they are not very nutritious and good for us. But that won’t stop us from eating them, right?! That’s why we are making an incredibly easy and healthier version of them that tastes at least as delicious!

When I made them the first time, they were gone within a day, more or less. And it resulted in a family fight about who would get the last one hahaha. So be aware that they’ll be gone quickly when you make them!

What is special about this dish?

Healthy(er) bounty bars. That is very special. Plus, they are incredibly easy to make, so anyone can make them! You really just need 4 ingredients to make them and you do not even NEED a blender. It of course is easier with one but it also us possible without one! That‘s what makes them really special! 

Are they healthy?

I would definitely say healthier than regular bounty bars. They are nutrient bomb but they definitely are better, nutrient wise, than regular ones. Why? Because regular ones are loaded with refined sugar, preservatives and flavor enhancers, which all are not healthy for our gut, teeth and overall health.

Our version is just made of shredded coconut, coconut milk, maple syrup or honey and chocolate. That is all. The shredded coconut and coconut milk are pure and without any additives, the maple syrup or honey still contain sugar but they also contain nutrients such as fibre and vitamins, especially honey does. When it comes to the chocolate, it really depends on the brand you choose. The darker the chocolate is, the healthier it is. Also make sure to choose one with as few ingredients as possible. You can check the  label at the back of the package and maybe you even find one, which is sweetened with coconut sugar.

How to make them:

This is incredibly simple. You just need to mix the shredded coconut, coconut milk and sweetener. This can be done with a mixer or blender, which definitely is quicker and easier, and if you don’t have one, you can also mix and knead it by hand. Once this is combined we are pressing it onto a tray, a casserole dish or into a baking tin and let it cool in the fridge or freezer for at least 1 hour or, even better, overnight.

The next morning, or a few hours later, we melt the chocolate. Please do not add coconut oil to thin it out, because then the chocolate won’t cover the bars as good. The pressed and chilled mass now is taken out of the fridge and cut into bar-sized pieces. These now are dipped in the chocolate and chilled in the fridge again! That’s it! 

The best snack

This is not only a perfect snack but also a great dessert. The best thing is, you can just take them out if the fridge and that’s it! That also is the reason they are gone so quickly 🙁

We LOVE these, even say they are better than Kokosbusserl, and that really means something!

Print

Healthier & easy, homemade, Vegan Bounty Bars

At least as good as the original and much healthier. Plus, they are soso easy to make. A bit fluffy and coconuty batter on the inside and crispy chocolate on the outside. Everythnig we want for a snack.

Course Dessert, Snack
Prep Time 15 Minuten
Cooling time 3 Stunden
Total Time 3 Stunden 15 Minuten
Servings 10 bars
Calories 212 kcal

What you will need

  • 150 g shredded coconut
  • 100 g coconut milk (the firm part only)
  • 3-4 tbsp maple syrup
  • 200 g chocolate

How to

  1. From the can of coconut milk, only use the thick part!!! Do not use the watery part. Add this firmer and thicker part to a blender along with the coconut shredds and the maple syrup until it makes a thick and sticky paste or dough.

  2. Into a baking tin or casserole dish or onto a baking tray lay a parchment paper and add the coconut filling on top. Press it down and flat, so it is about 1-1,5cm thick. Cool in the fridge for at least one hour or overnight.

  3. When ready, melt the chocolate and let cool a bit. Cut the bonuty bars into 10 about 3cm wide and 8cm long bars. Dip each bar into the motlen chocolate and lay onto the parchment paper again.

  4. Cool in the fridge for another 2 hours at least. Enjoy!

I hope you enjoy them as much as we do and have a fun time making them!

Happy cooking & enjoy,

Love,

Katie // Une Petite Cuisinière 

Kategorie: Desserts, Diet-Specific, Snack, Vegan Stichworte: bounty, bounty bars, coconut, dessert, healthy, healthy desserts, healthy snack, healthy vegan, homemade, homemade bounty bars, kokosbusserl, shredded coconut, Snack, sweets, vegan, veganuary

Super Easy Healthy Matcha Cheesecake in a jar

Oktober 20, 2020 by katharina.kuehr Kommentar verfassen

Easy, Matcha, Cheesecake perfectly portioned out just to take one whenever you want. Crispy, delicious cookie swirled in slightly sweet matcha-flavoured no-baked (healthy) cheesecake cream. Sounds good? Well, because it is good! And the best thing, it also is easy!

What is special about this dish?

Everything, basically. Cheesecake usually is made of a buttery-cookie crust and a cream cheese and cream filling, and then it is baked. This recipe could not really be further away from this. But it still is as delicious. Instead of buttery-cookie crust, we have a delicious healthy cookie. And instead of natural flavoured, high fat filling, we have a lighter, super creamy filling, that is not baked. And of course, there is the matcha in here!

What is Matcha?

Matcha is a green tea actually. It is most of the time sold in a powder form which is made from green tea leaves. IT originated in east Asia, where it is consumed a lot too. Especially in Japan it is very common to drink it. But how has it made it way to Europe and America? Well, Matcha contains a lot of caffein (because green tea does so too) and it has an incredibly high amount of antioxidants, which means it is really healthy. That’s why it has kind of been celebrated as a superfood in the past years and that also is why you can find a matcha latte on basically every menu in any coffee shop! It has a slightly bitter flavour and definitely is not something for everyone’s taste buds. To be honest, I do not even like it too much really. But in this recipe it tastes amazing! I promise. SO it really is for matcha lovers and non matcha lovers!

Is cheesecake healthy?

I am sorry to tell you that, but no it is not. Why? Lets start from the bottom. As I already mentioned, it is usually made out of cookies combined with butter. Extremely high in fat and sugar and with basically no nutritional value. And then the filling; cream cheese, cream and sugar. Not very nutrient-packed either. But is has loads of sugar and fats. The only positive thing is that it is pretty high in protein in comparison with most other cakes.

How to make cheesecake healthy

I have never made a regular baked cheesecake in a healthy form to be honest. BUT I have made a vegan healthy baked cheesecake and it turned out beyond bombastic! You can find the recipe here! But I can tell you a little about how to make no bake cheesecake (mousse) healthy. Instead of a regular cookie crust, you could make healthier cookies with oats or wholegrain flour and natural sweetener! And for the filling you could mix a few things. I like to mix yoghurt, greek yoghurt, curd cheese (topfen) and some cream cheese. The combination tastes really good, is way lower in fat and very high in protein! As we still need some sweetness, I like to swap out refined sugar for a more natural sweetener like maple syrup or honey for example.

How to make Matcha Cheesecake in a Jar?

This is incredibly easy actually. It comes down to two things; Making the cookies and making the cream. To make the cookies you need to blend oats, coconut shreds, coconut sugar and egg, then spread it on a baking tray and bake. That’s it. The mousse is not much more difficult. You simply add all the ingredients to a bowl and mix until creamy. Yes, that’s it! When the cookies are done and cooled, you break them apart and swirl them into the cream. Then you only have to portion them out and that already is it! Incredibly easy right?

When to have it

Whenever you want. I think it is perfect as a snack or dessert because it has the perfect serving size for just a little sweet craving, but you can really have it at any time of the day. I also think it is great if you are having friends over for dinner because you can prepare it beforehand and just take it out of the fridge!

I genuinely hope you enjoy this recipe (as much as my cousin and my best friend, because they keep asking me for when I am making it again 🙂 )! It is super easy, super delicious, and pretty healthy. Definitely worth giving a try for both – matcha lovers and non matcha lovers.

Print

Healthy Matcha Cheesecake in a jar

A delicious, easy and pretty healthy twist on the regular cheesecake. Creamy and sweet matcha mousse with swirled in cookie chunks.

Course Dessert, Snack
Prep Time 10 Minuten
Cook Time 20 Minuten
cooling time 30 Minuten
Total Time 1 Stunde
Servings 8 servings
Calories 185 kcal

What you will need

For the cookie:

  • 60 g rolled oats
  • 25 g coconut shreds
  • 1/2 egg
  • 40 g coconut sugar
  • 1 tbsp coconut oil

For the cream:

  • 250 g Topfen like cream cheese just lighter and slightly different in texture
  • 125 g cream cheese
  • 200 g greek yoghurt
  • 200 g yoghurt
  • 50 ml maple syrup
  • 3-4 tsp matcha

How to

  1. Preheat the oven to 180°C. For the cookies add all the ingredients to a food processor. Take about 2 tablespoons at a time and form a cookie on a baking tray lined with parchement paper. The dough will be very sticky, but this is the way it is supposd to be. Bake them for about 12-15 minutes.

  2. In a large bowl add all of the ingredients for the cream. Whip them up until creamy and well combined. Adjust sweetness and matcha to your desire by adding a little more if you want. Let chill in the fridge.

  3. When the cookies are golden brown, take them out of the oven and let them cool. Then break them apart into small chunks and whip them into the mousse. Divide it onto small jars or bowls and keep in the fridge!

    Enjoy!

Happy cooking,
Enjoy,
Katie // Une Petite Cuisinière

Kategorie: Desserts, Diet-Specific, Snack, Vegetarian Stichworte: cheesecake, crowd recipe, dinner recipe, gluten free, green tea, healthy, Healthy Dessert, matcha, matcha recipe, no bake, Snack, sugar free, treat, vegetarian dessert

Nächste Seite »

Footer

What has been happening on my Instagram

Copyright © 2024 Une Petite Cuisinière on the Foodie Pro Theme