• Zur Hauptnavigation springen
  • Skip to main content
  • Zur Fußzeile springen

feel food club

  • Home
  • About me
  • My Recipes
  • Blog
  • Navigation Menu: Social Icons

    • Instagram

Vegetarian

Tomato and Bean soup (V, GF)

Dezember 9, 2019 by katharina.kuehr 1 Kommentar

This soup is just in time for the snow that is expected soon. I feel like December is the perfect time for soups. Especially with all the cookies and treats I often feel like having a light soup that still fills me up, for dinner. This soup is ready in 20 minutes, it’s vegan, packed with protein, and super delicious.

To be honest my very favorite soup is Beef Soup. It’s a traditional Austrian dish that is very common. We add noodles, carrots, beef, and „Fritatten“ to it, and it is so good! We make it for Christmas every year! My mom is the best Chef when it comes to making this soup. It is a lot of work! But anyway, since we all to not have a bunch of time, especially during the week, for making dinner, I share this quick but super delicious recipe with you guys.

How to make it:

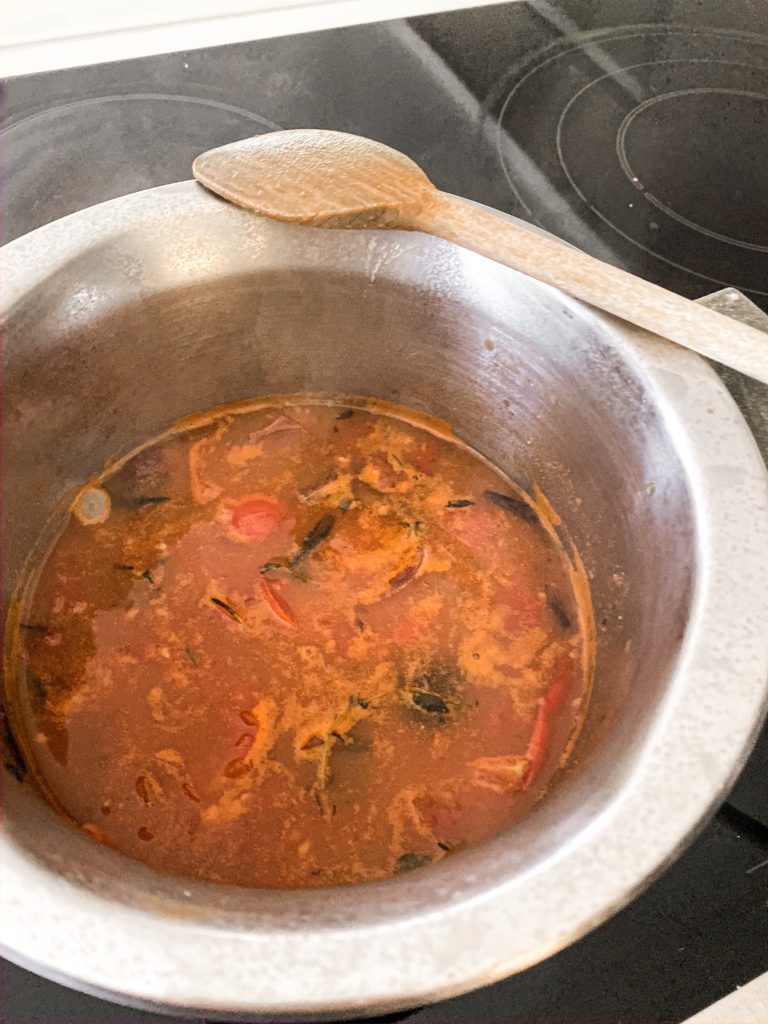
To make the soup the first, and essential step (don’t leave this out!! It adds so much flavor) is to brown the onions and herbs in the pot. No oil, no anything. We want them to turn a little bit burnt because that way the flavor will be super intense. You really do not have to worry wether it sticks to the pot or not because it doesn’t matter. 

After that we pour a mix of vegetable stock and canned, diced tomatoes on top. The vegetable stock is like a life hack when making soups, because it instantly gives a bunch of flavor. The tomato sauce, guess what, gives the tomato-y taste to the soup. This is going to simmer with a few other ingredients. Just before serving, you add in the freshly cooked and drained white beans. I like to use canned beans simply because they are more convenient but you can also cook fresh ones and add them. If you are not a fan of white beans at all, you can add other ones or if you want and are not vegan, prawns would work great in here! 

When to serve it?

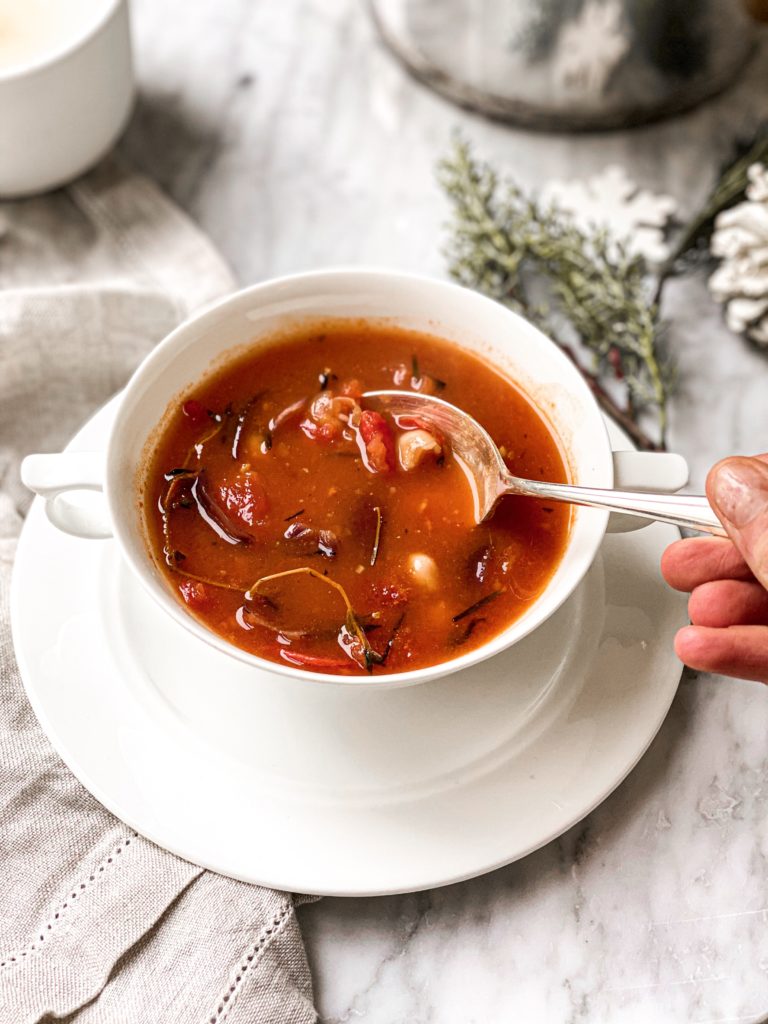
This soup works great as an appetizer whenever you are having friends over but also as a full dinner. I like to serve it with some bread or rice or quinoa, which you could add to the soup, just to make it a complete meal and more filling. The great thing is, you could just prepare it whenever you have time, and when you come home from work or school and had a long day, you can simply heat it up in 5 minutes and it will taste like a freshly cooked meal. This is the awesome thing about this. 

What about meal prep?

This meal is ideal for a big family because you can make it in large batches, it works great for meal prep, and it is very versatile. Of course, the way I would recommend you to eat it, is with white beans, just because I believe that they taste best, and it is a great plant-based meal, which always is great to have before going to bed. But you can also add in some cooked and shredded chicken, or prawns if you would like to have it with some animal protein. You can just make it for you and your family or friends and place the different protein sources/ add-ins on the table to everyone can pick whatever they like.

I hope that you are having a beautiful winter time and this soup will be added to your weekly meal plan. If you like it, it would mean a lot to me if you could leave a rating here on the website! If you decide to recreate it, be sure to tag me on Instagram with @uneptcuisiniere or with #unepetitecuisiniere !

Enjoy,

Katie 

5 von 1 Bewertung
Print

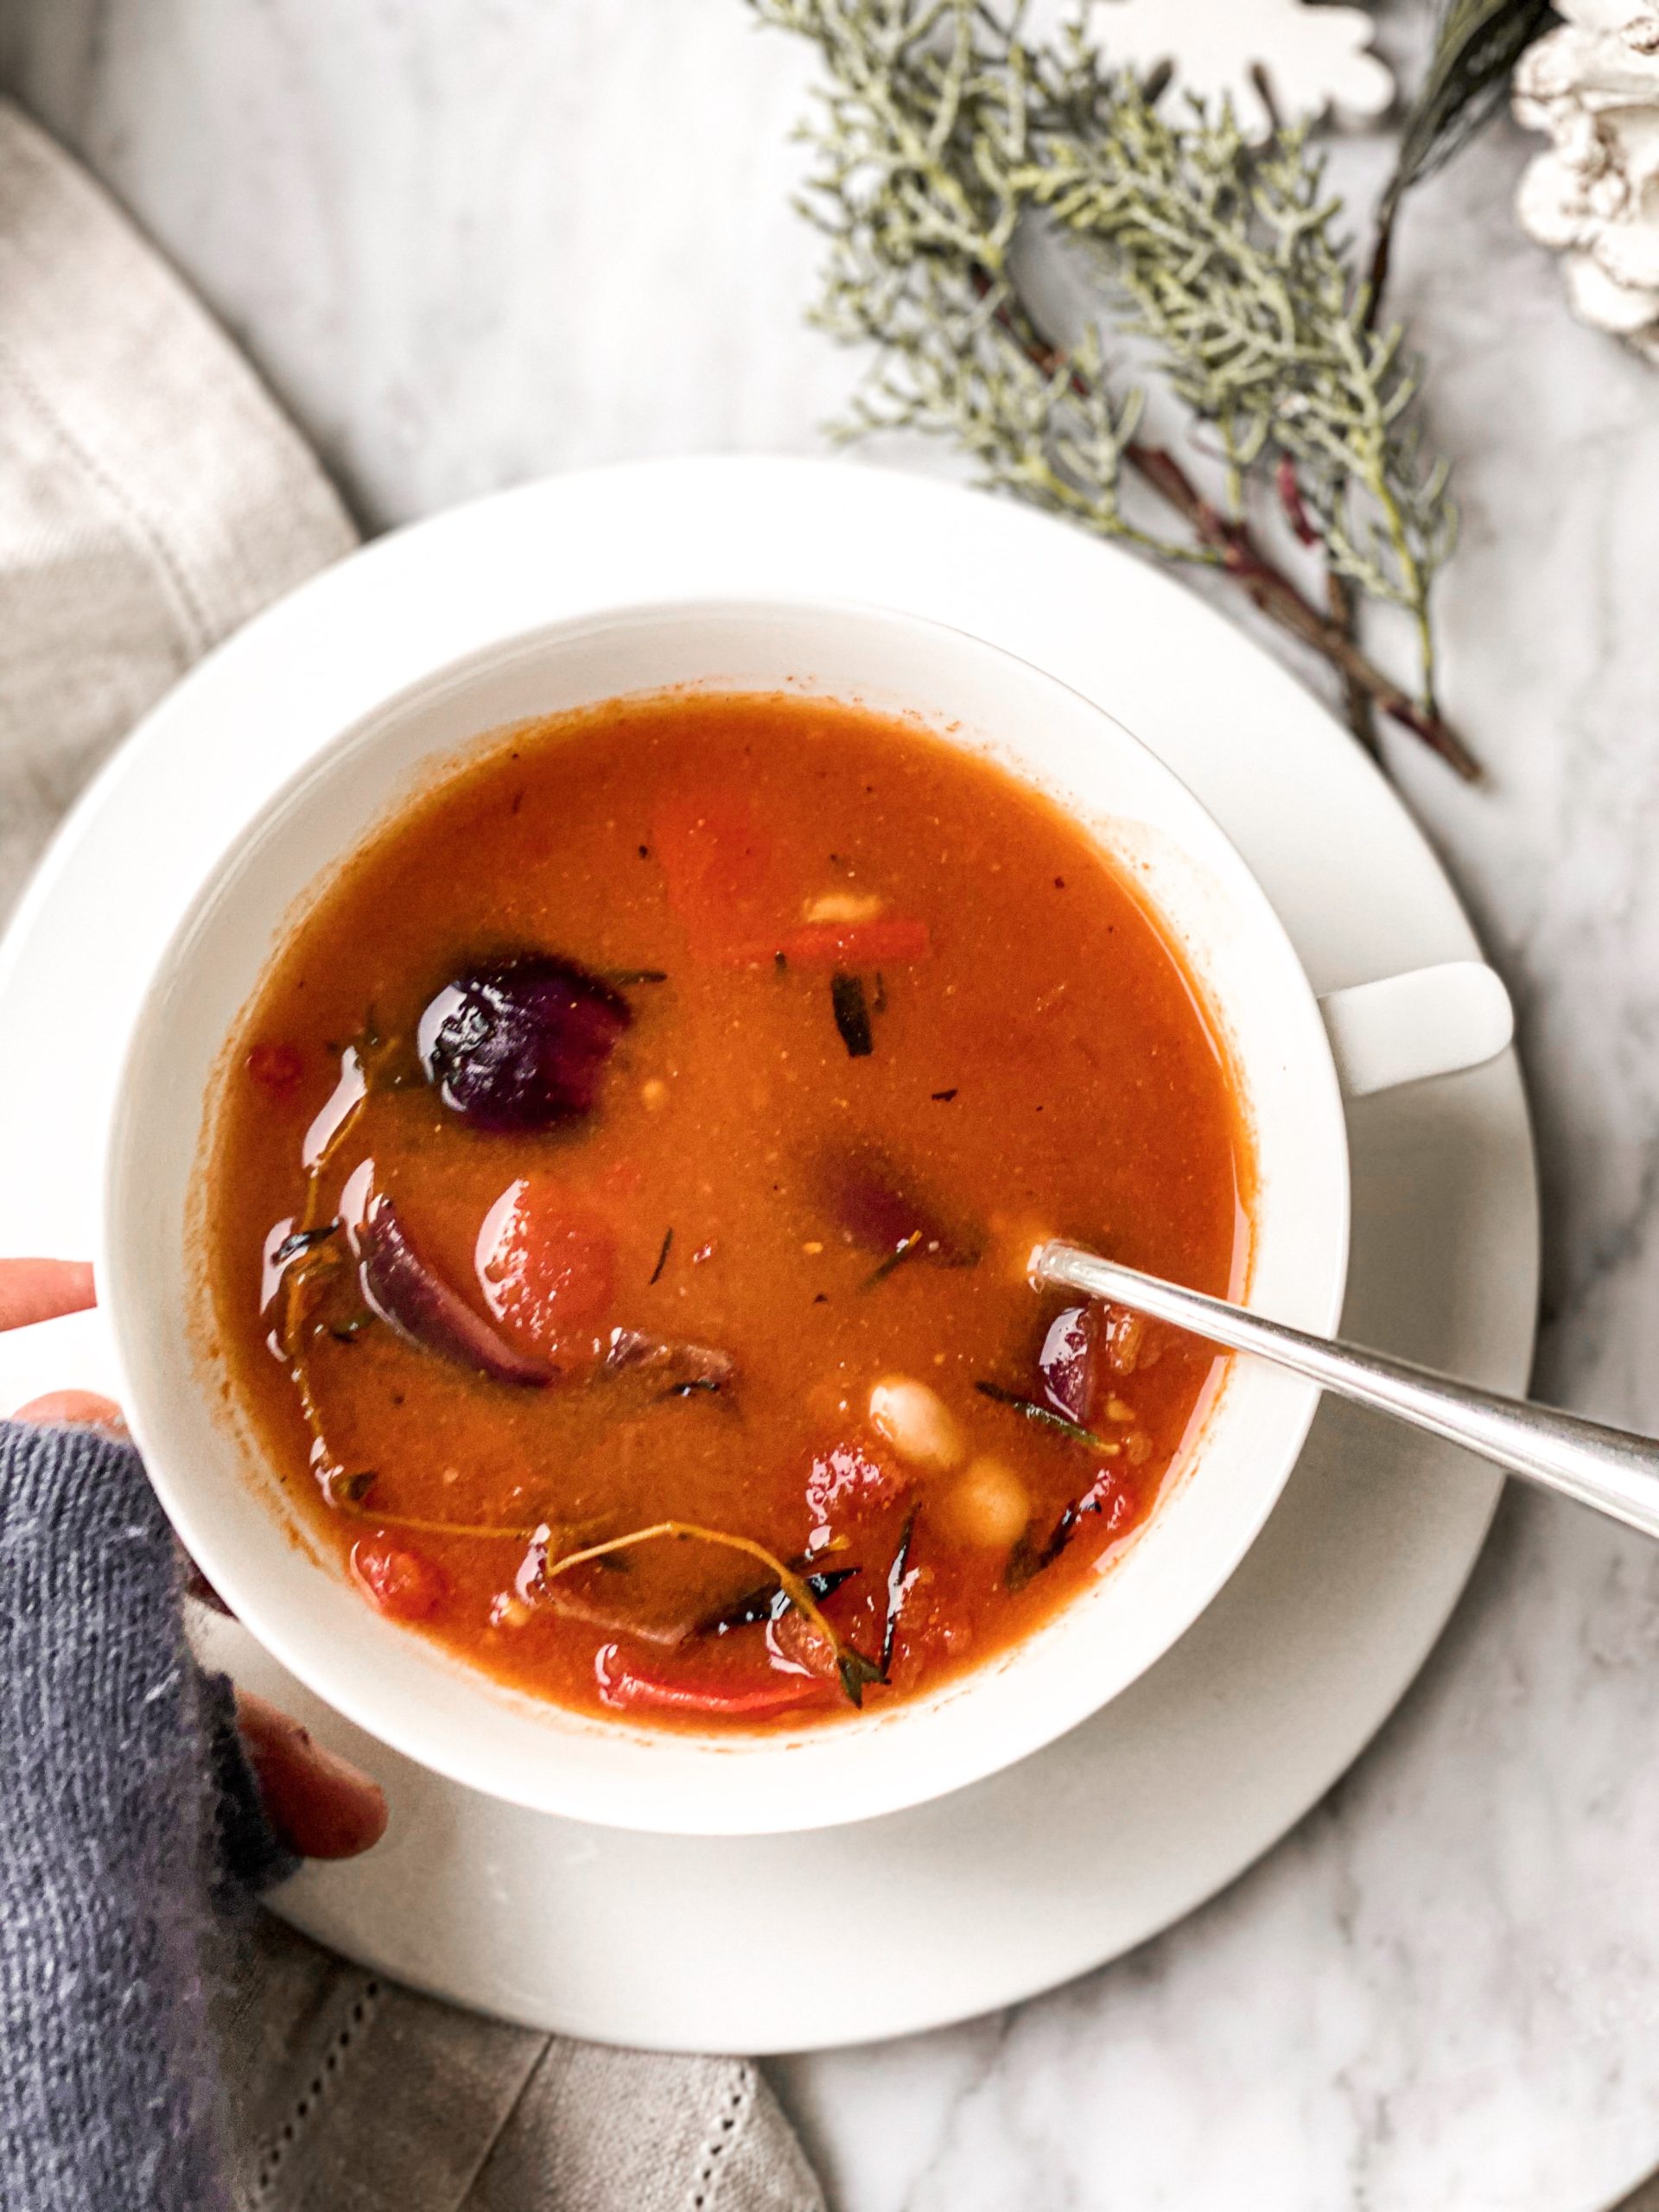
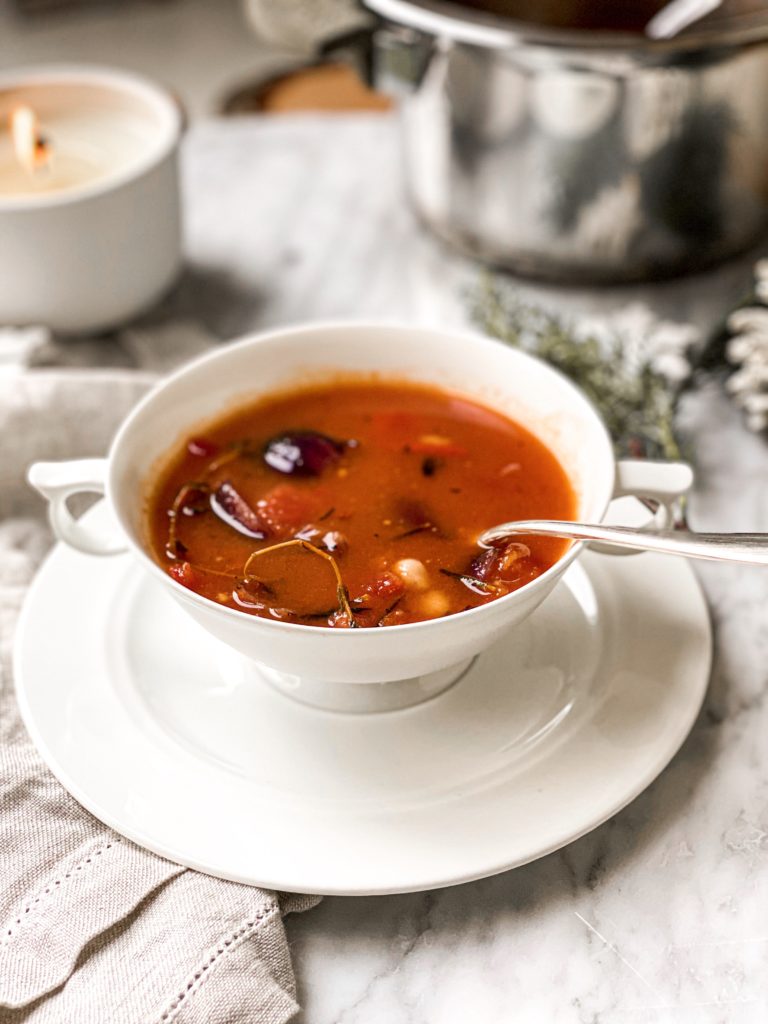
Tomato and Bean Soup

A delicious soup to warm up during winter season. Works great for meal prep and is super versatile.

Course Appetizer, dinner, lunch, Main Course, Soup
Prep Time 2 Minuten
Cook Time 18 Minuten
Total Time 20 Minuten
Servings 2 Servings
Calories 202 kcal

What you will need

That’s what you will need:

  • 1 Red Onion
  • 1/2 Handful Thyme
  • 1/2 Handful Rosemary
  • 500 ml Vegetable stock
  • 300 G Canned Tomatoes
  • 1 Tsp Avjar
  • 1 Tsp Tomato Paste
  • 150 G White Beans
  • 1 Tbsp Hummus

How to

This is how it works:

  1. Dice up the onion in quarters. Heat up a pot and add the onions along with the rosemary and the thyme. Let that all brown for about 5 minutes, until the onion is slightly burnt.

  2. Add the vegetable stock and the canned tomatoes. Also add the ajvar and the hummus to make it more creamy. If you want it spicy, add some Chilli flakes here.

  3. Once it has boiled, reduce to a simmer and let it simmer for about 10 minutes. Add in the beans and let simmer for 2 more minutes.

  4. Serve kn soup bowls with some bread or rice and enjoy!

Kategorie: Appetizers, christmas, Diet-Specific, Lunch/ Dinner, Soups, Vegan, Vegetarian Stichworte: beans, comfort meal, cozy, Soup, soup season, tomato, tomato bean soup, tomato soup, vegan, vegan comfort food, vegan soup, white bean soup, white beans

Green Beans with Almond Bread Crumbs

November 20, 2019 by katharina.kuehr 1 Kommentar

It’s Thanksgiving next week and Christmas very soon! Although here in Austria we do not celebrate thanksgiving, I know that a lot of people around the world do! November and December are the months for family come-togethers and dinner party’s with friends. I don’t think that in any other month there are that many big meals. 

For us, at Christmas we always make a huge Roastbeef with some potatoes and a salad but this year, for sure, I am going to change the usual game and make these beans instead of the salad! They are so good! I made them once when friends were over for dinner and they immediately asked for the recipe. 

Since it always is difficult to cook for so many people and still chat with them while being a host, I have made a super quick and simple side dish for you. I really love to make this whenever someone is over at my house because it is something almost every one likes, plus it is super simple to make. Also, you can make it vegan, which is perfect for anyone who has a dietary restriction. It is a side that goes with really any dish. 

This green bean recipe works great with meaty dishes such as a Roastbeef, a meatloaf, turkey, a roasted chicken or pork. If you add a little twist to it, such as adding some lemon zest, it already is completely different and works perfectly with some fish or seafood. Also if you make a vegetarian or vegan pie, this is a great and fresh addition! If you already have a carby and filling side, this is a great addition in place of the boring green salad to get some more veggies. 

It is as quick as preparing a salad and really good! Just boiling the beans, tossing them in olive oil. Roasting the breadcrumbs and chopped almonds in some butter or olive oil and assemble. If you are vegan, use oil, if you are gluten free, go for only nuts or some gluten free breadcrumbs. If you do not like almonds, switch them out for any other nuts (but believe me, almonds work really good in here)! It is super versatile.

What I also really like about this recipe is that if you do not eat all of it you can use it for lunch next day or you can even meal prep it! Store the almond breadcrumbs in a separate container and it will last in the fridge for a few days! When I have this for lunch, I like to pair it with some boiled eggs as whole-wheat bread or some Quinoa to make it more filling. This is a really delicious and balanced meal then, as you have a lot of vitamins from the beans and eggs, a healthy amount of protein from the eggs, healthy fats from the almonds and oil, and some whole grain carbs from the bread or the Quinoa. 

So stop looking for a side dish recipe for thanksgiving or Christmas! Make these healthy and flavorful cream beans with almond bread crumbs to make everyone happy! And a little tip: try it before the big event to convince yourself that it is REALLY good! So if you do like it, it would mean a lot to me if you could leave a rating and/ or a comment here on the blogpost. Also if you decide to try it out be sure to tag me on Instagram with @uneptcuisiniere or #unepetitecuisiniere !

Enjoy!

Print

Green Beans with Almond Breadcrumbs (Vegan)

This is a great side dish for Christmas Eve or Thanksgiving, or litteraly any occasion. It is super versatile and incredibly delicious.

Course Appetizer, dinner, lunch, Side Dish
Prep Time 5 Minuten
Cook Time 5 Minuten
Total Time 10 Minuten
Servings 4 people
Calories 166 kcal

What you will need

That is what you will need:

  • 400 g green beans
  • 40 g breadcrumbs preferably whole wheat
  • 20 g almonds
  • 20 g Butter if wanting it vegan, use Olive Oil or vegan Butter instead
  • 1 tbsp Olive Oil
  • optional some lemon zest see recipe notes

How to

That is how it works:

  1. Bring a large pot with water to a boil. Generously salt. Cut of the ends of the green beans, and if they are very long cut them in half too. Add them to the boiling water and let them cook for about 5-7 minutes until ready. You will be able to notice that once you can stab through with a fork easily.

  2. In the meantime chop up the almonds into small chuncks. Heat up the butter in a small pan. Once hot add in, both the breadcrumbs, and the almonds and fry them for about 2-3 minutes on medium heat.

  3. Once the beans are done, rinse them and shock them with cold water. This helps to preserve the colour and the vitamins. Toss them in some Olive Oil and add them onto a pretty serving plate. Add the breadcrumbs on top and serve!

    Enjoy!

Notes

Feel free to add some lemon or orange zest to give it some freshness. This addition would make the dish a perfect match to fish and seafood! 

If you do not like almonds, you can use any other nut, but almonds work really great in here!

You can also use gluten free breadcrumbs. 

Kategorie: American, Appetizers, Diet-Specific, Fall, Lunch/ Dinner, Side, Vegan, Vegetarian, Vegetarian Stichworte: 10minute, almonds, beans, christmas, friendsgiving, green beans, healthy, healthy fall, nuts, quick, quickside, side, sidedish, thanksgiving, vegan, veganfall

Crispy Pumpkin Gnocchi with Browned Sage Butter

November 17, 2019 by katharina.kuehr Kommentar verfassen

Halloween is over, but that is by no means a reason to declare pumping season as being over too! Since this year fall lasts pretty long, regarding the weather, and it still is pretty warm, there still is some time for pumpkins to grow and plenty ways and occasions to enjoy them. I thought I’d get a little creative with the typical fall veggie and experiment with it.

And, as you can see, the mission was successful! 🙂 I know that if you are not a veggie lover, eating one and the same vegetable, just because it is in season, can get really boring really quickly. Because I want to avoid that, I always vary with the way I prepare them. Steam, bake, pan fry, eat them raw, just whatever I feel like. In order to give you some inspiration on what else to do with the star of fall I combined two of our favorite dishes; Pumpkin + Gnocchi to make this real good Pumpkin Gnocchi with sage butter.

I know that it sounds a little complicated to make, and to be honest it is not super quick BUT you can prepare them in large batches and freeze them. Just important to know is that if you freeze them, thaw them before pan frying because otherwise they will be crispy on the outside while they are not done on the inside, and not nice and soft!

I recommend using Hokkaido Pumpkin because I believe the consistency of it works best with this recipe. If you really do not like Hokkaido you can switch it out for any other of your desire you may need a little bit more flour then, depending on what you chose. Pumpkins are very nutritious as they are high in Vitamins especially Vitamin A! Also they contain a bunch of antioxidants and help boosting your immune system, which is great especially for the cold months! 

The only other necessary ingredient in making the Gnocchi except for pumpkin is flour! The flour helps the pumpkin to get a gnocchi like texture and taste. It binds it together. I also added some spices to give it more flavor and a heartier note which transforms the into pure deliciousness! 

Making the gnocchi is not too complicated, just a lot of work. First you have to cut and peel the pumpkin into smaller pieces. Best is about 4cm wide and 2 thick. I steamed my pumpkin because when boiling they soak up a lot of water which later would make the gnocchi squishy and not crispy. Another option would be to bake it in the oven until soft. You can test this by simply piecing through with a fork. If that works easily, it is done, if not, it’ll take a little more time! Depending on the size of your chunks it will take approximately 20-30 minutes.

After steaming, they are mashed and all the water needs to be squished out for the perfect results! Combine it with the flour and spices. When the dough is done you can cut off some small pieces, for them into gnocchi and place them on a plate. Let the finished ones chill in the fridge while preparing the rest. 

The preparing after that is really easy. You just have to melt some butter with fresh sage in a pan until it gets brown. At this point, your kitchen will smell like heaven, so good. The sage works perfectly together with the pumpkin, it is just so good! Once it got a little brown, add the gnocchi and pan fry them for about 2 miuntes on each side. I know, this is not the traditional way to prepare gnocchi but it really is incredibly delicious. We do nto boil them in water because the Gnocchi are softer than usual gnocchi and would fall apart. If you really do not like the frying, you can add more flour until the dough is harder and then boil it. 

To serve it top it with some more of that butter and a fresh burrata because you can never go wrong with burrata! Otherwise you can also add some freshly grated parmesan cheese, pecorino, or mozzarella.

If you do look for a different way to enjoy pumpkin, you will definitely like this recipe. It is such a great one to enjoy in fall. 

If you decide to recreate it be sure to tag me with @uneptcuisiniere or #unepetitecuisiniere on Instagram and it would mean a lot to me if you would leave a rating here on the blog!

Bon appetit!

Katie

Print

crispy Pumpkin Gnocchi with Browned Sage Butter

A great way to enjoy the star of fall in a different way. If you like Gnocchi and Pumpkin, this dish will be for you!

Course dinner, lunch, Main Course
Prep Time 40 Minuten
Total Time 1 Stunde 10 Minuten
Servings 5 bowls
Calories 408 kcal

What you will need

For the Gnocchi

  • 400 g Hokkaido Pumpkin
  • 380 g Flour
  • 1 TSP Cinnamon
  • 1 tsp muskat
  • 1 tsp paprika powder
  • 1 tsp sea salt
  • some more flour for forming

For the Preparing/ Garnish:

  • 70 g Butter
  • 1 handful Sage
  • Burratta
  • some pine nuts

How to

Thats how it works:

  1. Bring a large pot with water to a boil. Peel the pumpkin and cut it into about 3-4cm wide and 2cm thick pieces. Lay them into a steamer and add the steamer on top of the water. Let the pumpkin steam for 25 miuntes.

  2. After 25 miuntes the pumpkin should be soft. You can test this by piecing through it with a fork. If it goes through easily it is done. If you do not have a steamer, you can also boil or bake the pumpkin. Smash the pumpkin down with a fork. there will be some water at the bottom now and we want to get rid of that in order to mak our gnocchi moist and not smushy.

  3. Take a kitchen towel or a cheese cloth and add the smashed pumpkin into it. Gently sqish it so some more water will come out. Once all the excess water is out, return the pumpkin into a bowl. Add the flour little by little, mixing through continuosly until a dough is formed. If you feeel like you have a good dough without adding all of the flour, leave some out, and if you feel like you do need more, add some more.

  4. Once the dough is formed take a smaller piece of that and roll it out into a saussage form. Cut off 3cm large pieces of that and form them into gnocchi in your hands. Here you might need some more flour on your working place in order to not make the Gnocchi stick. Once you have formed them place them on a plate and store in the fridge while making the other ones.

  5. When all of them are done, melt the butter in a large pan and add the sage. Let the butter brown for about 1-2 miuntes. Then add the Gnocchi in and let them fry for about 2 miuntes on each side.

  6. Add them onto the plates and top with some more butter. Cut uo the burratta and add it on top as well. To finish it off sprinkle some pine nuts and serve!

    Enjoy!

Kategorie: American, Cuisine, Diet-Specific, Fall, Lunch/ Dinner, Season, Side, Vegetarian, Vegetarian Stichworte: healthy, healthy fall

Vegan Rice Noodle Salad with Best Crispy Tofu

November 13, 2019 by katharina.kuehr 1 Kommentar

I love noodles prepared in any way. No matter if pasta in Italy, Suppennudeln in Austria, Ramen in Japan, or Pad Thai in Thailand. And because I know that we are all starting to get a little sick of the fall vegetables I decided to share a more summery recipe to boost your mood with this weather.

To be honest, I am not a Pasta Salad lover, I definitely prefer warm pasta over cold one, which also is the reason that this is a “warm pasta salad”! Especially with Glass Noodles I find that they often happen to stick together which I am no fan of at all. This super delicious dish is made with whole bunch of different vegetables and a lot of nutrients! 

The pasta dish itself is made out of glass noodles, also called rice noodles, bell peppers, carrots, zucchini, and brussel sprouts. This is what I usually have in the fridge on a daily basis and what most people have too. I love using these ingredients because I can just cook this meal from scratch without having to go to the shop, whenever I want. If you happen to have different vegetables in the fridge constantly such as celery or bean sprouts or whatever, you can just use those. This is what I love about this, it is super versatile because it is not a “traditional pad Thai recipe”.

When it comes to the sauce, let me tell you, it is super addicting! I do not only use this for the Pad Thai but also for dips, as bowl or salad dressing, or to coat in stir-fries. It is so good and tangy and just pairs so well with the rice noodles because they soak it all up and take on the flavor. To make it you have to add a few ingredients to the food processor which are peanut butter, lime juice, soy sauce, (vegan) fish sauce, ginger, scallions, and honey. Simply blend it all up and its done! Pretty simple-what?

This sounds pretty mouthwatering so far, don´t you think? But, I promise, we haven’t reached the best part of the dish so far: the crispy tofu. I know, the non-vegans out there are probably going to think, “oh no, not another one who is trying to convince me that Tofu is good! It is just plain and tastes like nothing!”. Yes, I get what you are saying and I have had that before too, but I tell you, try out this recipe and you will be convinced opposite! This way to prepare tofu is so delicious and super easy and quick too! Literally 10 minutes!

To make this incredibly tasty Tofu you first need to buy firm or extra firm tofu. Once you decide to make it, take it out of the package and take a few pieces of kitchen roll and lay them out on a flat surface. Add the tofu on top and place a few pieces of kitchen above it. Take a heav weight, this can be a book, a cutting board or whatever you have on hand, and put it on top. If you let that stand for about 5 minutes, the water will go out of the tofu and you will be left with some firmer and less moist tofu. If you do have a tofu press at home, you can skip this step and use it!

Next we need to cut it and coat it into small pieces, I like them to be like 1cm cubes but that is totally up to your preference. Coat them in some cornstarch. This will help the Tofu crisping up when in the pan. Now heat a tablespoon of oil in a pan. Sesame oil works best here because it has a really nice flavor which goes very well with this. Once hot, add in the tofu and you will be able to watch it get crispy on the outside. Stir it around and let it fry for about 2-3 minutes or until golden brown and really crispy. We are almost done, but now we have to add some flavor. This actually makes the tofu. While it is still in the hot pan, we add some sauce. I love to use a wok sauce but you can also go for soy sauce, stir-fry sauce, hoisin sauce or whatever you love. You can find these pre made sauces at any supermarket. Once added the sauce we let the tofu cook for another 2 minutes.

Now we can assemble the noodles, top with the tofu, some fresh scallions, peanuts and sriracha for that extra kick! I honestly love this dish as a quick lunch or light dinner. It gives me some summer vibes because of all the different colours and is super delicious. I hope that you will like it to and if you decide to recreate it be sure to tag me on Instagram with @uneptcuisiniere or with #unepetitecuisiniere! Also, it would mean a whole lot to me if you would leave a comment and rating under the blog post! Thank you very much and enjoy!

XX

Katie 

Print

Rice Noodle Salad with Best Crispy Tofu

A delicious Pad-Thai-ish recipe. Healthy and vegan and really delcious. It is amazing during hot summer days or for all of you who want to get some summer feels druing these days.

Course bowl, dinner, lunch, Main Course
Cuisine asian, thai
Prep Time 15 Minuten
Total Time 25 Minuten
Servings 3 servings
Calories 483 kcal

What you will need

For the Base:

  • 150 g Rice Noodles about 0.5cm thick
  • 1 tbsp sesame oil
  • 1 zucchini
  • 3 carrots
  • 1 bell pepper I like to use red one
  • 6 brussel sprouts

For the Sauce:

  • 1 tbsp peanut butter
  • 1 tbsp soy sauce
  • 2 tsp fish sauce vegan
  • 2 tsp honey or brown sugar
  • 3 cm ginger
  • 2 scallions
  • 1.5 tbsp lime juice
  • 1 tsp sriracha
  • 1 tbsp Water

For the Tofu:

  • 250 g firm Tofu
  • 2 tbsp corn starch
  • 1 tbsp sesame oil
  • 2 tbsp soy sauce

For the toppings:

  • crushed peanuts
  • fresh scallions
  • some hot sauce

How to

That is how it works:

  1. Bring a pot with water to a boil and cook the rice noodles according to package instructions.

  2. Lay down a piece of kitchen roll down on a flat surface. Add the tofu on top and another piece. Above lay something heavy such as a cutting board or a book and let it press for about 4-5 minutes.

  3. Meanwhile cut the vegetables into thin strips. The thinner the better, because they will be easier to eat with the noodles.

  4. In a small blender add all the ingredients for the sauce and blend until smooth.

  5. Cut up the tofu into 1cm sized chunks. Coat them in the corn starch. Heat up 1 tbsp of sesame oil in a pan. Once hot add teh tofu and let it fry for about 3-4 minutes. Then add the soy or stir-fry sauce and let it cook for another 2 minutes.

  6. Meanwhile heat up 1 tbsp of sesame oil in a pan. Once hot add the vegetables and stir-fry them.

  7. By now the noodles should be done cooking. Reserve a little of the cooking water, and drain the noodles. Add them into the pan with the vegetables and pour over the sauce. Add some of the reserved water, it will help everything to combine very well.

  8. Once mixed together seperate it onto the plates. Top it with the Tofu and some crushed peanuts, thinly sliced scallions and some more hot sauce if you like!

  9. Serve and enjoy!

Kategorie: Lunch/ Dinner, Salad, Season, Summer, Thai, Vegan, Vegetarian, Vegetarian Stichworte: asian, bell peppers, brussel sprouts, carrots, crispy, crispy tofu, fallvegan, glutenfree, noodles, pad thai, pasta, pastasalad, peanut, peanutbutter, peanuts, rice noodles, salad, thai, tofu, vegan, veganfood, Zucchini

« Vorherige Seite
Nächste Seite »

Footer

What has been happening on my Instagram

Copyright © 2024 Une Petite Cuisinière on the Foodie Pro Theme