• Zur Hauptnavigation springen
  • Skip to main content
  • Zur Fußzeile springen

feel food club

  • Home
  • About me
  • My Recipes
  • Blog
  • Navigation Menu: Social Icons

    • Instagram

katharina.kuehr

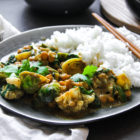
Super Green 20-Minute Curry

Oktober 27, 2019 by katharina.kuehr Kommentar verfassen

The temperatures are sinking and it’s getting colder outside. The time for cozy sweaters and comfortable evenings with hot chocolates is coming. Finally! Isn’t it one of the best times of a year? I do believe so (at least when you don’t have to go outside)! But also when it’s not warm outside you want to have something warm on the inside and you can best get this with a warm, comfortable dish. 

A big bowl of pasta, some good soup, a pot roast or even a curry. I love a good curry at this time of the year, especially when it’s spicy, it really gets me warm and makes me have a comfortable feeling. But I don’t only love curries in the winter to be honest, they are one of my favorite dishes of all. They are so flavorful, versatile and super nutritious. With a hearty side such as rice, quinoa or naan they make a perfect balanced meal.

Also, I really love the different colors you can have when making curries. It feels like eating the rainbow and they are all the same but different in flavors at the same time. You can make them spicy, mild or without any spice at all, you get basically add whichever vegetables you like, and eat it with whatever side you like. 

In this Curry I added three different greens as I think especially in this time of the year when comfort meals are in focus, it is hard to get all the veggies in an eat balanced meals. The great thing with veggies in curries is, that even if you don’t like the taste of a single vegetable a lot, it won’t matter that much since they are going to absorb a lot of the flavor of the curry paste. So you can be generous with the vegetables you add in. Just be careful, since they might have different cooking times. 

As a protein source I used chickpeas in this recipe because I decided to go for a vegan version. But again, it is very versatile. If you want a meaty version you can add in chicken, lamb, or beef, if you are craving fish, feel free to add salmon, mixed fish, or prawns or if you want to go for something plant based but don’t like chickpeas it don’t have them in hand, it works great with tofu too. Since the chickpeas are already pre cooked I add them at the end, but if you use something like chicken that is not cooked beforehand, make sure to add it before the vegetables so it will get completely cooked through. 
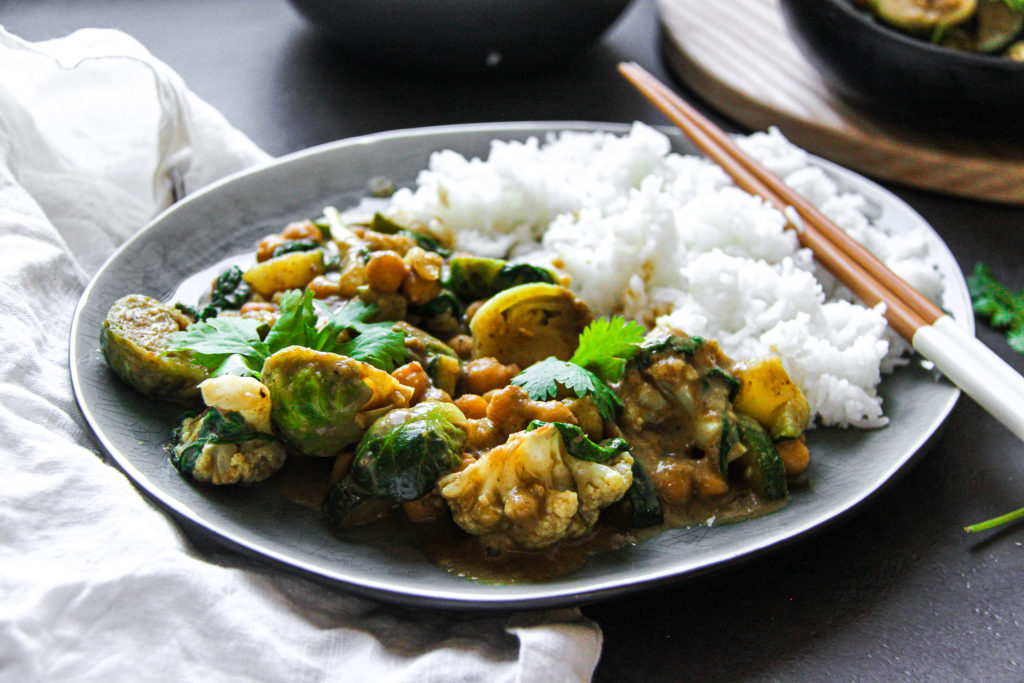
I like to serve mine with a side or rice but really any carb works. This curry is really great for meal prep too, I actually believe that it intensifies the flavor of you keep it in the fridge for one or more days. I also like this dish as a weeknight dinner because it is really simple and quick when you don’t feel like cooking after a long day. I hope that you will enjoy it and I would love to see it if you recreated to be sure to tag me with @uneptcuisiniere or with #unepetitecuisiniere on Instagram and leave a comment! 

Print

Super Green 20-Minute Curry

A great comforting dish for any weeknight dinner or as a perfect meal prep dish. Warming, nourishing and super delicious! The best part? – It only takes 20 minutes!

Course lunch, Main Course
Cuisine thai
Prep Time 5 Minuten
Cook Time 15 Minuten
Total Time 20 Minuten
Servings 2 people
Calories 473 kcal

What you will need

  • 100 g rice
  • 200 ml water
  • 1 tbsp oil
  • 50 g green curry paste you can use homemade or storebought ones, whichever you prefer or have on hand
  • 150 g Brussel Sprouts
  • 200 g Cauliflower
  • 1/2 Zucchini
  • 200 ml Light coconut milk
  • 100 ml water
  • 100 g canned chickpeas rinsed
  • 2 handful spinach
  • Cilantro for garnish

How to

That is how it works:

  1. In a pot add the rice along with 200ml of water and a generous amount of salt. Bring it to a boil and then reduce to a very low simmer and cover with a lid. Let it simmer for about 12-15 minutes without lifting the cover.

  2. Meanwhile half the brusselsprouts, and cut both the zucchini and cauliflower into small chunks. In a non-stick pan heat up the oil. Once hot add the curry paste and gently stir until it is all combined with the oil. When adding the paste before the vegetables the flavors get even more intense.

  3. Next, add the veggies except the spinach. The zucchini has a slightly shorter cooking time, so if you do not want it to get extra soft then add it maybe 3-4 minutes later. If you do not mind or actually like it, as I do, just add it now with the brussel sprouts and cauliflower.

  4. Fry them for about 3 minutes then pour the coconut milk and the water on top. Stir until the curry paste from the veggies and the sauce is well combined. Let this simmer for about 8 minutes and then add in the precooked chickpeas and the spinach. The greens will wilt down so do not worry if they seem huge at first! Let it all simmer for another 5 minutes. Salt it if necessary, this depends on your curry paste.

  5. By now the rice should be done too. Fluff it up with a fork so it gets nice and soft. Seperate it onto the plates and add the curry too! Top it with a little cilantro and some crushed peanuts if wanted.

    Serve and enjoy!
Kategorie: Diet-Specific, Fall, Lunch/ Dinner, Thai, Vegan, Vegetarian, Vegetarian Stichworte: brussel sprouts, cauliflower, chickpea, chickpeas, curry, fall, fallfood, green, greencurry, healthy, healthy fall, meal prep, vegan, vegan curry, veganfall, weeknightdinner, Zucchini

Ulmtimate Breakfast Tacos

Oktober 23, 2019 by katharina.kuehr Kommentar verfassen

Breakfast is the most important meal of the day, at least it is for me. It is the first meal that you are consuming after a long time of resting, recharging and fasting. It contains the first nutrients you decide to nourish your body with and it sets the mood for your day. For me, I always feel like If I am enjoying a healthy, balanced, nutritious and filling first meal of the day I am way more likely to make healthy decisions for the rest of the day. If I decide to start my day with a very sugar heavy breakfast that is not filling and satisfying I probable will not make good decisions regarding my food choices throughout the remaining day.

Even studies have found out that when eating a balanced and filling breakfast, it has several health benefits. Still, many people are not eating breakfast. This often results in snacking on a lot of foods that might not always be very nutrient dense throughout all morning. Also whenever going to school in the morning I notice that if I haven’t eaten before it is so much harder to concentrate and it takes a lot more energy for my brain to work. So having that all said, remember to always have some breakfast, especially if you can have these ultimate breakfast tortillas.

They are a perfect balanced meal. You have got carbohydrates to provide you with energy, protein for your brain and satisfaction, fibre for your digestion and being full for longer, vitamins for your overall health, healthy fats for that glowy skin (don’t worry, it has many other benefits too! :)), and some unsaturated fats because why not? This sounds like a lot of things at one time, I know. But don’t worry, making this won’t take you much longer than 15 max 20 minutes.

I am just talking about the benefits here but what actually are the ingredients now? First up whole wheat tortillas. Whole wheat contains a lot of fibre and vitamins which will keep you satisfied until lunch and give you energy because of the carbohydrates. Of course, if you are not a fan of whole wheat you can swap that out for white wheat but you will also loose some nutrients. If you can not find small tortillas at your local supermarket you can either swap it out for a large one and wrap it up as a tortilla or if you want to keep the look of tacos, you can cut about 10-12cm large circles out of your larger wrap and use the rest to make some chips, or simply dip it in guac.

Next up some protein. Here we have 3 different foods. First, eggs. I mean what are breakfast tacos without eggs (actually breakfast in general)? Eggs have so many different nutrients and are so healthy but so damn delicious. I scrambled them up with a little oil, for some healthy fats, and made them really creamy. I believe they are easiest to eat in those tacos when scrambled. If you prefer though, it is totally possible to fry them, poach them, or soft or hard boil them. This is really up to your preference but I simply love scrambled eggs with all that creaminess paired with the warm tortillas.

As a second protein source I used bacon. Bacon is not necessarily the healthiest food in the world but I feel like it is totally fine when enjoyed in moderation. In this recipe I believe that it works really well because it adds a crunch and saltiness, which works really great! The last but definitely not least protein source is cream cheese. It contains a lot of protein too and not too many calories as other cheeses. If you want to cut down the saturated fats here, go ahead and use yoghurt cream cheese or cottage cheese. For this recipe you are not using huge amounts of it so normal one works great! It adds a creaminess and works as a sauce on the bottom of the tortilla.

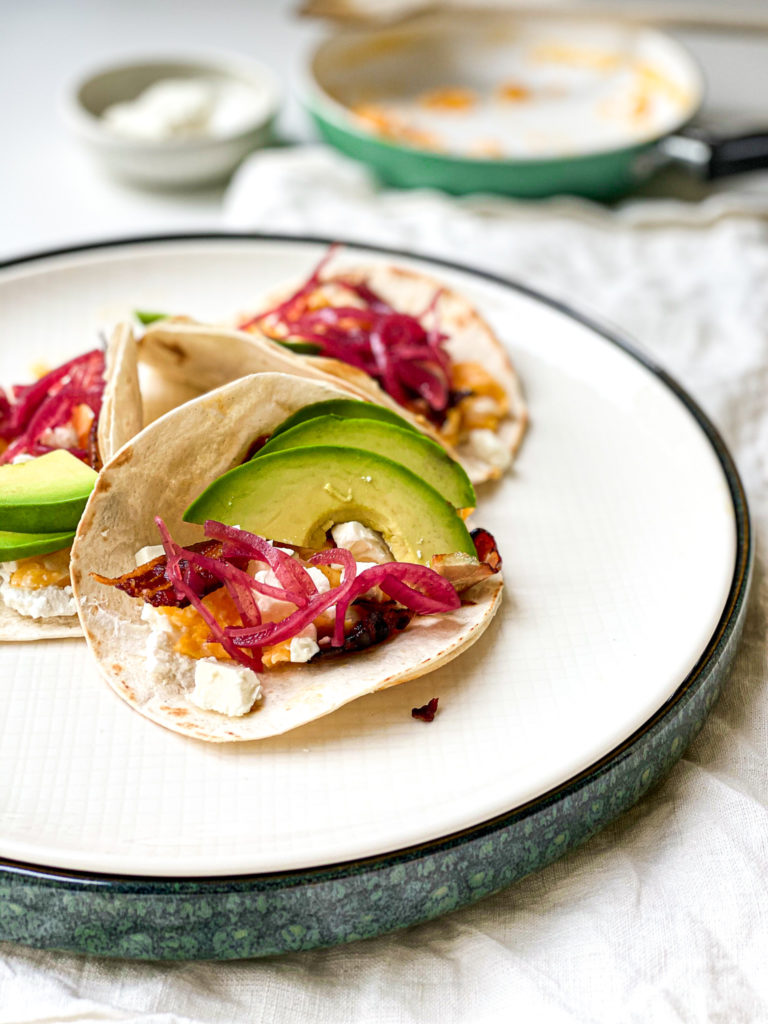
For the assembling it is really simple. Heat the tortillas up in a non-stick pan until slightly browned, do not use oil here, it really is not necessary and only makes it too crispy, so the tortillas loose their softness. Scramble up the eggs in a pan with a little oil until fluffy. Spread the heated up tortillas with the cream cheese and add the eggs on top. Next comes the cut up bacon strips. As topping slice up some avocado and add some pickled onions. The onions on top are sooo good! They add a sour- and addictiveness and rounds it all up. Sprinkle some salt, serve & enjoy!

Print

Ultimate Breakfast Tacos

A perfect dish for a big brekfast or brunch! It has everything you need in the first meal of the day!

Course Breakfast, brunch
Prep Time 8 Minuten
Total Time 15 Minuten
Servings 2 people
Calories 489 kcal

What you will need

  • 6 soft taco shells
  • 3 eggs
  • 1 tbsp olive oil
  • 3 brekfast bacon strips
  • 2 heaped tbsp cream cheese
  • 1 small Avocado
  • 2 tbsp pickled red onion

How to

Thats how it works:

  1. In a non-stick pan without oil heat up the tortillas until slightly brown on both sides.

    Meanwhile heat up the bacon in a pan without oil on medium-high heat. Fry them on each side for about 2-3 minutes until golden and crsipy.

    In a seperate pan heat up the olive oil and whisk the eggs in a bowl. Once hot, add the eggs into the oil and slowly scramble them up on medium heat. Add a sprinkle of sea salt and steadily stir them through the pan. While the eggs are cooking, the tortillas should be done heating up.

    Also the bacon should be done be now. Take it out of the pan and lay it on some kitchen paper to let the excess fat drip of and get it extra crispy.

    Spread ech tortilla with 1 tsp of cream cheese on the bottom. Then add the scrambled eggs on top. Take the bacon strips and bread or cut them into smaller pieces. Seperate them on the tacos. Cut the Avodaco into strips and also add them into the tacos. Last place the pickled red onions on top and spinkle with some sea salt!

    Serve and enjoy!
Kategorie: Breakfast, Lunch/ Dinner, Poultry & Meat Stichworte: avocado, avocao, breakfast, breaky, brunch, healthy, healthy brunch, sober brekfast, taco, tacos, ultimate

Creamy Pesto Rice with Roasted Fall Veggies and Crispy Chickpeas

Oktober 20, 2019 by katharina.kuehr Kommentar verfassen

I am a huge fan of pesto, when made freshly and in season. We make it a lot in summer. Pick the basil from out herb garden, use olive oil our neighbors made themselves from their trees in Croatia, add some good Italian Parmesan cheese, some delicious pine nuts and a pinch of salt. That’s at simpel as it is and that’s why I love it! So few ingredients, so much flavor! But now it’s October! And unfortunately it’s getting colder and there is no way for the basil to grow in our garden. Still, we all love pesto and want to enjoy it and that’s why I decided to add a little twist to it! 

This pesto recipe is not like the traditional Italian one but it is as delicious! It is made with fall ingredients. Instead of the basil I decided to use Swiss chard, and the pine nuts are substituted for almonds. I kept the Parmesan cheese and the olive oil because I believe that these really make the pesto taste like pesto and make it insanely addicting. To make it you simply have to roast the nits a but because that enhances the flavor, and then blend it up with the Swiss chard and a pinch of salt. Yes, that’s right, only those three ingredients! NEVER blend pesto with the Olive Oil and the cheese. That’s just not how it’s done. At least not in Italy. After blending, the Olive oil and Parmesan are stored in by hand, one by one, slowly. This makes it really creamy instead of mushy! 

Pesto is also great in nutritional value! Although it is quite high in calories it is super healthy! The greens provide you with a lot of minerals, vitamins, and fiber! The nuts add some healthy fats and a protein kick as well as other nutrients! The olive oil also provides you with some more healthy fats, which help you absorb the proteins better and the cheese gives some essential protein. So if you love pesto, here’s another reason to add in on everything. But honestly, I believe that this recipe doesn’t only work great in this dish but also you can totally add that pesto on top of scrambled eggs, into pasta, on top of toast, or whatever is on your mind! 

For the grain as carbohydrates I decided to use white rice. If you want to make it even healthier use whole grain/ brown rice but it is quicker when using white rice since it doesn’t have as long cooking times! If you do not like rice at all but still want to tray making this recipe you can substitute it for another grain! Pasta or Quinoa would work great too! Together with the pesto, the rice gets really creamy, kind of risotto-ish but not completely. Adding pesto if any sauce to rice is such a great way to spice up things a little and get your traditional plain rice to a mouthwatering dish! 

So, now we have the rice and the pesto… but what even is a bowl without some toppings and crunch. With the vegetables you can really feel free to add whichever are your favorites. I used cauliflower and brussel sprouts because they are in season now. Also, the brussel sprouts add some more greens into the dish and I love using the cauliflower because it is a great vegetable which can easily take on the favor of the spices! That way you can really taste your seasoning! Drizzle a little olive oil on top and roast them until crispy! This also works really great for meal prep if you just want to roast a big bunch of vegetables in the beginning of the week!

The chickpeas are coated with a great amount of spices and a good amount of olive oil! The oil is necessary in order to get a crunch and to intensify the flavor. If you want to make them extra crispy, pan fry them, but they are also super delicious when made in the oven plus you don’t have to wash an extra dish! So it’s a win win! 

When it’s all put together it just makes such a bomb combination! The creamy rice (if you want to make it extra ? add some more fresh Parmesan cheese on top!), the hearty roasted vegetables and the crispy chickpeas just make such a great combo! It is such a great comfort meal with such delicious fall meal packed with local and seasonal ingredients! A perfect mid-week dinner and great for meal prep! I hope that you will enjoy it as much as I do! 

Print

Creamy Pesto Rice with Crispy Chickpeas and Vegetables

An ideal weeknight dinner with a delicious twist on traditional pesto with crispy chickpeas and roasted veggies!

Course dinner, lunch, Main Course
Prep Time 15 Minuten
Cook Time 25 Minuten
Total Time 40 Minuten
Servings 2 People
Calories 635 kcal

What you will need

  • 100 G Rice
  • 100 g Chickpeas caned, washed & rinsed
  • 1 tbsp Olive Oil
  • 1 handful sage
  • 180 G Brussel Sprouts
  • 180 G Cauliflower
  • 1 Tbsp Olive Oil
  • 1 Tbsp balsamic vinegar
  • 1/2 Tsp Paprika Powder
  • 1/2 Tsp Chilli Powder
  • 1/2 Tsp Turmeric Powder

For the Pesto:

  • 2 stalks Swiss Chard
  • 20 g Almonds
  • 20 g Parmesan Cheese freshly grated
  • 1 tbsp Olive Oil
  • 1,5-3 tbsp Water can sub for olive oil for even more flavor
  • 1 tsp salt

How to

That‘s how it works:

  1. Roast the almonds in a non stick pan over medium high heat for about 3-5 minutes, stirring occasionally.

  2. Into a food processor add the almonds, the Swiss chard and the salt and pulse until combined! Pour the mixture into a bowl and alternately add the grated Parmesan cheese, olive oil, and water into the mixture until it gets all creamy and rich! If you want to make it all Italian, you can only add olive oil, but I decided to make it a little lighter so I mixed it with water.

  3. In the meantime preheat the oven to 180C. Wash and rinse the brussel sprouts and cut them in half. In a bowl combine them with about 1/2 tbsp of Olive Oil and the balsamic vinegar. Spread them onto a third of a baking tray lined with parchment paper.

  4. Cut of the cauliflower into smaller pieces. Add them into a bowl, along with chili, paprika, and turmeric, 1/2 tbsp of olive Oil and salt. Combine them all and place on another third of the baking tray.

  5. Wash, drain and tap the chickpeas dry for extra crispyness. Add the Olive oil, sea salt, and finely chopped up sage into a bowl along with the chickpeas and toss it. Add them to the remaining third of the baking tray and bake everything for 20-25 minutes!

  6. In the meantime cook the rice according to package instructions. About 3 minutes before it being done, add the pesto into the pot, keeping 1 tabslespoon aside. When done, stir it all together and you will see that the parmesan cheese has melted and it is all creamy.

  7. By now the vegetables and chickpeas should be done and crispy too!. Seperate the rice and onto two bowls. Top them with the vegetables and chickpeas and drizzle the remaining pesto on top. Grate some fresh parmesan for the finishing touch and enjozy!

Kategorie: Diet-Specific, Fall, Lunch/ Dinner, Season, Vegetarian, Vegetarian Stichworte: brusselsprouts, cauliflower, chickpeas, creamy, creamy rice, fall, fallfood, fallpesto, healthy fall, mangold, parmesan, parmesan cheese, pesto, rice, Risotto, swiss chard, vegetables, vegetarian, veggies

Caramelized Pecan and Fig Salad

Oktober 16, 2019 by katharina.kuehr 1 Kommentar


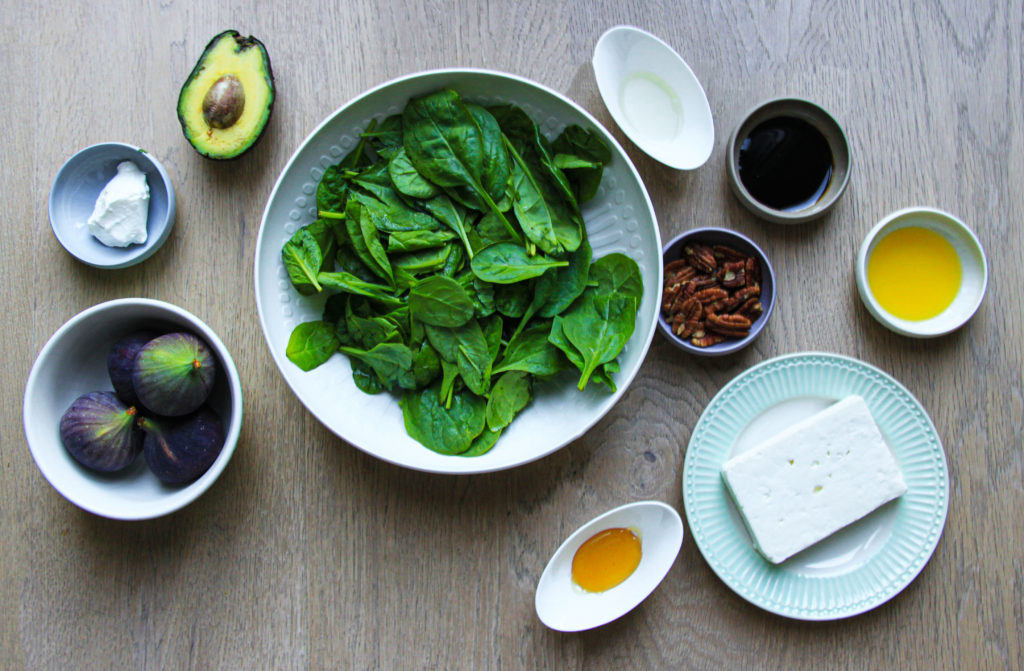
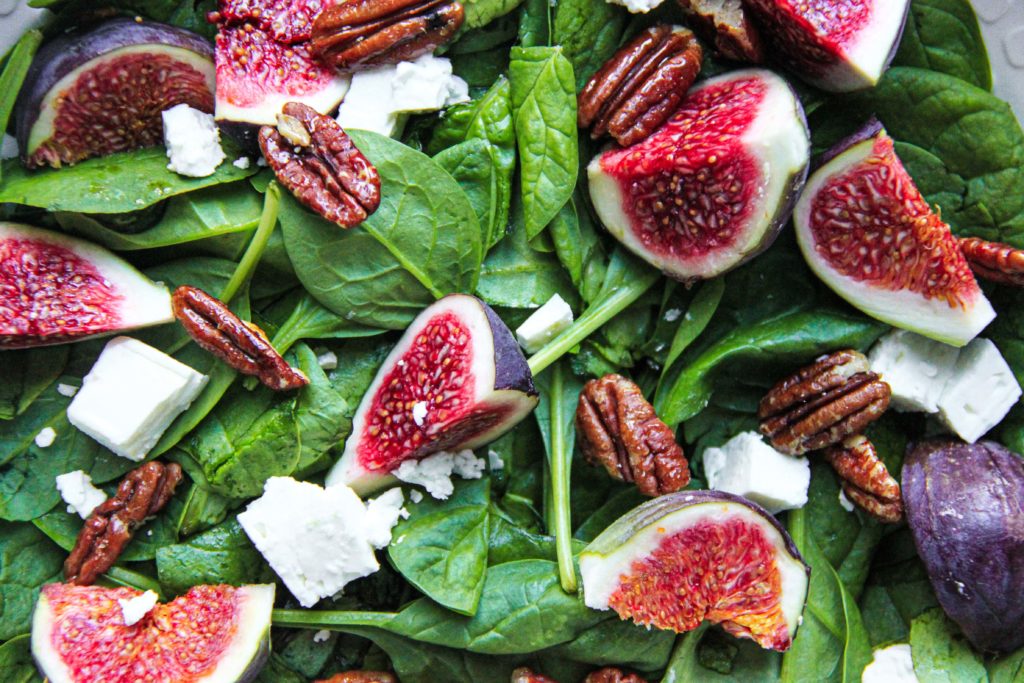
We’re are in the middle of October which means that we are in the middle of fig season. One of the best seasons ever, I believe. They are juicy, soft, sweet, and they have such a pretty color! Plus they are so versatile I believe! They go well on so many things! Add them to your French toast, on top of a yoghurt bowl, dried in granola, serve them with cheese, add them into salads or Buddha bowls, or even grill them to serve as a side. The options are endless! 

But a fig is not necessarily a fig. There are small ones and there are bigger ones. I really like the small ones on top of yoghurt for example because they are just perfect in size and you can always eat the skin! With the bigger ones, I prefer using them in salads or as a snack. But if you want to consume them with the peel, make sure to buy organic ones. If you don’t then I would not recommend eating the skin! 

Figs have a great nutritional value too! When fresh they are really low in calories, but have a quite high fiber content! They help reducing the blood pressure as they increase the potassium in your body. Also, they are high in calcium, which is an essential Mineral. When dried, they are higher in calories but also in fiber, with incredible 9g per 100g serving. So if you want to add some sweet or chewiness to your next granola, or just snack in something sweet with nut butter than grab some figs next time, either dried or fresh with some nut butter and you have a delicious and filling snack! 

Onto the next highlight of the salad; the caramelized pecans! I am a huge fan of pecans, I lottery eat them on anything! I love the flavor and the crunch! Nuts in general are packed with protein, vitamins and healthy fats! They are a great addition in nutritional value and crunch to almost any dish! Yoghurt, salads, stir fry’s, curries, you name it! Caramelized First nuts is incredibly simple and only requires 3 ingredients! The nuts themselves, some honey or agave, and a pinch of sea salt. I like to prepare them in a non – stick pan as I believe that it is easiest and quickest. 

It is as simple as adding all the ingredients to the pan and heating it up. At first it will seem as there was too little honey as it will only stick on a few nuts, but as soon as it heats up it will get more liquid and it will cover all the nuts. They work great on a salad as they add sweetness but I also think that they go along very well with cheese or yoghurt. I like the pre make them in a batch in the beginning of the week and them add on on several different dishes throughout the week. If you are not a fan of pecans they can be substituted them for any other nut. Walnuts and almonds would work great, hazelnuts do work too but I would not recommend using cashews since they already have a sweet touch and are rather soft so I would not recommend using them. 

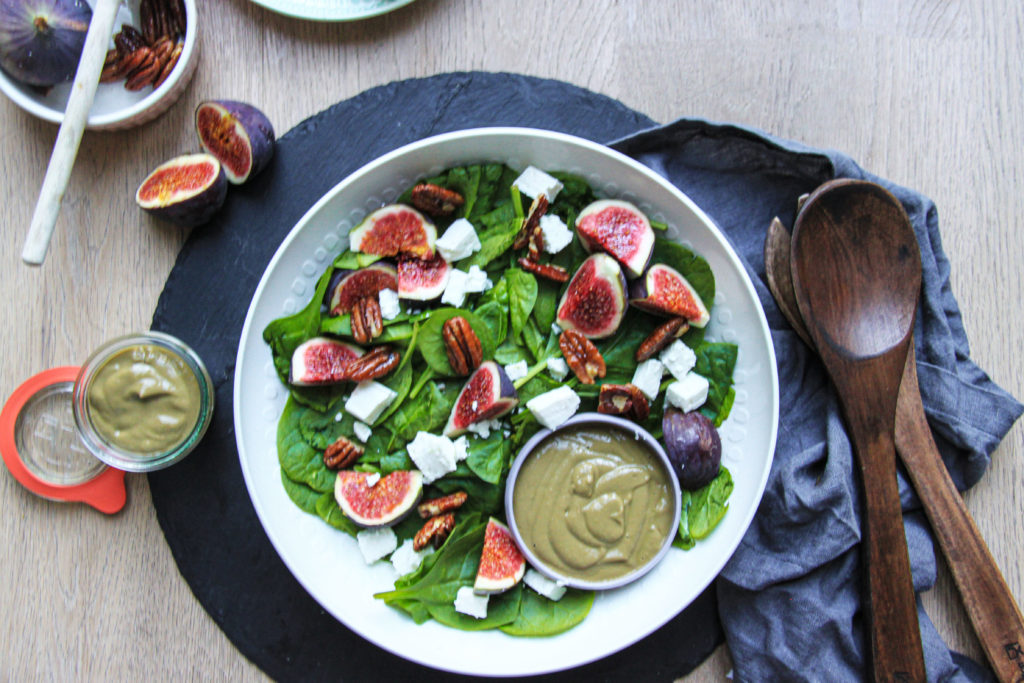
The dressing for the salad is really creamy and delicious. It is not loaded with tons of calories like conventional store bought ones. It is made out of Avocado, Greek Yoghurt, Dijon Mustard, honey, Tahin, anchovies Lemon Juice and Vinegar. I know that it sounds like a lot of ingredients but it is totally worth it! It is an oil free dressing. Just blend all of the ingredients up and you will end up with a delicious creamy dressing! 

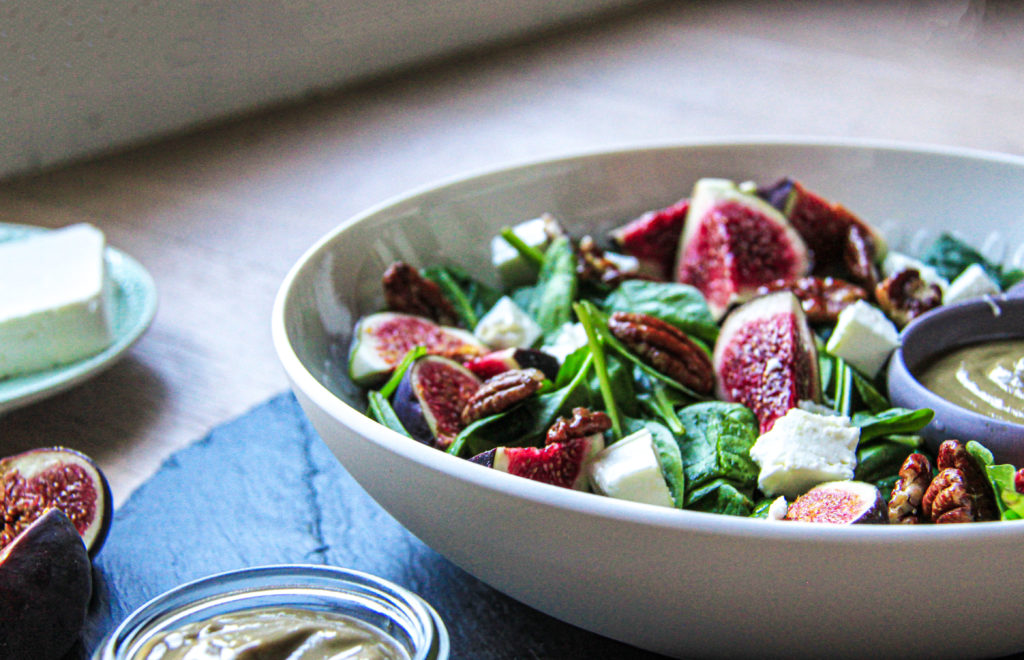
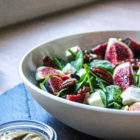
To add the finishing touches coat the spinach in the dressing, cut up some dogs, crumble feta cheese and add the walnuts on top! It is an amazing side dish in Fall with some roasted meat or to enjoy along a bowl of pasta! It contains a lot of fall ingredients, which I love since it is a great way to enjoy all the seasonal and regional food! 

Print

Caramelized Pecan and Fig Salad

A delicious side dish to incooperate all of the delicious fall foods!

Course appe, Salad, Side Dish
Prep Time 15 Minuten
Cook Time 3 Minuten
Total Time 18 Minuten
Servings 4 servings
Calories 153 kcal

What you will need

For the Salad:

  • 3 handful Baby spinach (baby spinach preferably)
  • 2 Figs
  • 25 g Pecans
  • 2 tsp Honey
  • 40 g Feta Cheese

For the Dressing:

  • 30 g Avocado
  • 2 tbsp Greek Yoghurt
  • 1 tbsp Tahin
  • 2 tsp White Vinegar
  • 1/2 juice Lemon
  • 1 Anchovie
  • 2 tsp Mustard
  • 1 tsp honey

How to

That’s how it works:

  1. Add all of the ingredients for the salad into a small blender. Add maybe about 1,5 tablespoons of water to start out. Blend it up. It should be creamy but runny. If it is too thick, feel free to add a little more Tahin or water in order to thin it out. Add a generous pinch of salt and set aside, best in the fridge.

  2. Add the nuts into a small nonstick pan. If you do not have one it is not a huge problem but if you have the option, use a non-stick one. Add the honey and a pinch of salt into it. Don’t worry if the honey will only stick onto a few nuts. Heat it up on medium high, constantly stirring. As soon as it gets hot the honey will get more liquid and coat all of the nuts. Once that happened, take the bits out of the pan and set aside. 

  3. Toss the spinach with the dressing and separate it onto 4 bowls. Cut up the figs and add them on top. Crumble the feta. Finally, add the caramelized pecans on top and serve! 

    Enjoy! 

Kategorie: Fall, Lunch/ Dinner, Salad, Salads, Side Stichworte: fall, fallfood, fallsalad, feta, feta cheese, Fig, healthy, healthy fall, nut, nuts, pecan, salad, side, side salad, sidedish

« Vorherige Seite
Nächste Seite »

Footer

What has been happening on my Instagram

Copyright © 2024 Une Petite Cuisinière on the Foodie Pro Theme